Table of Contents
Advertisement
Quick Links
Advertisement
Table of Contents

Related Manuals for Lenovo Legion Y730 Series


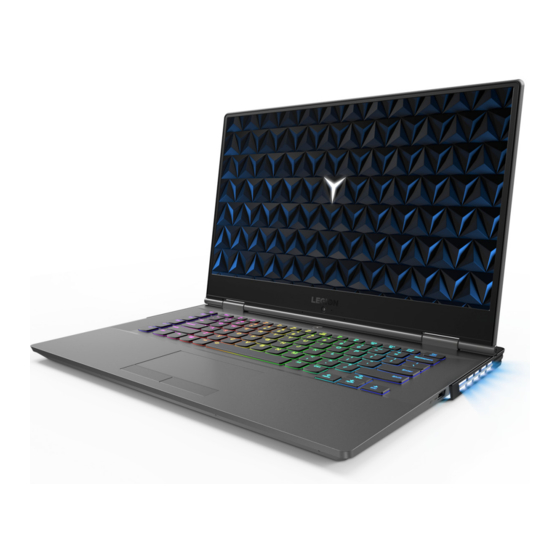
Summary of Contents for Lenovo Legion Y730 Series
- Page 1 Y730 Hardware Maintenance Manual...
- Page 2 Note: • Before using this information and the product it supports, be sure to read the general information under “Notices” on page 99. First Edition (July 2018) © Copyright Lenovo 2018. All rights reserved. LIMITED AND RESTRICTED RIGHTS NOTICE: If data or software is delivered pursuant a General Services Administration “GSA” contract, use, reproduction, or disclosure is subject to restrictions set forth in Contract No. GS-35F-05925. © 2018 Lenovo...
-
Page 3: Table Of Contents
Power-on password ..........24 Hard-disk password ..........24 Administrator password ........24 Power management ........25 Screen blank state ..........25 Putting the computer to sleep or shutting it down ..............25 Putting your computer to sleep ......25 Shutting down the computer ......25 Lenovo Legion Y730-15ICH/Legion Y730- 15ICHg/Legion Y730-17ICH/Legion Y730- 17ICHg ............26 Specifications ..........26 Status indicators ........... 28 Hotkeys............31 FRU replacement notices ......32 Screw notices ..........32 Removing and replacing an FRU ....33 1010 Base cover . -
Page 4: About This Manual
• The product-specific section includes service, reference, and product-specific parts information. Important: This manual is intended only for trained servicers who are familiar with Lenovo products. Use this manual to troubleshoot problems effectively. Before servicing a Lenovo product, make sure to read all the information under “Safety information” on page 1 and “Important service information” on page 16. -
Page 5: Safety Information
Safety information Safety information This chapter presents the following safety information that you need to get familiar with before you service a Lenovo Legion Y730-15ICH/Legion Y730- 15ICHg/Legion Y730-17ICH/Legion Y730-17ICHg computer: • “General safety” on page 2 • “Electrical safety” on page 3 • “Safety inspection guide” on page 5 • “Handling devices that are sensitive to electrostatic discharge” on page 6 • “Grounding requirements” on page 6 • “Safety notices: multilingual translations” on page 7 • “Laser compliance statement” on page 14... -
Page 6: General Safety
Hardware Maintenance Manual General safety Follow these rules below to ensure general safety: • Observe a good housekeeping in the area where the machines are put during and after the maintenance. • When lifting any heavy object: 1. Make sure that you can stand safely without slipping. 2. Distribute the weight of the object equally between your feet. 3. Use a slow lifting force. Never move suddenly or twist when you attempt to lift it. 4. Lift it by standing or pushing up with your leg muscles; this action could avoid the strain from the muscles in your back. Do not attempt to lift any object that weighs more than 16 kg (35 lb) or that you think is too heavy for you. • Do not perform any action that causes hazards to the customer, or that makes the machine unsafe. -
Page 7: Electrical Safety
Safety information Safety information Electrical safety Observe the following rules when working on electrical equipments. Important: Use only approved tools and test equipments. Some hand tools have handles covered with a soft material that does not insulate you when working with live electrical currents. Many customers have rubber floor mats near their machines that contain small conductive fibers to decrease electrostatic discharges. - Page 8 Hardware Maintenance Manual • Always look carefully for possible hazards in your work area. Examples of these hazards are moist floors, nongrounded power extension cables, power surges, and missing safety grounds. • Do not touch live electrical circuits with the reflective surface of a plastic dental mirror. The surface is conductive; such touching can cause personal injury and machine damage. • Do not service the following parts with the power on when they are removed from their normal operating places in a machine: – Power supply units – Pumps – Blowers and fans – Motor generators and similar units. (This practice ensures correct grounding of the units.) • If an electrical accident occurs: – Caution: do not become a victim yourself. – Switch off the power. – Send the victim to get medical aid.
-
Page 9: Safety Inspection Guide
The power cord should be the type specified in the parts list. c. Insulation must not be frayed or worn. 4. Check for cracked or bulging batteries. 5. Remove the cover. 6. Check for any obvious non-Lenovo alterations. Use good judgment as to the safety of any non-Lenovo alterations. 7. Check inside the unit for any obvious unsafe conditions, such as metal filings, contamination, water or other liquids, or signs of fire or smoke damage. 8. Check for worn, frayed, or pinched cables. -
Page 10: Handling Devices That Are Sensitive To Electrostatic Discharge
Hardware Maintenance Manual Handling devices that are sensitive to electrostatic discharge Any computer part containing transistors or integrated circuits (ICs) should be considered sensitive to electrostatic discharge (ESD). ESD damage can occur when there is a difference in charge between objects. Protect against ESD damage by equalizing the charge so that the machine, the part, the work mat, and the person handling the part are all at the same charge. Notes: 1. Use product-specific ESD procedures when they exceed the requirements noted here. 2. -
Page 11: Safety Notices: Multilingual Translations
Safety information Safety notices: multilingual translations The safety notices in this section are provided in English, French, German, Hebrew, Italian, Japanese, and Spanish. Safety notice 1 Before the computer is powered on after FRU replacement, make sure all screws, springs, and other small parts are in place and are not left loose inside the computer. Verify this by shaking the computer and listening for rattling sounds. - Page 12 Hardware Maintenance Manual Safety notice 2 DANGER Some standby batteries contain a small amount of nickel and cadmium. Do not disassemble a standby battery, recharge it, throw it into fire or water, or short- circuit it. Dispose of the battery as required by local ordinances or regulations. Use only the battery in the appropriate parts listing.
- Page 13 Safety information Safety notice 3 DANGER The battery pack contains small amounts of nickel. Do not disassemble it, throw it into fire or water, or short-circuit it. Dispose of the battery pack as required by local ordinances or regulations. Use only the battery in the appropriate parts listing when replacing the battery pack.
- Page 14 Hardware Maintenance Manual Safety notice 4 DANGER The lithium battery can cause a fire, an explosion, or a severe burn. Do not recharge it, remove its polarized connector, disassemble it, heat it above 100°C (212°F), incinerate it, or expose its cell contents to water. Dispose of the battery as required by local ordinances or regulations.
- Page 15 Safety information Safety notice 5 If the LCD breaks and the fluid from inside the LCD gets into your eyes or on your hands, immediately wash the affected areas with water at least for 15 minutes. Seek medical care if any symptoms caused by the fluid are present after washing. Si le panneau d’affichage à...
- Page 16 Hardware Maintenance Manual Safety notice 6 DANGER To avoid shock, do not remove the plastic cover that protects the lower part of the inverter card. Afin d’éviter tout risque de choc électrique, ne retirez pas le cache en plastique protégeant la partie inférieure de la carte d’alimentation. Aus Sicherheitsgründen die Kunststoffabdeckung, die den unteren Teil der Spannungswandlerplatine umgibt, nicht entfernen.
- Page 17 Safety information Safety notice 8 DANGER Before removing any FRU, turn off the computer, unplug all power cords from electrical outlets, remove the battery pack, and then disconnect any interconnecting cables. Avant de retirer une unité remplaçable en clientèle, mettez le système hors tension, débranchez tous les cordons d’alimentation des socles de prise de courant, retirez la batterie et déconnectez tous les cordons d’interface.
-
Page 18: Laser Compliance Statement
Hardware Maintenance Manual Laser compliance statement Some models of Lenovo computer are equipped from the factory with an optical storage device such as a CD-ROM drive or a DVD-ROM drive. Such devices are also sold separately as options. If one of these drives is installed, it is certified in the U.S. to conform to the requirements of the Department of Health and Human Services 21 Code of Federal Regulations (DHHS 21 CFR) Subchapter J for Class 1 laser products. Elsewhere, the drive is certified to conform to the requirements of the International Electrotechnical Commission (IEC) 825 and CENELEC EN 60 825 for Class 1 laser products. - Page 19 Safety information A CD-ROM drive, a DVD-ROM drive, or any other storage device installed may contain an embedded Class 3A or Class 3B laser diode. Note the following: DANGER Emits visible and invisible laser radiation when open. Do not stare into the beam, do not view directly with optical instruments, and avoid direct exposure to the beam. Radiação por raio laser ao abrir. Não olhe fixo no feixe de luz, não olhe diretamente por meio de instrumentos óticos e evite exposição direta com o feixe de luz.
-
Page 20: Important Service Information
Strategy for replacing FRUs Before replacing parts: Make sure that all software fixes, drivers, and BIOS downloads are installed before replacing any FRUs listed in this manual. After a system board is replaced, ensure that the latest BIOS is loaded to the system board before completing the service action. To download software fixes, drivers, and BIOS, follow the steps below: 1. Go to http://support.lenovo.com. 2. Enter the serial number or select a product or use Lenovo smart downloading. 3. Select the BIOS/Driver/Applications and download. 4. Follow the directions on the screen and install the necessary software. -
Page 21: Strategy For Replacing A Hard Disk Drive
Important service information Use the following strategy to prevent unnecessary expense for replacing and servicing FRUs: • If you are instructed to replace an FRU, but the replacement does not solve the problem, reinstall the original FRU before you continue. • Some computers have both a processor board and a system board. If you are instructed to replace either of them, and replacing one of them does not solve the problem, reinstall that board, and then replace the other one. • If an adapter or a device consists of more than one FRU, any of the FRUs may be the cause of the error. Before replacing the adapter or device, remove the FRUs one by one to see if the symptoms change. Replace only the FRU that changed the symptoms. Attention: The setup configuration on the computer you are servicing may have been customized. Running Automatic Configuration may alter the settings. Note the current configuration settings (using the View Configuration option); then, when service has been completed, verify that those settings remain in effect. -
Page 22: Important Information About Replacing Rohs Compliant Frus
Electronic Equipment Directive (2002/95/EC) is a European Union legal requirement affecting the global electronics industry. RoHS requirements must be implemented on Lenovo products placed on the market after June 2006. Products on the market before June 2006 are not required to have RoHS compliant parts. -
Page 23: General Checkout
General checkout General checkout This chapter presents the following information: • “What to do first” on page 20 • “Power system checkout” on page 21 Before you go to the checkout, make sure to read the following important notes: Important notes: • Only certified trained personnel can service the computer. • Before replacing any FRU, read the entire page on removing and replacing FRUs. • Carefully remove screws for reuse when replacing FRUs. • Be extremely careful during such write operations as copying, saving, or formatting. Drives in the computer that you are servicing sequence might have been altered. -
Page 24: What To Do First
Hardware Maintenance Manual What to do first When you do return an FRU, you must include the following information in the parts exchange form or parts return form that you attach to it: 1. Name and phone number of servicer 2. Date of service 3. Date on which the machine failed 4. Date of purchase 5. Procedure index and page number in which the failing FRU was detected 6. Failing FRU name and part number 7. Machine type, model number, and serial number 8. Customer’s name and address Note for warranty: During the warranty period, the customer may be responsible for repair costs if the computer damage was caused by misuse, accident, modification, unsuitable physical or operating environment, or improper maintenance by the customer. -
Page 25: Power System Checkout
2. Measure the output voltage at the plug of the ac adapter cable. See the following figure: Voltage (V dc) 20V/2.25A 15V/3A 9V/2A 5V/2A Note: Output voltage for the ac adapter pin No. 2 may differ from the one you are servicing. 3. If the voltage is not correct, replace the ac adapter. 4. If the voltage is acceptable, do the following: • Replace the system board. • If the problem persists, go to “Lenovo Legion Y730-15ICH/Legion Y730- 15ICHg/Legion Y730-17ICH/Legion Y730-17ICHg” on page 26 Note: Noise from the ac adapter does not always indicate a defect. Checking operational charging To check whether the battery charges properly during operation, use a discharged battery pack or a battery pack that has less than 50% of the total power remaining when installed in the computer. -
Page 26: Checking The Battery Pack
Hardware Maintenance Manual Perform operational charging. If the battery status indicator or icon does not light on, remove the battery pack and let it return to room temperature. Reinstall the battery pack. If the charge indicator or icon is still off, replace the battery pack. If the charge indicator still does not light on, replace the system board. Then reinstall the battery pack. If it is still not charged, go to the next section. Checking the battery pack Battery charging does not start until the Power Meter shows that less than 95% of the total power remains; under this condition the battery pack can charge to 100% of its capacity. This protects the battery pack from being overcharged or from having a shortened life. To check your battery, move your cursor to the Power Meter icon in the icon ® tray of the Windows taskbar and wait for a moment (but do not click it), and the percentage of battery power remaining is displayed. To get detailed information about the battery, double-click the Power Meter icon. Note: If the battery pack becomes hot, it may not be able to be charged. Remove it from the computer and leave it at room temperature for a while. After it cools down, reinstall and recharge it. -
Page 27: Related Service Information
This chapter presents the following information: • “Restoring the factory contents by using OneKey Recovery” on page 23 • “Passwords” on page 24 • “Power management” on page 25 Restoring the factory contents by using Push-button reset Restore of factory default The Lenovo Legion Y730-15ICH/Legion Y730-15ICHg/Legion Y730-17ICH/ Legion Y730-17ICHg computers come with pre-installed Push-button reset. In order to save application files and the initial backed up files of the system, the hard disk in a Lenovo computer includes a hidden partition when it is shipped. If you need to restore the system to the point of your first boot up, press the Novo button and run System Recovery. For details of Push-button reset, see the Recovery system in the User Guide. -
Page 28: Passwords
Hardware Maintenance Manual Passwords As many as three passwords may be needed for any Lenovo computer: the power-on password (POP), the hard disk password (HDP), and the administrator password. If any of these passwords has been set, a prompt for it appears on the screen whenever the computer is turned on. The computer does not start until the password is entered. -
Page 29: Power Management
Related service information Power management Note: Power management modes are not supported for APM operating system. To reduce power consumption, the computer has three power management modes: screen blank, sleep (standby), and hibernation. Screen blank state If the time set on the “Turn off monitor” timer in the operating system expires, the LCD backlight turns off. To end screen blank state and resume normal operation, press any key on the keyboard Putting the computer to sleep or shutting it down When you have finished working with your computer, you can put it to sleep or shut it down. Putting your computer to sleep When the computer is in sleep mode, you can quickly wake it to resume use, bypassing the startup process. -
Page 30: Lenovo Legion Y730-15Ich/Legion Y730-15Ichg/Legion Y730-17Ich/Legion Y730-17Ichg
Hardware Maintenance Manual Lenovo Legion Y730-15ICH/Legion Y730-15ICHg/ Legion Y730-17ICH/Legion Y730-17ICHg This chapter presents the following product-specific service references and product-specific parts information: • “Specifications” on page 27 • “Status indicators” on page 29 • “Hotkeys” on page 30 • “FRU replacement notices” on page 31 • “Removing and replacing an FRU” on page 32 • “Locations” on page 81 • “Parts list” on page 85 Specifications The following table lists the specifications of the Lenovo Legion Y730-15ICH/ Legion Y730-15ICHg/Legion Y730-17ICH/Legion Y730-17ICHg: Table 1. Specifications... - Page 31 Lenovo Legion Y730-15ICH/Legion Y730-15ICHg/Legion Y730-17ICH/ Legion Y730-17ICHg Table 1. Specifications (continued) Display D isplay resolution 1920 × 1080 pixels (LCD) LCD backlight I/O Ports USB 3.1 (Gen 2) × 2, USB 3.1 (Gen 1) × 1, Type-C × 1 Audio Combo audio jack × 1 Video/Audio HDMI-out × 1, Mini DisplayPort × 1 Ethernet RJ-45 × 1 Battery pack Type Li-Polymer Cells/Capacity 3 Cells, 57 Wh 4 Cells, 76 Wh Note: The capacity given here is the typical or average capacity as measured in a specific test environment. Capacities measured in other environments may differ but are no lower than the rated capacity (see product label). ac power adapter...
-
Page 32: Status Indicators
Hardware Maintenance Manual Status indicators The system status indicators below show the computer status: Lenovo Legion Y730-15 series... - Page 33 Lenovo Legion Y730-15ICH/Legion Y730-15ICHg/Legion Y730-17ICH/ Legion Y730-17ICHg Lenovo Legion Y730-17 series a Camera indicator When this indicator is on, the camera is in use. b Power indicator Indicator status Meaning Solid blue The computer is powered on. Slow blinking blue The computer is in sleep mode. The computer is powered off. c Caps Lock When this indicator is on, you can type uppercase indicator letters directly.
- Page 34 Hardware Maintenance Manual Lenovo Legion Y730-15/17 series a Battery indicator ac power Indicator status Meaning Disconnected The battery is not being charged. The battery has been charged Solid amber between 0% and 79%. Connected The battery has been charged Solid white between 80% and 100%. b Rear connector When the computer is powered on, these indicators indicators are on.
-
Page 35: Hotkeys
Lenovo Legion Y730-15ICH/Legion Y730-15ICHg/Legion Y730-17ICH/ Legion Y730-17ICHg Hotkeys You can access certain system settings quickly by pressing the appropriate hotkeys. Table 3. Hotkeys Hotkey Function Mutes/unmutes the sound. Increases/decreases the volume level. Enables/disables built-in microphones. Increases/decreases display brightness. Switches display devices. Turns on/off airplane mode. Displays the Settings app. Enables/disables the integrated camera. Enables/disables the touch pad. Enables the print screen function. Note: It is only available on Lenovo Legion Y730-15 series. Enables the insert function. Adjusts the keyboard backlight. Fn + Space: Note: The keyboard backlight can be customized in CUE (software). Starts Magic Y Key (software). Starts/Ends screen recording. Note: It is available when you are playing games. The function of the two keys can be customized in Magic Y Key. Note: These two keys are only available on Lenovo Legion Y730- 15 series. -
Page 36: Fru Replacement Notices
Hardware Maintenance Manual FRU replacement notices This section presents notices related to removing and replacing parts. Read this section carefully before replacing any FRU. Screw notices Loose screws can cause a reliability problem. In the Lenovo computer, this problem is addressed with special nylon-coated screws that have the following characteristics: • They maintain tight connections. • They do not easily come loose, even with shock or vibration. • They are harder to tighten. -
Page 37: Removing And Replacing An Fru
Lenovo Legion Y730-15ICH/Legion Y730-15ICHg/Legion Y730-17ICH/ Legion Y730-17ICHg Removing and replacing an FRU This section presents exploded figures with the instructions to indicate how to remove and replace the FRU. Make sure to observe the following general rules: 1. Do not attempt to service any computer unless you have been trained and certified. An untrained person runs the risk of damaging parts. 2. Before replacing any FRU, review “FRU replacement notices” on page 31. 3. Begin by removing any FRUs that have to be removed before the failing FRU. Any of such FRUs are listed at the top of the page. Remove them in the order in which they are listed. 4. Follow the correct sequence in the steps to remove the FRU, as given in the figures by the numbers in square callouts. 5. When turning a screw to replace an FRU, turn it in the direction as given by the arrow in the figure. -
Page 38: 1010 Base Cover
Hardware Maintenance Manual 1010 Base cover Figure 1. Removal steps of base cover Remove the screws 1 and 2. Lenovo Legion Y730-15 series Step Screw (quantity) Color M2.0 x L11.5 mm, Phillips-head (6) Black M2.0 x L3.0 mm, Phillips-head (5) Black... - Page 39 Lenovo Legion Y730-15ICH/Legion Y730-15ICHg/Legion Y730-17ICH/ Legion Y730-17ICHg Figure 1. Removal steps of base cover (continued) Lenovo Legion Y730-17 series Step Screw (quantity) Color M2.0 x L10.5 mm, Phillips-head (6) Black M2.0 x L3.0 mm, Phillips-head (5) Black Use a prying tool to remove the base cover in the directions shown by arrows 3 and 4. Lenovo Legion Y730-15 series...
- Page 40 Hardware Maintenance Manual Figure 1. Removal steps of base cover (continued) Lenovo Legion Y730-17 series...
- Page 41 Lenovo Legion Y730-15ICH/Legion Y730-15ICHg/Legion Y730-17ICH/ Legion Y730-17ICHg Note: Applying labels to the base cover The new base cover FRU is shipped with a kit containing labels of several kinds. When you replace the base cover, you need to apply the following labels: The following labels need to be peeled off from the old base cover and put on the new base cover. QR code label ES label CPU label VGA label Rating label GML label Malaysia/Indonesia label 15x10 mm Argentina label 68x6 mm South Africa label 20x10 mm Israel/USA/Canada/Taiwan 32 × 10 mm...
- Page 42 Hardware Maintenance Manual...
- Page 43 Lenovo Legion Y730-15ICH/Legion Y730-15ICHg/Legion Y730-17ICH/ Legion Y730-17ICHg Lenovo Legion Y730-17 series...
-
Page 44: 1020 Battery Pack
Only use the battery specified in the parts list for your computer. Any other battery could ignite or explode. For access, remove this FRU: • “1010 Base cover” on page 34 Figure 2. Removal steps of battery pack Detach the battery pack connector in the direction shown by arrow 1, remove the screws 2. Lenovo Legion Y730-15 series Step Screw (quantity) Color M2.0 x L4.0 mm, Phillips-head (4) Silver... - Page 45 Lenovo Legion Y730-15ICH/Legion Y730-15ICHg/Legion Y730-17ICH/ Legion Y730-17ICHg Figure 2. Removal steps of battery pack (continued) Lenovo Legion Y730-17 series Step Screw (quantity) Color M2.0 x L4.0 mm, Phillips-head (5) White...
- Page 46 Hardware Maintenance Manual Figure 2. Removal steps of battery pack (continued) Remove the battery pack in the direction shown by arrow 3. Lenovo Legion Y730-15 series Lenovo Legion Y730-17 series...
-
Page 47: 1030 Ssd Card
Lenovo Legion Y730-15ICH/Legion Y730-15ICHg/Legion Y730-17ICH/ Legion Y730-17ICHg 1030 SSD card For access, remove these FRUs in order: • “1010 Base cover” on page 34 • “1020 Battery pack” on page 40 Attention: • Do not drop the SSD card or apply any physical shock to it. The SSD card is sensitive to physical shock. Improper handling can cause damage and permanent loss of data. - Page 48 Hardware Maintenance Manual Figure 3. Removal steps of SSD card (continued) Lenovo Legion Y730-17 series Step Screw (quantity) Color M2.0 x L4.0 mm, Phillips-head (1) White Remove the SSD card in the direction shown by arrow 3. Lenovo Legion Y730-15 series...
- Page 49 Lenovo Legion Y730-15ICH/Legion Y730-15ICHg/Legion Y730-17ICH/ Legion Y730-17ICHg Figure 3. Removal steps of SSD card (continued) Lenovo Legion Y730-17 series...
-
Page 50: 1040 Pci Express Mini Card For Wireless Lan
• “1030 SSD card” on page 43 Important: The preinstalled WLAN module may only be replaced with a Lenovo approved module in order to comply with FCC and IC regulations. Refer to Table 4 “Parts list—Overall” on page 86 for Lenovo part numbers for the approved modules. - Page 51 Lenovo Legion Y730-15ICH/Legion Y730-15ICHg/Legion Y730-17ICH/ Legion Y730-17ICHg Figure 4. Removal steps of PCI Express Mini Card for wireless LAN (continued) Disconnect the two wireless LAN cables (black, white) 2, and then release the cables from the cable guides. Remove the screw 3. Lenovo Legion Y730-15 series Step Screw (quantity) Color M2.0 x L4.0 mm, Phillips-head (1) Sliver Lenovo Legion Y730-17 series Step Screw (quantity) Color M2.0 x L4.0 mm, Phillips-head (1)
- Page 52 Hardware Maintenance Manual Figure 4. Removal steps of PCI Express Mini Card for wireless LAN (continued) Remove the card in the direction shown by arrow 4. Lenovo Legion Y730-15 series Lenovo Legion Y730-17 series When installing: In models with a wireless LAN card that has two antenna connectors, plug the black cable into the jack labeled MAIN, and the white cable into the jack labeled AUX on the card.
-
Page 53: 1050 Dimm
Lenovo Legion Y730-15ICH/Legion Y730-15ICHg/Legion Y730-17ICH/ Legion Y730-17ICHg 1050 DIMM For access, remove these FRUs in order: • “1010 Base cover” on page 34 • “1020 Battery pack” on page 40 • “1030 SSD card” on page 43 • “1040 PCI Express Mini Card for wireless LAN” on page 46 Figure 5. Removal steps of DIMM Insert a flat blade tool into the memory module cover, and then remove the memory module cover manually. Lenovo Legion Y730-15 series... - Page 54 Hardware Maintenance Manual Figure 5. Removal steps of DIMM (continued) Release the two latches on both edges of the socket at the same time in the directions shown by arrows 1, and then unplug the DIMM in the direction shown by arrow 2. Lenovo Legion Y730-15 series Lenovo Legion Y730-17 series...
-
Page 55: 1060 Subwoofer
Lenovo Legion Y730-15ICH/Legion Y730-15ICHg/Legion Y730-17ICH/ Legion Y730-17ICHg 1060 Subwoofer For access, remove these FRUs in order: • “1010 Base cover” on page 34 • “1020 Battery pack” on page 40 • “1030 SSD card” on page 43 • “1040 PCI Express Mini Card for wireless LAN” on page 46 • “1050 DIMM” on page 49 Figure 6. Removal steps of subwoofer Disconnect the connector in the direction shown by arrow 1. Remove the subwoofer 2. Lenovo Legion Y730-17 series... -
Page 56: 1070 Hard Disk Drive
• Before removing the drive, suggest the customer to backup all the information on it if possible. • Never remove the drive while the system is operating or in suspend mode. Figure 7. Removal steps of hard disk drive Disconnect the connector in the direction shown by arrow 1. Remove the screws 2. Lenovo Legion Y730-15 series Step Screw (quantity) Color M2.0 x L4.0 mm, Phillips-head (4) Sliver... - Page 57 Lenovo Legion Y730-15ICH/Legion Y730-15ICHg/Legion Y730-17ICH/ Legion Y730-17ICHg Figure 7. Removal steps of hard disk drive (continued) Lenovo Legion Y730-17 series Step Screw (quantity) Color M2.0 x L4.0 mm, Phillips-head (4) White...
- Page 58 Hardware Maintenance Manual Figure 7. Removal steps of hard disk drive (continued) Remove the hard disk drive from the slot in the direction shown by arrow 3. Lenovo Legion Y730-15 series Lenovo Legion Y730-17 series When installing: Make sure that the connector is attached firmly.
- Page 59 Lenovo Legion Y730-15ICH/Legion Y730-15ICHg/Legion Y730-17ICH/ Legion Y730-17ICHg Figure 7. Removal steps of hard disk drive (continued) Remove the screws 4 and detach the metal frame from the hard disk drive. Then remove the HDD FFC in the direction shown by arrow 5. Lenovo Legion Y730-15 series Step Screw (quantity) Color M3.0 x L3.0 mm, Phillips-head (4) Sliver Lenovo Legion Y730-17 series Step Screw (quantity) Color M3.0 x L3.0 mm, Phillips-head (4) Black...
-
Page 60: 1080 Fan And Heat Sink
• “1040 PCI Express Mini Card for wireless LAN” on page 46 • “1050 DIMM” on page 49 • “1060 Subwoofer” on page 51 • “1070 Hard disk drive” on page 52 Figure 8. Removal steps of fan and heat sink Unplug the fan connector in the direction shown by arrow 1. Remove the screws 2. Lenovo Legion Y730-15 series Step Screw (quantity) Color M2.0 x L4.0 mm, Phillips head (6) Sliver... - Page 61 Lenovo Legion Y730-15ICH/Legion Y730-15ICHg/Legion Y730-17ICH/ Legion Y730-17ICHg Figure 8. Removal steps of fan and heat sink (continued) Lenovo Legion Y730-17 series Step Screw (quantity) Color M2.0 x L4.0 mm, Phillips head (6) White When installing: Make sure that the connector is attached firmly.
- Page 62 Hardware Maintenance Manual Figure 8. Removal steps of fan and heat sink (continued) Remove the fan and heat sink in the direction shown by arrow 3. Be careful not to damage the connector. Lenovo Legion Y730-15 series Lenovo Legion Y730-17 series...
- Page 63 Lenovo Legion Y730-15ICH/Legion Y730-15ICHg/Legion Y730-17ICH/ Legion Y730-17ICHg Figure 8. Removal steps of fan and heat sink (continued) Lenovo Legion Y730-15 series Lenovo Legion Y730-17 series When installing: Before you attach the fan assembly to the computer, apply thermal grease, at an amount of 0.2 grams, to the part shown in the figure above. Either too much or too little grease application can cause a thermal...
-
Page 64: 1090 Speakers
Hardware Maintenance Manual 1090 Speakers For access, remove these FRUs in order: • “1010 Base cover” on page 34 • “1020 Battery pack” on page 40 • “1030 SSD card” on page 43 • “1040 PCI Express Mini Card for wireless LAN” on page 46 • “1050 DIMM” on page 49 • “1060 Subwoofer” on page 51 • “1070 Hard disk drive” on page 52 • “1080 Fan and heat sink” on page 56 Figure 9. Removal steps of speakers Unplug the speaker connectors 1. Then remove the speakers 2. Lenovo Legion Y730-15 series... - Page 65 Lenovo Legion Y730-15ICH/Legion Y730-15ICHg/Legion Y730-17ICH/ Legion Y730-17ICHg Figure 9. Removal steps of speakers (continued) Lenovo Legion Y730-17 series...
-
Page 66: 1100 Io Board And Backup Battery
• “1020 Battery pack” on page 40 • “1030 SSD card” on page 43 • “1040 PCI Express Mini Card for wireless LAN” on page 46 • “1050 DIMM” on page 49 • “1060 Subwoofer” on page 51 • “1070 Hard disk drive” on page 52 • “1080 Fan and heat sink” on page 56 • “1090 Speakers” on page 60 Figure 10. Removal steps of IO board and backup battery Detach the IO board connector and backup battery connector in the directions shown by arrow 1 and 2. Remove the screw 3 and 4. Lenovo Legion Y730-15 series Step Screw (quantity) Color M2.0 x L4.0 mm, Phillips-head (1) Sliver M2.0 x L4.0 mm, Phillips-head (1) Sliver... - Page 67 Lenovo Legion Y730-15ICH/Legion Y730-15ICHg/Legion Y730-17ICH/ Legion Y730-17ICHg Figure 10. Removal steps of IO board and backup battery (continued) Lenovo Legion Y730-17 series Step Screw (quantity) Color M2.0 x L4.0 mm, Phillips-head (1) White M2.0 x L4.0 mm, Phillips-head (1) White When installing: Make sure that the connectors are attached firmly.
- Page 68 Hardware Maintenance Manual Figure 10. Removal steps of IO board and backup battery (continued) Remove the IO board, backup battery and lock bracket in the direction shown by arrow 5, 6 and 7. Lenovo Legion Y730-15 series Lenovo Legion Y730-17 series...
-
Page 69: 1110 System Board
Lenovo Legion Y730-15ICH/Legion Y730-15ICHg/Legion Y730-17ICH/ Legion Y730-17ICHg 1110 System board Important notices for handling the system board: When handling the system board, bear the following in mind. • Be careful not to drop the system board on a bench top that has a hard surface, such as metal, wood, or composite. - Page 70 Hardware Maintenance Manual Figure 11. Removal steps of system board (continued) Lenovo Legion Y730-17 series...
- Page 71 Lenovo Legion Y730-15ICH/Legion Y730-15ICHg/Legion Y730-17ICH/ Legion Y730-17ICHg Figure 11. Removal steps of system board (continued) Remove the screws 3. Lift the system board slightly, disconnect the connectors in the direction shown by arrow 4. Lenovo Legion Y730-15 series Step Screw (quantity) Color M2.0 x L4.0 mm, Phillips-head (1) Sliver Lenovo Legion Y730-17 series Step Screw (quantity) Color M2.0 x L4.0 mm, Phillips-head (3) White...
- Page 72 Hardware Maintenance Manual Figure 11. Removal steps of system board (continued) Remove the system board in the direction shown by arrow 5. Lenovo Legion Y730-15 series Lenovo Legion Y730-17 series...
-
Page 73: 1120 Upper Case
Lenovo Legion Y730-15ICH/Legion Y730-15ICHg/Legion Y730-17ICH/ Legion Y730-17ICHg 1120 Upper case For access, remove these FRUs in order: • “1010 Base cover” on page 34 • “1020 Battery pack” on page 40 • “1030 SSD card” on page 43 • “1040 PCI Express Mini Card for wireless LAN” on page 46 • “1050 DIMM” on page 49 • “1060 Subwoofer” on page 51 • “1070 Hard disk drive” on page 52 • “1080 Fan and heat sink” on page 56 • “1090 Speakers” on page 60 • “1100 IO board and backup battery” on page 62 • “1110 System board” on page 65 Figure 12. Removal steps of upper case Use a prying tool to remove the cover in the direction shown by arrow 1. - Page 74 Hardware Maintenance Manual Figure 12. Removal steps of upper case (continued) Lenovo Legion Y730-17 series...
- Page 75 Lenovo Legion Y730-15ICH/Legion Y730-15ICHg/Legion Y730-17ICH/ Legion Y730-17ICHg Figure 12. Removal steps of upper case (continued) Remove the screws 2. And then remove the hinge cover in the direction shown by arrow 3. Lenovo Legion Y730-15 series Step Screw (quantity) Color M2.0 × L2.0 mm, Phillips-head (2) Black Lenovo Legion Y730-17 series Step Screw (quantity) Color M2.0 × L2.0 mm, Phillips-head (2) Black...
- Page 76 Hardware Maintenance Manual Figure 12. Removal steps of upper case (continued) Remove the screws 4 and 5. Lenovo Legion Y730-15 series Step Screw (quantity) Color M2.0 x L2.0 mm, Phillips-head (2) Black M2.5 x L5.0 mm, Phillips-head (4) Grey Lenovo Legion Y730-17 series Step Screw (quantity) Color M2.0 x L2.0 mm, Phillips-head (2) Black M2.5 x L5.0 mm, Phillips-head (4) Black...
- Page 77 Lenovo Legion Y730-15ICH/Legion Y730-15ICHg/Legion Y730-17ICH/ Legion Y730-17ICHg Figure 12. Removal steps of upper case (continued) Remove the upper case from the LCD module in the directions shown by arrow 6. Lenovo Legion Y730-15 series Lenovo Legion Y730-17 series...
-
Page 78: 1130 Lcd Unit
1130 LCD unit For access, remove these FRUs in order: • “1010 Base cover” on page 34 • “1020 Battery pack” on page 40 • “1030 SSD card” on page 43 • “1040 PCI Express Mini Card for wireless LAN” on page 46 • “1050 DIMM” on page 49 • “1060 Subwoofer” on page 51 • “1070 Hard disk drive” on page 52 • “1080 Fan and heat sink” on page 56 • “1090 Speakers” on page 60 • “1100 IO board and backup battery” on page 62 • “1110 System board” on page 65 • “1120 Upper case” on page 69 Figure 13. Removal steps of LCD unit Remove the LCD front bezel in the direction shown by arrows 1. Lenovo Legion Y730-15 series... - Page 79 Lenovo Legion Y730-15ICH/Legion Y730-15ICHg/Legion Y730-17ICH/ Legion Y730-17ICHg Figure 13. Removal steps of LCD unit (continued) Lenovo Legion Y730-17 series Note: Glue is used between the LCD bezel and the LCD panel. The LCD bezel is susceptible to damage after removal. Order a replacement LCD bezel if you need to remove it when servicing a customer's computer.
- Page 80 Hardware Maintenance Manual Figure 13. Removal steps of LCD unit (continued) Remove screws 2. Remove the hinge 3. Lenovo Legion Y730-15 series Step Screw (quantity) Color M2.5 x L2.5 mm, Phillips-head (6) Black Lenovo Legion Y730-17 series Step Screw (quantity) Color M2.5 x L2.5 mm, Phillips-head (6) Black...
- Page 81 Lenovo Legion Y730-15ICH/Legion Y730-15ICHg/Legion Y730-17ICH/ Legion Y730-17ICHg Figure 13. Removal steps of LCD unit (continued) Pull out the tapes in the direction shown by arrow 4. Lenovo Legion Y730-15 series Remove the screws 4. Lenovo Legion Y730-17 series Step Screw (quantity) Color M2.0 x L3.0 mm, Phillips-head (4) Black...
- Page 82 Hardware Maintenance Manual Figure 13. Removal steps of LCD unit (continued) Lift the LCD module slightly. Disconnect the connector in the direction shown by arrow 5. Then remove the LCD module. Lenovo Legion Y730-15 series Lenovo Legion Y730-17 series...
-
Page 83: 1140 Integrated Camera
Lenovo Legion Y730-15ICH/Legion Y730-15ICHg/Legion Y730-17ICH/ Legion Y730-17ICHg 1140 Integrated camera For access, remove these FRUs in order: • “1010 Base cover” on page 34 • “1020 Battery pack” on page 40 • “1030 SSD card” on page 43 • “1040 PCI Express Mini Card for wireless LAN” on page 46 • “1050 DIMM” on page 49 • “1060 Subwoofer” on page 51 • “1070 Hard disk drive” on page 52 • “1080 Fan and heat sink” on page 56 • “1090 Speakers” on page 60 • “1100 IO board and backup battery” on page 62 • “1110 System board” on page 65 • “1120 Upper case” on page 69 • “1130 LCD unit” on page 74 Figure 14. Removal steps of integrated camera Note: The integrated camera is stuck on the top center of the LCD cover. - Page 84 Hardware Maintenance Manual Figure 14. Removal steps of integrated camera (continued) Lenovo Legion Y730-17 series When installing: Stick the integrated camera to the LCD cover and adjust its placement to make sure the connector is attached firmly.
-
Page 85: Locations
Lenovo Legion Y730-15ICH/Legion Y730-15ICHg/Legion Y730-17ICH/ Legion Y730-17ICHg Locations Front view and right-side view 1 Integrated camera 2 Built-in microphones 3 Computer display 4 Wireless antennas 5 Power button 6 Keyboard 7 Touch pad and click buttons 8 Ventilation slots (outlet) 9 USB (Type-A) port J Novo button Lenovo Legion Y730-15 series... - Page 86 Hardware Maintenance Manual Lenovo Legion Y730-17 series...
-
Page 87: Bottom And Left-Side View
Lenovo Legion Y730-15ICH/Legion Y730-15ICHg/Legion Y730-17ICH/ Legion Y730-17ICHg Bottom and Left-side view 1 Fans 2 Subwoofer (on select models) 3 Ventilation slots (intake) 4 Speakers 5 Ventilation slots (outlet) 6 Combo audio jack 7 USB (Type-C) port Lenovo Legion Y730-15 series Lenovo Legion Y730-17 series... -
Page 88: Rear View
Hardware Maintenance Manual Rear view 1 Ventilation slots (outlet) 2 Mini DisplayPort 3 HDMI-out port 4 USB (Type-A) port 5 RJ-45 port 6 USB (Type-A) port 7 ac power jack 8 Kensington Mini Security slot Lenovo Legion Y730-15/17 series... -
Page 89: Parts List
Lenovo Legion Y730-15ICH/Legion Y730-15ICHg/Legion Y730-17ICH/ Legion Y730-17ICHg Parts list This section presents the following service parts: • “Overall” on page 86 • “LCD FRUs” on page 92 • “Miscellaneous parts” on page 96 • “ac adapters” on page 97 • “Screws” on page 98 Note: Each FRU is available for all types or models, unless specific types or models are specified. Attention: Do not attempt to replace an FRU on your own. If an FRU is damaged, contact a Lenovo authorized servicer or a marketing representative for replacement... -
Page 90: Overall
Hardware Maintenance Manual Overall Lenovo Legion Y730-15 series... - Page 91 Lenovo Legion Y730-15ICH/Legion Y730-15ICHg/Legion Y730-17ICH/ Legion Y730-17ICHg Table 4. Parts list—Overall Lenovo Legion Y730-15 series FRU no. See “Miscellaneous parts” on page 96. LCD unit (see “LCD FRUs” on page 92). Hinge Cover Kit C 81HD R+L 5CB0S56949 Strip Cover C 81HD 5CB0S56977 Upper Case C 81HD BK W/TPKB BL BU 5CB0S56967 Upper Case C 81HD BK W/TPKB BL FR 5CB0S56995 Upper Case C 81HD BK W/TPKB BL TR 5CB0S56947 Upper Case C 81HD BK W/TPKB BL BZ 5CB0S56972 Upper Case C 81HD BK W/TPKB BL GR 5CB0S56963 Upper Case C 81HD BK W/TPKB BL ND 5CB0S56993 Upper Case C 81HD BK W/TPKB BL TI 5CB0S56964 Upper Case C 81HD BK W/TPKB BL HB 5CB0S56994 Upper Case C 81HD BK W/TPKB BL LA...
- Page 92 Hardware Maintenance Manual Table 4. Parts list—Overall (continued) FRU no. 8GB DDR4 2666 SoDIMM,Micron 01AG841 16GB DDR4 2666 SoDIMM,Ramaxel 01AG844 8GB DDR4 2666 SoDIMM,Samsung 01AG837 16GB DDR4 2666 SoDIMM,Micron 01AG842 ST Rosewood2D 7mm 2TB HDD 5H20M37521 Storage,HDD,1T,7200,7mm,SATA,ST 01FR405 RTC Battery C 81HD 5B10S56966 Wireless,CMB,FXN,8822BE M2 01AX712 Wireless,CMB,IN,9560 NV M2 01AX768 Storage SSD PM981 256G M.2 SAM 01FR544 Storage SSD PC401 256G M.2 Hynix 01FR537 Storage SSD PC401 512G M.2 Hynix 01FR538 16G,M.2,2280,PCIe3x2,INT,STD 00UP480 Storage SSD BG3 128G 2242 PCIe TSB 01FR521 Speaker C 81HD R+L 5SB0S56979 SP/A L17M3PG2 11.52V57Wh3cell 5B10Q88560 Lower Case C 81HD...
- Page 93 Lenovo Legion Y730-15ICH/Legion Y730-15ICHg/Legion Y730-17ICH/ Legion Y730-17ICHg Lenovo Legion Y730-17 series...
- Page 94 Hardware Maintenance Manual Table 4. Parts list—Overall Lenovo Legion Y730-17 series FRU no. See “Miscellaneous parts” on page 96. LCD unit (see “LCD FRUs” on page 92). HINGE COVER KIT C 81HG 5CB0S57350 STRIP COVER C 81HG 5CB0S57370 Upper Case C 81HG BK W/KBTPBL TI 5CB0S57363 Upper Case C 81HG BK W/KBTPBL ARE 5CB0S57328 Upper Case C 81HG BK W/KBTPBL TR 5CB0S57364 Upper Case C 81HG BK W/KBTPBL HG 5CB0S57373 Upper Case C 81HG BK W/KBTPBL IND 5CB0S57374 Upper Case C 81HG BK W/KBTPBL HB 5CB0S57361 Upper Case C 81HG BK W/KBTPBL USA 5CB0S57342 Upper Case C 81HG BK W/KBTPBL RU 5CB0S57343 Upper Case C 81HG BK W/KBTPBL INT 5CB0S57344 UpperCase C 81HG BKW/KBTPBL CZ-SK 5CB0S57380 Upper Case C 81HG BK W/KBTPBL ICE...
- Page 95 Lenovo Legion Y730-15ICH/Legion Y730-15ICHg/Legion Y730-17ICH/ Legion Y730-17ICHg Table 4. Parts list—Overall (continued) FRU no. 8GB DDR4 2666 SoDIMM,Micron 01AG841 16GB DDR4 2666 SoDIMM,Ramaxel 01AG844 8GB DDR4 2666 SoDIMM,Samsung 01AG837 16GB DDR4 2666 SoDIMM,Micron 01AG842 SUBWOOFER C 81HG 5SB0S57354 Storage,HDD,1T,7200,7mm,SATA,ST 01FR405 ST Rosewood2D 7mm 2TB HDD 5H20M37521 RTC BATTERY C 81HG 5B10S57377 Wireless,CMB,FXN,8822BE M2 01AX712 Wireless,CMB,IN,9560 NV M2 01AX768 Storage SSD PM981 256G M.2 SAM 01FR544 Storage SSD PC401 256G M.2 Hynix 01FR537 Storage SSD PC401 512G M.2 Hynix 01FR538 16G,M.2,2280,PCIe3x2,INT,STD...
-
Page 96: Lcd Frus
Hardware Maintenance Manual LCD FRUs Lenovo Legion Y730-15 series... - Page 97 Lenovo Legion Y730-15ICH/Legion Y730-15ICHg/Legion Y730-17ICH/ Legion Y730-17ICHg Table 5. Parts list—LCD FRUs Lenovo Legion Y730-15 series FRU no. LCD Bezel C 81HD 5B30S56954 LG LP156WFG SPB2 FHDI AG S NB 5D10R19779 IN N156HCE-EN1 C1 FHDI AG S NB 5D10M42864 BO NV156FHM-N4G FHDI AG S NB 5D10R00685 AU B156HAN02.0 0A FHDI AG S NB 5D10M42890 Hinges C 81HD L+R 5H50S56962 Camera,720P,Front,2MIC,WTB,Ltn 01HW029 Camera,720P,Front,2MIC,WTB,Bsn 01HW027 Camera,720P,Front,2MIC,WTB,Chy 01HW028 Camera,720P,Front,2MIC,WTB,Azw 01HW037 LCD Cover C 81HD W/ANT&EDP_144HZ 5CB0S56946 LCD Cover C 81HD W/ANT&EDP_60HZ...
- Page 98 Hardware Maintenance Manual Lenovo Legion Y730-17 series...
- Page 99 Lenovo Legion Y730-15ICH/Legion Y730-15ICHg/Legion Y730-17ICH/ Legion Y730-17ICHg Table 5. Parts list—LCD FRUs Lenovo Legion Y730-17 series FRU no. LCD BEZEL C 81HG 5B30S57346 LG LP173WFG SPD2 FHDI AG S NB 5D10R25354 LG LP173WF4 SPF6 FHDI AG S NB 5D10Q59856 AU B173HAN03.2 0A FHDI AG S NB 5D10R11221 LCD HINGE R+L C 81HG 5H50S57362 Camera,720P,Front,2MIC,WTB,Ltn 01HW029 Camera,720P,Front,2MIC,WTB,Bsn 01HW027 Camera,720P,Front,2MIC,WTB,Chy 01HW028 Camera,720P,Front,2MIC,WTB,Azw 01HW037 LCD Cover C 81HG W/ANT&EDP_144HZ 5CB0S57379 LCD Cover C 81HG W/ANT&EDP_60HZ 5CB0S57375...
-
Page 100: Miscellaneous Parts
Hardware Maintenance Manual Miscellaneous parts Table 6. Parts list—Miscellaneous parts Lenovo Legion Y730-15 series FRU no. System miscellaneous parts: • (a) K Lock bracket C 81HD 5B40S56965 • (b) DDR Shielding C 81HD 5S60S56987 • (c) HDD FFC C 81HD 5C10S56971 • (d) HDD Bracket C 81HD 5B40S56984 • (e) Wlan Sponge C 81HD 5T10S56950 • (f) SSD Bracket C 81HD For 2242 5B40S74439 • (g) Removeable Tapes C 81HD R+L 5T10S56989 • (h) Camera_MIC rubber C 81HD 5R60S56980 Note: Letters in parentheses are references to the exploded view in “Overall” on... -
Page 101: Ac Adapters
Lenovo Legion Y730-15ICH/Legion Y730-15ICHg/Legion Y730-17ICH/ Legion Y730-17ICHg ac adapters Table 7. Parts list—ac adapters Lenovo Legion Y730-15/17 series ADL135NDC3A 20V6.75A COO 01FR042 ADL135NLC3A 20V6.75A AD BIS 5A10J75112 Longwell LP-34A+H03VV-F+LS-18 1m cord 145000553 LINETEK LS15+H03VV-F+PE-364 1m cord 145000586 LINETEK LS15+H03VV-F+LP-37 1m cord 145000597 VOLEX CH10S3+H03VV-F+VAC5S 1m cord 145000527 LINETEK LS15+H03VV-F+LP-41 1m cord 145000595 LINETEK PE-361+ H05VV-F+ LS15 1m cord 145000592 LINETEK LS15+H03VV-F+LP-23A 1m cord 145000589 VOLEX VAC5S+VCTF+M755 1m cord 145000530 Longwell LP-61L+H03VV-F+LS-18 1m cord 145000561... -
Page 102: Screws
01YW103 lux 0027+H03VV-F 0.75/3C+0011 1m cord 145500013 lux 0014+H03VV-F 0.75/3C+0011 5L60J33143 lux 0034+H03VV-F 0.75/3C+0011 1m cord 145500011 lux 0033+H03VV-F 0.75/3C+0011 1m cord 145500001 lux 0038+H03VV-F 0.75/3C+0011 1m cord 145500006 lux0036+RVV 300/300 0.75/3C+0002 1mcord 145500003 lux 0040+H03VV-F 0.75/3C+0011 1m cord 145500015 Fru, LINECORD,TW,1M,3P,NON-LH 01YW107 lux 0044+H03VV-F 0.75/3C+0011 1m cord 145500010 lux 0046+IS694 0.75/3C+0011 1m cord 145500004 lux 0029+H03VV-F 0.75/3C+0011 1m cord 145500009 Screws Table 8. Parts list—screws Lenovo Legion Y730-15 series Screw KIT C 81HD 5S10S56943 Lenovo Legion Y730-17 series SCREW KIT C 81HG 5S10S57371... -
Page 103: Notices
Notices Notices Lenovo may not offer the products, services, or features discussed in this document in all countries. Consult your local Lenovo representative for information on the products and services currently available in your area. Any reference to a Lenovo product, program, or service is not intended to state or imply that only that Lenovo product, program, or service may be used. Any functionally equivalent product, program, or service that does not infringe any Lenovo intellectual property right may be used instead. However, it is the... -
Page 104: Trademarks
Furthermore, some measurements may have been estimated through extrapolation. Actual results may vary. Users of this document should verify the applicable data for their specific environment. Trademarks LENOVO, LENOVO logo and LEGION logo are trademarks of Lenovo. Microsoft, Windows and Cortana are trademarks of the Microsoft group of companies. The terms HDMI and HDMI High-Definition Multimedia Interface are trademarks or registered trademarks of HDMI Licensing LLC in the United States and other countries. USB Type-C and USB-C are trademarks of USB Implementers Forum. Thunderbolt is a trademark of Intel Corporation or its subsidiaries in the...
Need help?
Do you have a question about the Legion Y730 Series and is the answer not in the manual?
Questions and answers