
Related Manuals for Electrolux EGT6242


Summary of Contents for Electrolux EGT6242
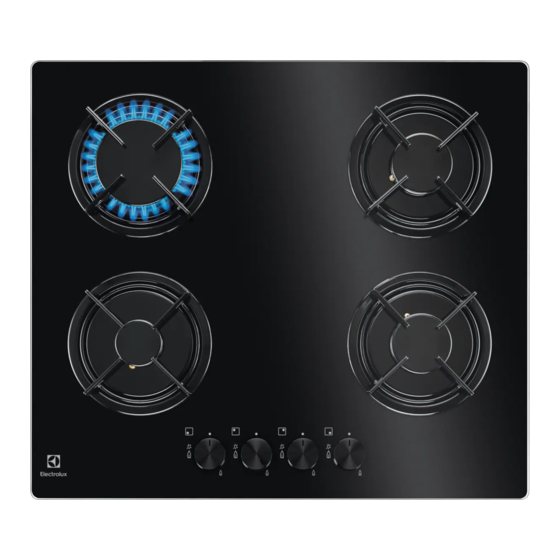
- Page 1 ..................... EGT6242 EN HOB USER MANUAL FR TABLE DE CUISSON NOTICE D'UTILISATION...
-
Page 2: Table Of Contents
9. TECHNICAL INFORMATION ..........15 WE’RE THINKING OF YOU Thank you for purchasing an Electrolux appliance. You’ve chosen a product that brings with it decades of professional experience and innovation. Ingenious and stylish, it has been designed with you in mind. -
Page 3: Safety Information
ENGLISH 1. SAFETY INFORMATION Before the installation and use of the appliance, carefully read the supplied instructions. The manufacturer is not responsible if an incorrect installation and use causes in- juries and damages. Always keep the instructions with the appliance for future reference. 1.1 Children and vulnerable people safety WARNING! Risk of suffocation, injury or permanent disability. -
Page 4: Safety Instructions
• Never try to extinguish a fire with water, but switch off the appliance and then cover flame e.g. with a lid or a fire blanket. • Do not store items on the cooking surfaces. • Do not use a steam cleaner to clean the appliance. - Page 5 ENGLISH • Make sure not to cause damage to the • Do not put cutlery or saucepan lids on mains plug (if applicable) or to the the cooking zones. They become hot. mains cable. Contact the Service or an • Set the cooking zone to “off” after use. electrician to change a damaged mains •...
-
Page 6: Product Description
• Make sure that the ventilation openings • Clean regularly the appliance to prevent are not blocked. the deterioration of the surface material. • Prolonged intensive use of the appli- • Do not use water spray and steam to ance may call for additional ventilation, clean the appliance. -
Page 7: Daily Use
ENGLISH Symbol Description minimum gas supply 4. DAILY USE WARNING! Burner cap Refer to the Safety chapters. Burner crown Ignition candle 4.1 Ignition of the burner Thermocouple WARNING! WARNING! Be very careful when you use Do not keep the control knob open fire in kitchen environment. -
Page 8: Helpful Hints And Tips
5. HELPFUL HINTS AND TIPS WARNING! Refer to the Safety chapters. 5.1 Energy savings • If possible, always put the lids on the pans. WARNING! • When the liquid starts to boil, turn down Make sure that pot handles is not the flame to barely simmer the liquid. -
Page 9: Troubleshooting
ENGLISH • Wash stainless steel parts with water, Clean the appliance with a damp and then dry them with a soft cloth. cloth and some detergent. • The pan supports are not dishwasher At the end rub the appliance dry proof. - Page 10 10 www.electrolux.com Problem Possible cause Remedy The flame is blow out im- • Thermocouple is not • After lightning the mediately after ignition heated sufficient flame, keep the knob pushed for equal or less than 10 seconds. The gas ring burns un- •...
-
Page 11: Installation
ENGLISH 8. INSTALLATION WARNING! Location Refer to the Safety chapters. The hob may be located in a kitchen, a WARNING! kitchen/diner or bed sitting room (with a The following instructions about volume greater than 20 m³), but not in a installation, connection and main- bathroom or shower room. - Page 12 12 www.electrolux.com The connection should be suitable for 8.4 Adjustment of minimum level connecting to R 1/2 (1/2 BSP male To adjust the minimum level of the burn- thread). ers: When the final connection has been made, it is essential that a thorough leak Light the burner.
- Page 13 ENGLISH and local Electricity Board regulations. For your own safety the installation must be done by a qualified electrician (e.g. your local Electricity Board, or a contractor who is on the roll of the National Inspec- tion Council for Electrical Installation Con- tracting [NICEIC]).
- Page 14 14 www.electrolux.com To replace the connection cable use only H05V2V2-F T90 or equivalent type. Make sure that the cable section is applicable to the voltage load and the working temperature. The yellow/green earth wire (B) must be approxi- mately 2 cm longer than the live and neutral wire (A).
-
Page 15: Technical Information
ENGLISH 9. TECHNICAL INFORMATION Hob dimensions Hob recess dimensions Width: 590 mm Width: 560 mm Length: 520 mm Length: 480 mm Heat input Rapid burner: 2.9 kW Semi-rapid burner: 1.9 kW Auxiliary burner: 1.0 kW TOTAL POWER: G20 (2H) 20 mbar = 7.7 kW G30 (3+) 28-30 mbar = 545 g/h G31 (3+) 37 mbar = 536 g/h Electric supply:... - Page 16 16 www.electrolux.com 10. ENVIRONMENT CONCERNS Recycle the materials with the symbol and electronic appliances. Do not dispose . Put the packaging in applicable appliances marked with the symbol containers to recycle it. with the household waste. Return the Help protect the environment and human...
- Page 17 9. CARACTERISTIQUES TECHNIQUES ........29 NOUS PENSONS À VOUS Merci d'avoir choisi ce produit Electrolux. Avec ce produit, vous bénéficiez de dizaines d'années d'expérience professionnelle et d'innovation. Ingénieux et élégant, il a été conçu sur mesure pour vous.
-
Page 18: Consignes De Sécurité
18 www.electrolux.com 1. CONSIGNES DE SÉCURITÉ Avant d'installer et d'utiliser cet appareil, lisez soigneuse- ment les instructions fournies. Le fabricant ne peut être tenu pour responsable des dommages et blessures liés à une mauvaise installation ou utilisation. Conservez tou- jours cette notice avec votre appareil pour vous y référer ultérieurement. -
Page 19: Instructions De Sécurité
FRANÇAIS • Ne faites pas fonctionner l'appareil avec un minuteur externe ou un système de commande à distance. • Il peut être dangereux de laisser chauffer de la graisse ou de l'huile sans surveillance sur une table de cuisson car cela pourrait provoquer un incendie. •... - Page 20 20 www.electrolux.com • L'ensemble des branchements électri- • Les informations relatives à l'alimenta- ques doit être effectué par un techni- tion en gaz se trouvent sur la plaque si- cien qualifié. gnalétique. • L'appareil doit être relié à la terre.
- Page 21 FRANÇAIS • L'huile qui a servi contient des restes mètre supérieur à celui des brûleurs. d'aliments pouvant provoquer un incen- Risque de surchauffe et de rupture de die à température plus faible que l'huile la plaque en verre (si votre appareil en n'ayant jamais servi.
-
Page 22: Description De L'appareil
22 www.electrolux.com 3. DESCRIPTION DE L'APPAREIL 3.1 Disposition de la surface de cuisson Table de cuisson Brûleur rapide Brûleur auxiliaire Brûleur semi-rapide Manettes de commande 3.2 Manettes de commande Symbole Description alimentation en Symbole Description gaz minimum pas d'alimenta- tion en gaz / posi- tion arrêt... -
Page 23: Conseils Utiles
FRANÇAIS Si le brûleur s'éteint accidentelle- ment, tournez la manette de com- mande sur la position Arrêt et at- tendez au moins 1 minute avant d'essayer une nouvelle fois d'allu- mer le brûleur. Le générateur d'étincelles se dé- clenche automatiquement à la mi- se sous tension de l'appareil, après l'installation ou une coupure d'électricité. -
Page 24: Entretien Et Nettoyage
24 www.electrolux.com AVERTISSEMENT Brûleur Diamètres des réci- Assurez-vous que les poignées pients des récipients ne dépassent pas du devant de la table de cuisson. Semi-rapi- 120 - 220 mm Assurez-vous que les récipients de arrière de cuisson sont bien centrés sur... -
Page 25: Cas D'anomalie De Fonctionnement
FRANÇAIS des supports de casseroles sont au mi- AVERTISSEMENT lieu du brûleur. Ne faites pas glisser les récipients sur le verre car ils pourraient en rayer la surface. De même, ne fai- • Replacez les supports de casserole tes pas tomber d'objets durs ou avec soin afin de ne pas endomma- pointus sur le verre. - Page 26 26 www.electrolux.com Problème Cause probable Solution La flamme s'éteint immé- • Le thermocouple n'est • Maintenez la manette diatement après l'alluma- pas suffisamment enfoncée pendant chauffé 10 secondes environ une fois la flamme allu- mée. Les flammes du brûleur à...
-
Page 27: Installation
FRANÇAIS 8. INSTALLATION AVERTISSEMENT – il ne peut pas devenir plus chaud que la Reportez-vous aux chapitres con- température ambiante, à savoir plus de cernant la sécurité. 30 °C ; – il n'est pas plus long que 1 500 mm ; AVERTISSEMENT –... - Page 28 28 www.electrolux.com Si la pression de l'alimentation en gaz • Utilisez toujours une prise de courant peut être modifiée ou est différente de la de sécurité correctement installée. pression nécessaire, vous devez monter • Assurez-vous que la prise de courant un système de réglage de la pression sur...
-
Page 29: Caracteristiques Techniques
FRANÇAIS d'accès au cas où une intervention tech- nique serait nécessaire. 30 mm min 20 mm (max 150 mm) 60 mm Panneau amovible Espace pour les branchements Élément de cuisine avec four Les branchements électriques de la table de cuisson et du four doivent être installés séparément pour des raisons de sécurité... - Page 30 30 www.electrolux.com Puissance Brûleur rapide : 2.9 kW Brûleur semi-rapide : 1.9 kW Brûleur auxiliaire : 1.0 kW PUISSANCE TOTALE : G20 (2H) 20 mbar = 7.7 kW G30 (3+) 28-30 mbar = 545 g/h G31 (3+) 37 mbar = 536 g/h Alimentation électrique :...
- Page 31 FRANÇAIS votre centre local de recyclage ou portant le symbole avec les ordures contactez vos services municipaux. ménagères. Emmenez un tel produit dans...
- Page 32 www.electrolux.com/shop...
Need help?
Do you have a question about the EGT6242 and is the answer not in the manual?
Questions and answers