
Related Manuals for Link4 iPonic 614


Summary of Contents for Link4 iPonic 614
- Page 1 iPonic ™ INTELLIGENT ENVIRONMENTAL CONTROLLER Installation and User’s Guide October 2012 Edition Copyright © 2012 Corporation...
- Page 2 960-3100-00 iPonic 614 Installation Manual...
-
Page 3: Table Of Contents
To Change the Humidifying and Dehumidifying Setpoints ..........11 Irrigation ....................11 Irrigation Pump Setup ....................11 Irrigation Settings ......................11 Alarms ....................... 12 Alarm Function ......................12 Changing the Alarm Settings ..................12 Receiving Alarm Notifications by Text or Email ............. 12 960-3100-00 iPonic 614 Installation Manual... - Page 4 Enabling and Creating Your Fuzzy Logic Settings ............27 Setting Your Fuzzy Logic Cycle Period ................. 27 Night Setpoint ...................... 28 Enabling CO Night Setpoint ..................28 Changing CO Night Target Once Enabled ..............28 960-3100-00 iPonic 614 Installation Manual...
- Page 5 Complete Menu Structure Listing ............35 Control Strategy ..................44 Setpoint and Staging Worksheets ................44 Temperature and Humidity Worksheet ................44 Worksheet ......................45 Cycle & Trigger Worksheet for Irrigation ............... 45 Growth Schedule Worksheet ..................46 960-3100-00 iPonic 614 Installation Manual...
-
Page 7: Introduction
The reason why we stand out from others is because of our Link4 Promise: Our passion is to provide growers with intelligent control solutions. We understand controlling your growing environment is critical to your success. -
Page 8: Warranty
No affirmation of fact or promise made by Link4, whether or not in this contract, will constitute a warranty that the goods will conform to the affirmation or promise. -
Page 9: Mounting And Installation
Make sure to consider the additional weight of the power cords of the external equipment. 5. There are 4 mounting holes on the outside of the iPonic 614 enclosure. Use the appropriate tools and hardware depending upon the surface the unit will be mounted to. 960-3100-00 iPonic 614 Installation Manual... -
Page 10: Connecting The Indoor Sensor Module
3. You may extend the sensor cable as needed, but be sure to use an adapter and wire approved by Link4 to make any extensions (the wire and adapter can both be purchased from Link4.) If any splices are needed to extend cable length, make certain they are WATERTIGHT. -
Page 11: Internet Setup
Once you have completed the hardware installation detailed above and registered your account at iponic.link4cloud.com you can add your controller to your link4 internet account. To view your serial number and registration key, start at the main status screen. Press the menu button. Press 3 for “System Setup,” then OK. -
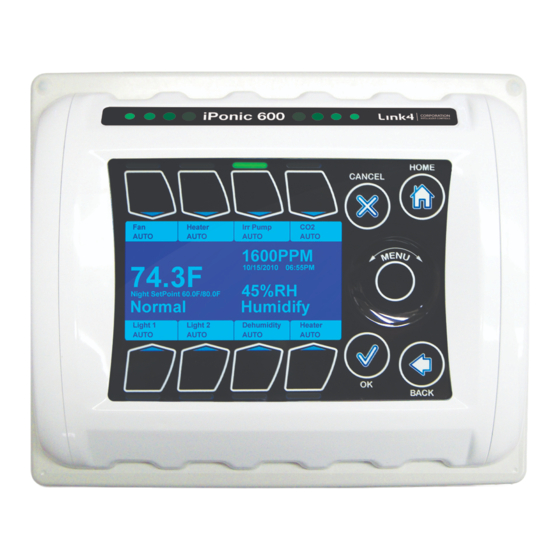
Page 12: Equipment Setup
Equipment Setup Main Status Screen 960-3100-00 iPonic 614 Installation Manual... -
Page 13: Navigation
Each of the eight electrical outlets is hardwired to one of six independently controlled outputs. On each side of the unit the bottom two outlets are ganged, whereas the top two are independent. The 960-3100-00 iPonic 614 Installation Manual... -
Page 14: Time Setpoints
Press OK when you have selected the correct time. Press OK again to save your changes. To adjust the start time of your Night time setpoint (the end of your Day time setpoint) press button 3 from the Setpoint Times screen and adjust this time in the same way. 960-3100-00 iPonic 614 Installation Manual... -
Page 15: Light Control
Equipment Selection procedure at the beginning of this chapter. Because a heater will generally require a stronger current than the controller can handle you will want to plug your heater into a trigger box which 960-3100-00 iPonic 614 Installation Manual... -
Page 16: Ventilation Fans Setup
614 make sure the equipment is selected using the Equipment Selection procedure at the beginning of this chapter. Assuming a small (less than three amperes) dehumidifier for your DeHum output, this equipment type can be plugged 960-3100-00 iPonic 614 Installation Manual... -
Page 17: Humidifier Setup
Off Period to set the amount of time you would like the irrigation pump to run during each phase of the cycle to set the Off Period length. When you are done making changes press OK. Press OK again to save your changes. 960-3100-00 iPonic 614 Installation Manual... -
Page 18: Alarms
Connecting to the Internet.) When connecting to the internet you will have created an account at http://www.iponic.link4cloud.com, to enable alarm notifications login to your account. You can open your controller settings by clicking “View Controller.” 960-3100-00 iPonic 614 Installation Manual... -
Page 19: Alarm Output
It is used to notify the user via telephone, cell phone, or pager whenever the sensors reach the user programmed temperature alarm limits. Refer to the Advanced section of this manual for more information on hard wiring additional equipment including a Sensaphone. 960-3100-00 iPonic 614 Installation Manual... -
Page 20: Default Menu Structure Listing
Switch to (Equipment Type) Equipment type shown will be Tank or Generator, whichever you DO NOT have set up. 1.3.2.4 (CO2 Cycle On Time) Option appears if a CO2 tank is setup. 1.3.2.5 (CO2 Cycle Off Time) 960-3100-00 iPonic 614 Installation Manual... - Page 21 Same suboptions as Inside Temperature. 2.2.1.3 Cool Setpoint Same suboptions as Inside Temperature. 2.2.2 Humidity 2.2.2.1 Inside Humidity Same suboptions as Inside Temperature. 2.2.2.2 Humidify Setpoint Same suboptions as Inside Temperature. 2.2.2.3 Dehumidify Setpoint Same suboptions as Inside Temperature. 960-3100-00 iPonic 614 Installation Manual...
- Page 22 3.1.2.1.2 Initial Settings 3.1.2.1.2.1 Set Type 3.1.2.1.2.2 Set Name 3.1.2.2 Same suboptions as Light. 3.1.2.3 Irrig Pump 3.1.2.3.1 Timed Override 3.1.2.3.1.1 Enable/Disable Override 3.1.2.3.1.2 Override to On/Off 3.1.2.3.1.3 Start Time 3.1.2.3.1.4 Duration 3.1.2.3.1.5 Daily\One time 960-3100-00 iPonic 614 Installation Manual...
- Page 23 Initial Settings 3.1.2.4.3.1 Set Type 3.1.2.4.3.2 Set Name 3.1.2.5 Heater Same suboptions as DeHum. 3.1.2.6 Vent Fans Same suboptions as Light. 3.1.2.7 (Blank) Same suboptions as DeHum. 3.1.2.8 (Blank) Same suboptions as DeHum. Scheduling Setup 960-3100-00 iPonic 614 Installation Manual...
- Page 24 3.4.5 LowTemp Alarm Threshold 3.4.6 LowHum Alarm Threshold 3.4.7 LowCO2 Alarm Threshold 3.4.8 Light Off Delay Time/Date Setup 3.5.1 Set Time 3.5.2 Set Date Advanced 3.6.1 Global Humidity Settings Same suboptions as in Current Setpoints. 960-3100-00 iPonic 614 Installation Manual...
- Page 25 Enable/Disable Ramping 3.6.7.4 CO2 Fuzzy Settings 3.6.8 More 3.6.8.1 Time Setting 3.6.8.1.1 Back Light Time 3.6.8.1.2 Button Light Time 3.6.8.2 Controller Version 3.6.8.3 Clear Data 3.6.8.3.1 Clear History 3.6.8.3.2 Format File System 3.6.8.3.3 Restore Factory Defaults 960-3100-00 iPonic 614 Installation Manual...
- Page 26 Save/Restore Sched 3.7.3.1 Save Schedule 3.7.3.2 Restore Schedule 3.7.3.3 Delete Schedule Communication Setup 3.8.1 IP Address Setup 3.8.1.1 Set to Manual IP 3.8.1.2 Reset MAC to default 3.8.1.3 Change name 3.8.1.4 EDIT 3.8.2 Server Setup 960-3100-00 iPonic 614 Installation Manual...
- Page 27 3.8.2.1 Set to Private Server 3.8.2.2 Reset Regist. Key Measurement Units 3.9.1 Temp Units 3.9.2 Light Units Save/Restor Config Save Schedule Restore Schedule Delete Schedule 960-3100-00 iPonic 614 Installation Manual...
-
Page 28: Advanced Programming
Menu->Growth Schedule->(select Phase or Week)->(select Setting Type)->adjust as you would Basic Settings To Save Entire Schedule for Future Use Insert USB into port inside the controller case. Menu->Growth Schedule->5. Save/Restore Sched->button 1 to save, choose a name for your settings file and press OK 960-3100-00 iPonic 614 Installation Manual... -
Page 29: To Restore Schedule For Use
2 to set the start and end times for your lights which will now be independent from your time setpoints. Separate Light Bank Enable To use a light bank not run by the controller: Menu->SystemSetup->6. Advanced->Global Light Settings->button 4 960-3100-00 iPonic 614 Installation Manual... -
Page 30: Power Cool Down Time
Menu->Stages->1. Temp Stages->use buttons 5, 6, 7 & 8 to select stage and equipment type, press button 3 “Setup” and choose Off or On. Press OK. When you are done making changes press OK. Press OK again to save your changes. 960-3100-00 iPonic 614 Installation Manual... -
Page 31: Stage Separation/Width
The concepts that we described for cooling operate in the same manner for heating. Changing the Temperature Deadband Menu->SystemSetup->6. Advanced->button 2 for Global Temp Settings->button 1 for Deadband->wheel (1 to change increment) 960-3100-00 iPonic 614 Installation Manual... -
Page 32: Ramping
“Fan Cut Off Enabled”. This is to prevent you from wasting CO by generating it just to push it out of your growing environment. If you are not concerned with CO loss while your fans are running you can disable this feature with the following steps. 960-3100-00 iPonic 614 Installation Manual... -
Page 33: To Disable Or Re-Enable Fan Cut
5, 6, 7 & 8->press 2 to edit value (press 1 to change increment) Setting Your Fuzzy Logic Cycle Period Menu->SystemSetup->6. Advanced->Global CO2 Settings->6CO2 Cycle Period->Set Time with buttons 1, 2, 3 & 4 and wheel 960-3100-00 iPonic 614 Installation Manual... -
Page 34: Co 2 Night Setpoint
8 to set the duration the water should be off during each irrigation cycle. Once Daily or Single Event Irrigation See Once Daily or Single Event Overrides in the Advanced Timing Control section of this manual. 960-3100-00 iPonic 614 Installation Manual... - Page 35 An advanced setting will allow you to choose any of the 8 outputs (including the unnamed relays) and set the type of the equipment the controller will recognize as being installed at that output. 960-3100-00 iPonic 614 Installation Manual...
- Page 36 AC/Heater to both the heating stage AND the cooling stage in which you utilize the AC, otherwise it will not engage and blow the warmed or cooled air. When you have assigned all equipment and stages, press OK, press OK again to save your changes. 960-3100-00 iPonic 614 Installation Manual...
- Page 37 4. Run the free end of the cable to the controller unit. 5. You may extend the cable as needed, but make sure to use an adapter and wire approved by Link4 to make any extensions (the wire and adapter can be purchased from Link4). If any splices are needed to extend cable length, make certain they are WATERTIGHT.
- Page 38 Sensaphone will contact the right number. After testing remember to unplug the iPonic 614 before continuing to install other equipment. 10. Refer to the Sensaphone installation instructions for programming the unit. 960-3100-00 iPonic 614 Installation Manual...
- Page 39 Menu->SystemSetup->SensorSetup->button 2 for Advanced->button 2 to calibrate by entering adjustment value Format File System Menu->SystemSetup->6. Advanced-> More->button 3 for Clear Data->button 2 to format file system Save Log Files Insert USB into port inside the controller case. 960-3100-00 iPonic 614 Installation Manual...
- Page 40 3 to enable and setup USB logging Diagnostics Menu->SystemSetup->6. Advanced-> More->button 7 for Diagnostics ->button 1 to save FS, button 2 to run UI test, button 3 for dataflash type 960-3100-00 iPonic 614 Installation Manual...
- Page 41 Option appears when you enable CO2 Night Setpoint and/or enable DIF setpoint and create a DIF setting. 1.3.2 Set CO2 Setpoint 1.3.3 Global CO2 Settings 1.3.3.1 Deadband 1.3.3.2 Fan Cut Off 1.3.3.3 Switch to (Equipment Type) 960-3100-00 iPonic 614 Installation Manual...
- Page 42 (Set DIF Ramp Time) For option to appear DIF Setpoint must be enabled, a DIF setting must be set and Ramping must be enabled. 1.5.6 (Set DAY Ramp Time) Option appears if Ramping is enabled. 960-3100-00 iPonic 614 Installation Manual...
- Page 43 2.4.4 Flowering Duration 2.4.5 Start Date 2.4.6 Vegetative Start 2.4.7 Flowering Start 2.4.8 Help Save/Restore Sched 2.5.1 Save Schedule 2.5.2 Restore Schedule 2.5.3 Delete Schedule Reports Sensor Report 3.1.1 Since Reset 3.1.2 Last 24 Hours 960-3100-00 iPonic 614 Installation Manual...
- Page 44 Establish the type and give a name to each of your six basic outputs as well as relay outputs 7 and 8. Set up to one timed override for each output. 4.1.2.1 Output 1 Name Options will vary by output type. 960-3100-00 iPonic 614 Installation Manual...
- Page 45 Same suboptions as Output 1 Name. 4.1.2.8 Output 8 Name Same suboptions as Output 1 Name. Scheduling Setup 4.2.1 Disable/Enable Growth Curve 4.2.2 Total Duration 4.2.3 Vegetative Duration 4.2.4 Flowering Duration 4.2.5 Start Date 4.2.6 Vegetative Start 960-3100-00 iPonic 614 Installation Manual...
- Page 46 Same suboptions as in Current Setpoints. 4.6.2 Global Temp Settings Same suboptions as in Current Setpoints. 4.6.3 Global CO2 Settings Same suboptions as in Current Setpoints. 4.6.4 Global Light Settings 4.6.4.1 Power Cool Down Time 4.6.4.2 Light Day Set Point 960-3100-00 iPonic 614 Installation Manual...
- Page 47 4.6.8.1.1 Back Light Time 4.6.8.1.2 Button Light Time 4.6.8.2 Controller Version 4.6.8.3 Clear Data 4.6.8.3.1 Clear History 4.6.8.3.2 Format File System 4.6.8.3.3 Restore Factory Defaults 4.6.8.4 Bootload 4.6.8.5 Password 4.6.8.6 Start Wizard Enable 4.6.8.7 Diagnostics 960-3100-00 iPonic 614 Installation Manual...
- Page 48 4.7.3.2 Restore Schedule 4.7.3.3 Delete Schedule Communication Setup 4.8.1 IP Address Setup 4.8.1.1 Set to Manual IP 4.8.1.2 Reset MAC to default 4.8.1.3 Change name 4.8.1.4 EDIT 4.8.2 Server Setup 4.8.2.1 Set to Private Server 960-3100-00 iPonic 614 Installation Manual...
- Page 49 4.8.2.2 Reset Regist. Key Measurement Units 4.9.1 Temp Units 4.9.2 Light Units Save/Restor Config Save Schedule Restore Schedule Delete Schedule (Stages) This option appears when Stage Show/Hide is set to “Show”. Temp Stages Humidity Stages 960-3100-00 iPonic 614 Installation Manual...
- Page 50 High Set Pt. Low Set Pt. High Set Pt. (°F/°C) (°F/°C) (min) FOR ON/OFF & VENT ONLY EQUIPMENT OUTPUTS HEATING STAGES COOLING STAGES NAME DHLT = ON = OFF = GO TO % = NOT AFFECTED 960-3100-00 iPonic 614 Installation Manual...
- Page 51 (hh:mm) (ppm) (ppm) (W/m2) Cycle & Trigger Worksheet for Irrigation CYCLE MODE TRIGGER MODE START CYCLE EQUIPMENT ON TIME TIME END TIME TIME START TIME END TIME OUTPUTS NAME (hh:mm:ss) (hh:mm) (hh:mm) (hh:mm) (hh:mm) (hh:mm) 960-3100-00 iPonic 614 Installation Manual...
- Page 52 ° ° ° ° ° ° ° ° ° ° ° ° ° ° ° ° ° ° ° ° ° ° ° ° ° ° ° ° ° ° ° ° ° ° ° 960-3100-00 iPonic 614 Installation Manual...
Need help?
Do you have a question about the iPonic 614 and is the answer not in the manual?
Questions and answers