Weider 240 TC User Manual
Hide thumbs
Also See for 240 TC:
- User manual (21 pages) ,
- Manuel de l'utilisateur (20 pages) ,
- Bedienungsanleitung (20 pages)
Table of Contents
Advertisement
Quick Links
Model No. WEEVBE1409.0
Serial No.
Write the serial number in the
space above for reference.
Serial Number Decal
QUESTIONS?
If you have questions, or if there are
missing parts, please contact us:
Call: 08457 089 009
From Ireland: 00 (44) 53 9236102
Website: www.iconsupport.eu
E-mail: csuk@iconeurope.com
Write:
ICON Health & Fitness, Ltd.
c/o HI Group PLC
Express Way
Whitwood, West Yorkshire
WF10 5QJ
UK
CAUTION
Read all precautions and instruc-
tions in this manual before using
this equipment. Keep this manual
for future reference.
All manuals and user guides at all-guides.com
USERʼS MANUAL
www.iconeurope.com
Advertisement
Table of Contents

Subscribe to Our Youtube Channel
Related Manuals for Weider 240 TC


Summary of Contents for Weider 240 TC
- Page 1 All manuals and user guides at all-guides.com USERʼS MANUAL Model No. WEEVBE1409.0 Serial No. Write the serial number in the space above for reference. Serial Number Decal QUESTIONS? If you have questions, or if there are missing parts, please contact us: Call: 08457 089 009 From Ireland: 00 (44) 53 9236102 Website: www.iconsupport.eu...
-
Page 2: Table Of Contents
This drawing shows the location(s) of the warning decal(s). If a decal is missing or illegible, see the front cover of this manual and request a free replacement decal. Apply the decal in the location shown. Note: The decal(s) may not be shown at actual size. WEIDER is a registered trademark of ICON IP, Inc. -
Page 3: Important Precautions
All manuals and user guides at all-guides.com IMPORTANT PRECAUTIONS WARNING: To reduce the risk of serious injury, read all important precautions and instructions in this manual and all warnings on your weight bench before using your weight bench. ICON assumes no responsibility for personal injury or property damage sustained by or through the use of this product. -
Page 4: Before You Begin
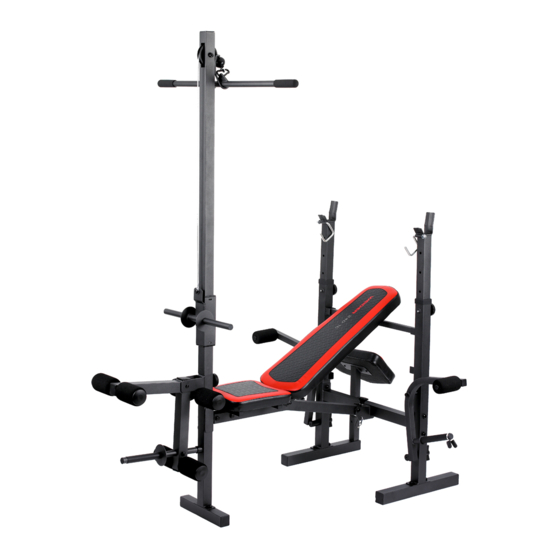
BEFORE YOU BEGIN All manuals and user guides at all-guides.com Thank you for selecting the new WEIDER 240 TC reading this manual, please see the front cover of this ® weight bench. The weight bench offers a selection of manual. To help us assist you, note the product model exercises designed to develop the major muscle number and serial number before contacting us. -
Page 5: Part Identification Chart
PART IDENTIFICATION CHART All manuals and user guides at all-guides.com Refer to the drawings below to identify small parts used in assembly. The number in parentheses by each draw- ing is the key number of the part, from the PART LIST near the end of this manual. IMPORTANT: If you cannot find a part in the hardware kit, check to see if it has been preassembled. -
Page 6: Assembly
All manuals and user guides at all-guides.com ASSEMBLY To make assembly easier, carefully read the • For help identifying small parts, use the PART following information and instructions: IDENTIFICATION CHART on page 5. • Assembly requires two persons. • The following tools (not included) may be required for assembly: •... - Page 7 All manuals and user guides at all-guides.com 3. Attach the Front Leg (2) to the Front Base (3) with two M10 x 52mm Carriage Bolts (74) and two M10 Black Locknuts (66). 4. Attach the Front Leg (2) to the Frame (1) with two M10 x 60mm Bolts (57), two M10 x 55mm Bolts (59), six M10 Black Washers (64), and four M10 Black Locknuts (66).
- Page 8 All manuals and user guides at all-guides.com 6. Orient the Backrest Support (17) so that the pins are facing downward. Bracket Set the Backrest Support (17) in one of the sets of brackets on the Left and Right Uprights (6, Pins Bracket 7.
- Page 9 All manuals and user guides at all-guides.com 9. Orient the Backrest (18) and the Backrest Tubes (16) as shown. Make sure that the indi- cated holes are in the location shown. Attach the Backrest (18) to the Backrest Tubes (16) with four M6 x 40mm Screws (62) and four M6 Washers (65).
- Page 10 All manuals and user guides at all-guides.com 12. Attach the Weight Tube (24) to the Leg Lever (8) with an M8 x 58mm Bolt (72), two M8 Washers (73), a 13mm x 11.5mm Spacer (53), and an M8 Locknut (67). Next, press the Leg Lever Bumper (42) onto the Weight Tube (24).
- Page 11 All manuals and user guides at all-guides.com 14. Attach the Left Barbell Hook (51) to a Weight Rest (13) as shown with an M10 Silver Washer (70) and an M10 Silver Locknut (34). Do not overtighten the Silver Locknut; the Left Barbell Hook must pivot easily.
- Page 12 All manuals and user guides at all-guides.com 17. Route the Cable (21) through the top of the Lat Tower (14); make sure that the Cable is Storage 66 64 under the storage hook. Hook Next, wrap the Cable (21) over the Pulley (22), and attach the Pulley inside the Lat Tower (14) with an M10 x 60mm Bolt (57), two M10 Black Washers (64), two 16mm x 10mm Spacers...
-
Page 13: Adjustment
ADJUSTMENT All manuals and user guides at all-guides.com The weight bench is designed to be used with your own weight set (not included). The steps below explain how you can adjust the weight bench. Refer to the accompanying exercise guide to see the correct form for several exercises. - Page 14 All manuals and user guides at all-guides.com USING THE FLY ARMS To use the Fly Arms (10, 11), slide the desired weights (not included) onto the weight tubes on the Fly Arms. If the weights have large center holes, first slide a Weight Adapter (32) onto each weight tube.
- Page 15 All manuals and user guides at all-guides.com USING THE LAT TOWER To use the Lat Tower (14), first remove the 45mm Square Inner Cap (38) from the Front Leg (2). Next, insert the Lat Tower into the Front Leg, and tighten the Curl Knob (28) into the Front Leg and into the hole in the Lat Tower.
- Page 16 All manuals and user guides at all-guides.com STORING THE WEIGHT BENCH You can store either the Curl Post (9) or the Lat Tower (14) on the storage tube on the right base when you are not using them. Before storing the weight bench, remove any weights, slide the Lat Tower (14) onto the stor- age tube, and adjust the Backrest (18) to the highest inclined position.
-
Page 17: Exercise Guidelines
All manuals and user guides at all-guides.com EXERCISE GUIDELINES FOUR TYPES OF STRENGTH WORKOUTS workout, and the numbers of repetitions and sets to complete. Progress at your own pace and be sensitive Note: A “repetition” is one complete cycle of an exer- to your bodyʼs signals. -
Page 18: Part List
All manuals and user guides at all-guides.com PART LIST—Model No. WEEVBE1409.0 R0909A Key No. Qty. Description Key No. Qty. Description Frame 25mm Square Inner Cap Front Leg Leg Lever Bumper Front Base 25mm Round Inner Cap Left Base Small Pad Cap Right Base 50mm Square Inner Cap Left Upright... -
Page 19: Exploded Drawing
All manuals and user guides at all-guides.com EXPLODED DRAWING—Model No. WEEVBE1409.0 R0909A... -
Page 20: Ordering Replacement Parts
All manuals and user guides at all-guides.com ORDERING REPLACEMENT PARTS To order replacement parts, please see the front cover of this manual. To help us assist you, be prepared to provide the following information when contacting us: • the model number and serial number of the product (see the front cover of this manual) •...
Need help?
Do you have a question about the 240 TC and is the answer not in the manual?
Questions and answers