Table of Contents
Advertisement
Available languages
Available languages
Quick Links
Advertisement
Table of Contents

Related Manuals for HQ Power LED STARCLOTH II


Summary of Contents for HQ Power LED STARCLOTH II
- Page 1 VDPLSC2 LED STARCLOTH II 2 X 3 M RGB STARDRAPE 2 X 3 M RGB-STERRENGORDIJN RIDEAU ÉTOILÉ RVB 2 X 3 M CORTINA DE ESTRELLAS RGB - 2 X 3 M RGB-STERNENVORHANG - 2 X 3 M USER MANUAL GEBRUIKERSHANDLEIDING...
- Page 2 VDPLSC2 V. 01 – 09/07/2015 ©Velleman nv...
- Page 3 VDPLSC2 terminator eindweerstand résistance de terminaison terminación Terminierung How to turn the controller line from 3-pins into 5-pins (plug and socket). Controller line van 3-pin naar 5-pin aanpassen (stekker en contact). Modifier la ligne du contrôleur de 3 broches en 5 broches (fiche et contact). Modificar la línea del controlador de 3 polos y 5 polos (conector y contacto).
-
Page 4: Safety Instructions
VDPLSC2 USER MANUAL Introduction To all residents of the European Union Important environmental information about this product This symbol on the device or the package indicates that disposal of the device after its lifecycle could harm the environment. Do not dispose of the unit (or batteries) as unsorted municipal waste;... -
Page 5: General Guidelines
Keep this manual for future reference. Features With its dimensions of 2 x 3 m and its 176 tri-colour RGB SMD LEDs, the LED STARCLOTH II is the perfect solution for all kinds of smaller on-stage shows. It comes with a high-quality carrying bag for easy transportation. -
Page 6: Installation
VDPLSC2 Installation Safety Before mounting the product, read and follow the safety recommendations indicated in the Safety Instructions. Rigging Overhead mounting requires extensive experience: calculating workload limits, determining the installation material to be used… Have the material and the device itself checked regularly. Do not attempt to install the device yourself if you lack these qualifications as improper installation may result in injuries. -
Page 7: Standalone Mode
VDPLSC2 Stand-Alone Mode The device starts running in stand-alone mode after connection to the mains. Connect the device to the mains to switch it on Press MENU to enter the menu. Select the auto or sound mode and confirm. Master/Slave Mode Notes ... - Page 8 VDPLSC2 DMX Channel Values channel function from description no function dimmer master dimmer no function strobe strobe from slow to fast no function red from 0-100 % no function green from 0-100 % no function blue from 0-100 % no function programme 1 programme 2 programme 3...
-
Page 9: Cleaning And Maintenance
VDPLSC2 Cleaning and Maintenance Before starting any cleaning or maintenance activities: Unplug the device's power cord from the outlet. Let the device cool down. Cleaning Use normal glass cleaner and a soft cloth to wipe off the outside casing. ... - Page 10 VDPLSC2 GEBRUIKERSHANDLEIDING Inleiding Aan alle burgers van de Europese Unie Belangrijke milieu-informatie betreffende dit product Dit symbool op het toestel of de verpakking geeft aan dat, als het na zijn levenscyclus wordt weggeworpen, dit toestel schade kan toebrengen aan het milieu. Gooi dit toestel (en eventuele batterijen) niet bij het gewone huishoudelijke afval;...
-
Page 11: Algemene Richtlijnen
Bewaar deze handleiding voor verdere raadpleging. Eigenschappen De LED STARCLOTH II is een sterrengordijn van 2 x 3 m met 176 RGB SMD-leds. Het is de perfecte oplossing voor kleinere toepassingen. Geleverd met een hoogwaardige draagtas voor eenvoudig transport. - Page 12 VDPLSC2 Installatie Veiligheid Voor u het toestel installeert, dient u de veiligheidsinstructies te lezen en in acht te nemen. Rigging Het ophangen vereist een degelijke praktijkervaring: u moet de maximumbelasting van de draagconstructie kunnen berekenen, weten welk constructiemateriaal u kunt gebruiken, … Laat het materiaal en het toestel regelmatig nakijken.
- Page 13 VDPLSC2 Autonome modus (standalone) Het toestel start op in autonome modus, nadat u het gekoppeld hebt aan het lichtnet. Sluit het toestel aan op het lichtnet om het in te schakelen. Druk op MENU om het menu te openen. Selecteer de automatische of muziekgestuurde modus en bevestig. Master/slave-modus Opmerkingen ...
- Page 14 VDPLSC2 DMX-waarden per kanaal kanaal functie omschrijving geen functie dimmer master-dimmer geen functie stroboscoop stroboscoop van langzaam naar snel geen functie rood van 0-100 % geen functie groen van 0-100 % geen functie blauw van 0-100 % geen functie programma 1 programma 2 programma 3 programma 4...
-
Page 15: Reiniging En Onderhoud
VDPLSC2 Reiniging en onderhoud Voor het reinigen of onderhoud: Ontkoppel het toestel van het lichtnet. Laat het toestel afkoelen. Reiniging Gebruik een glasreiniger en een zachte doek om de behuizing te reinigen. Reinig de externe lenzen om de 20 dagen met een glasreiniger en een zachte doek. ... -
Page 16: Consignes De Sécurité
VDPLSC2 MODE D'EMPLOI Introduction Aux résidents de l'Union européenne Informations environnementales importantes concernant ce produit Ce symbole sur l'appareil ou l'emballage indique que l’élimination d’un appareil en fin de vie peut polluer l'environnement. Ne pas jeter un appareil électrique ou électronique (et des piles éventuelles) parmi les déchets municipaux non sujets au tri sélectif ;... -
Page 17: Directives Générales
Garder ce mode d'emploi pour toute référence ultérieure. Caractéristiques Le LED STARCLOTH II est un rideau étoilé de 2 x 3 m avec 176 LEDs RVB SMD. Une solution parfaite pour des applications plus petites. Livré avec une housse de haute qualité pour un transport aisé. -
Page 18: Panneau De Contrôle
VDPLSC2 Installation Sécurité Avant de monter l'appareil, lire et respecter les avertissements indiqués dans les Consignes de sécurité. Montage en hauteur L’installation de cet appareil exige une solide expérience pratique : le calcul de la charge max. de la construction, les matériaux d’installation requis,…... -
Page 19: Mode Maître/Esclave
VDPLSC2 Mode autonome L'appareil démarre en mode autonome après la connexion au réseau. Connecter l'appareil au réseau électrique pour l'allumer Appuyer sur MENU pour accéder au menu. Sélectionner le mode automatique ou contrôlé par la musique et confirmer. Mode maître/esclave Notes ... - Page 20 VDPLSC2 Valeurs DMX par canal canal fonction à description pas de fonction variateur variateur maître pas de fonction stroboscope stroboscope de lent à rapide pas de fonction rouge de 0-100 % pas de fonction vert de 0-100 % pas de fonction bleu de 0-100 % pas de fonction programme 1...
-
Page 21: Nettoyage Et Entretien
VDPLSC2 Nettoyage et entretien Avant tout nettoyage ou entretien : Débrancher le câble d'alimentation. Laisser refroidir l'appareil. Nettoyage Utiliser un nettoyant à vitres normal et un chiffon doux pour nettoyer le boîtier. Nettoyer les lentilles externes avec un nettoyant à vitres et un chiffon doux au moins tous les 20 jours. -
Page 22: Manual Del Usuario
VDPLSC2 MANUAL DEL USUARIO Introducción A los ciudadanos de la Unión Europea Importantes informaciones sobre el medio ambiente concerniente a este producto Este símbolo en este aparato o el embalaje indica que, si tira las muestras inservibles, podrían dañar el medio ambiente. No tire este aparato (ni las pilas, si las hubiera) en la basura doméstica;... -
Page 23: Normas Generales
Características Con sus dimensiones de 2 x 3 m y sus 176 LEDs SMD RGB tricolores, la LED STARCLOTH II es la solución ideal para todo tipo de pequeños espectáculos. Se entrega en una bolsa de transporte de alta calidad para un fácil transporte. -
Page 24: Instalación
VDPLSC2 Instalación Seguridad Antes de instalar el producto, lea y siga las recomendaciones indicadas en las Instrucciones de seguridad. Montaje en altura La instalación de este aparato exige una sólida experiencia práctica: debe poder calcular la carga máx. del soporte, debe conocer los materiales necesarios para la instalación, etc. De vez en cuando, una verificación de la estructura y del aparato mismo debe ser llevada a cabo por un técnico especializado. -
Page 25: Modo Maestro/Esclavo
VDPLSC2 Modo autónomo (stand-alone) El aparato se inicia en el modo autónomo (stand-alone) después de haberlo activado. Enchufe el aparato a una toma eléctrica para activarlo Pulse MENU para entrar en el menú. Seleccione el modo automático o el modo controlado por la música y confirme. Modo maestro/esclavo Observaciones ... - Page 26 VDPLSC2 Valores DMX detallados por canal canal función descripción sin función dimmer dimmer maestro sin función estroboscopio efecto estroboscópico de lento a rápido sin función rojo de 0-100 % sin función verde de 0-100 % sin función azul de 0-100 % sin función programa 1 programa 2...
-
Page 27: Limpieza Y Mantenimiento
VDPLSC2 Limpieza y mantenimiento Antes de limpiar o mantener el aparato: Desconecte el aparato de la red eléctrica. Deje que el aparato se enfríe. Limpieza Utilice limpiacristales y un paño suave para limpiar la caja. Limpie las lentes externas con limpiacristales y un paño suave cada 20 años. ... - Page 28 VDPLSC2 BEDIENUNGSANLEITUNG Einführung An alle Einwohner der Europäischen Union Wichtige Umweltinformationen über dieses Produkt Dieses Symbol auf dem Produkt oder der Verpackung zeigt an, dass die Entsorgung dieses Produktes nach seinem Lebenszyklus der Umwelt Schaden zufügen kann. Entsorgen Sie die Einheit (oder verwendeten Batterien) nicht als unsortierter Hausmüll;...
-
Page 29: Allgemeine Richtlinien
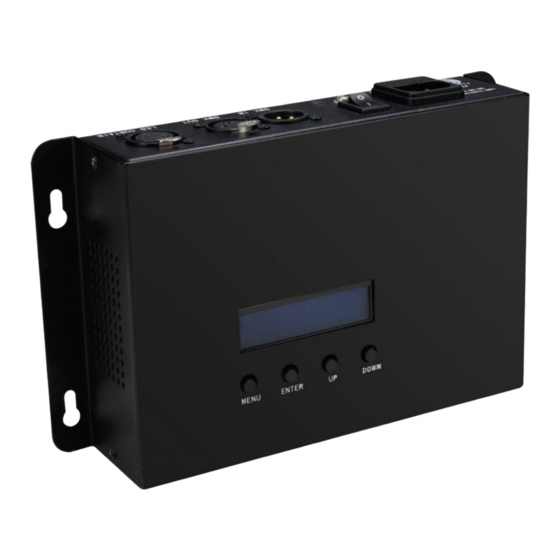
Bewahren Sie diese Bedienungsanleitung für künftige Einsichtnahme auf. Eigenschaften Der LED STARCLOTH II (2 x 3 m), der mit 176 dreifarbigen RGB SMD-LEDs ausgestattet ist, ist die ideale Lösung für kleinere Shows. Wird mit einer hochwertigen Transporttasche für einen einfachen Transport geliefert. - Page 30 VDPLSC2 Beschreibung Siehe Abbildungen, Seite 2 dieser Bedienungsanleitung. LED-Display Signalausgang Netzeingang LED-Vorhang EIN/AUS-Schalter Masse-Anschluss Taste HOLD DMX-Eingang Signalkabel DMX-Ausgang Installation Sicherheit Bevor Sie das Gerät installieren, lesen und beachten Sie alle Sicherheitshinweise. Höhenmontage: Eine gründliche praktische Erfahrung ist für die Installation des Gerätes notwendig: Sie müssen die max.
-
Page 31: Stand-Alone-Modus
VDPLSC2 Anwendung Bedienfeld Bedienen Sie die Funktionen des Bedienfelds mit den vier Tasten unten im Display. Taste Funktion Um in das Menü zu gelangen, verlassen Sie die aktuelle Funktion ohne die Einstellung zu MODE speichern, oder verlassen Sie das Menü. Um in einer Liste mit Funktionen oder Optionen nach oben zu scrollen oder einen Wert zu erhöhen. - Page 32 VDPLSC2 Startadresse Verwenden Sie nachfolgende Liste, um die richtige Adresse zu bestimmen. Die Liste zeigt die Einstellungen für 1 bis 3 an. Tun Sie dasselbe für die anderen Einheiten. Beispiel: Kanal-Modus Höchste Startadresse Startadresse 9 (1 + 8) 17 (9 + 8) Kanal 1 - 8 9 - 16...
-
Page 33: Reinigung Und Wartung
VDPLSC2 Reinigung und Wartung Vor dem Reinigen oder Warten: Trennen Sie das Gerät vom Netz. Lassen Sie das Gerät abkühlen. Reinigung Verwenden Sie einen Glasreiniger und ein sanftes Tuch, um das Gehäuse zu reinigen. Reinigen Sie die externen Linsen alle 20 Tage mit Glasreiniger und ein sanftes Tuch. ... - Page 34 levering, of een vervangend product tegen 50% van de kostprijs of terugbetaling van 50 % bij ontdekking na één jaar tot 2 jaar. Velleman® Service and Quality Warranty • Valt niet onder waarborg: Since its foundation in 1972, Velleman® acquired extensive experience in - alle rechtstreekse of onrechtstreekse schade na de levering veroorzaakt the electronics world and currently distributes its products in over 85 aan het toestel (bv.
- Page 35 - tout dommage à cause d’une utilisation commerciale, professionnelle ou • Consejo: Lea el manual del usuario y controle los cables, las pilas, etc. collective de l’appareil (la période de garantie sera réduite à 6 mois lors antes de devolver el aparato. Si no se encuentra un defecto en el artículo d’une utilisation professionnelle) ;...
Need help?
Do you have a question about the LED STARCLOTH II and is the answer not in the manual?
Questions and answers