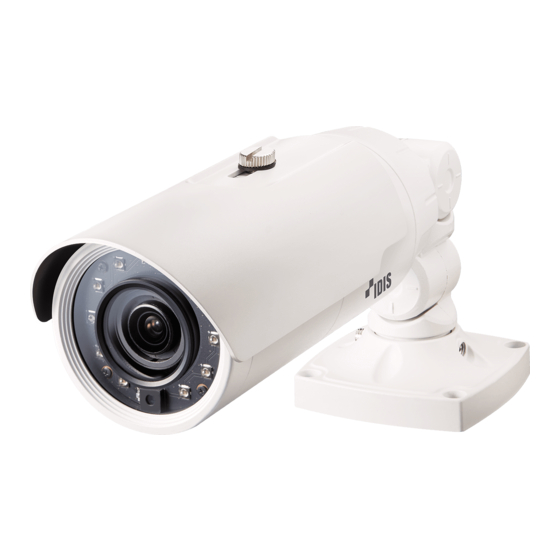
Idis DC-T3233HRX Quick Manual
Hide thumbs
Also See for DC-T3233HRX:
- Operation manual (50 pages) ,
- Quick manual (12 pages) ,
- Operation manual (53 pages)
Summary of Contents for Idis DC-T3233HRX
- Page 1 Network Camera Quick Guide DC-T3233HRX / DC-T3234HRX DC-T6233HRX / DC-T6234HRX Powered by...
-
Page 2: Safety Precautions
Safety Precautions WARNING RISK OF ELECTRIC SHOCK DO NOT OPEN WARNING: TO REDUCE THE RISK OF ELECTRIC SHOCK, DO NOT REMOVE COVER (OR BACK). NO USER-SERVICEABLE PARTS INSIDE. REFER SERVICING TO QUALIFIED SERVICE PERSONNEL. Important Safeguards 1. Read Instructions 10. Overloading All the safety and operating instructions should be read before the Do not overload wall outlets and extension cords as this can result appliance is operated. -
Page 3: Fcc Compliance Statement
IDIS Co., Ltd. reserves all rights concerning this document. Use or duplication of this document in part or whole without the prior consent of IDIS Co., Ltd. is strictly prohibited. Contents of this document are subject to change without prior notice for reasons such as functionality enhancements. - Page 4 Allen Wrench Sun Shield Screw, O Ring Screws (4ea.) Please download software (IDIS Discovery, IDIS Center, IDIS Solution Suite Compact) and product manual from this link : https://www.idisglobal.com/support/csdownload - IDIS Website (www.idisglobal.com) > Support > Technical Resources - Search IDIS Discovery, IDIS Center, IDIS Solution Suite Compact.
-
Page 5: Camera Installation
Camera Installation Lens IR LED Installation Body Stand Inserting a SD Memory Card Bottom Cover Loosen the screws counterclockwise and remove the cover. Mounting Bracket Cable Sun Shield Screw Hole SD Memory Card Slot, Factory Reset Button PIR Sensor Insert a SD memory card into the SD memory card Cable slot with the ‘micro SD’... - Page 6 Installation Screw the camera sun shield to the camera using the screw and rubber provided with the camera. Screw the mounting bracket to the wall or ceiling by using screws provided with the camera. Screw the bottom cover to the mounting bracket by using screws provided with the camera.
-
Page 7: Specifications
-40°C ~ +55°C (-40°F ~ +131°F) [-20°C ~ +55°C (-4°F ~ +131°F) when the heater is operating] Operating Humidity 0% ~ 90% Power Input , PoE(IEEE 802.3af, Class3), 0.72A Power DC-T3233HRX, Max. 8.64W Consumption DC-T6233HRX DC-T3234HRX, Max. 9.24W DC-T6234HRX Certifications FCC, CE, IP66 DirectIP NVR makes it easy to use cameras without extra network configurations. - Page 9 Сетевая камера Краткое руководство пользователя DC-T3233HRX Powered by...
-
Page 10: Правила Техники Безопасности
Правила техники безопасности ПРЕДУПРЕЖДЕНИЕ ОПАСНОСТЬ ПОРАЖЕНИЯ ЭЛЕКТРИЧЕСКИМ ТОКОМ НЕ ОТКРЫВАТЬ ПРЕДУПРЕЖДЕНИЕ. ДЛЯ СНИЖЕНИЯ ОПАСНОСТИ ПОРАЖЕНИЯ ЭЛЕКТРИЧЕСКИМ ТОКОМ, НЕ СНИМАЙТЕ КРЫШКУ (ИЛИ ЗАДНЮЮ ПАНЕЛЬ). ВНУТРИ НАХОДЯТСЯ ДЕТАЛИ, ТЕХНИЧЕСКОЕ ОБСЛУЖИВАНИЕ КОТОРЫХ МОГУТ ПРОИЗВОДИТЬ ТОЛЬКО КВАЛИФИЦИРОВАННЫЕ СПЕЦИАЛИСТЫ. ДЛЯ ПРОВЕДЕНИЯ ТЕХНИЧЕСКОГО ОБСЛУЖИВАНИЯ ОБРАТИТЕСЬ К КВАЛИФИЦИРОВАННОМУ СПЕЦИАЛИСТУ. Важные... -
Page 11: Авторские Права
Постоянный ток Авторские права © 2017 IDIS Co., Ltd. Корпорация IDIS, Ltd. сохраняет за собой все права на данный документ. Частичное или полное использование или копирование этого документа без предварительного получения согласия корпорации IDIS, Ltd. строго запрещено. Содержимое данного документа может быть изменено без предварительного уведомления по причинам, связанным... - Page 12 Комплектация Во время приобретения устройства проверьте коробку, чтобы убедиться, что в комплект включены следующие принадлежности: В зависимости от ситуации некоторые детали могут быть разными. Сетевая камера Держатель Солнцезащитный экран камеры Руководство к платформе на Краткое руководство пользователя Торцовый ключ открытом коде Винт...
-
Page 13: Установка Камеры
Кабель Сетевой порт Видеовыход BNC (желтый кабель) Подача питания (красный кабель) FGND Аудиовход Аудиовыход Тревожный вход Тревожный выход Установка камеры Нажимайте на SD-карту памяти до тех пор, пока она не выйдет из гнезда, после чего выньте ее. Логотип microSD Logo является Установка... - Page 14 Установка Прикрепите солнецзащитный экран к камере с помощью винта и резины, поставляемых в комплекте. Прикрепите держатель к стене или потолку с помощью винтов, которые идут в комплекте с камерой. Прикрепите нижнюю крышку к держателю с помощью винтов, которые идут в комплекте с камерой.
-
Page 15: Технические Характеристики
12 В , PoE (IEEE 802.3af, класс 3) Потребляемая мощность макс. 8,64 Вт Сертификации FCC, CE Производитель: IDIS Co., Ltd • Адрес: Республика Корея, 8-10, Techno 3-ro, Yuseong-gu, Daejeon, 34012 • • Импортер: ООО «Авикс Дистрибьюторский Центр» (ООО «Авикс ДЦ») Адрес: 115093, г. - Page 16 IDIS Co., Ltd. For more information, please visit www.idisglobal.com...


Need help?
Do you have a question about the DC-T3233HRX and is the answer not in the manual?
Questions and answers