
Subscribe to Our Youtube Channel
Related Manuals for Eton E100


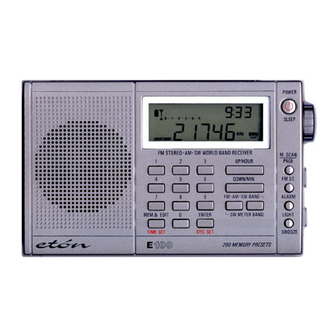
Summary of Contents for Eton E100
- Page 1 w w w . e t o n c o r p . c o m E 1 0 0 O P E R A T I O N M A N U A L A M / F M / S H O R T W A V E R A D I O...
-
Page 2: Table Of Contents
DO YOU NEED HELP? We want you to thoroughly enjoy the use of your E100 radio. If you need help while learning its operation, please contact us, using the methods below. Monday-Friday, 8:30 a.m. - 4:00 p.m., North American Pacific Time. -
Page 3: Introduction
INTRODUCTION Thank you for purchasing the E100 AM/FM/Shortwave Radio. This radio has been designed and manufactured to high quality standards, and will provide reliable operation for many years. Please carefully read the Owner’s Manual in order to take advantage of the many interesting features of the E100. -
Page 4: Diagrams
Refers only to the display’s upper right corner. Stand Tone Control Volume Control MEMORY DISPLAY Lock Switch Refers only to the display’s upper right corner. Battery Compartment Cover E100 OPERATION MANUAL continued RADIO ON DISPLAY Battery Symbol Antenna Symbol Alarm AM/PM Indicator Triangle... -
Page 5: Getting Started
2. Assure that the antenna gain switch (17), on the left side of the radio is in the high-gain, H, position. TURNING THE E100 ON AND OFF The E100 can be turned on by the two methods shown below. To turn it off, press the POWER/SLEEP button (3). 1. Battery Saver/Timer Method Perform a quick, short press of the POWER/SLEEP button (3). -
Page 6: Volume And Tone Controls
You can skip this section if you are in North America and just purchased the E100. It is already set-up in the factory for use in North America. If you travel to other world regions, make the changes below as necessary. -
Page 7: Clock And Alarm Features
CHANGING THE CLOCK FROM 24 TO 12 HOUR FORMAT, on page 22. To set the clock: 1. Turn the radio off. The clock digits appear in the lower part of the display (43). 2. Press/release the button labeled ‘Time Set’ (15). The clock’s digits flash in the display. -
Page 8: Working With Memory
E100 WORKING WITH MEMORY At the factory, the E100 is set up with 8 pages of memory, each page holding 25 frequencies. This enables storing of 200 frequencies into memory. This factory setting can be changed and tailored to your personal needs or can be left as-is. - Page 9 If you are not interested in changing memory pages and wish to keep the original factory memory page setting, skip this section. At the factory, the E100 is set up to access memory page 1 when storing a frequency. You can leave this as-is or change to a different memory page.
- Page 10 5 seconds. It then moves on to the next memory preset for another 5 seconds. To stop memory preset auto-scan, press/release either the Up/Hour or Down/Min. button. E100 WORKING WITH MEMORY continued MOVING A STORED FREQUENCY If desired, a frequency that has been stored into a memory can be moved to a different memory on the same page, or a different page.
- Page 11 3. Within 2 seconds, press/release the Mem.&Edit button. CUSTOMIZING MEMORY PAGES The E100 is configured at the factory with 8 memory pages, each page having 25 memories, for a total of 200 memories. You can change this set-up. The number of memory pages can be set to your choice of 4, 5, 8 or 20.
-
Page 12: System Set Codes And The System Set Code Table
CODE TABLE continued DEFAULT FACTORY SYSTEM SET CODES When shipped from the factory, the radio’s System Set Code Table is set up as follows. Changes can be made via the procedure shown in the section titled CHANGING SYSTEM SET CODES. -
Page 13: Other E100 Information
USING THE LIGHT A quick, short press/release of the SNOOZE/LIGHT button (10), located at the top of the radio, will turn on the display light, shining from the right side of the display, for about 10 seconds. A longer, 5 second press/release of the button will cause it to stay on indefinitely (note that this will greatly decrease battery life). -
Page 14: Troubleshooting
If the radio does not function and the solutions below do not resolve the problem, perform a ‘reset’. To do this, slide the RESET switch, on the bottom of the E100, in the direction of the arrow. WILL NOT TURN ON 1. -
Page 15: Listening To Shortwave Stations
• Around sunset and sunrise, both the day and night bands may be good, sometimes exceptionally good. Listening at these times can often be quite rewarding. • Signal strengths are often stronger when holding the radio in your hands and being very close to a window. SELECTING A SHORTWAVE METER BAND What is a band? It’s a frequency range. - Page 16 Published by International Broadcasting Services. IBS North America, Box 300, Penn’s Park, PA 18943 Phone: 215-598-3794 www.passband.com WORLD RADIO TV HANDBOOK Published in North America by Watson Guptil Publications. 770 Broadway - 7th Floor, New York, NY 10003-9595 www.watsonguptill.com E100 OPERATION MANUAL continued...
- Page 17 Shortwave is similar and the shortwave bands have names like 25 meters, 31 meters, 49 meters, etc. These are abbreviated 25m, 31m and 49m. Just like in AM and FM radio, one simply gets into the shortwave band and tunes around, looking for stations.
-
Page 18: Shortwave Listening Guide
Listed below are the characteristics of the major shortwave bands. Follow these guidelines for best listening results. How to get into a specific band will vary from one radio to another. Consult your owner’s manual for instruction on how to access the bands on your radio or call etón Corporation if it’s not clear to you. - Page 19 If you are in a building with one or more stories above you, signals can also be impaired in strength. In such a situation, position yourself, and especially the radio's antenna, as close to a window as possible while listening.
-
Page 20: Warranty Registration
To ensure full warranty coverage or product updates, registration of your etón or Grundig product should be complete as soon as possible after purchase or receipt. To register your radio, please select one of the following methods: 1) Register by visiting our... -
Page 21: Service Information
E100 SERVICE INFORMATION SERVICE YOUR etón OR GRUNDIG PRODUCT To obtain service for your etón or Grundig product we recommend first contacting an etón service representative at 800-872-2228 US,... - Page 22 AVEZ-VOUS BESOIN D’AIDE? Nous voulons que vous profitiez pleinement de l’utilisation de votre récepteur radio E100. Si vous avez besoin d’aide tout en suivant le mode d’emploi, veuillez nous contacter, en utilisant les méthodes ci-dessous. Du lundi au vendredi, de 8 h 30 à 16heures, heure standard du Pacifique (Amérique du Nord).
-
Page 23: Introduction
INTRODUCTION Nous vous remercions de votre achat du récepteur radio AM/FM/Ondes courtes E100. Ce guide d’utilisation est divisé en deux sections, le FONCTIONNEMENT DE BASE et l’INTRODUCTION AUX ONDES COURTES. Si vous êtes nouveau à l’écoute des ondes courtes, la section INTRODUCTION AUX ONDES COURTES vous fournira toutes les informations qui vous sont nécessaires pour profiter... -
Page 24: Diagrammes
Commutateur de verrouillage Couvercle du compartiment AFFICHAGE DES CODES DE RÉGLAGE des piles DU SYSTÈME Fait seulement référence au coin supérieur droit de l’affichage E100 MANUEL D’ OPÉRATION continué AFFICHAGE DU POSTE RÉCEPTEUR DE RADIO ALLUMÉ Symbole des pile Symbole d’antenne Indicateur AM/PM de la fonction de réveil... -
Page 25: Pour Commencer
2. Assurez-vous que commutateur de gain d’antenne (17), situé sur le côté gauche du récepteur radio est sur la position haut-gain, H. COMMENT ALLUMER ET ÉTEINDRE LE E100 Le E100 peut être allumé par les deux méthodes montrées ci-dessous. Pour l’éteindre, appuyez sur le bouton POWER/SLEEP [ALIMENTA- TION/SOMMEIL] (3). -
Page 26: Les Commandes De Réglage Du Volume Et De La Tonalité
DE L’AMÉRIQUE DU NORD Vous pouvez sauter cette section si vous êtes en Amérique du Nord et si vous venez d’acheter le E100. Il est déjà réglé à l’usine pour être utilisé en Amérique du Nord. Si vous voyagez dans d’autres régions du monde, effectuez les changements ci-dessous lorsque c’est nécessaire. - Page 27 ET LA MISE À L’ARRÊT DE LA FONCTION DE RÉVEIL. La fonction de réveil vous réveillera à la dernière station de radio choisie, à moins que le récepteur radio ne soit pas réglé pour le réveil à une station préférée (Utilisez le code 01 de réglage du système.).
-
Page 28: De Réveil
ON/OFF-TIMER [ALLUMER/ÉTEINDRE – MINUTERIE] L’UTILISATION DE LA MÉMOIRE continué À l’usine, le E100 est configuré par défaut avec 8 pages de mémoire, chaque page peut contenir 25 fréquences. Ceci permet de stocker 200 fréquences en mémoire. Cette configuration par défaut faite à l’usine peut être modifiée et personnalisée selon vos besoins propres ou elle... - Page 29 Si vous n’êtes pas intéressé à modifier les pages de mémoire et souhaitez conserver les réglages de la configuration par défaut faite à l’usine, sautez cette section. À l’usine, le E100 est configuré pour accéder la page de mémoire 1 lorsque vous stockez une fréquence.
- Page 30 1. Appuyez puis relâchez le bouton M.Scan/Page [Balayage/Page de mémoire] (7). 2. Utilisez le bouton Up/Hour [Haut/Heure] ou Down/Min. [Bas/Minute] (5,6) pour sélectionner l’emplacement du préréglage de mémoire de la fréquence que vous voulez supprimer. E100 MANUEL D’ OPÉRATION continué...
-
Page 31: Codes De Réglage Du Système Et Tableau Des Codes
[Mémoire & Éditer] PERSONNALISER LES PAGES DE MÉMOIRE Le E100 est configuré à l’usine avec 8 pages de mémoires, chaque page ayant 25 préréglages en mémoire, pour un total de 200 préréglages en mémoire. Vous pouvez changer cette configuration. Le nombre de pages de mémoire peut être modifié... -
Page 32: De Réglage Du Système
être effectuées à l’aide de la procédure montrée dans la section intitulée CHANGEMENT DES CODES DE RÉGLAGE DU SYSTÈME. • La fonction de réveil du récepteur radio utilise la dernière station choisie. Code 02. • Huit pages avec 25 mémoires chacune (200 mémoires au total).Code 08. -
Page 33: Autres Renseignements Sur Le E100
C’est une fonction excellente à utiliser lorsque vous voyagez. Avant de mettre le récepteur radio dans une valise, un sac à main ou une serviette, éteignez-le puis verrouillez-le. Ceci empêchera une mise en marche accidentelle et l’épuisement des piles. -
Page 34: 10 Dépannage
‘réinitialisation’. Pour effectuer cette opération, glissez le bouton RESET [RÉINITIALISATION] situé en dessous du E100, dans la direction de la flèche. LE RÉCEPTEUR RADIO NE S’ALLUME PAS 1. Assurez-vous que le commutateur LOCK [VERROUILLAGE] est en position OFF [HORS SERVICE] (enfoncé). -
Page 35: Écoute Des Stations D'ondes Courtes
être de très bonne qualité. • La force du signal du signal est souvent plus forte lorsque vous tenez le récepteur radio et que vous êtes très près d’une fenêtre. LA SÉLECTION D’UNE BANDE DE FRÉQUENCES DES ONDES COURTES EN MÈTRES Qu’est-ce qu’une bande ? C’est une gamme de fréquence. - Page 36 SW METER BAND [BANDE DE FRÉQUENCES DES ONDES COURTES EN MÈTRES] (12) le récepteur radio est réglé au début de la bande de fréquences. Pendant que vous appuyez sur le bouton, le numéro de bande de fréquences est indiqué...
- Page 37 CLÉ POUR APPRÉCIER VOTRE RÉCEPTEUR D’ONDES COURTES INTRODUCTION Maintenant que vous avez un récepteur radio à ondes courtes, vous voudrez sans aucun doute écouter immédiatement des stations internationales. Si vous êtes novice dans les ondes courtes, prenez quelques minutes pour apprendre les principes fondamentaux présentés ci-dessous.
-
Page 38: Guide D'écoute Des Ondes Courtes
(ou le manuel d’utilisation) pour déterminer quelle désignation de fréquence il utilise en ondes courtes. La plupart des récepteurs radio utilisent les abréviations kHz et MHz. Sur certains récepteurs radio ces fréquences ressembleront à : 15100 kHz, 15105 kHz ou 15110 kHz, mais sur d’autres récepteurs radio elles ressembleront à... - Page 39 Suivez ces règles pour obtenir les meilleurs résultats. Comment trouver une bande particulière pourra varier d’un récepteur radio à un autre. Consultez votre manuel d’utilisation pour obtenir les instructions pour accéder aux bandes sur votre récepteur radio ou appelez etón Corporation si cela vous trouvez que cela n’est pas clair.
-
Page 40: Enregistrement De La Garantie
Si vous êtes dans un bâtiment avec un étage ou plus au-dessus de vous, la puissance des signaux peut s’en trouver affectée. Dans un tel cas, rapprochez-vous, et rapprochez surtout l’antenne du récepteur radio le plus près possible d’une fenêtre pendant l’écoute. ENREGISTREMENT DE LA GARANTIE continué... -
Page 41: Garantie Limitée Au Client Initial
équipements non fournis par etón ; des accidents, l’utilisation incorrecte, abusive, négligente, la mauvaise E100 GARANTIE LIMITÉE AU CLIENT INITIAL application, le feu, l’eau, la foudre, ou d’autres évènements fortuits; une tension de secteur incorrecte, des variations de tension ou des surtensions;... - Page 42 BENÖTIGEN SIE HILFE? Das Radio E100 soll Ihnen optimalen Nutzen bringen. Wenn Sie beim Erlernen des Betriebs des Radios Hilfe brauchen, kontaktieren Sie uns bitte folgendermaßen: Montag bis Freitag, 8:30 Uhr bis 16:00 Uhr, Pazifische Standardzeit Nordamerikas. 1-800-872-2228 von den USA...
-
Page 43: Introduction
INTRODUCTION Vielen Dank, dass Sie sich für das E100 UKW/MW/KW -Radio entschieden haben. Dieses Radio wurde nach hohen Qualitätsstandards entwickelt und hergestellt und kann über viele Jahre hinweg einen zuverlässigen Dienst leisten. Bitte lesen Sie das Benutzerhandbuch sorgfältig durch, so dass Sie die vielen interessanten Funktionen des E100 nutzen können.. -
Page 44: Abbildungen
Gilt nur für die Anzeige in der rechten oberen Ecke. Ständer Klangregler Lautstärkenregler ANZEIGE DER CODES ZUR SYSTEMEINSTELLUNG Sperrschalter Gilt nur für die Anzeige in der rechten oberen Ecke. Batteriefachabdeckung E100 BETRIEB HANDBUCH fortgesetzt ANZEIGE BEI EINGESCHALTETEM RADIO Batterie-Symbol Antennen-Symbol AM/PM-Anzeige, Wecker... -
Page 45: Vor Beginn
Seite des Radios in der Stellung H (hohe Verstärkung) befindet. EIN- UND AUSSCHALTEN DES E100 Das E100 kann auf eine der beiden unten beschriebenen Weisen eingeschaltet werden. Zum Ausschalten auf den Knopf POWER/SLEEP (3) drücken. 1. Einschalten mit Batterieschutz / Einschlafzeit-Automatik Schnell und kurz auf den Knopf POWER/SLEEP (3) drücken. -
Page 46: Regelung Der Lautstärke Und Des Klangs
WAHL VON UKW, MW ODER KURZWELLE Nach dem Einschalten des E100 erfolgt die Wahl von UKW, MW oder KW durch Drücken auf die Taste ‚FM/MW/SW Band’ (11). Wenn das AM-Band gewählt wird, erscheint auf der Anzeige MW und nicht AM. - Page 47 Wenn die Weckfunktion ausgelöst wird, schaltet sie das Radio ein. Auf der Anzeige blinkt das Symbol für die Aktivierung der Weckfunktion (31). Das Radio spielt 30 Minuten lang, bis es abgeschaltet wird oder bis der Knopf SNOOZE/LIGHT gedrückt wird (siehe unten SCHLUMMERFUNKTION).
-
Page 48: Uhr Und Wecker
Knopf ON/OFF TIMER gedrückt wird. E100 SPEICHER Die Werkseinstellung sieht 8 Speicherseiten für das E100 vor. Auf jede Seite passen 25 Frequenzen. Folglich können 200 Frequenzen in die Speicher eingegeben werden. Diese Werkseinstellung kann belassen oder geändert und je nach persönlichen Vorlieben angepasst werden. -
Page 49: Speicher
ändern und die ursprünglichen Werkseinstellungen für die Speicherseiten verwenden möchten. Die Werkseinstellung für das E100 sieht vor, dass beim Speichern von Frequenzen auf Speicherseite 1 zugegriffen wird. Wenn diese nicht beibehalten werden soll, kann zu einer andere Speicherseite übergegangen werden. Es wird emp- fohlen, zunächst das Eingeben von Sendern in Speicherseite 1 zu lernen... - Page 50 Speichervoreinstellung weitergegangen. Zum Stoppen der automatischen Voreinstellungssuche, entweder die Taste ‚Up/Hour’ oder die Taste ‚Down/Min’ drücken und wieder loslassen. E100 SPEICHER fortgesetzt SPEICHERN EINER FREQUENZ AN EINEM ANDERN PLATZ Nach Bedarf kann eine in einen Speicher eingegebene Frequenz in einen anderen Speicher auf der gleichen Seite oder auf einer anderen Seite eingegeben werden.
-
Page 51: Codes Und Code-Tabelle Zur Systemein Stellung
3. Innerhalb von 2 Sekunden die Taste ‚Mem.&Edit’ drücken und wieder loslassen. ANPASSEN VON SPEICHERSEITEN Im Werk wird das E100 mit 8 Speicherseiten mit jeweils 25 Speichern ausgestattet, so dass insgesamt 200 Speicher verfügbar sind. Diese Einstellung kann geändert werden. Die Anzahl der Speicherseiten kann nach Wahl auf 4, 5, 8 oder 20 eingestellt werden. - Page 52 3. Innerhalb von 5 Sekunden mit den Zifferntasten ‚12’ eingeben und dann sofort die Taste ENTER drücken und wieder loslassen. Auf der Anzeige erscheint kurz ‚12H’. E100 CODES UND CODE-TABELLE ZUR SYSTEMEIN STELLUNG fortgesetzt VOM WERK VOREINGESTELLTE CODES Wenn das Gerät vom Werk geliefert wird, ist die Code-Tabelle zur...
-
Page 53: Weitere Informationen Über Das E100
Radio eingeschaltet ist, während der Sperrschalter LOCK eingeschaltet wird, bleibt der Lautstärkenregler funktionsfähig. Diese Funktion ist auf Reisen sehr nützlich. Das Radio vor dem Verpacken in einen Koffer, das Handgepäck oder einen Aktenkoffer ausschalten und dann sperren. Dadurch wird verhindert, dass es sich aus Versehen einschaltet und die Batterien entlädt. -
Page 54: Fehlerbehebung
Batterien gut sind. Wenn das Radio nicht funktioniert und die unten angeführten Maßnahmen das Problem nicht beheben, das Radio ‚zurücksetzen’. Dazu den Schalter RESET auf der Unterseite des E100 in Pfeilrichtung schieben. KANN NICHT EINGESCHALTET WERDEN 1. Prüfen, ob sich der Sperrschalter LOCK in der Stellung AUS (nach unten gedrückt) befindet. -
Page 55: Empfang Von Kurzwellensendern
Tages- als auch die Nachtbänder gut sein, manchmal ungewöhnlich gut. Das Hören zu diesen Zeiten kann oft besonders lohnend sein. • Die Signalstärke ist oft besser, wenn das Radio in der Hand gehalten wird und sich sehr nahe an einem Fenster befindet. WAHL EINES KURZWELLENBANDS Was ist ein Band? Es handelt sich um einen Frequenzbereich. - Page 56 Veröffentlicht von International Broadcasting Services, IBS North America, Box 300, Penn’s Park, PA 18943 Telefon: 215-598-3794 www.passband.com WORLD RADIO TV HANDBOOK Veröffentlicht in Nordamerika von Watson Guptil Publications, 770 Broadway - 7th Floor, New York, NY 10003-9595 www.watsonguptill.com E100 BETRIEB HANDBUCH fortgesetzt...
-
Page 57: 12 Führer Zum Kurzwellenempfang
Radiomodellen leicht unterscheiden. Das ist ganz normal. Auf manchen Radios sind die Bänder deutlich gekennzeichnet, auf anderen gibt es keine Kennzeichnungen. Wenn es nicht offensichtlich ist, wie auf dem Radio ein Band eingestellt werden kann, schauen Sie bitte in dem Benutzerhandbuch oder auf der Website der etón Corporation (www.etoncorp.com) nach... - Page 58 Eigenschaften der wichtigsten Kurzwellenbänder aufgeführt. Wenn Sie diesen Richtlinien folgen, werden sie beste Ergebnisse haben. Wie ein bestimmtes Band eingestellt wird, hängt von dem Radio ab. Schauen Sie in Ihrem Benutzerhandbuch nach, wie diese Bänder eingestellt werden oder rufen Sie bei der etón Corporation an, wenn Sie noch Fragen haben.
- Page 59 Gebäude befinden und ein oder mehrere Stockwerke über sich haben, kann das Signal in der Stärke ebenfalls negativ beeinflusst werden. Stellen Sie in diesem Fall sich und besonders die Radioantenne während des Empfangs so nahe wie möglich an ein Fenster. E100 BETRIEB HANDBUCH fortgesetzt EIGENSCHAFTEN Ähnlich wie 31m...
-
Page 60: Garantie-Registrierung
E100 BEGRENZTE GARANTIE FÜR DEN URSPRÜNGLICHEN KUNDEN Für dieses von der etón Corporation (etón) vertriebene Markenprodukt von ETON oder GRUNDIG besteht eine Garantie bezüglich herstellungsbedingter Material- und Verarbeitungsmängel für die folgende begrenzte Garantiezeit: EIN (1) JAHR FÜR ERSATZTEILE UND ARBEIT Diese begrenzte Garantie beginnt zum Zeitpunkt des ursprünglichen... -
Page 61: Begrenzte Garantie Für Den Ursprünglichen Kunden
Auslaufen von Säure; Änderungen oder Modifikationen am Produkt oder den Einsatz unautorisierter Teile, Materialien, Zubehöre oder Geräte, die das Produkt beschädigen oder zu Leistungsproblemen führen. E100 WARTUNGSINFORMATIONEN DIE WARTUNG IHRES PRODUKTS VON etón ODER GRUNDIG Wenn Sie Ihr Produkt von etón oder Grundig warten lassen möchten, empfehlen wir, zunächst einen Kundendienstvertreter von etón zur... - Page 62 ¿NECESITA AYUDA? Deseamos que disfrute completamente de su radio E100. Si necesita ayuda para aprender su operación, por favor póngase en contacto con nosotros usando cualquiera de los métodos descritos abajo. Lunes a viernes, 8:30 a.m. - 4:00 p.m., hora del Pacífico de Norteamérica.
-
Page 63: Introducción
INTRODUCCIÓN Muchas gracias por comprar el radio de AM/FM/Onda corta modelo E100. Este radio ha sido diseñado y fabricado utilizando normas de la más alta calidad y le suministrará una operación confiable durante muchos años. Por favor, lea cuidadosamente el Manual del Propietario para poder tomar ventaja de las muchas características... -
Page 64: Diagramas
Receptáculo de audífono Botón de reposición DIAGRAMAS PANTALLA CON EL RADIO APAGADO Antena telescópica Pantalla LCD Botón para encender el radio y dormir Símbolo de batería Símbolo de antena Control de sintonización fina Escala 1-5 Arriba/Hora Abajo/Minuto Exploración de memoria/Botón de página FM ESTÉREO... -
Page 65: Instrucciones Iniciales
(17), en el lado izquierdo del radio, está en la posición "H" de alta ganancia. FORMA DE ENCENDER Y APAGAR EL MODELO E100 El modelo E100 se puede encender por los dos métodos indicados abajo. Para apagarlo, pulse el botón "POWER/SLEEP" (3). 1. Método de temporizador/ahorrar baterías Pulse en forma rápida y corta el botón "POWER/SLEEP"... -
Page 66: Controles De Volumen Y Tono
FUERA DE NORTEAMÉRICA Puede ignorar esta sección si reside en Norteamérica y se acaba de comprar el modelo E100. Ya está ajustado en la fábrica para uso en Norteamérica. Si viaja a otras regiones del mundo, haga los cambios indicados abajo como sean necesarios. - Page 67 4. SINTONIZACIÓN FINA El control "FINE TUNING" (Sintonización fina) (4) está situado en el lado derecho del radio. Sintoniza en pasos de 1 kilohercio en AM y onda corta, y en pasos de 0.05 megahercios en FM. Use este control para la sintonización fina de sus estaciones favoritas, o en la forma...
-
Page 68: Funciones De Reloj Y Alarma
TIMER", con excepción del botón "SNOOZE/LIGHT" USO DE LA MEMORIA continuación El modelo E100 está programado en la fábrica con 8 páginas de memoria, cada página capaz de guardar 25 frecuencias. Esto permite guardar 200 frecuencias en la memoria. Esta programación de fábrica se puede cambiar para adaptarse mejor a su preferencia personal o dejar como viene de fábrica. -
Page 69: Uso De La Memoria
Si no está interesado en cambiar las páginas de la memoria y desea mantener la programación original de fábrica, pase a la siguiente sec- ción. En la fábrica, el modelo E100 es programado para tener acceso a la página de memoria 1 cuando guarda una frecuencia. Puede dejar esto así... - Page 70 La memoria pasa entonces al siguiente número de memoria por otros 5 segundos. Para detener esta exploración automática de la memoria, pulse y suelte el botón "Up/Hour" o el botón "Down/Min.". E100 USO DE LA MEMORIA continuación FORMA DE MOVER UNA FRECUENCIA GUARDADA Si lo desea, una frecuencia guardada en una memoria puede ser movida a una memoria diferente en la misma página o en una pági-...
-
Page 71: Códigos Del Sistema Y Tabla De Códigos Del Sistema
3. Dentro de 2 segundos, pulse y suelte el botón "Mem.&Edit". ESPECIALIZACIÓN DE LAS PÁGINAS DE MEMORIA El modelo E100 es programado en la fábrica con 8 páginas de memoria, cada una de ellas con 25 memorias, para un total de 200 memorias. - Page 72 CÓDIGOS DEL SISTEMA PROGRAMADOS EN LA FÁBRICA Cuando el radio salió de la fábrica, estaba programado con los códigos indicados abajo. Los cambios se pueden hacer usando el procedimiento mostrado en la sección titulada "FORMA DE CAMBIAR LOS CÓDIGOS DEL SISTEMA".
-
Page 73: Otra Información Acerca Del Modelo E100
USO DE LA LUZ Una pulsación rápida y corta del botón "SNOOZE/LIGHT" (22), situado en la parte superior del radio, encenderá la luz que ilumina la pantalla desde el lado derecho durante aproximadamente 10 segundos. Si pulsa el botón por más tiempo (5 segundos), la luz se quedará encendida indefinidamente (note que esto disminuirá... -
Page 74: Localización De Fallas
PROCEDIMIENTO DE REPOSICIÓN Cuando lleve a cabo una "reposición", asegúrese de que las baterías en uso estén buenas. Si el radio no funciona y las soluciones indi- cadas no resuelven el problema, haga la "reposición". Para hacerlo, mueva el interruptor "RESET", situado en la parte inferior del radio E100, en la dirección de la flecha. -
Page 75: Forma De Escuchar Estaciones De Onda Corta
• Las intensidades de las señales son muchas veces más fuertes cuando se sostiene el radio con la mano muy cerca de una ventana. SELECCIÓN DE UNA BANDA DE ONDA CORTA ¿Qué es una banda? Es una gama de frecuencias. En este caso, es una gama de frecuencias en que se pueden encontrar estaciones de radio internacionales. - Page 76 IBS North America, Box 300, Penn's Park, PA 18943 Teléfono: 215-598-3794 www.passband.com WORLD RADIO TV HANDBOOK (Manual de radio y TV de todo el mundo). Publicado en Norteamérica por Watson-Guptil Publications, 770 Broadway - 7th Floor, New York, NY 10003-9595 www.watsonguptill.com...
-
Page 77: Guía Para Escuchar Estaciones De Onda Corta
éste es el concepto más importante que debe aprender rápidamente. Si ha escuchado alguna vez un radio de AM o FM, entonces ya sabe lo que es una banda. La banda de AM cubre una gama de frecuencias desde 530 hasta 1600 kilohercios, la banda de FM es de 88 a 108 megahercios. - Page 78 La forma de sintonizar una banda específica podrá variar de un radio a otro. Consulte su manual de propietario para obtener instrucciones acerca de la forma de tener acceso a las bandas en su radio, o llame a etón Corporation si tiene alguna duda.
- Page 79 DE ONDA CORTA continuación USO DEL RADIO DURANTE EL ATARDECER Y LA NOCHE Esta es la mejor hora para escuchar el radio en onda corta, porque las estaciones están transmitiendo deliberadamente hacia Norteamérica. Estas bandas son extremadamente buenas también alrededor del amanecer y la puesta del sol.
-
Page 80: Para Registrar Su Garantía
Grundig debe ser completado tan pronto como sea posible, después de la compra o llegada del producto. Para registrar su radio, por favor seleccione uno de los métodos siguientes:... -
Page 81: Garantía Limitada Para El Comprador Original
E100 INFORMACIÓN DE SERVICIO SERVICIO DE SU PRODUCTO etón O GRUNDIG Para obtener servicio para su producto etón o Grundig, recomendamos que se comunique primero con un representante de servicio de etón... - Page 82 PER QUESITI E CHIARIMENTI: La etón si augura che l'uso della E100 risulti del tutto piacevole. A questo fine, quanti richiedano aiuto in merito al funzionamento della radio sono pregati di mettersi in contatto con il fabbricante, usando i metodi indicati sotto.
-
Page 83: Introduzione
INTRODUZIONE Grazie dell'acquisto della radio AM/FM/onde corte E100. Questa radio è stata progettata e prodotta in ottemperanza agli standard di qualità più elevati per fornire molti anni d'ascolto, con grande affidabilità. Leggere attentamente questo manuale per sfruttare bene le molteplici funzioni della E100. -
Page 84: Illustrazioni
Comando del tono LOW/HIGH Comando del volume MEMORY DISPLAY Interruttore di bloccaggio Occupa solo l'angolo superiore destro dello display. Sportello dello scompartimento delle batterie E100 MANUALE OPERATIVO segue DISPLAY A RADIO ACCESA Icona della batteria Icona dell'antenna Cursore Indicatore AM/PM della sveglia... -
Page 85: Attivita' Iniziali
2. Accertarsi che l'interruttore ANT. GAIN H/M/L (17) sul lato sinistro della radio sia in posizione di guadagno alto H (High). ACCENSIONE E SPEGNIMENTO E' possibile accendere la E100 in due modi, come indicato sotto. Per spegnerla, premere il pulsante POWER/SLEEP (3). 1. Metodo del salvabatterie/sleep timer Premere e rilasciare rapidamente il pulsante POWER/SLEEP (3). -
Page 86: Funzionamento Della Radio
Fuori dal Nord America, le stazioni AM (o MW secondo il display della E100) sono spaziate ad intervalli di 9 kHz e la gamma FM può essere diversa da quella statunitense, com'è il caso del Giappone, dove è... - Page 87 3. Premere e rilasciare di nuovo il pulsante ENTER. 4. SINTONIA FINE Il comando di sintonia fine (4) si trova sul lato destro della radio. Esegue la sintonia in passi da 1 kilohertz in AM ed onde corte e da 0,05 megahertz in FM.
-
Page 88: Caratteristiche Dell'orologio E Della
E100 OPERAZIONI IN MEMORIA La memoria della radio E100 è impostata in fabbrica su 8 pagine, ciascuna delle quali contiene le impostazioni di 25 frequenze, per un totale di 200 frequenze complessive. Questa impostazione predefinita possono essere modificate, personalizzandola. Durante l'apprendi- mento della memorizzazione delle emittenti, si consiglia di adottare l'impostazione predefinita. -
Page 89: Operazioni In Memoria
Se non si desidera modificare le pagine di memoria, preferendo conservare l'impostazione originale, si può passare direttamente alla sezione successiva. In fabbrica, la E100 è impostata in modo memo- rizzare una frequenza accedendo alla pagina 1 della memoria. Si può... - Page 90 5 secondi, trascorsi i quali viene attivata la preimpostazione successiva per lo stesso lasso di tempo. Per arrestare la scansione delle preimpostazioni in memoria, premere e rilasciare il pulsante UP/HOUR o DOWN/MIN. E100 OPERAZIONI IN MEMORIA segue TRASFERIMENTO DI UNA FREQUENZA MEMORIZZATA Se lo si desidera, è...
- Page 91 3. Premere e rilasciare entro 2 secondi il pulsante MEM.&EDIT. PERSONALIZZAZIONE DELLE PAGINE DI MEMORIA La E100 è configurata in fabbrica con 8 pagine di memoria, ciascuna con 25 impostazioni, per un totale di 200 frequenze memorizzabili. Il numero di pagine di memoria può essere modificato da 8 a 4, 5 o 20.
-
Page 92: Codici Di Impostazione Del Sistema E Relativa Tabella
CODICI DI IMPOSTAZIONE DEL SISTEMA PREDEFINITI IN FABBRICA La radio esce dalla fabbrica impostata nel modo indicato sotto. Le modifiche vanno apportate in conformità alle indicazioni della sezione MODIFICA DEI CODICI DI IMPOSTAZIONE DEL SISTEMA. • La sveglia attiva l'ultima stazione sintonizzata. Codice 02. -
Page 93: Altre Informazioni Sulla E100
USO DELL'INTERRUTTORE DI BLOCCAGGIO Impostando l'interruttore di bloccaggio sulla posizione ON si escludono tutti i pulsanti e la manopola di sintonia fine. Se la radio è accesa mentre si attiva questo interruttore, il comando del volume rimane operativo. Questa caratteristica risulta molto utile durante i viaggi. -
Page 94: Individuazione Dei Guasti
Se la radio non funziona e le soluzioni indicate sotto non risolvono il problema, eseguire un ripristino facendo scorrere l'interrut- tore RESET sul fondo della E100, nella direzione indicata dalla freccia. LA RADIO NON SI ACCENDE 1. Accertarsi che l'interruttore di bloccaggio sia in posizione OFF (premuto). -
Page 95: Scansione Automatica Delle Onde Corte
• All'alba ed al tramonto, è possibile ricevere bene o benissimo le bande sia diurne che notturne, con risultati d'ascolto molto soddisfacenti. • Per migliorare la ricezione bisogna tenendo la radio in mano e spostarla il più vicino possibile ad una finestra. SELEZIONE DI UNA BANDA AD ONDE CORTE Una banda non è... - Page 96 IBS North America, Box 300, Penn’s Park, PA 18943 U.S.A. Telefono: +215 598-3794 www.passband.com WORLD RADIO TV HANDBOOK Pubblicato in Nord America dalla Watson Guptil Publications, 770 Broadway - 7th Floor, New York, NY 10003-9595, U.S.A. www.watsonguptill.com E100 MANUALE OPERATIVO segue...
-
Page 97: Guida All'ascolto Delle Onde Corte
Chiunque abbia ascoltato trasmissioni AM o FM, ha fatto esperienza con le bande radio. La banda AM è pari a 530-1600 KHz, mentre quella FM va da 66 a 108 megahertz. Per banda si intende infatti una gamma di frequenze entro la quale operano le varie stazioni. - Page 98 L'accesso ad una data banda varia da radio a radio. Consultare il manuale operativo per istruzioni in merito o rivolgersi alla etón Corporation per ulteriori chiarimenti.
- Page 99 Inoltre il segnale risulta indebolito se il punto d'ascolto si trova ad un piano intermedio, con uno o più piani sovrastanti. In tale situazione, disporre la radio ed in particolare la relativa antenna il più vicino possibile ad una finestra. La ricezione può aumentare ulteriormente se, dopo essersi avvicinati ad una finestra, si regge la radio in mano.
-
Page 100: Registrazione Della Garanzia
Per assicurare la completa copertura in garanzia o gli aggiornamenti del prodotto etón o Grundig, la registrazione della relativa garanzia va effettuata quanto prima possibile dopo l'acquisto o la ricezione. Per registrare la radio, selezionare uno dei seguenti metodi: 1) Registrazione presso il sito PRODUCT REGISTRATION Indicare il proprio nome, recapito Web www.etoncorp.com... -
Page 101: Garanzia Limitata Estesa All'acquirente Originario
E100 INFORMAZIONI SUL SERVIZIO SERVIZIO DI ASSISTENZA AI PRODOTTI etón O GRUNDIG Per sottoporre ad un intervento di servizio il proprio prodotto etón o Grundig, si suggerisce anzitutto di rivolgersi ad un tecnico etón,... - Page 102 w w w . e t o n c o r p . c o m 1-800-872-2228 from the U.S. 1-800-637-1648 from Canada 1-650-903-3866, worldwide FAX: 650-903-3867 customersvc@etoncorp.com www.etoncorp.com etón Corporation 1015 Corporation Way Palo Alto, California 94303 v. 12-07-04...
Need help?
Do you have a question about the E100 and is the answer not in the manual?
Questions and answers