Table of Contents
Advertisement
Quick Links
Advertisement
Table of Contents

Subscribe to Our Youtube Channel
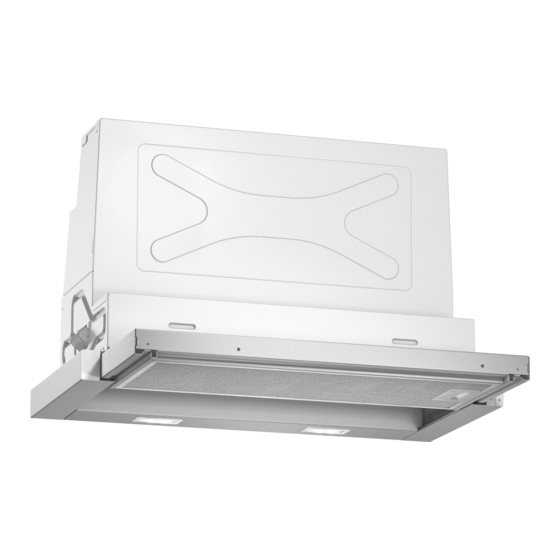
Summary of Contents for NEFF D46ED52X0
- Page 1 Extractor hood [en] Instructions for installation and use...
-
Page 2: Table Of Contents
Produktinfo with an external clock timer or a remote Additional information on products, accessories, replacement parts and services can be found at control. www.neff-international.com and in the online shop www.neff-eshop.com (Important safety 8Intended use information Read these instructions carefully. Only then... -
Page 3: Important Safety Information
Important safety information en Always ensure adequate fresh air in the room Warning if the appliance is being operated in exhaust Risk of fire! air mode at the same time as room air- Grease deposits in the grease filter may ■... -
Page 4: Environmental Protection
Environmental protection Warning 7Environmental protection Risk of electric shock! A defective appliance may cause electric ■ Your new appliance is particularly energy-efficient. Here shock. Never switch on a defective t e c t i o n E n v i r o n m e n t a l p r o you can find tips on how to save even more energy appliance. -
Page 5: Operating Modes
Operating modes en ÇOperating modes 1Operating the appliance These instructions apply to several appliance variants. It Exhaust air mode p l i a n c e O p e r a t i n g t h e a p is possible that individual features are described which O p e r a t i n g m o d e s do not apply to your appliance. -
Page 6: Cleaning And Maintenance
Cleaning and maintenance 2Cleaning and maintenance Area Cleaning agent Stainless steel Hot soapy water: Clean with a dish cloth and then dry with a Warning soft cloth. t e n a n c e C l e a n i n g a n d m a i n Risk of burns! Clean stainless steel surfaces in the grind The appliance will become hot during operation,... -
Page 7: Trouble Shooting
Trouble shooting en On appliances with a glass plate in the filter pull-out: In the dishwasher: Note: If the metal mesh grease filters are cleaned in the The glass plate can be removed easily and can be ■ dishwasher, slight discolouration may occur. This has cleaned in the dishwasher. - Page 8 Customer service Replacing bulbs 4Customer service These instructions apply to several appliance variants. It When calling us, please give the product number (E is possible that individual features are described which C u s t o m e r s e r v i c e no.) and the production number (FD no.) so that we can do not apply to your appliance.
-
Page 9: Customer Service
Customer service en INSTALLATION INSTRUCTIONS Appliance width 60 cm: Installation instructions These instructions apply to several appliance variants. It is possible that individual features are described which do not apply to your appliance. This appliance is installed in a upper cabinet. ■... -
Page 10: Important Safety Information
Important safety information Room air-dependent heat-producing (Important safety appliances (e.g. gas, oil, wood or coal- information operated heaters, continuous flow heaters or water heaters) obtain combustion air from the room in which they are installed and discharge Read these instructions carefully. Only then i n f o r m a t i o n I m p o r t a n t s a f e t y the exhaust gases into the open air through an... -
Page 11: General Information
General information en Warning KGeneral information Risk of fire! Grease deposits in the grease filter may catch Exhaust air mode fire. The specified safety distances must be G e n e r a l i n f o r m a t i o n observed in order to prevent an accumulation Warning... -
Page 12: Installation
General information Electrical connection Make the cut-out for the exhaust air pipe. To do this, make an opening in the top or back panel of the fitted unit with an additional recess for the power Warning cord. Risk of electric shock! Components inside the appliance may have sharp edges. - Page 13 Installation en Connect the power cord provided to the appliance. ¨ Use the strain relief to secure the power cord in place. © Body wall thickness: 19 mm Fold out the tabs on both of the mounting pieces. ¨ Screw the mounting pieces to the body on the left and right.
- Page 14 Installation Sliding out the appliance Screw in the filler strip fully. Note: Before you remove the appliance, protect the hob with a piece of polystyrene from the packaging. Use a flat-blade screwdriver to push in the fastening bolt, and turn it 90° until it locks into place. ¨...
- Page 15 Installation en Connecting the pipes Appliance width 90 cm: You must also screw the appliance to the wall-hanging Note: If an aluminium pipe is used, smooth the area cupboards either side of it. where it is to be connected before you connect it. Exhaust air pipe, dia.
- Page 16 Constructa Neff Vertriebs-GmbH Carl-Wery-Straße 34 D-81739 München *9001058662* Register your product online www.neff-international.com 9001058662 960211...


Need help?
Do you have a question about the D46ED52X0 and is the answer not in the manual?
Questions and answers