Table of Contents
Advertisement
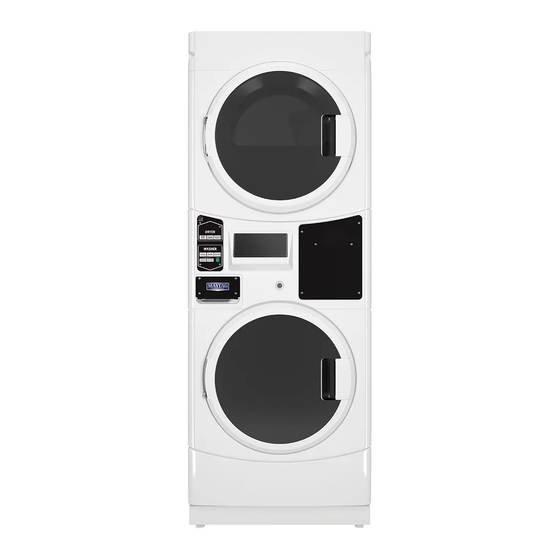
MLG22PR
MLG22PD
MLG22PN
WARNING:
precautions, including the following:
Read all instructions before using the dryer.
Keep a minimum clearance of 100 mm (4 in.) between
www.maytagcommerciallaundry.com
rear of the dryer and any wall.
INSTALLATION
INSTRUCTIONS
ORIGINAL INSTRUCTIONS
C
OmmeRCIAL
W
To reduce the risk of re, electric shock
S
TACked
/d
ASheR
RyeR
G
AS
IMPORTANT S
W11295154A
Advertisement
Table of Contents

Related Manuals for Maytag Commercial MLG22PR


Summary of Contents for Maytag Commercial MLG22PR
- Page 1 INSTALLATION INSTRUCTIONS ORIGINAL INSTRUCTIONS OmmeRCIAL TACked ASheR RyeR MLG22PR MLG22PD MLG22PN IMPORTANT S WARNING: To reduce the risk of re, electric shock precautions, including the following: Read all instructions before using the dryer. Keep a minimum clearance of 100 mm (4 in.) between www.maytagcommerciallaundry.com...
-
Page 2: Table Of Contents
TABLE OF CONTENTS Page Stacked Washer/Dryer Safety ..........3 Stacked Washer/Dryer Disposal ..........6 Tools & Parts .................. 7 Alternate Parts and Accessories ..........8 Specifications ................. 8 Dimensions/Clearances ............. 9 Stacked Washer/Gas Dryer Installation Requirements .. 10 Dryer Venting Requirements ........... 13 Dryer Gas Supply Requirements .......... -
Page 3: Stacked Washer/Dryer Safety
STACKED WASHER/DRYER SAFETY n It is recommended that the owner post, in a prominent location, instructions for the customer’s use in the event the customer smells gas. This information should be obtained from your gas supplier. n Post the following warning in a prominent location. FOR yOUR SAFeTy 1. - Page 4 STACKED WASHER/DRYER SAFETY WARNING: FIRE OR EXPLOSION HAZARD Failure to follow safety warnings exactly could result in serious injury, death or property damage. – Do not store or use gasoline or other flammable vapors and liquids in the vicinity of this or any other appliance.
- Page 5 STACKED WASHER/DRYER SAFETY n Do not dry unwashed items in the dryer. n Clean dryer lint screen before or after each load. n Do not use this dryer if industrial chemicals have been used for cleaning. The possible n Do not use this dryer without the lint screen presence of residual quantities of aggressive in place.
-
Page 6: Stacked Washer/Dryer Disposal
STACKED WASHER/DRYER SAFETY n Keep area around the exhaust opening n See “Electrical Requirements” section for and adjacent surrounding areas free from earthing instructions. the accumulation of lint, dust, and dirt. n Adequate ventilation has to be provided to n Ventilation openings in the base shall not avoid the back-flow of gases into the room be obstructed by a carpet or similar object. -
Page 7: Tools & Parts
TOOLS & PARTS Tools Needed: 203 mm (8") 203 mm (8") or 254 mm (10") Flat-Blade Screwdriver Phillips Screwdriver or 254 mm (10") Adjustable Wrench Pipe Wrench that opens to 25 mm (1") Torx T-20 Security 25 mm (1") Hex-Head 8 mm (5/16") Socket Wrench Pliers †... -
Page 8: Alternate Parts And Accessories
ALTERNATE PARTS AND ACCESSORIES Alternate Parts Your installation may require additional parts. If you are interested in purchasing one of the items listed here, contact your authorised Maytag distributor. If You Have You Will Need to Buy Overhead sewer Standard 76 L (20 gal.) 990 mm (39") tall drain tub or utility sink, sump pump and connectors (available from local plumbing suppliers) -
Page 9: Dimensions/Clearances
DIMENSIONS/CLEARANCES Dimensions Front View Side View Back View Clearances Side Clearances Back/Top Clearances... -
Page 10: Stacked Washer/Gas Dryer Installation Requirements
STACKED WASHER/GAS DRYER INSTALLATION REQUIREMENTS Stacked Washer/Gas Dryer Location Stacked washer/gas dryer installation clearances n The location must be large enough to allow the washer and dryer doors to be fully opened. n Additional spacing should be considered for ease of installation and servicing. - Page 11 STACKED WASHER/GAS DRYER INSTALLATION REQUIREMENTS Stacked Washer/Gas Dryer Electrical Requirements IMPORTANT: Observe all governing codes and ordinances. NOTE: In accordance with the European EMC Directive This is 3-wire appliance which must be earthed. (2014/30/EU), the maximum electricity supply system impedance to which the gas dryer should be connected is declared to be 0.054 Ohm + j0.034 Ohm.
- Page 12 STACKED WASHER/GAS DRYER INSTALLATION REQUIREMENTS Stacked Washer/Gas Dryer Gas Supply Requirements Supply line requirements: Provide a rigid gas supply line to the washer/dryer location. It should be minimum 12.5 mm (1/2") ID. When acceptable to the gas supplier and local codes, 10 mm (3/8") ID rigid supply line may be used for lengths under 6.1 m (20').
-
Page 13: Dryer Venting Requirements
DRYER VENTING REQUIREMENTS Rigid metal vent: n Recommended for best drying performance and to avoid crushing and kinking. Flexible metal vent: (Acceptable only if accessible to clean) n Must be fully extended and supported in final dryer location. n Remove excess to avoid sagging and kinking that may result in reduced airflow and poor performance. - Page 14 DRYER VENTING REQUIREMENTS Vent Hoods 102 mm (4") Diameter Exhaust Hoods Exhaust hood must be at least 305 mm (12") from the ground or any object that may be in the path of the exhaust (such as flowers, rocks, bushes, or snow). Box Hood Louvered Hood Angled Hood...
-
Page 15: Dryer Gas Supply Requirements
DRYER VENTING REQUIREMENTS If an Exhaust Hood Cannot be Used Multiple Dryer Venting The outside end of main vent should have a sweep elbow directed A main vent can be used for venting a group of dryers. The main downward. vent should be sized to remove 5663 l/min. -
Page 16: Installing Stacked Washer/Dryer
INSTALLING STACKED WASHER/DRYER Remove Transport System NOTE: Slide washer/dryer onto cardboard or hardboard before 4. Close the bolt holes with the four transport bolt hole plugs. moving to avoid damaging floor covering. IMPORTANT: If the washer/dryer is to be transported, call your product distributor or installer. - Page 17 INSTALLING STACKED WASHER/DRYER Connect Inlet Hoses Insert new hose washers (supplied) into each end of the inlet Connect Inlet Hoses to Washer hoses. Firmly seat the washers in the couplings. 1. Attach the cold water hose to the washer’s cold water inlet valve.
- Page 18 INSTALLING STACKED WASHER/DRYER Route Drain Hose Proper routing of the drain hose avoids damage to your floor due 4. The washer drain system can be installed using a floor drain, to water leakage. Read and follow these instructions. wall standpipe, floor standpipe, or laundry tub. Remove drain hose from the washer drum Laundry tub drain or standpipe drain 1.
-
Page 19: Washer Drain System
WASHER DRAIN SYSTEM Laundry tub drain system The washer can be installed using the standpipe drain system (floor or wall), the laundry tub drain system, or the floor drain The laundry tub needs a minimum 76 L (20 gal.) capacity. system. -
Page 20: Leveling
LEVELING Leveling Stacked Washer/Dryer Leveling your washer/dryer properly reduces excess noise and 3. If washer/dryer is not level, use a 14 mm or 9/16" open- vibration. end or adjustable wrench to turn jam nuts clockwise (as viewed from above) on feet until they are about 13 mm (1/2") from the washer/dryer cabinet. -
Page 21: Complete Installation
COMPLETE INSTALLATION 8. Check dryer operation. Using a full heat cycle, let the dryer run 1. Check the electrical requirements. Be sure that you have the for at least 5 minutes. Dryer will stop when time is used up. correct electrical supply and the recommended earthing method. See “Electrical Requirements. - Page 22 REVERSING DRYER DOOR SWING (OPTIONAL) Reverse Hinge 4. Lift the inner door assembly off outer door assembly. 1. Use a small flat-blade screwdriver to remove the two plug strips from the inner door. Slide the head of the screwdriver under the plugs, without scratching the inner door surface, and lift up the strip.
- Page 23 REVERSING DRYER DOOR SWING (OPTIONAL) Replace the Door Assembly 2. Remove the strike using a Phillips screwdriver. 1. Place the inner door assembly inside the outer door assembly. 3. Insert strike on the opposite side. 2. Reassemble the inner and outer door assemblies with the six screws.
-
Page 24: Stacked Washer/Dryer Maintenance Instructions
STACKED WASHER/DRYER MAINTENANCE INSTRUCTIONS Washer To clean washer interior: Cleaning the Door Seal/Bellow 1. Open the washer door and remove any clothing or items from 1. Open the washer door and remove any clothing or items from the washer. the washer. 2. -
Page 25: If You Need Assistance
STACKED WASHER/DRYER MAINTENANCE INSTRUCTIONS Washer Dryer Always do the following to maintain washer Maintenance instructions: freshness: n Clean lint screen before and after each cycle. n Use only HE (High Efficiency) detergent. n Removing accumulated lint: n Leave the door slightly open after each cycle to allow for better From inside the dryer cabinet: ventilation and drying of washer interior. -
Page 26: Electronic Control Setup Instructions
ELECTRONIC CONTROL SETUP INSTRUCTIONS Washer Control Dryer Control General Washer/Dryer User Information NOTE: After the washer/dryer has been installed and connected to electrical supply, the display will show “0 MINUTES” on the SCROLLING “OUT OF ORDER” MESSAGE, FOLLOWED BY A washer and dryer portions of the display. - Page 27 ELECTRONIC CONTROL SETUP INSTRUCTIONS WARM START (after power failure) – A few seconds after DEBIT CARD READY – This washer/dryer is debit card ready. power is restored, if a cycle was in progress at the time of the It will accept a variety of debit card systems, but does NOT power failure, “RESELECT CYCLE”...
- Page 28 ELECTRONIC CONTROL SETUP INSTRUCTIONS Start Operating Set-up 8 00 TYPE OF DRYER PRICING (DRYER) Washer/dryers are preset at the factory and do not require any 8 00 Fixed cycle with top off. For detailed programming. However, if you want to change the settings, follow description, see “General User Information.
- Page 29 ELECTRONIC CONTROL SETUP INSTRUCTIONS OPTIONS TO USE IF SPECIAL PRICING IS SELECTED 7.00 SPECIAL PRICE START HOUR (WASHER) NOTE: Uses military time – 24 hr. clock (DRYER): SPECIAL CYCLE PRICE (DRYER) 7.00 This is the start hour; 0-23 hours. Select START HOUR by pressing POWERWASH Represents the number of quarters (Coin 1) 3 06...
- Page 30 ELECTRONIC CONTROL SETUP INSTRUCTIONS C.20 VALUE OF COIN 2 (WASHER) L.00 PRICE SUPPRESSION OPTION (WASHER) PD MODELS: This represents the value of coin C.20 This option causes the customer display to 2 in number of nickles. 20 = $1.00. Increase show “ADD”...
- Page 31 ELECTRONIC CONTROL SETUP INSTRUCTIONS If cycle counter (9 0C) is selected, the following is true: Normal Cycle Settings allows the owner A3.02 1 00 Cycles in HUNDREDS. 1 02 = 200 to select the cycle default options of Water Temperature, Prewash, and Extra Rinse. 2 00 Cycles in ONES.
-
Page 32: Warranty
MAYTAG COMMERCIAL LAUNDRY LIMITED WARRANTY MLG22 ****** IF YOU NEED SERVICE: Contact your authorized Maytag Commercial Laundry distributor. To locate your authorized Maytag Commercial Laundry distributor, visit www.MaytagCommercialLaundry.com. For written correspondence: Maytag Commercial Laundry Service Department 2000 N M 63...
Need help?
Do you have a question about the MLG22PR and is the answer not in the manual?
Questions and answers