Epson ELPDC04 User Manual
High resolution document camera
Hide thumbs
Also See for ELPDC04:
- User manual (58 pages) ,
- Specifications (2 pages) ,
- Technical brief (7 pages)
Table of Contents
Advertisement
Quick Links
Advertisement
Table of Contents

Related Manuals for Epson ELPDC04


Summary of Contents for Epson ELPDC04
- Page 1 EPSON ® ELPDC04 High Resolution Document Camera User’ s Guide...
- Page 2 SEIKO EPSON CORPORATION. The information contained herein is designed only for use with this EPSON product. EPSON is not responsible for any use of this information as applied to other products.
-
Page 3: Table Of Contents
Contents Welcome ........1 Getting the Most from Your Document Camera . - Page 4 Adjusting the Image ....... 22 Using the Pointer ....... . . 23 Pausing the Main Display.
- Page 5 Notices ........43 Important Safety Instructions .
-
Page 6: Welcome
Welcome ® our versatile EPSON ELPDC04 High Resolution Document Camera can be connected to most types of projectors and display devices. From boardrooms to auditoriums, you can show fine detail with a large variety of presentation materials. Your document camera captures images at a resolution of 1024 ×... -
Page 7: Getting The Most From Your Document Camera
Getting the Most from Your Document Camera Depending on your presentation, you can take advantage of any or all of these options: Connecting to a projector or TV/computer monitor The document camera requires an output device, such as a projector or TV/computer monitor, to display its image. To connect the document camera to these devices, see page 11. -
Page 8: Getting More Information
EPSON PrivateLine get help fast. Call (800) 637-7661 and enter the PIN on the card included with your document camera. Or take advantage of EPSON’s electronic support services 24 hours a day. See page 38 for more information. - Page 9 Welcome...
-
Page 10: Setting Up The Document Camera
Setting Up the Document Camera his chapter explains how to set up the document camera for a video presentation. You’ll find instructions for: Unpacking the document camera Installing batteries in the remote control Positioning the document camera Unfolding the document camera Connecting to a projector or TV/computer monitor Connecting to a computer Connecting a mouse to the document camera... -
Page 11: Unpacking The Document Camera
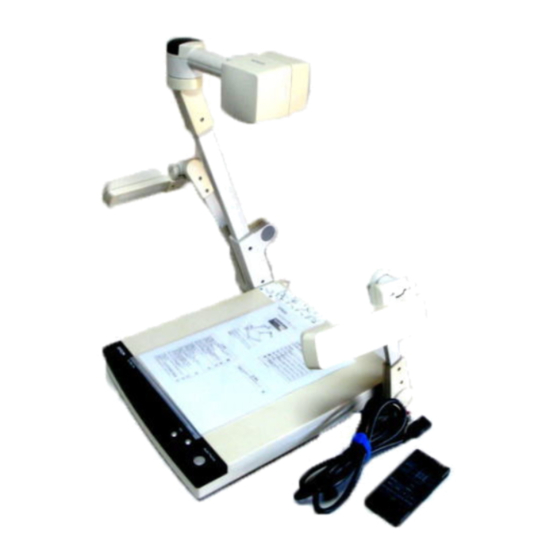
Unpacking the Document Camera After unpacking the document camera, make sure you have all the items shown below: document camera RGB video cable Save all the packaging in case you need to ship the document camera later. Always use the original packaging (or equivalent) when you need to send the document camera to another location. -
Page 12: Installing Batteries In The Remote Control
Installing Batteries in the Remote Control Before using the remote control, install its batteries. 1. Press down on the battery cover and slide it off. 2. Insert two AAA batteries as shown. 3. Replace the battery compartment cover. caution When replacing batteries, take the following precautions: Don’t mix old and new... -
Page 13: Positioning The Document Camera
Positioning the Document Camera Before connecting the document camera, you need to decide where to caution place it. Wherever you place it, be sure to follow these guidelines: Don’t hold or lift the document camera by the camera head arm or lighting unit arms;... -
Page 14: Unfolding The Document Camera
Unfolding the Document Camera Follow these steps to unfold the document camera: 1. Raise the camera arm until you hear a click, then lower it slightly until it locks into place. 2. Rotate the camera head so that the lens faces the stage (downward). - Page 15 4. Rotate the lighting units forward, as shown, until they stop. lighting unit lighting unit 5. Tilt the lighting arms outward until they stop; then position the lighting units so that they face the stage (downward). Setting Up the Document Camera...
-
Page 16: Connecting To A Projector Or Tv/Computer Monitor
You can connect the document camera to any projector or monitor that has a standard RGB video or composite video input port. EPSON projectors support both connections. Most computer monitors support only RGB video, while many television monitors support composite video. Follow the instructions below to connect the document camera to your output device with an RGB video cable or an RCA cable. -
Page 17: Connecting The Rca Cable
Connecting the RCA Cable Before you start, make sure your document camera and projector or TV are turned off. 1. Connect one end of the RCA cable to the document camera’s 2. Connect the other end of the RCA cable to the RCA input port Setting Up the Document Camera port. -
Page 18: Connecting To A Computer
Connecting to a Computer The document camera comes with one RGB video input port. This can be used to connect a laptop or desktop computer to the document camera. This is especially useful if your projector has only one input port. You can connect a computer to the document camera’s RGB input port as described below, and connect the document camera to the projector’s input port as described on page 11. -
Page 19: Connecting A Mouse To The Document Camera
Connecting a Mouse to the Document Camera The included mouse functions as a pointing device. It also gives you access to the document camera’s on-screen display, which controls many of the features that are selectable from the remote control. To connect the mouse, follow the instructions below. -
Page 20: Adjusting The Camera Dip Switches
0. To use control codes, set the switch to 1. Setting Up the Document Camera note For a list of control codes, go to http://support.epson.com. After selecting your product from the list, you can access technical information on controlling your document... - Page 21 Setting Up the Document Camera...
-
Page 22: Using The Document Camera
Using the Document Camera nce you have set up the document camera, you’re ready to turn it on, adjust the image, and give your presentation. This chapter covers the following: Turning on the document camera and other equipment Switching between picture sources Adjusting the lighting Adjusting the image Using the pointer... -
Page 23: Turning On Your Equipment
Turning On Your Equipment Make sure your document camera and other equipment are set up and connected correctly, as described in Chapter 1. Always turn on your projector or monitor first. Then turn on your document camera, as described below, followed by any other equipment you’ve connected to it. -
Page 24: What To Do If You See A Blank Screen
Once you see your image, turn to page 22 for instructions on making adjustments. If your image doesn’t appear, see the next section for help. When you’re done with your presentation, turn off the document camera as described on page 27. What To Do If You See a Blank Screen If an image doesn’t appear, try the following: Make sure the cables are connected correctly, as described on... -
Page 25: Switching Between Picture Sources
Switching Between Picture Sources If you have an external video source connected to the document camera, such as a laptop or desktop computer, you can switch between the video source and the camera. Press the button on the RGB1 remote control to switch the video source. Press the button to Main switch back to the camera. -
Page 26: Adjusting The Lighting
Adjusting the Lighting If you are presenting printed material or 3-D objects, the two upper lamps provide ample light. If the ambient lighting in the room is sufficient, however, you may obtain a better image with the upper lamps off. Press the button on the remote control to turn off the lamps Lamp... -
Page 27: Adjusting The Image
Adjusting the Image Once you see your image, you may need to make certain adjustments: Zooming and Focusing Your Image Use the the image, and use the camera will automatically focus the image. Your document camera is equipped with a double speed zoom feature. Press either button to zoom at a higher rate of speed. -
Page 28: Adjusting The Brightness
Adjusting the Brightness The document camera is initially set to auto iris. You can manually adjust the iris to control the amount of light that reaches the camera. If the screen looks dark, press the to open the iris so that more light reaches the camera. If the screen looks too bright, press the Close default setting, press the... -
Page 29: Pausing The Main Display
Pausing the Main Display note During a presentation, it may be necessary to change the material you The pause feature only works are displaying. Press the when the document camera is in the Main display mode. It This freezes the image on screen, allowing you to change your does not work then the material. - Page 30 Icon Name Auto Focus Zoom Tele/Wide Focus Near/Far Iris Open/Close Pointer White balance Automatic White balance Manual Aperture selection On/Off Gamma selection Save settings Restore defaults Function Automatically brings objects on the stage into focus. Zooms in or out. Manually focuses objects that do not work with the auto focus feature.
-
Page 31: Using The Camera Head As A Conventional Video Camera
Using the Camera Head as a Conventional Video Camera By rotating the camera head to a horizontal position, you can use the note document camera as a conventional video camera. To view walls or The camera’s shutter operates distant objects, flip down the close-up lens. The document camera can at 15 frames per second. -
Page 32: Turning Off And Storing The Document Camera
Turning Off and Storing the Document Camera When you’ve finished using the document camera, follow these steps to turn off and store it. If you’re using a monitor or projector, shut it down last. 1. Turn off the document camera. 2. - Page 33 5. Turn the lighting units toward the lighting arms until they stop; caution Be careful not to let the camera arm drop, or you may damage it. lighting unit lighting arm 6. Rotate the lighting units backward, as shown, until they stop. Using the Document Camera then tilt the lighting arms toward the stage (inward).
- Page 34 7. Lower the right lighting arm and rotate the camera head to its original position. 8. Raise the camera arm until you hear a click, then lower the arm until it stops. Using the Document Camera...
- Page 35 Using the Document Camera...
-
Page 36: Maintaining And Transporting The Document Camera
Maintaining and Transporting the Document Camera on a regular basis is keep the lenses and stage clean. Any dirt or smears warning Before you clean any part of on the lenses or stage may show up on your presented image. the document camera, turn it You should not replace the lamps or any other parts. -
Page 37: Cleaning The Lenses
Cleaning the Lenses Clean the lenses whenever you notice dirt or dust on the surface. Maintaining and Transporting the Document Camera Use a canister of compressed air to remove dust. To remove dirt or smears on the lenses, use lens-cleaning paper. If necessary, moisten a soft cloth with lens cleaner and gently wipe the lens surface. -
Page 38: Cleaning The Document Camera Case
Cleaning the Document Camera Case Before you clean the case, first turn off the document camera and unplug the power cord. To remove dirt or dust, wipe the case with a soft, dry, lint-free cloth. To remove stubborn dirt or stains, moisten a soft cloth with water and a neutral detergent. -
Page 39: Transporting The Document Camera
Transporting the Document Camera The document camera contains many glass and precision parts. If you note need to transport it, follow these guidelines to prevent damage to the EPSON shall not be liable document camera: for any damages incurred during transportation. -
Page 40: Solving Problems
Solving Problems his chapter helps you solve problems with your document camera, and tells you how to contact technical support for problems you can’t solve yourself. This chapter explains the following: Solving problems with the image Solving problems with the remote control Contacting technical support Solving Problems... -
Page 41: Solving Problems With The Image
Solving Problems with the Image No image appears on the screen. The image contains static or noise. The image is blurry. Solving Problems Check that all cables are properly connected (see Chapter 1) and everything is turned on. Make sure the projector or computer is not in sleep mode. Check the projector documentation, or try pressing a key on the computer keyboard. -
Page 42: Solving Problems With The Remote Control
The presentation material may be too close to the lens. Make sure the close-up lens is closed. The presentation material may be too far from the lens. Open the lens by flipping it down. Make sure there is no condensation on the lenses. You may need to wait before using the document camera after moving it from a cold environment to a warm environment. -
Page 43: Where To Get Help
Telephone Support Services To use the EPSON PrivateLine Support service, call (800) 637-7661 and enter the PIN on the EPSON PrivateLine Support card included with your document camera. This is the fastest way of speaking to a live representative, and it’s free. This service is available 6 Pacific Time, Monday through Friday, for the duration of your warranty period. -
Page 44: Technical Specifications
Technical Specifications General Resolution Lens Frame speed Shooting area Limit of focus adjustment Zoom Focus Iris White balance Gamma selection Frequency selection Video output Lighting Lamps 1/3 inch (848,676 progressive square pixels) 1024 × 768 pixels F=2.8, f=5.8 to 58 mm 15 frames per second 13.4 ×... -
Page 45: Remote Control
Remote Control Range Batteries Dimensions Weight Folded (h × w × d) Unfolded (h × w × d) Electrical Rated frequency Power supply Power consumption Environmental Temperature Humidity Technical Specifications 23 feet (7 m) Alkaline AAA (2) 14.3 lb (6.5 kg) 3.9 ×... -
Page 46: Safety
Safety United States FCC 47CFR Part 15B Class B (DoC) UL1950 3rd Edition Canada ICES-003 CSA C22.2 No.950-95 (cUL) Compatible Video Formats The document camera supports NTSC and PAL video standards, as well as the monitor display formats listed below. Mode Refresh Rate (Hz) VGA1... - Page 47 Mode SXGA—75 SXGA—85 UXGA—60 UXGA—65 UXGA—70 UXGA—75 UXGA—85 MAC 13 MAC 16 MAC 19 MAC 21 PC98 Technical Specifications Refresh Rate (Hz) Resolution × 75.025 1280 1024 × 85.024 1280 1024 × 1600 1200 × 1600 1200 × 1600 1200 ×...
-
Page 48: Notices
Notices his chapter includes safety instructions and other important information about your EPSON document camera. Important Safety Instructions Follow these safety instructions when setting up and using the document camera: Read Instructions – All the safety and operating instructions should be read before the appliance is operated. - Page 49 Notices Ventilation – Slots and openings in the cabinet are provided for ventilation and to ensure reliable operation of the product and to protect it from overheating, and these openings must not be blocked or covered. The openings should never be blocked by placing the product on a bed, sofa, rug, or other similar surface.
- Page 50 A product and cart combination should be moved with care. Quick stops, excessive force, and uneven surfaces may cause the product and cart combination to overturn. Object and Liquid Entry – Never push objects of any kind into this product through openings as they may touch dangerous voltage points or short-out parts that could result in a fire or electric shock.
-
Page 51: Remote Control Information
Remote Control Information You can operate the document camera by remote control via a line-of-sight infrared (IR) receiver at the front and rear of the document camera. The document camera may not respond to remote control commands under the following conditions: These conditions commonly cause problems for most infrared-controlled equipment. -
Page 52: Declaration Of Conformity
Declaration of Conformity According to 47CFR, Part 2 and 15 Class B Personal Computers and Peripherals; and/or CPU Boards and Power Supplies used with Class B Personal Computers EPSON AMERICA, INC. Located at: 3840 Kilroy Airport Way MS: 3-13 Long Beach, CA 90806-2469... -
Page 53: Fcc Compliance Statement
FCC Compliance Statement For United States Users This equipment has been tested and found to comply with the limits for a Class B digital device, pursuant to Part 15 of the FCC Rules. These limits are designed to provide reasonable protection against harmful interference in a residential installation. -
Page 54: Warranty
EPSON Dealer or EPSON Customer Care Center. Epson will, at its option, repair or replace on an exchange basis the defective unit, without charge for parts or labor. When warranty service involves the exchange of the product or of a part, the item replaced becomes EPSON property. - Page 55 To locate an Authorized EPSON Servicer nearest you, call the EPSON Connection at (562) 276-4394 in the U.S. and (905) 709-3839 in Canada or write to: Epson America, Inc., P. O. Box 93012, MS: 6-33, Long Beach, CA 90809-3012. Notices...
-
Page 56: Index
18 to 19 unfolding, 9 to 10 Electrical specifications, 40 Enlarging, image, 22 Environmental specifications, 40 EPSON technical support, 3, 38 Far button, 22 FCC compliance statement, 48 Focusing image, 22 Folding document camera, 27 to 29 Frame speed, 26, 39... - Page 57 Image brightness, 23 focusing, 22 resolution, 39 shooting area, 39 shooting speed, 26, 39 sources, selecting, 20 troubleshooting, 19, 36 to 37 white balance, 23, 25 zooming, 22 Image Mate Software, 26 Iris, adjusting, 23 Lamp selecting, 21 specifications, 39 Lens cleaning, 31 to 32 specifications, 39...
- Page 58 Transporting, 34 Troubleshooting image, 19, 36 to 37 remote control, 37, 46 Turning off document camera, 27 Turning on document camera, 18 to 19 Unfolding, document camera, 9 to 10 Unpacking, document camera, 6 Video camera, using camera as, 26 Video formats supported, 41 to 42 Warranty, 49 to 50 White balance, adjusting, 23, 25...
Need help?
Do you have a question about the ELPDC04 and is the answer not in the manual?
Questions and answers