Table of Contents
Advertisement
Quick Links
Safety information
Please read the safety instructions carefully before using the product for the first time and keep the
instructions for future reference.
1. This product is not a toy. Keep it out of reach of children.
2. Keep product out of the reach of children and pets to avoid chewing and swallowing.
3. Never use old and new batteries or different types of batteries together. Remove the batteries
when you are not using the system for a longer period of time. Check the polarity (+/-) of the
batteries when inserting them in the product. Wrong positioning can cause an explosion.
Batteries are not included.
4. Product operating and storage temperature is from 0 degree Celsius to 40 degree Celsius.
Under and over this temperature might affect the function.
5. Never open the product. Touching the inside electrics can cause electric shock. Repairs or
service should only be performed by qualified personnel.
6. Do not expose to heat, water, moisture, direct sunlight!
7. The unit is not waterproof. If water or foreign objects enter the unit, it may result in fire or electric
shock. If water or a foreign object enters the unit, stop use immediately.
8. Do not use non original accessories together with the product as this can make the product
functionality abnormal.
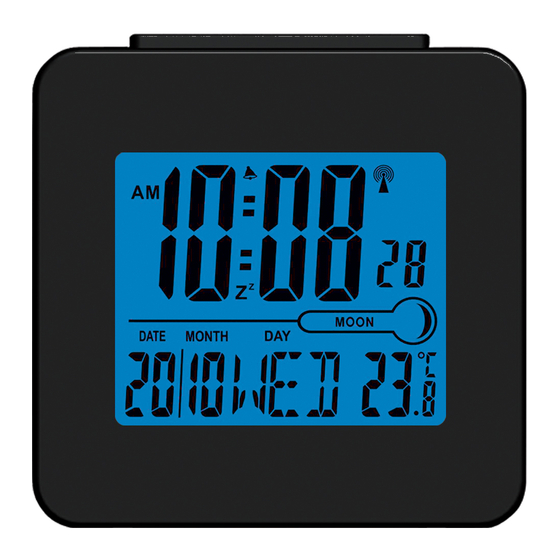
Start-up (radio controlled clock)
1.
Open the battery compartment and pull the batteries in it.
2.
When inserting the batteries, the clock will scan the DCF frequency signal ( ) flashes on the LCD
if the signal is OK).
3.
The clock manually scans the time signal by pressing wave for 2 seconds. For failed reception in 5
minutes, scanning stops.
4.
(
) turns on indicate signal received successfully.
Manual time setting
1. When the LCD display the TIME, hold "TIME" button for 2 seconds to enter clock/Calendar
setting.
2. Press "UP" or "DOWN" buttons to adjust the setting and press "TIME" button to confirm each
setting.
3. The setting sequence is shown as follow: 12/24H display, Hour, Minute, Year, Month, Date and
Language.
Adjust the Daily Alarm
1. Hold the "ALARM" button for 2 seconds to enter ALARM time setting. Press "UP" or "DOWN"
button to adjust the ALARM time.
2. Press "ALARM" button to switch ALARM on or off. If it is on.
Time Zone
DENVER REC-34 - QUICK START GUIDE
www.facebook.com/denver.eu
ENG - 1
Advertisement
Table of Contents

Related Manuals for Denver REC-34


Summary of Contents for Denver REC-34
- Page 1 DENVER REC-34 - QUICK START GUIDE www.facebook.com/denver.eu Safety information Please read the safety instructions carefully before using the product for the first time and keep the instructions for future reference. 1. This product is not a toy. Keep it out of reach of children.
- Page 2 Additional information is available at the technical department of your city. Hereby, Inter Sales A/S declares that the radio equipment type REC-34 is in compliance with Directive ENG - 2...
- Page 3 DK-8382 Hinnerup Denmark www.facebook.com/denver.eu If the user manual is not printed in your local language, then please enter our website to see if it is found online under the model you have. The website address is: www.denver-electronics.com ENG - 3...
Need help?
Do you have a question about the REC-34 and is the answer not in the manual?
Questions and answers