Table of Contents

Related Manuals for Koldfront KIM450BL


Summary of Contents for Koldfront KIM450BL
- Page 1 Built-in Ice Maker KIM450BL Owner’s Manual For more information on other great EdgeStar products on the web, go to http://www.edgestar.com To use the EdgeStar self-diagnostic tool, go to https://support.edgestar.com V2.4-04042019...
- Page 2 Important Safety Information Improper handling can cause serious damage to the EdgeStar ice maker and/or injury to the user. This ice maker is designed for domestic indoor use only. Do not use the unit for industrial or commercial use. Any other use may invalidate the warranty. Please review the ratings label located on the rear panel of the unit for electrical and other technical data related to this unit.
- Page 3 General Safety • To prevent back and other types of injuries, use at least two people to move and install the ice maker. • Install the ice maker in a well ventilated area where the ambient temperature is above 50° F and below 100°...
-
Page 4: Table Of Contents
Table of Contents IMPORTANT SAFETY INFORMATION..........II TABLE OF CONTENTS ..............IV INTRODUCTION ................1 PARTS IDENTIFICATION ..............2 ................... 2 ..................2 RONT INSTALLING THE ICE MAKER ............3 ..............3 NPACKING THE AKER ................ 3 YPES OF NSTALLATION Freestanding installation: .............. -
Page 5: Introduction
Introduction Thank you for purchasing this EdgeStar built in ice maker. We hope that this purchase will be the beginning of a lasting and rewarding relationship between you and EdgeStar. We will provide the customer support and exemplary products necessary to nurture that relationship. This manual contains important information regarding the proper installation, use and maintenance of your ice maker. -
Page 6: Parts Identification
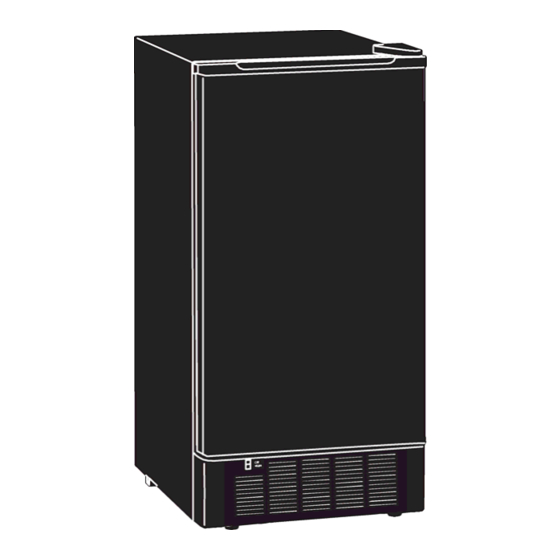
Parts Identification Front View Back View... -
Page 7: Installing The Ice Maker
Installing the Ice Maker Warning: Use two or more people to move and install the ice maker. Failure to do so can result in back or other injury. The ice maker should be installed by a licensed plumber in accordance with local electrical and plumbing code requirements. -
Page 8: Installation Clearance Requirements
Installation Clearance Requirements Note: This icemaker should be installed by a licensed plumber only. • To ensure proper service access and ventilation, allow more than 2” of clearance at the ” at the top and at the sides. The installation should allow the icemaker to be rear, and pulled forward for servicing if necessary. -
Page 9: Electrical Requirements
Electrical Requirements Electrical Shock Hazard • Plug into a grounded 3-prong outlet. • Never remove the grounding prong from the plug. • Never use an adapter. • Never use an extension cord. • Failure to follow these instructions can result in fire, electrical shock, or death Before you move your icemaker into its final location, it is important to make sure you have the proper electrical connection: A standard electrical supply (115 V, 60Hz.), properly grounded in accordance with the National... -
Page 10: Leveling The Ice Maker
Leveling the Ice Maker It is important for the icemaker to be leveled in order to work properly. It can be raised or lowered by rotating the four feet on the bottom of the machine. If you find that the surface is not level, rotate the feet until the ice maker becomes level. -
Page 11: Water Supply And Drain Connections
Water Supply and Drain Connections The water supply should be ready at the point of installation. The water supply pressure should be a minimum of 15 psi with a static pressure of no more than 80 psi. (A wall outlet directly behind the ice maker will make installation easier.) When you connect the water supply hose and drain hose, pay attention to the label on the back that indicates the location of the water inlet and water outlet. -
Page 12: Operation
Operation Final Check List before Operation 1. Have all packing materials and tape been removed from the interior and exterior of the ice maker? 2. Did you clean the ice storage bin? 3. Have the installation instructions been followed, including connecting the machine to water and electricity? Does the unit have proper drainage? 4. -
Page 13: How The Machine Makes Ice
How the Machine Makes Ice Turn the ICE/OFF/WASH switch to the ICE position. The machine will automatically start the ice making stage. There are two distinct cycles: freeze and harvest. During the freeze cycle, water flows across the evaporator surface to form the ice. In the harvest cycle, the ice is released. A complete cycle can take 15 to 40 minutes, depending on temperature and operating conditions. -
Page 14: Control Panel (Rear Of Unit)
Control Panel (rear of unit) 1. Ice Full (Red) LED: Ice Full indicator light. When this LED is lit, the ice storage bin is full of ice or there is something obstructing the ice slide. The unit will stop producing ice. When ice cubes are removed from the ice storage bin, clearing the ice slide, the red LED will keep flashing for 3 minutes. -
Page 15: Normal Sounds
Normal Sounds Your new icemaker may make sounds that are not familiar to you. Most of the new sounds are normal. Hard surfaces like the floor and walls can make the sounds seem louder than they actually are. The following describes the kinds of sounds that might be new to you and what may be making them. -
Page 16: What Should Be Kept Clean
What Should be Kept Clean? There are 5 things to keep clean: 1. The exterior 2. The ice bin and water trough 3. The condenser 4. The water distribution tube 5. The ice-making system Warning: Before proceeding with cleaning and maintenance operations, make sure the power line of the unit is disconnected and the water line is shut off. -
Page 17: Condenser Cleaning
Condenser Cleaning A dirty or clogged condenser prevents proper airflow, reduces ice making capacity, and causes higher than recommended operating temperatures that may lead to component failure. Have the condenser cleaned at least once every six months. 1. Unplug the ice maker or disconnect power. 2. -
Page 18: Ice-Making System Cleaning
Ice-making System Cleaning Caution: • Many ice machine cleaners contain acids. • DO NOT use or mix with any other solvent-based cleaner products. • Use rubber gloves to protect your hands. • Carefully read all safety instructions printed on the container of the ice machine cleaner. •... - Page 19 Issue Possible Cause Solution The machine won't The icemaker is unplugged. Plug the icemaker in. operate. The breaker is tripped. Reset the breaker. The icemaker power switch Switch the icemaker power switch to is OFF. ICE (ON). The ice storage bin is full of Take away some ice cubes and make ice.
-
Page 20: Specifications
Specifications Note: Technical data and performance information are provided for reference only. Description of product Built-in Ice Maker Model KIM450BL Voltage/Frequency AC 115V~60Hz Ice-Making / Ice-Harvest rated current 3.0A / 3.6A Color Black Ice Storage capacity 25 lbs. maximum Ice-making capability 50 lbs. -
Page 21: Edgestar Limited Warranty
EdgeStar Limited Warranty Full One-year Parts and Labor This product is warranted by EdgeStar and is subject to any conditions set forth as follows: WHAT IS COVERED: For a period of ONE (1) YEAR from the date of original retail purchase, EdgeStar will repair or replace any part free of charge including labor that fails due to a defect in materials or workmanship.
Need help?
Do you have a question about the KIM450BL and is the answer not in the manual?
Questions and answers