
Related Manuals for Casella Vortex 3


Summary of Contents for Casella Vortex 3
- Page 1 USER MANUAL High Flow Air Sampling Pump HB4101- 01 May 2021 Casella Regent House, Wolseley Road, Kempston, Bedford. MK42 7JY T:+44(0) 1234 844 100 F:+44(0) 1234 841 490 E: info@casellasolutions.com www.casellasolutions.com...
-
Page 2: Table Of Contents
Vortex3 Contents Safety and warnings................4 Disposal ....................4 Disclaimer ..................... 5 Introduction ..................6 Controls and fittings................7 Controls and menu structure ..............7 Sampling inlet..................9 Interlocking system ................10 Operation .................... 11 Turn the pump on/off ................11 Charge the pump battery ..............11 Setup before starting a run..............12 Start/stop a sampling run..............14 Lock and unlock the pump ..............14... - Page 3 Vortex3 Auto – run...................19 Warning and error messages .............. 19 Warnings ....................19 Errors ....................19 Airwave software for mobile devices ..........20 Bluetooth connection and security ............20 Dashboard view ...................20 Control panel..................21 Menu options ..................21 Saved runs & notes ................23 Technical specifications ..............25 Declarations ..................
-
Page 4: Safety And Warnings
• The Vortex3 pump contains no user serviceable parts. If a fault is suspected, return the pump to Casella or a Casella approved service centre. CAUTION If the equipment is likely to come into contact with aggressive substances, take precautions to prevent the instrument from being adversely affected, so that the type of protection is not compromised. -
Page 5: Disclaimer
Whilst every care is taken to ensure that the information in this manual is correct, Casella will assume no responsibility for loss, damage or injury caused by any errors in, or omissions... -
Page 6: Introduction
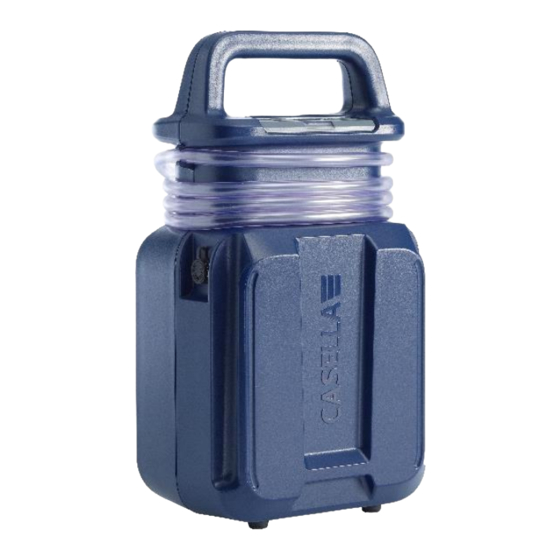
Vortex3 Introduction The Vortex3 is the latest generation of static, high flow rate sampling pumps, which can now be controlled and monitored from your mobile phone or tablet using the Airwave App and Bluetooth® 4.0 connectivity (Pro model only). On models without remote connectivity, all the running parameters are clearly displayed on the pump’s full colour OLED screen. -
Page 7: Controls And Fittings
Vortex3 Controls and fittings The Vortex3 has a small number of easy-to-use controls and a unique, patent pending interlocking mechanism that allows multiple units to be carried to site. Controls and menu structure Scroll up / increase Colour display Scroll down / decrease View all run parameters and menu items Start / stop / enter... - Page 8 Vortex3 This is the menu that you use on a regular basis to set the flow and calibrate the pump between sample runs. It also gives you the ability to pre-select a sample volume or perform a timed run (see Setup before starting a run on page 13).
-
Page 9: Sampling Inlet
Vortex3 Sampling inlet Tubing Clip Tubing Guide Connect the tubing to the blue inlet nozzle on the rear of pump. There is convenient stowage for a sampling head and tubing. Remove the sampling head (if already fitted) from its stowed position and unwind the tubing noting that there is a clip just below the handle and a guide to ‘manage’... -
Page 10: Interlocking System
Vortex3 Interlocking system The Vortex3 has a unique, patent-pending interlocking mechanism which enables a number of pumps to be connected together making them easier to carry and distribute around a site. Note: Only carry as many units as you feel comfortable with and if in any doubt, consult local manual handling guidance. -
Page 11: Operation
Vortex3 Operation This section describes how to use the pump to take air samples using the minimum of settings. The Vortex3 has many other menu and settings options and these are described in later chapters. Turn the pump on/off To turn on the pump: Press to turn on the pump. -
Page 12: Setup Before Starting A Run
Vortex3 To check the battery level: Turn on the pump as described. Check the battery level, which will show either a percentage when the pump is not running or number of hours remaining when the pump is running. Turn off the pump. To charge the pump battery: Ensure that the pump is either off or on and displaying START with the pump NOT running. - Page 13 Vortex3 Set the flow rate Navigate to SET FLOW, and then press Press to change the flow rate, and then press the enter key. Calibrate the pump Always calibrate the pump at the required sampling flow rate for greatest accuracy. Note: If using a filter with a small pore size or if operating at a high flow rate, which results in a high back pressure, it may take the pump a little longer to stabilise when adjusting the calibrated value.
-
Page 14: Start/Stop A Sampling Run
Vortex3 Start/stop a sampling run Ensure the pump is calibrated and set to the correct flow rate. If you want to start a timed sampling run, see page 16. To start a sampling run: Turn on the pump. Press for 3 seconds. The following screens should be visible. -
Page 15: Timed Run
Vortex3 Note: To remove partial lock when the pump is running, perform the partial lock procedure twice, the first time the pump will enter full lock mode the second time the pump will be unlocked. Full lock Full lock mode is denoted by a closed padlock icon and can only be set when the pump is running. -
Page 16: Settings
This section describes the settings you may wish, or need, to alter occasionally, and it describes how to access system information you may be asked for by a service technician . To access the SETTINGS menu: With the Casella screen visible, Press press &... -
Page 17: Time And Date
Vortex3 Time and date Set the date and time. Press to sequence through the numbers to be set. Contrast You may want to reduce the contrast for operation in low light conditions. Screen timeout Use a screen timeout if you want to save power. -
Page 18: Block Retry
Vortex3 Block retry When the inlet is blocked for more than 20 seconds the pump stops sampling. After 1 minute the pump tries to resume sampling. You can set the number of retries before the pump stops working. Info Use this setting to see the serial number and firmware version. -
Page 19: Auto - Run
Vortex3 Auto – run When set to ON the pump runs automatically when connected to the charger. This mode could be used when you want to run a static long term sample. Warning and error messages Warnings When turning the pump on, if the battery level is too low a warning message will be displayed. -
Page 20: Airwave Software For Mobile Devices
To install the Airwave software: On your mobile device go to the Play Store and search for Casella Airwave. Click the Casella Airwave selection to install the software. Bluetooth connection and security With Bluetooth® enabled, Airwave can connect to the Vortex3 whether it is stopped or in a sampling run. -
Page 21: Control Panel
Vortex3 Control panel On the dashboard, touch the device you want to control. A comprehensive set of measurement results similar to those shown on the right will be displayed. You may need to scroll up and down to view all the available data. On the control panel you can, start and stop a sampling run, applying a pause actually stops a run. - Page 22 Vortex3 Select run mode Use the options on this screen to select how a run will be ‘managed’ e.g. either manually start a new or continue a previous run or select a volume (see page 14) or timed (see page 16) run. Press Settings to review what volume or time has been pre-selected.
-
Page 23: Saved Runs & Notes
Vortex3 Settings Use this option to change Instrument Identification and/or the field names on the Send Results via eMail form (see page 22). About Use this option to see the version number of the Airwave software (bottom right of the screen). Saved runs &... - Page 24 Vortex3 Download stored runs Stored runs are downloaded to the Airwave app and touching brings up the options as shown below. Toucing an individual run also provides the “Copy Result to clipboard” and Create Email options. Notes Touching the screen brings up the QWERTY keyboard. Pressing return takes you back to the dashboard screen...
-
Page 25: Technical Specifications
Vortex3 Technical specifications Flow Performance Flow Range ml/min 5,000 to 12,000 Flow Control < ± 5% at calibrated point Fault Detector Detects blockages with a selectable number of automatic restarts up to 10 times Compliance ISO 13137 compliant Operating Display Colour OLED Controls 4 buttons... -
Page 26: Declarations
Bluegiga technologies. The Bluetooth® Qualified Design IDs for this module are: Bluetooth Controller QDID: B021015, Bluetooth Smart Software: QDID B018942 Copies of the modules regional approvals certificates may be obtained from Casella or Bluegiga. This product contains an FCC and Industry Canada certified Bluetooth® Low energy wireless... - Page 27 Vortex3 CE DECLARATION OF CONFORMITY Casella declares that this product is in compliance with the essential requirements and other relevant provisions of applicable EC directives. A copy of the EU Declaration of Conformity for this product may be obtained by clicking on the product compliance documentation link at www.casellasolutions.com.
-
Page 28: Frequently Asked Questions
Vortex3 Frequently asked questions What is the difference between the Standard and Pro models? We recognise that different users have different requirements we have created two models listed in the table below. If you want a basic version of the pump, i.e. without Bluetooth® connectivity the Vortex3 standard is the pump that you require but if you would like greater functionality including the ability to remotely view and control the pump then the Vortex3 Pro is the model to select. - Page 29 Vortex3 What is the flow control and why is that so important? During the sample run a number of factors can slow the pump, for example a loaded filter or reduced battery voltage, resulting in a reduced flow rate. If this happens the air volume measurement becomes inaccurate, affecting the accuracy of your re sults.
-
Page 30: Servicing, Maintenance, And Support
Servicing The Vortex3 pump contains no user serviceable parts and if a fault is suspected, return the pump to Casella using the RMA procedure or a Casella approved service centre. The warranty DOES NOT extend to cleaning of the instrument. -
Page 31: Support
Vortex3 battery gauge the Vortex3 should occasionally be cycled by running the pump until the Battery Low message is displayed to fully discharge the battery and then to fully charged. Signs of the battery gauge getting inaccurate are if when running the pump the battery screen displays an inaccurate life remaining time, on the diagnostics screen the battery capacity after a full charge is showing a much higher capacity than expected or when charging the Vortex3 it may also not get up to 100% charge shown on the display. -
Page 32: Part Numbers And Accessories
Vortex3 Part numbers and accessories Vortex3 models VORTEX3 Vortex3 Standard pump VORTEX3PRO Vortex3 Pro pump All pumps include a 1.8 m tube, Field Guide and Certificate of Conformity. Order mains charger (CF44) separately. Vortex3 accessories CM362 Rotameter 1-20l/ min Flow Meter P110004 Asbestos Head with Cowl CF44...
Need help?
Do you have a question about the Vortex 3 and is the answer not in the manual?
Questions and answers