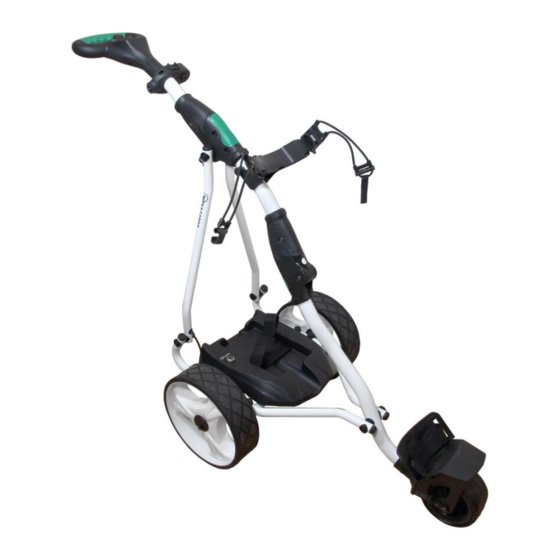
Summary of Contents for Nova Caddy P1D3
- Page 1 P1D3 Electric Golf Trolley Model: P1D3 User Manual Nova Caddy Golf Products www.novacaddy.com Tel: +1 905-209-9937...
-
Page 2: Table Of Contents
CONTENTS Page Packing List and Parts Glossary Assembly Instructions Operating Instructions Important Safety Instructions Electronic System General Maintenance Technical Specifications Trouble Shooting Frequently Asked Questions One-Year Limited Warranty... -
Page 3: Packing List And Parts Glossary
Congratulations on your purchase of the NovaCaddy P1D3 Electric Golf Trolley. The P1D3 Electric Golf Trolly is one of the lightest on the market, while keeping impressive power and plentiful battery life. To ensure operate the golf trolley properly, please read this instruction before using your P1D3. 1.Packing List and Parts Glossary Standard Parts •... - Page 4 Pic 1 Front Wheel T-Handle with LCD Upper Folding Hinge Lower Bag Support Motor/Gearbox Ass. Lower Bag Strap Rear Wheels 10. Middle Folding Hinge Battery Plug 11. Upper Bag Strap Battery Tray 12. Upper Bag Holder...
-
Page 5: Assembly Instructions
2. Assembly Instructions 1.Unpack all items carefully and check everything has been included. Some extras may be in small packages so do not throw anything away until all has been checked. 2. Place the frame structure (one piece) on soft and clean floor and ensure that you do not scratch the frame on a hard surface. - Page 6 Pic 5 Pic 6 Pic 7 Pic 8 Pic 9 5. Place battery pack on battery tray and fasten Velcro strap around battery tightly. Insert battery plug into caddy outlet. Pic 10 Pic 10 6. Install clamp style Accessories Station on frame and attach Scorecard Holder, Umbrella Holder to Accessories Station.
- Page 7 Pic 11 Pic 12 Pic 13 Pic 14 Pic 15...
-
Page 8: Operating Instructions
3. Operating Instructions 3.1. T-Handle Function Pic 14 3.1.1. Power ON/OFF. The Dual Function (Power/Stop-Go Combo button) controls the caddy’s power supply. Press and hold for 2-5 seconds in order to turn the caddy ON or OFF. LED Battery/Power indicator will lite up when power is ON. - Page 9 3.1.4. Stop-Go Button and Brake Function: One brief press Power/Stop-Go Combo button in order to Pause or Run the trolley. Select the speed to match your pace. The cart will remember its last setting when you stop, and travel at that speed automatically when you start again, except when you change the speed knob position.
- Page 10 3.3.3. USB Port: USB port is located at back of handle. Use cart battery to charge Cell Phone, GPS, USB speaker or any other USB device. 3.4. Test Caddy Test caddy power supply by press POWER button on handle. All power volume lights (Red, Yellow, Green) should come on and caddy should be operable by control panel on the handle.
- Page 11 occur or in direct sunshine. 3.5.1.3. In order to prolong the service life of the battery, AVOID full discharge. 3.5.1.4. DO NOT overcharge the battery. 3.5.1.5. Do not leave the battery on the charger for extended periods of time. 3.5.1.6. The red color battery’s pole stands for positive, and the black color for negative. In case of battery replacement please reconnect the poles of battery correctly.
- Page 12 3.5.2.8. Never expose or throw the Lithium battery into open fire. EXTREME FIRE HAZARD Recommendations: Similar to a mechanical device that wears out faster with heavy use, so also does the depth of discharge (DoD) determine the cycle count to Lithium battery. The shorter the discharge (low DoD), the longer the Lithium battery will last.
-
Page 13: Important Safety Instructions
The battery will take approximately 2-3 rounds and charging cycles before it reaches its full operating potential. During the first couple of rounds it might still be below its optimal power. Always keep your battery fully charged before another game. Never keep your battery connected to the grid during prolonged power outages. -
Page 14: Electronic System
5. Electronic Systems • Safety Protection: When the temperature of the controller box reaches its upper limit in case of an overload, it will automatically shut down to cool off. Give the caddy a short time to cool down, then you can run it again. You can still use free-wheeling mode to pull the cart and keep your game run. -
Page 15: Technical Specifications
• Inspect your cart at least once a year thoroughly, please contact our customer service if there are any problem. • Always disconnect the battery when you store the caddy, and always reassemble your caddy before reconnecting the battery. If you are not planning to play for at least a month, store the battery in a cool and dry place (not on concrete floor or metal surface) DO NEVER leave battery on charger. -
Page 16: Trouble Shooting
8. Trouble Shooting SYMPTOM ACTION Caddy does not have • Make Sure battery is plugged correctly onto cart plug power • Check battery charge level • Check all wiring connections and plugs • Depress and hold down power button for at least 5 seconds •... - Page 17 position. Question: The trolley stops by itself. A: Please check the battery charge. Also the controller box has a shut down function, if the battery is too low or the controller is overheating. Question: The caddy tracks to one side. •...
-
Page 18: One-Year Limited Warranty
10. One-Year Limited Warranty Your NovaCaddy product is warranted to be defects in materials and workmanship for one year after the date of purchase. In the event of a defect under this warranty, we will repair the product. This warranty does not cover damages caused by misuse, improper handling, installation, or maintenance provided by someone other that a NovaCaddy authorized service department.


Need help?
Do you have a question about the P1D3 and is the answer not in the manual?
Questions and answers