Table of Contents
Advertisement
Available languages
Available languages
Quick Links
KMM-D505DAB
DIGITAL MEDIA RECEIVER
Quick Start Guide
DIGITAL-MEDIA-RECEIVER
Schnellstartanleitung
RICEVITORE MULTIMEDIALE DIGITALE
Guida di avvio rapido
RÉCEPTEUR MULTIMÉDIA NUMÉRIQUE
Guide de démarrage rapide
DIGITALE MEDIAONTVANGER
Snelstartgids
RECEPTOR DE MEDIOS DIGITALES
Guía de inicio rápido
© 2019 JVCKENWOOD Corporation
For detailed operations and information, refer to the INSTRUCTION MANUAL on the following website:
Für detaillierte Bedienungen und Informationen siehe BEDIENUNGSANLEITUNG auf der folgenden Website:
Per le operazioni e le informazioni dettagliate, fare riferimento al ISTRUZIONI PER L'USO nel seguente sito web:
Pour les opérations et les informations détaillées, reportez-vous au MODE D'EMPLOI sur le site web suivant:
Raadpleeg de GEBRUIKSAANWIJZING op de volgende website voor gedetailleerde informatie over de
bediening:
Para obtener más información y detalles sobre las operaciones, consulte el MANUAL DE INSTRUCCIONES en el
siguiente sitio web:
<www.kenwood.com/cs/ce/>
ENGLISH
DEUTSCH
ITALIANO
FRANÇAIS
NEDERLANDS
ESPAÑOL
B5K-0695-00 [E]
Advertisement
Table of Contents

Related Manuals for Kenwood KMM-D505DAB


Summary of Contents for Kenwood KMM-D505DAB
- Page 1 ENGLISH DEUTSCH ITALIANO FRANÇAIS NEDERLANDS ESPAÑOL KMM-D505DAB DIGITAL MEDIA RECEIVER For detailed operations and information, refer to the INSTRUCTION MANUAL on the following website: Quick Start Guide Für detaillierte Bedienungen und Informationen siehe BEDIENUNGSANLEITUNG auf der folgenden Website: DIGITAL-MEDIA-RECEIVER Per le operazioni e le informazioni dettagliate, fare riferimento al ISTRUZIONI PER L’USO nel seguente sito web: Schnellstartanleitung Pour les opérations et les informations détaillées, reportez-vous au MODE D’EMPLOI sur le site web suivant:...
- Page 2 Information sur l’élimination des anciens équipements électriques et électroniques et piles électriques (applicable dans les pays qui ont adopté des systèmes de collecte sélective) Les produits et piles électriques sur lesquels le pictogramme (poubelle barrée) est apposé ne peuvent pas être éliminés comme ordures ménagères.
- Page 3 Déclaration de conformité se rapportant à la directive RE 2014/53/EU Déclaration de conformité se rapportant à la directive RoHS 2011/65/EU Fabricant: JVCKENWOOD Corporation Declaration of Conformity with regard to the RE Directive 2014/53/EU 3-12, Moriya-cho, Kanagawa-ku, Yokohama-shi, Kanagawa, 221-0022, JAPAN Declaration of Conformity with regard to the RoHS Directive 2011/65/EU Représentants dans l’UE: Manufacturer:...
- Page 4 S tem JVCKENWOOD izjavlja, da je radijska equipment “KMM-D505DAB” is in compliance with l΄apparecchio radio “KMM-D505DAB” è conforme že rádiové zařízení “KMM-D505DAB” splňuje oprema » KMM-D505DAB « v skladu z Direktivo Directive 2014/53/EU. alla Direttiva 2014/53/UE. podmínky směrnice 2014/53/EU. 2014/53/EU.
- Page 5 HRVATSKI / SRPSKI JEZIK Русский Käesolevaga JVCKENWOOD kinnitab, et JVCKENWOOD ovim izjavljuje da je radio oprema JVCKENWOOD настоящим заявляет, что „KMM-D505DAB“ raadiovarustus on vastavuses “KMM-D505DAB” u skladu s Direktivom радиооборудование «KMM-D505DAB» direktiiviga 2014/53/EL. 2014/53/EU. соответствует Директиве 2014/53/EU. ELi vastavusdeklaratsiooni terviktekst on Cjeloviti tekst deklaracije Europske unije o Полный...
-
Page 6: Basic Procedure
Installation/Connection Basic procedure Remove the key from the ignition switch, then disconnect the terminal of the car battery. This section is for the professional installer. Install the DAB antenna. See “Installing the DAB antenna (supplied)” For safety’s sake, leave wiring and mounting to professionals. Consult the on page 4. - Page 7 Blue/white: To the power control terminal when using the optional power DAB antenna jack amplifier or to the antenna control terminal in the vehicle c Brown: To connect the Kenwood navigation system, refer your navigation manual d Yellow: Battery wire...
- Page 8 Installing the DAB antenna (supplied) Part list (supplied) Connect the DAB antenna to the DAB antenna jack. (Page 3) (F) Film antenna (×1) (G) Amplifier unit (cable with booster, 3.5 m) (×1) (H) Cable clamper (×3) CAUTION (I) Cleaner (×1) • The film antenna (F) is exclusively for use inside the vehicle. •...
-
Page 9: Antenna Installation
Antenna installation CAUTION Remove the front pillar cover of your car. When installing the antenna cable inside the front pillar with the air bag installed Front pillar • The front pillar cover is secured with a special clip which may need to be replaced when it is removed. - Page 10 Rub the film antenna gently onto the Set the position of the protrusion of the Remove the film covering the earth sheet amplifier unit (G) with the K mark on the windscreen in the direction of the arrow and paste the earth sheet on the metal part shown to allow it to stick firmly.
-
Page 11: Before Use
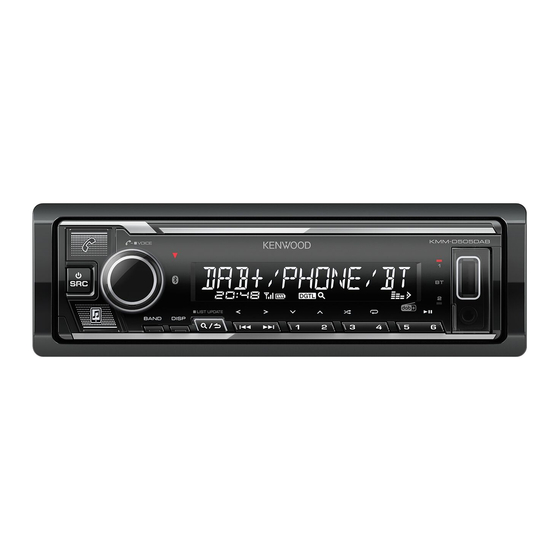
Before Use Basics (on the faceplate) IMPORTANT Volume knob Display window*1 USB input terminal • To ensure proper use, please read through this Guide before using this product. It is especially important that you read and observe Warnings and Cautions in this Guide. •... -
Page 12: Getting Started
Getting Started Set the other optional settings You can only set the following items while the unit is in STANDBY source. Set the clock and date Press B SRC repeatedly to enter STANDBY. Press the volume knob to enter [FUNCTION]. Press the volume knob to enter [FUNCTION]. -
Page 13: Digital Radio
Digital Radio Analog Radio About DAB (Digital Audio Broadcasting) Search for a station DAB is one of the digital radio broadcasting systems available today. It can Press B SRC repeatedly to select RADIO. deliver digital quality sound without any annoying interference or signal Press BAND repeatedly to select FM1/FM2/FM3/AM. -
Page 14: Start Playback
On the faceplate Play back/pause Press 6 IW. • Refer to the INSTRUCTION MANUAL on the following website for the detailed explanation of each item: <www.kenwood.com/cs/ce/> Reverse/Fast-forward Press and hold • The availability of each item vary depending on the model. - Page 15 Examples of some well-used settings Illumination Color Setting Subwoofer Level Setting You can set your preferred illumination color for each zone. Press the volume knob to enter [FUNCTION]. Turn the volume knob to select [AUDIO CONTROL], then press the knob. Turn the volume knob to select [SUBWOOFER SET], then press the knob.
-
Page 16: Other Information
• Signal conditions vary depending on the surroundings. For playback operations of AUX source, refer to the INSTRUCTION MANUAL Connect the microphone on the following website: <www.kenwood.com/cs/ce/> Connect the supplied microphone to the microphone input jack on the rear panel. Note for specifications... -
Page 17: Answer A Call
Once pairing is completed, Bluetooth connection is established automatically. • “BT1” and/or “BT2” indicator on the faceplate lights up. • “ ” indicator lights up to show the strength of the battery and signal of the connected device. Answer a call Press or the volume knob or one of the number buttons (1 to 6). - Page 18 Einbau/Anschluss Grundlegendes Verfahren Ziehen Sie den Schlüssel aus dem Zündschloss, und trennen Sie dann den -Klemme der Autobatterie ab. Dieser Abschnitt ist für den professionellen Einbautechniker gedacht. Installieren Sie die DAB-Antenne. Siehe “Installieren Sie die DAB-Antenne Überlassen Sie aus Sicherheitsgründen die Arbeiten zur Montage (mitgeliefert)”...
- Page 19 Blau/weiß: Bei Verwendung des optionalen Leistungsverstärkers entweder DAB-Antennenbuchse einen Anschluss an den Stromsteuerungsanschluss oder an den Antennensteuerungsanschluss des Fahrzeugs durchführen Braun: Beziehen Sie sich hinsichtlich des Anschlusses an das Kenwood- Navigationssystem auf die Bedienungsanleitung des betreffenden Geräts Sicherung (10 A) Antennenanschluss Gelb: Batteriekabel Rot: Zündkabel...
- Page 20 Installieren Sie die DAB-Antenne (mitgeliefert) Teileliste (mitgeliefert) Schließen Sie eine DAB-Antenne an die DAB-Antennenbuchse an. (Seite 3) (F) Folienantenne (×1) (G) Verstärkereinheit (Kabel mit Booster, 3,5 m) (×1) (H) Kabelklemme (×3) ACHTUNG (I) Reiniger (×1) • Die Folienantenne (F) ist ausschließlich zur Verwendung im Inneren des Fahrzeugs gedacht.
- Page 21 Antenneneinbau ACHTUNG Entfernen Sie die Frontsäulenabdeckung an Ihrem Fahrzeug. Beim Installieren des Antennenkabels im Inneren der Frontsäule bei eingebautem Airbag Frontsäule • Die Frontsäulenabdeckung wird mit einem speziellen Clip gesichert, der beim Ausbau möglicherweise ausgetauscht werden muss. Wenden Sie sich an Ihren Fahrzeughändler für Einzelheiten zum Entfernen der Clip Frontsäulenabdeckung und zur Bestellung...
- Page 22 Reiben Sie die Folienantenne vorsichtig auf Richten Sie die Position des Vorsprungs an der Entfernen Sie die Folie, die das Erdungsblatt Verstärkereinheit (G) mit der K-Markierung an der Windschutzscheibe in Pfeilrichtung, um abdeckt, und kleben Sie das Erdungsblatt auf sicheres Anhaften zu erzielen. der Folienantenne (F) aus und kleben auf.
-
Page 23: Vor Der Inbetriebnahme
Vor der Inbetriebnahme Grundlagen (auf der Frontblende) WICHTIG Lautstärke-Regler Displayfenster*1 USB-Eingangsterminal • Um richtige Verwendung sicherzustellen, lesen Sie die Anleitung vor der Verwendung des Produkts sorgfältig durch. Es ist besonders wichtig, dass Sie die Warnungen und Vorsichtshinweise in dieser Anleitung lesen und beachten. •... -
Page 24: Erste Schritte
Erste Schritte Festlegen anderer optionaler Einstellungen Sie können nur die folgenden Punkte einstellen, während die Einheit im STANDBY- Modus ist. Stellen Sie die Uhrzeit und das Datum ein Drücken Sie SRC wiederholt, um auf STANDBY zu schalten. Drücken Sie den Lautstärke-Regler, um auf [FUNCTION] zu schalten. - Page 25 Digitalradio Analogradio Wissenwertes über DAB (Digital Audio Broadcasting) Suche nach einem Sender DAB ist eines der heute verfügbaren digitalen Rundfunksendesysteme. Es kann Drücken Sie SRC wiederholt, um RADIO zu wählen. Klang in Digitalqualität ohne störende Interferenzen oder Signalverzerrung liefern. Drücken Sie BAND wiederholt, um FM1/FM2/FM3/AM zu wählen. Außerdem kann dieser Dienst Text, Bilder und Daten übermitteln.
- Page 26 Wiedergabe/Pause Drücken Sie 6 • Siehe BEDIENUNGSANLEITUNG auf der folgenden Seite für detaillierte Vorspulen/Rückspule Halten Sie gedrückt. Erklärungen jedes Elements: <www.kenwood.com/cs/ce/> • Die Verfügbarkeit jedes Elements ist nach dem Modell unterschiedlich. Auswählen einer Datei Drücken Sie [FUNCTION]-Menüelemente Auswählen eines Ordners Drücken Sie 2...
- Page 27 Beispiele einiger häufig verwendeter Einstellungen Einstellung der Beleuchtungsfarbe Subwoofer-Pegeleinstellung Sie können Ihre bevorzugte Beleuchtungsfarbe für jede Zone einstellen. [FUNCTION] Drücken Sie den Lautstärke-Regler, um auf zu schalten. Drehen Sie den Lautstärke-Regler zum Wählen von [AUDIO CONTROL] , und drücken Sie dann den Regler. Drehen Sie den Lautstärke-Regler zum Wählen von [SUBWOOFER SET] , und...
-
Page 28: Andere Informationen
Schließen das Mikrofon an Für Wiedergabebedienungen einer AUX-Quelle siehe BEDIENUNGSANLEITUNG Schließen Sie das mitgelieferte Mikrofon an der Mikrofon-Eingangsbuchse an der auf der folgenden Website: Rückseite an. <www.kenwood.com/cs/ce/> Sichern Sie das Kabel Hinweis zu technischen Daten Stellen Sie den mit Kabelklemmen... - Page 29 Wenn der Pairing-Vorgang ausgeführt ist, wird die Bluetooth-Verbindung automatisch hergestellt. • Die Anzeige “BT1” und/oder “BT2” auf der Frontblende leuchtet auf. • Die “ ”-Anzeige leuchtet auf, um die Stärke der Batterie und das Signal des angeschlossenen Geräts anzuzeigen. Nehmen Sie einen Ruf entgegen Drücken Sie oder den Lautstärke-Regler oder eine der Zifferntasten (1 bis 6).
-
Page 30: Installazione E Collegamenti
Installazione e collegamenti Procedura di base Sfilare la chiave di accensione e scollegare la presa della batteria del veicolo. Questa sezione è destinata agli installatori. Installare l’antenna DAB. Vedere la sezione “Installazione dell’antenna DAB Per motivi di sicurezza si raccomanda di affidare l’installazione e i collegamenti (in dotazione)”... - Page 31 Presa d’antenna DAB Blu/bianco: Alla presa di alimentazione in caso d’uso dell’amplificatore di potenza opzionale, oppure alla presa dell’antenna del veicolo Marrone: Per informazioni sul collegamento del sistema di navigazione Kenwood si prega di consultarne il manuale Fusibile (10 A) Presa d’antenna...
- Page 32 Installazione dell’antenna DAB (in dotazione) Elenco delle parti (in dotazione) Collegare l’antenna DAB all’apposita presa d’ingresso DAB. (Pagina 3) (F) Antenna a pellicola (×1) (G) Amplificatore (cavo da 3,5 m con booster) (×1) (H) Fermacavo (×3) ATTENZIONE (I) Salviettina detergente (×1) •...
-
Page 33: Installazione Dell'antenna
Installazione dell’antenna ATTENZIONE Rimuovere il coprimontante. Passaggio del cavo d’antenna nel montante del veicolo quando vi è installato l’airbag Montante anteriore • Il coprimontante è fissato in posizione con una speciale graffetta che potrebbe tuttavia essere necessario sostituire una volta rimossa. - Page 34 Strofinandola premere delicatamente l’antenna Allineare la sporgenza dell’amplificatore (G) al Rimuovere la pellicola protettiva dalla lamina di contrassegno K ubicato sull’antenna (F) e farlo contro il parabrezza nel senso della freccia in collegamento a massa e applicare quest’ultima modo che vi aderisca perfettamente. aderire al vetro.
-
Page 35: Prima Dell'uso
Prima dell’uso Fondamenti (frontalino) IMPORTANTE Manopola del volume Finestra del display*1 Presa d’ingresso USB • Prima di usare l’apparecchio, e per usarlo in modo corretto, si raccomanda di leggere a fondo questa Guida. È particolarmente importante leggere e osservare gli avvisi e le note di attenzione nella Guida. -
Page 36: Operazioni Preliminari
Operazioni preliminari Provvedere alle altre impostazioni opzionali Gli elementi che seguono possono essere impostati solo mentre l’apparecchio è nella modalità STANDBY. Impostare l’ora e la data Premere SRC ripetutamente per accedere al modo STANDBY. Premere la manopola del volume per accedere al modo [FUNCTION] Premere la manopola del volume per accedere al modo [FUNCTION]... -
Page 37: Radio Digitale
Radio digitale Radio analogica Informazioni sulla funzione DAB (Digital Audio Broadcasting) Ricercare una stazione Il DAB è uno dei sistemi di diffusione radio digitale oggi disponibili. Esso offre Premere quante volte necessario SRC sino a selezionare RADIO. un suono di qualità digitale esente da interferenze o distorsioni del segnale. Può Premere quante volte necessario BAND per selezionare la banda FM1, FM2, inoltre trasmettere testi, immagini e dati. -
Page 38: Impostazione Delle Funzioni
Riproduzione/pausa Premere 6 • Fare riferimento al ISTRUZIONI PER L’USO disponibile nel seguente sito web per la spiegazione dettagliata di ciascuna voce: <www.kenwood.com/cs/ce/> Avanzare o retrocedere Premere a lungo • La disponibilità di ciascuna voce varia a seconda del modello. - Page 39 Esempi di alcune impostazioni ben utilizzate Impostazione del colore d’illuminazione Impostazione del livello del subwoofer È possibile impostare il colore d’illuminazione preferito per ciascuna zona. [FUNCTION] Premere la manopola del volume per accedere al modo Ruotare la manopola del volume sino a selezionare [AUDIO CONTROL] quindi premerla.
-
Page 40: Altre Informazioni
Per istruzioni sulla riproduzione della sorgente AUX si prega di vedere il Collegare il microfono ISTRUZIONI PER L’USO da questo sito: Collegare il microfono in dotazione al jack di ingresso microfono sul pannello <www.kenwood.com/cs/ce/> posteriore. Nota per le specifiche Se necessario assicurare... -
Page 41: Rispondere A Una Chiamata
Al termine dell’accoppiamento la connessione Bluetooth si stabilisce automaticamente. • Sul frontalino s’illuminano gli indicatori “BT1” e/o “BT2”. • S’illumina l’indicatore “ ” per indicare lo stato di carica della batteria e la forza del segnale del dispositivo connesso. Rispondere a una chiamata Premere , la manopola del volume o uno dei tasti numerici (da 1 a 6). -
Page 42: Procédure De Base
Installation/Connexion Procédure de base Retirez la clé de contact, puis déconnectez la borne de la batterie de la voiture. Cette section est réservée aux installateurs professionnels. Installez l’antenne DAB. Reportez-vous à “Installation de l’antenne DAB Pour des raison de sécurité, laissez le travail de câblage et de montage des (fourni)”... - Page 43 Bleu/blanc: À la borne de commande d’alimentation lorsque vous utilisez Prise d’antenne DAB l’amplificateur de puissance en option, soit à la borne de commande d’antenne du véhicule Marron: Pour connecter au système de navigation Kenwood, reportez-vous à votre manuel de navigation Fusible (10 A) Borne de l’antenne Jaune: Câble de batterie...
- Page 44 Installation de l’antenne DAB (fourni) Liste de pièces (fourni) Connectez une antenne DAB à la prise d’antenne DAB. (Page 3) (F) Antenne film (×1) (G) Amplificateur (câble avec amplificateur, 3,5 m) (×1) (H) Serre-câble (×3) AVERTISSEMENT (I) Nettoyant (×1) • L’antenne film (F) doit uniquement être utilisée à l’intérieur du véhicule. •...
-
Page 45: Installation De L'antenne
Installation de l’antenne AVERTISSEMENT Retirez le couvercle du pilier avant de votre voiture. Lors de l’installation du câble d’antenne à l’intérieur du pilier avant avec un coussin de sécurité installé Pilier avant • Le couvercle du pilier avant est fixé avec une attache spéciale qui peut avoir besoin d’être remplacée lorsqu’elle est retirée. - Page 46 Frotter l’antenne film doucement sur le pare- Positionnez la protubérance de l’amplificateur Retirez le film recouvrant la feuille de masse (G) sur la marque K de l’antenne film (F) et brise dans la direction de la flèche pour qu’elle et collez la feuille de masse sur la partie colle fermement.
-
Page 47: Avant L'utilisation
Avant l’utilisation Fonctionnement de base (sur la façade) IMPORTANTES Bouton de volume Fenêtre d’affichage*1 Prise d’entrée USB • Pour utiliser correctement l’appareil, veuillez lire ce Guide complément avant de l’utiliser. Il est particulièrement important que vous lisiez et acceptiez les avertissements et les précautions de ce Guide. •... -
Page 48: Prise En Main
Prise en main Réglage des autres réglages optionnels Vous pouvez régler uniquement les éléments suivants quand l’appareil est sur la source STANDBY. Réglez l’horloge et la date Appuyez répétitivement sur SRC pour entrer en veille STANDBY. Appuyez sur le bouton de volume pour entrer [FUNCTION] Appuyez sur le bouton de volume pour entrer [FUNCTION]... -
Page 49: Radio Numérique
Radio Numérique Radio Analogique À propos du DAB (Digital Audio Broadcasting) Recherchez une station DAB est l’un des systèmes de radio numérique disponibles aujourd’hui. Il peut Appuyez répétitivement sur SRC pour sélectionner RADIO. offrir un son de qualité numérique sans toutes les interférences gênantes ni les Appuyez répétitivement sur BAND pour sélectionner FM1/FM2/FM3/AM. -
Page 50: Réglages Des Fonctions
Appuyez sur 6 • Reportez-vous au MODE D’EMPLOI sur les sites web suivant pour une Recherche rapide vers Maintenez enfoncée explication détaillée de chaque élément: <www.kenwood.com/cs/ce/> l’arrière/vers l’avant • La disponibilité de chaque élément varient en fonction du modèle. Sélectionnez un fichier... - Page 51 Exemples de certains réglages utilisés fréquemment Réglage de la couleur d’éclairage Réglage du niveau de caisson de grave Vous pouvez régler votre couleur d’éclairage préférée pour chaque zone. [FUNCTION] Appuyez sur le bouton de volume pour entrer Tournez le bouton de volume pour choisir [AUDIO CONTROL] , puis appuyez sur le bouton.
-
Page 52: Autres Informations
Pour les opérations de lecture de la source AUX, reportez-vous au MODE Connectez le microphone D’EMPLOI sur le site web suivant: Branchez le microphone fourni sur la prise d’entrée du microphone sur le panneau <www.kenwood.com/cs/ce/> arrière. Remarque pour les spécifications Plage de fréquences Bluetooth: Fixez si nécessaire en... -
Page 53: Répondre À Un Appel
Une fois le pairage terminé la connexion Bluetooth est établie automatiquement. • L’indicateur “BT1” et/ou “BT2” sur la façade s’allume. • L’indicateur “ ” s’allume pour montre la puissance de la batterie et du signal du périphérique connecté. Répondre à un appel Appuyez sur , sur le bouton de volume ou sur l’une des touches numériques (1 à... - Page 54 Installeren/Verbinden Basisprocedure Haal de sleutel uit het contactslot en ontkoppel vervolgens de aansluiting van de auto-accu. Dit gedeelte is voor de professionele installateur. Installeer de DAB-antenne. Zie “Installeren van de DAB-antenne Laat het monteren en verbinden voor de veiligheid door een vakman (bijgeleverd)”...
- Page 55 Lichtblauw/geel: Naar de stuur-afstandsbedieningsadapter DAB-antenne-aansluiting Blauw/wit: Naar de spanningsaansluiting wanneer u een los verkrijgbare eindversterker gebruikt, ofwel naar de antenne-aansluiting van de auto Bruin: Raadpleeg de navigatiehandleiding als u een Kenwood navigatiesysteem wilt aansluiten Zekering (10 A) Antenne-aansluiting Geel: Accukabel...
- Page 56 Installeren van de DAB-antenne (bijgeleverd) Onderdelenlijst (bijgeleverd) Verbind een DAB-antenne met de DAB-antenne-aansluiting. (Pagina 3) (F) Stripantenne (×1) (G) Versterkerunit (kabel met booster, 3,5 m) (×1) (H) Kabelklem (×3) VOORZORGEN (I) Reiniger (×1) • De stripantenne (F) is uitsluitend voor gebruik in de auto. •...
- Page 57 Installeren van antenne VOORZORGEN Verwijder de afdekking van de voorpilaar van de auto. Indien de antennekabel in de voorpilaar wordt geplaatst en een airbag is gemonteerd Voorpilaar • De afdekking van de voorpilaar is vastgezet met een speciale klem die u mogelijk na het verwijderen moet vervangen.
- Page 58 Wrijf voorzichtig over de stripantenne op het Plaats de positie van de uitsparing van de Verwijder de strook die het aardingsvel bedekt versterkerunit (G) op de K-markering op de voorruit in de richting van de aangegeven pijl en plak het vel op een metalen gedeelte van de zodat de antenne goed vast zit.
-
Page 59: Alvorens Gebruik
Alvorens gebruik Basispunten (op het voorpaneel) BELANGRIJK Volumeknop Displayvenster*1 USB-ingangsaansluiting • Lees alvorens dit product in gebruik te nemen deze handleiding door voor een juist gebruik. Het is vooral belangrijk dat u de Waarschuwingen en Voorzorgsmaatregelen in deze handleiding goed doorleest en opvolgt. •... - Page 60 Starten Stel de andere optionele instellingen in U kunt de volgende items alleen instellen terwijl het apparaat op STANDBY staat. Instellen van de klok en datum Druk herhaaldelijk op SRC om de STANDBY functie te activeren. Druk op de volumeknop om [FUNCTION] op te roepen.
- Page 61 Digitale Radio Analoge Radio Meer over DAB (Digital Audio Broadcasting) Opzoeken van een zender DAB is een van de hedendaagse beschikbare digitale radio-uitzendsystemen. DAB Druk herhaaldelijk op SRC om RADIO te kiezen. levert een digitale geluidskwaliteit, zonder interferentie en signaalvervorming. Druk herhaaldelijk op BAND om FM1/FM2/FM3/AM te kiezen.
- Page 62 Afspelen/pauzeren Druk op 6 • Raadpleeg de GEBRUIKSAANWIJZING op de volgende website voor een gedetailleerde uitleg over elk item: <www.kenwood.com/cs/ce/> Snel achterwaarts/Snel Houd even ingedrukt. • De beschikbaarheid van elk item varieert afhankelijk van het model.
- Page 63 Voorbeelden van enkele veelgebruikte instellingen Kleurinstelling van verlichting Subwooferniveau-instelling U kunt de verlichtingskleur van uw voorkeur instellen voor elke zone. [FUNCTION] Druk op de volumeknop om op te roepen. Draai de volumeknop om [AUDIO CONTROL] te kiezen en druk vervolgens op de knop.
-
Page 64: Andere Informatie
• De signaalcondities verschillen afhankelijk van de omgeving. Raadpleeg de GEBRUIKSAANWIJZING op de volgende website voor het afspelen Verbind de microfoon van AUX-bronnen: Sluit de bijgeleverde microfoon aan op de microfooningang op het achterpaneel. <www.kenwood.com/cs/ce/> Opmerking voor specificaties Zet indien nodig met Stel de Bluetooth-frequentiebereik:... - Page 65 Nadat het koppelen eenmaal is uitgevoerd, wordt de Bluetooth verbinding automatisch gemaakt. • De “BT1” en/of “BT2” indicator(s) licht(en) op het voorpaneel op. • “ ”-indicator gaat branden om het vermogen van de batterij en het verbonden apparaat te tonen. Beantwoorden van een gesprek Druk op , de volumeknop of op een van de cijfertoetsen (1 tot 6).
-
Page 66: Procedimiento Básico
Instalación/Conexión Procedimiento básico Quite la llave del interruptor de encendido; después, desconecte el terminal de la batería del automóvil. Esta sección es para los instaladores profesionales. Instale la antena DAB. Consulte “Instalación de la antena DAB Para fines de seguridad, deje que un profesional realice el cableado y el (suministrado)”... - Page 67 Azul/blanco: Al terminal de control de potencia, cuando utiliza el amplificador de potencia opcional, o al terminal de control de la antena en el vehículo Marrón: Para conectar el sistema de navegación Kenwood, consulte el manual de navegación Fusible (10 A) Terminal de la antena Amarillo: Cable de la batería...
- Page 68 Instalación de la antena DAB (suministrado) Lista de piezas (suministradas) Conecte una antena DAB a la toma de antena DAB. (Página 3) (F) Antena tipo película (×1) (G) Amplificador (cable con amplificador, 3,5 m) (×1) (H) Abrazadera para cables (×3) PRECAUCIÓN (I) Limpiador (×1) •...
-
Page 69: Instalación De La Antena
Instalación de la antena PRECAUCIÓN Retire la cubierta del montante delantero de su vehículo. Cuando pase el cable de la antena por el interior del montante delantero con el airbag instalado Montante delantero • La cubierta del montante delantero está fijada con una grapa especial que puede ser necesario sustituir si se la extrae. - Page 70 Frote suavemente la antena de película sobre Alinee la posición del saliente del amplificador Retire la película que cubre la hoja de conexión (G) con la marca K de la antena tipo película (F) el parabrisas en la dirección de la flecha para a tierra y pegue la hoja en la parte metálica del adherirla firmemente.
-
Page 71: Antes Del Uso
Antes del uso Puntos básicos (en la placa frontal) IMPORTANTE Rueda de volumen Ventanilla de visualización*1 Terminal de entrada USB • Antes de utilizar este producto y para asegurar su uso correcto, lea esta guía por completo. En especial, lea y observe las Advertencias y Precauciones incluidas en esta guía. -
Page 72: Procedimientos Iniciales
Procedimientos iniciales Configure los otros ajustes opcionales Los siguientes elementos se pueden configurar solamente mientras la unidad está en la fuente STANDBY. Ajuste del reloj y la fecha Pulse SRC repetidamente para ingresar a STANDBY. Pulse la rueda de volumen para ingresar en [FUNCTION] Pulse la rueda de volumen para ingresar en [FUNCTION]... - Page 73 Radio digital Radio analógica Acerca de DAB (Radiodifusión de audio digital) Búsqueda de una emisora DAB es unos de los sistemas de radiodifusión digital de radio disponibles en la Pulse SRC repetidamente para seleccionar RADIO. actualidad. Puede proporcionar sonido de calidad digital sin ninguna interferencia Pulse BAND repetidamente para seleccionar FM1/FM2/FM3/AM.
- Page 74 Reproducción/pausa Pulse 6 • Para obtener más detalles sobre cada una de las opciones, consulte el MANUAL DE INSTRUCCIONES en el siguiente sitio web: <www.kenwood.com/cs/ce/> Retroceder/avanzar Pulse y mantenga pulsado • La disponibilidad de cada opción varía según el modelo.
- Page 75 Ejemplos de algunos ajustes de uso frecuente Ajuste del color de iluminación Ajuste del nivel de subwoofer Puede ajustar el color de iluminación preferido para cada zona. [FUNCTION] Pulse la rueda de volumen para ingresar en Gire la rueda de volumen para seleccionar [AUDIO CONTROL] y, a continuación, pulse la rueda.
-
Page 76: Otras Informaciones
Con respecto a las operaciones de reproducción de la fuente AUX, consulte el Conecte el micrófono MANUAL DE INSTRUCCIONES en el siguiente sitio web: Conecte el micrófono suministrado a la toma de entrada de micrófono en el panel <www.kenwood.com/cs/ce/> trasero. Nota sobre las especificaciones Asegúrelo mediante... -
Page 77: Contestar Una Llamada
Cuando haya finalizado el emparejamiento, la conexión Bluetooth se establece automáticamente. • Las indicaciones “BT1” y/o “BT2” se iluminan en la placa frontal. • El indicador “ ” se enciende para mostrar la carga de la batería y la intensidad de la señal del dispositivo conectado. Contestar una llamada Pulse o la rueda de volumen o uno de los botones numéricos (1 a 6). - Page 80 • Microsoft and Windows Media are either registered trademarks or trademarks of Microsoft Corporation in the United States and/or other countries. • Android is a trademark of Google LLC. • The Bluetooth® word mark and logos are registered trademarks owned by Bluetooth SIG, Inc. and any use of such marks by JVCKENWOOD Corporation is under license.
Need help?
Do you have a question about the KMM-D505DAB and is the answer not in the manual?
Questions and answers