Manual This Marsh 
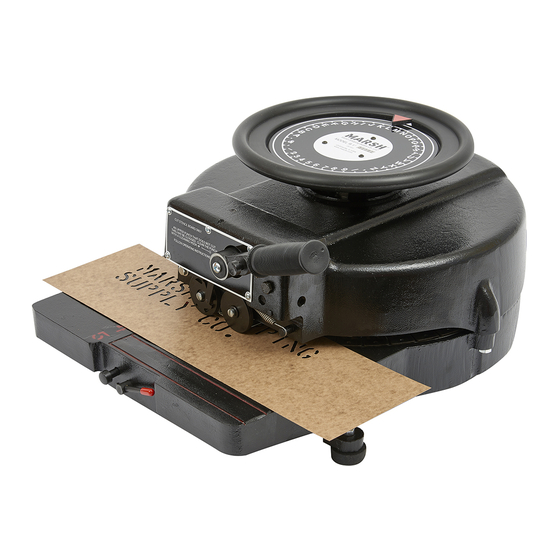
Hand Stencil Machine Owner’s Manual provides operation and maintenance instructions for all R, H, Q, and S models. These models include the R, R-5, R-5-SPAN-N, R-RUSSIAN, R-SPAN-N, H, H-POLY, H-RUSSIAN, H-SPAN-N, Q, Q-POLY, Q-SPAN-N, S, S- 5, S-5-SPAN-N, S-RUSSIAN and S-SPAN-N. Marsh manufactures stencil machines that cut 1/4"...
Installation Introduction Your stencil machine is fully assembled and packed safely in a shipping carton. No assembly is necessary after you unpack your machine. Choose a location for the machine that is solid and about 30" (762 mm) high. The front of the bench or shelf should extend about 1"...
Natural oil board, with a thickness of .015" (0.38 mm), is recommended for use with 1" (25.4 mm), 3/4" (19.05 mm), and 1/2" (12.7 mm) machines and for use with Marsh Fountain Roller, Fountain Brush or Spray Inks. Use Lightweight oil board .007" (0.18 mm) with 1/4"...
Page 6
Operation Cutting the Oilboard To cut and space characters follow the steps below and refer to Figure C. 1. Move the hand wheel and align the indicator with the desired character. 2. When the indicator is aligned, push the handle down. 3.
Maintenance Cleaning the Punches As you use your stencil machine, the punches may become clogged with oilboard particles. If these particles prevent the machine from cutting complete characters, the punches need to be cleaned. Follow the step below and refer to Figure D to clean the punches.
Page 8
The moving parts under the cover plate, the hood casting, and the base plate should be cleaned and greased with a light oil every one to two years. Marsh suggests using Dow Corning 1292 Long Life Bearing Grease. To clean and grease the parts under the cover plate, refer to the following steps and Figure E.
Follow the procedures outlined in the Operation and Maintenance sections of this manual to help prevent problems from occurring. For further assistance, please contact your Marsh distributor, or Marsh Company at: Telephone:...
Page 10
Troubleshooting Problem: The punches are not cutting completely through the oilboard. Possible Cause: Solution: 1. The punches are clogged with oilboard particles. 1. Clean the punches with the cleaning hook. See page 2. The punch depth adjustment may need to be 2.
Repair This section provides steps that guide you through the repair or replacement of certain parts. Cleaning the Treads on the Left Feed Wheel 1. Loosen the bolt on the left feed wheel. 2. Carefully push the spacing cam to the right and remove the left feed wheel. See Figure F.
Page 12
Repair Adjusting the Tracking on the Lower Feed Roller Assembly 1. Turn the machine upside down. 2. To raise the feeding of the oilboard above a guide line, turn the inside nut clockwise. See Figure G. 3. To lower the feeding of the oilboard below a guide line, turn the outside nut counterclockwise.
Page 13
Repair Adjusting the Punch Depth 1. Loosen the five screws on the front cover plate. 2. Remove the handle screw and washer and pull the cover plate and handle assembly away from the machine and place it to the side. 3.
Page 14
Repair Replacing a Punch and Die 1. Turn the machine upside down. 2. Locate the punch and die that needs to be replaced. 3. Loosen the two screws in the die and remove it. See Figure I. 4. Insert the screw driver through the holes in the die carrier and loosen the two screws in the punch and remove it.
Page 15
Repair Replacing the Lower Feed Roller Assembly 1. Turn the machine upside down. 2. Press the release button to unlock the lever. See Figure J. 3. Note the position of the set screw for proper reassembly and then loosen the set screw on the stud collar using an allen wrench.
Page 16
Repair 9. Place the stud collar about 1/16" (1.6 mm) from the base wall, but not so close that it rubs against the wall. 10. Insert the allen wrench in the set screw of the stud collar and pull the stud collar and spring to the right.
Parts List Liste des pièces de rechange Lista de repuestos Stencil Machine Assembly See page 40 for item descriptions and orders numbers. Ensemble de découpeuse de pochoirs Voir la page 44 pour la description et le numéro de chaque pièce. Ensamblaje de la máquina cortadora de estarcidos...
Page 18
Parts List Liste des pièces de rechange Lista de repuestos 25004/98337 Rev C...
Page 19
Parts List Liste des pièces de rechange Lista de repuestos Front Assembly See page 40 for item descriptions and orders numbers. Ensemble avant Voir la page 44 pour la description et le numéro de chaque pièce. Ensamblaje de la parte frontal Véase la página 48 para obtener las descripciones y el número pedido de las piezas.
Page 20
Parts List Liste des pièces de rechange Lista de repuestos 25004/98337 Rev C...
Page 21
Parts List Liste des pièces de rechange Lista de repuestos Base Assembly See page 42 for item descriptions and orders numbers. Ensemble base Voir la page 46 pour la description et le numéro de chaque pièce. Ensamblaje de la base Véase la página 50 para obtener las descripciones y el número pedido de las piezas.
Page 22
Parts List Liste des pièces de rechange Lista de repuestos 25004/98337 Rev C...
Page 23
Parts List Liste des pièces de rechange Lista de repuestos Carriage Assembly See page 43 for item descriptions and orders numbers. Ensemble de carrousel Voir la page 47 pour la description et le numéro de chaque pièce. Conjunto de transportación Véase la página 51 para obtener las descripciones y el número pedido de las piezas.
Page 24
Parts List Liste des pièces de rechange Lista de repuestos 25004/98337 Rev C...
Page 25
6. Screw,cap head hex RP04A 7. Wheel assy, hand RP07X 8. Hood (1/4", 1/2", 3/4") RP02-SHQ Hood (1") RP02-R 9. Carrier, punch (1/4", 1/2", 3/4") RP04-SHQ 10. Base, with shaft and plate 1/2" RP01X-H Base, with shaft and plate 3/4" RP01X-S Base, with center shaft 1"...
Page 26
22. Wheel assy, feed left (1/4") RP23LB-Q Wheel assy, feed left (1/2") RP23LB-H Wheel assy, feed left (3/4") RP23LB-S Wheel assy, feed left (1") RP23LB-R 23. Washer, sprag spring RP1611-AR 24. Nut RP47A 25. Washer, lock integral tooth RP47B 26. Stop, spacing RP44 27.
Page 29
La clientèle est priée d’indiquer ces références lors de toute commande de pièces de rechange. On voudra bien noter également la quantité de pièces par paquet et la référence de pièce spécifique au modèle de découpeuse concerné.
Page 30
22. Ensemble de roue d’alimentation gauche (6,35 mm) RP23LB-Q Ensemble de roue d’alimentation gauche (12,7 mm) RP23LB-H Ensemble de roue d’alimentation gauche (19,05 mm)RP23LB-S Ensemble de roue d’alimentation gauche (25,4 mm) RP23LB-R 23. Rondelle d’arrêt à ressort RP1611-AR 24. Ecrou RP47A 25.
Page 31
RP77 7. Rondelle RP1503C 8. Boulon à tête hexagonale RP1503B 9. Vis à tête ronde fendue RP15G 10. Barre de réglage RP15C 11. Pièce d’écartement RP15D 12. Ensemble des rouleaux d’alimentation inférieurs RP15 13. Rondelle de blocage à denture interne RP38B 14.
Liste des pièces de rechange Ensemble base, voir page 37 (suite) Description Référence de pièce Quantité par kit 31. Plaque, table (6,35 mm) RP01PL-Q Plaque, table (12,7 mm) RP01PL-H Plaque, table (19,05 mm) RP01PL-S 32. Vis cruciforme à tête plate...
6. Tornillo, de cabeza hexagonal RP04A 7. Conjunto de la rueda manual RP07X 8. Cubierta (1/4", 1/2", 3/4") RP02-SHQ Cubierta (1") RP02-R 9. Transportador, punzonador (1/4", 1/2", 3/4") RP04-SHQ 10. Base, con eje y placa 1/2" RP01X-H Base, con eje y placa 3/4" RP01X-S Base, con eje central 1"...
Page 34
Descripción Número de pieza Cantidad por juego 11. Conjunto del brazo de centralización RP30X-SHQ (1/4", 1/2", 3/4") Conjunto del brazo de centralización (1") RP30X-R 12. Arandela RP35W 13. Tornillo, de cabeza hexagonal RP09A 14. Resorte, de la manivela RP37S 15. Oscilador, del conjunto de centralización RP28 16.
Page 35
45. Tuerca, hexagonal de seguridad RP47A 46. Arandela, de seguridad con diente de integración RP47B 47. Tornillo, prisionero (1/4", 1/2", 3/4") RP48-SHQ Tornillo, prisionero (1") RP48-R 48. Palanca con empuñadura de 7/8" sin collarín RP27944 Ensamblaje de la base, veáse la página 37 Descripción Número de pieza...
Page 36
30. Base con eje y placa (1/4") RP01X-Q Base con eje y placa (1/2") RP01X-H Base con eje y placa (3/4") RP01X-S Base con eje central (1") RP01X-R 31. Placa de apoyo (1/4") RP01PL-Q Placa de apoyo (1/2") RP01PL-H Placa de apoyo (3/4") RP01PL-S 32.
Page 37
Index Adjusting Slanted characters tracking on lower feed rollers Spacing of characters adjusting the punch depth Stencil board inserting stencil board Cleaning selecting stencil board the punches the treads on the left feed wheel crooked characters Table of contents Cutting the oil board Treads, cleaning Troubleshooting Hand stencil machines, varieties...
Page 38
Caractères inclinés Réglage avance de l’ensemble des rouleaux d’alimentation Carton huilé inférieurs avance du carton dans la découpeuse réglage de la verticale des emporte-pièce choix du carton huilé insertion du carton huilé Remplacement : de l’ensemble des rouleaux d’alimentation inférieurs Découpage du carton huilé...
Page 39
Indice Ajuste Partes de Repuesto, Lista de del arrastre en los rodillos de avance inferiores 22 Punzonador y matriz de la profundidad de los punzonadores limpieza de sustitución de profundidad del punzonador Bandas de rodamiento, limpieza de las profundidad del punzonador, ajuste de la Reparación Caracteres torcidos Cortado de los caracteres sobre la...