
Subscribe to Our Youtube Channel
Related Manuals for Smeg SOU130S1


Summary of Contents for Smeg SOU130S1
- Page 1 ELECTRONIC OVENS USE & CARE MANUAL FOURS ELECTRONIQUES GUIDE D’UTILISATION ET D’ENTRETIEN HORNOS ELECTRÓNICOS MANUAL DE USO & MANTENIMIENTO...
-
Page 3: Table Of Contents
TABLE OF CONTENTS PAGE TABLE OF CONTENTS PAGE 1 - Safety Precautions 13 - Time Oven Mode Operation Cooking Time 2 - Safety Instructions Stop Time Safety for the Oven Safety for the Self-Cleaning Oven 14 - Setting the Meat Probe 3 - Cooking with the Convection Oven 15 - Understanding the Various Oven Modes Advantages of Convection Cooking... -
Page 4: Safety Precautions
1 - Safety Precautions IMPORTANT INSTRUCTION Please read all instructions before using this appliance. WARNING CAUTION When properly cared for, your new oven has been designed to be a safe, reliable appliance. Read all instructions carefully Do not store items of interest to children above the oven. before using this oven. -
Page 5: Safety Instructions
2 - Safety Instructions Safety for the Oven Safety for the Self-Cleaning Oven • Confirm that the door locks and will not open once both • Tie long hair so that it doesn’t hang loose. selectors are in CLEAN position and the door lock icon •... -
Page 6: Cooking With The Convection Oven
3 - Cooking with the Convection Oven Advantages of Convection Cooking In a conventional oven, the heat sources cycle on and off to • Even baking, browning and crisping are achieved. maintain an average temperature in the oven cavity. • During roasting, juices and flavors are sealed in while the As the temperature gradually rises and falls, gentle air currents exterior is crisp. -
Page 7: Getting To Know Your Oven
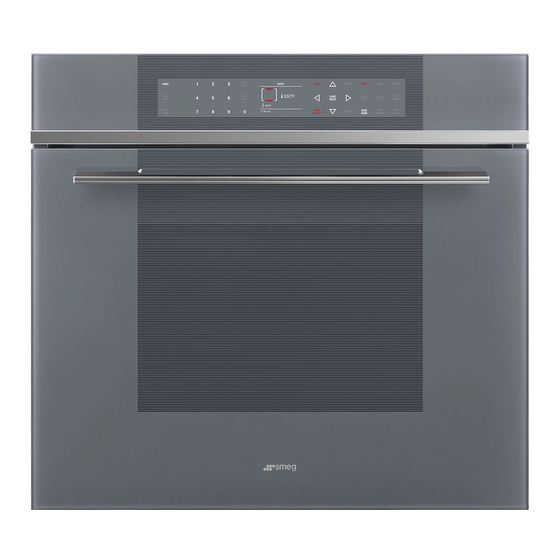
4 - Getting to know your Oven The illustration shows the double oven which also represents the single oven. FEATURES I - L I - L Control panel Grill element Cooling vents Door seal Meat probe Compartment lights Data labels Lower element (not shown) Convection fan and Circular Element (not shown) I - L... -
Page 8: Cooling Fan
4 - Getting to know your Oven Cooling Fan Oven air intakes and vents The oven air intake is located in the bottom part of the door, The cooling system starts operating automatically in all cooking while the hot air vent is located above the door itself. Hot air is modes when the temperature at oven centre reaches approx. -
Page 9: The Control Panels
5 - The Control Panels Your appliance could vary slightly with respect to the illustrations. Numerical Keypad Display Screen Cooking Mode Menu CONTROL PANEL – SINGLE OVEN LOCK FRIDAY 11/20/2015 TIMER LIGHT RECIPES BAKE BROIL CONVECT KEYS CLASSIC KEEP LOCK COOK 04:26 START... -
Page 10: Oven Modes
6 - Oven Modes The following illustrations give an overview of what happens in the oven with each mode setting. The arrows represent the location of the heat sources during specific modes. The lower element is concealed under the oven floor. CAVITY STYLES Thermal Cavity Convection Cavity... -
Page 11: General Oven Information
7 - General Oven Information Power Failure After the power returns to the oven, the door lock mechanism Before using your oven for the first time remove all packing and perform a test run then the clock time and date are displayed . foreign materials from the oven(s). -
Page 12: General Oven Tips
8 - General Oven Tips Preheating the Oven 120/240 vs. 120/208 Volt Connection • Preheat the oven when using the Bake, Convection Bake and • Most oven installations will have a 120/240 voltage Convection Roast modes. connection. • Use Fast Preheat mode when a shorter time is desired to •... -
Page 13: Oven Telescopic Racks
8 - General Oven Tips To remove extendable rack from the oven: 1. Lift of rack slightly and push it towards the back of the oven 2. Lift rack up at front and then remove it until the stop releases. To replace an oven rack: 1. -
Page 14: Getting Started
9 - Getting Started Instructions for initial switch-on Once the oven has been connected to the power supply for the first time, the control automatically prepares for setting a number of user settings, which remain stored in case of any subsequent switch-on. -
Page 15: User Settings
10 - User Settings Temperature & Weight With the oven on, press the key to access the setting Press the arrow key to select one of the two SETTING menu. This menu permits personalizing the settings of your temperature options “°C/°F” or weight options Kg/ib and oven. -
Page 16: Date
10 - User Settings Date Brightenss Press the arrow key to select the date format from among Press the arrow key to choose which luminosity setting the options “D.M.Y. – Y.M.D. – M.D.Y.” and confirm with the to change between ON or STAND-BY, then by means of the key. -
Page 17: System Setting
11 - System setting Main Voltage With the oven on, press the key to access the SYSTEM The purpose of this option is to set the type of appliance power menu. This menu permits setting of parameters or special supply during installation. Press the keys to select 240V functions. -
Page 18: Starting Your Oven
12 - Starting your Oven Switching the oven on and off Selecting the cooking mode IMPORTANT IMPORTANT • Do not leave the door open for a long time during cooking. • The key does not stop the function. START/PAUSE • The door must be kept closed during the functions. -
Page 19: Changing Temperature
12 - Starting your Oven Changing temperature 1. From the cooking mode preview display page, the IMPORTANT temperature can be changed by means of the numerical keypad or the arrows , subsequently confirming by means of the key. START • The function operates at levels. -
Page 20: Pre-Heating Phase
12 - Starting your Oven Pre-heating phase While the oven is in pre-heating phase, the instantaneous temperature is displayed underneath the cooking mode icon. 3. Press the key again to run the function. Just as soon as the set temperature is reached, an acoustic START The display page shows the icon of the active functions signal is heard and the instantaneous temperature indication... -
Page 21: Time Oven Mode Operation
13 - Time Oven Mode Operation • In double oven models, both ovens can be set independently 5 After cooking, the oven switches off and an acoustic signal to operate a timed mode. warns that cooking has terminated. • Be sure that the time-of-day clock is displaying the correct To change the cooking time when the oven is already operating, time. -
Page 22: Setting The Meat Probe
14 - Setting the Meat Probe When roasts, steaks or poultry are being cooked, this is the best way to tell when the food is correctly cooked. This oven is optionally provided with the meat probe feature to sense the temperature inside meat and stop cooking as soon as the set value is reached. -
Page 23: Understanding The Various Oven Modes
15 - Understanding the Various Oven Modes Roast Tips and Techniques True Convection Tips and Techniques Roasting is cooking with heated air. Both upper and lower Reduce recipe baking temperatures by 25°F (15°C). elements in the oven are used to heat the air but no fan is used •... -
Page 24: Convection Roast Tips And Techniques
15 - Understanding the Various Oven Modes Convection Roast Tips and Techniques • Do not preheat for Convection Roast. RACK POSITION • Roast in a low-sided, uncovered pan. • When roasting whole chickens or turkey, tuck wings behind back and loosely tie legs with kitchen string. •... -
Page 25: Broil Tips And Techniques
15 - Understanding the Various Oven Modes Broil Tips and Techniques • Place rack in the required position needed before turning on the oven. • Use Broil mode with the oven door closed. • Preheat oven for 5 minutes before use. •... -
Page 26: Dehydrate Tips And Techniques
15 - Understanding the Various Oven Modes Dehydrate Tips and Techniques • Dehydrating can be done using the Dehydrate mode. A lower temperature is used and the circulating heated air slowly removes the moisture for food preservation. • The Dehydrate mode temperature is pre-programmed at 140ºF (60ºC). •... -
Page 27: Recipes
16 - Recipes The Recipe function of your oven gives you the chance to cook food without having to set the oven manually every time. By selecting a recipe; the cooking mode, the temperature and the time are automatically set according to the recipe selected from the menu. Recipe List Type of Food Food condition... - Page 28 16 - Recipes Saving a personalized recipe: Once a recipe has been selected, the “Time” and “Weight” NOTE setting can be changed and the recipe can be saved among the “SAVED” ones. If the time and weight values are changed and not saved 1.
-
Page 29: Classic Pizza (On Some Models)
17 - Classic Pizza (On Some Models) was specifically designed so you can bake perfect in just a few minutes. CLASSIC PIZZA PIZZA For perfect results, press the key to access this special recipe. After you make your settings, Classic Pizza recipes will CLASSIC PIZZA do the rest, reaching about 590°F (310°C) by turning on the heating elements at 100% of their capacity. -
Page 30: Tips For A Good Pizza
17 - Classic Pizza (On Some Models) Tips For A Good Pizza: • Given the high temperatures and short baking time, we recommend that you insert and remove the pizzas quickly so that the door is open for as short a time as possible and the temperature doesn’t drop. •... -
Page 31: Sabbath Mode Instructions (On Some Models)
18 - Sabbath Mode Instructions (On Some Models) The Sabbath Mode function of your oven complied with Jewish laws. This function allows the oven to perform only the static function. In the case of the double oven, this function can be enabled in both compartments at the same time. -
Page 32: Oven Care And Cleaning
19 - Oven Care and Cleaning Self-Cleaning the Oven Preparing the Oven for Self-Clean This oven features a pyrolytic self-cleaning function that 1. Remove all utensils and bake ware. eliminates the difficult and time consuming manual scrubbing 2. Remove non-porcelain oven racks. If chromed racks are left of the oven interior. -
Page 33: Setting The Self Cleaning Mode
20 - Setting The Self Cleaning Mode To Set the Self-Clean Mode To Delay the Start of Cleaning 1. Follow steps 1 through 3 above. 1. Press the ON/OFF key (select the compartment to be cleaned in case of double oven). 2. -
Page 34: General Oven Care
21 - General Oven Care How to Use the Oven Cleaning Chart 1. Locate the number of the part to be cleaned in the illustration on this page. 2. Find the part name in the chart. • Use the cleaning method in the left column if the oven is black or white. •... -
Page 35: Oven Finishes / Cleaning Methods
22 - Oven Finishes / Cleaning Methods The entire oven can be safely cleaned with a soapy sponge, rinsed and dried. If stubborn soil remains, follow the recommended cleaning methods below. • Always use the mildest cleaner that will do the job. •... -
Page 36: Do-It-Yourself Maintenance Oven Door Removal
23 - Do-it-Yourself Maintenance Oven Door Removal ATTENTION • Make sure oven is cool and power to the oven has been turned off before removing the door. Failure to do so could result in electrical shock or burns. • The oven door is substantial. Use both hands to remove the oven door. The door front is glass of which there are 4 panes. •... -
Page 37: Replacing An Oven Light
24 - Replacing an Oven Light • Each oven is equipped with three halogen lights (per cavity) OVEN LIGHT located in the lateral walls of the oven. • The lights are switched on when the door is opened or when the oven is in a cooking cycle. -
Page 38: Solving Baking Problems
25 - Solving Baking Problems With either Bake or Convection Bake, poor results can occur for many reasons other than a malfunction of the oven. Check the chart below for causes of the most common problems. Since the size, shape and material of baking utensils directly affect the baking results, the best solution may be to replace old baking utensils that have darkened and warped with age and use. -
Page 39: Solving Operational Problems
26 - Solving Operational Problems Before contacting service, check the following to avoid unnecessary service charges. Oven Problem Problem Solving Steps Error F1030* or F2030* appears A problem with latch mechanism occurred. Remove power and turn it back on again after in the display window. - Page 41 DOC COD. 09X9410 - 06-20...
Need help?
Do you have a question about the SOU130S1 and is the answer not in the manual?
Questions and answers