Advertisement
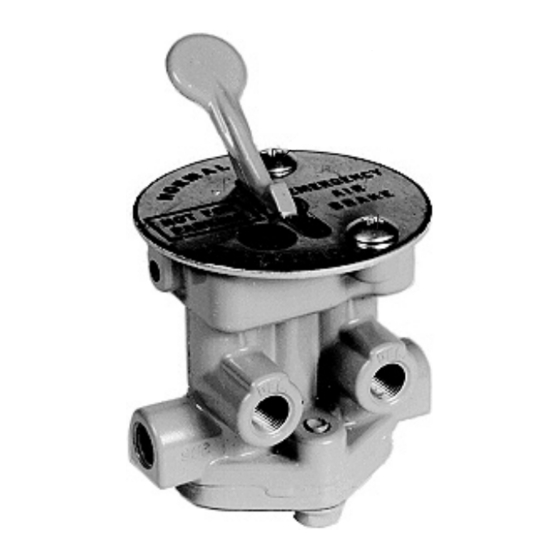
BENDIX
TW-2
, TH-3
®
™
Lever Positioner
Pin
Spring
Body
Cap Screws
Figure 1
Kit Contents
Item No.
2*
Inlet Plate O-Ring
2*
Inlet Plate O-Ring
3
Valve Spring
4
Valve
5
Plunger Spring
6
Plunger O-Ring
7
Tube of Lubricant
Figure 1 – Bendix
TW-2
®
AND PE-4
CONTROL VALVES MAINTENANCE KIT
™
™
Lever/Cam
Plunger
(x2)
6
5
4
3
2
Inlet Plate
Lock Washer
Description
Qty.
1
2
2
2
2
2
1
, TH-3
and PE-4
Control Valves Maintenance Kit
™
™
™
Screw
Position
1
Figure 2
*NOTE: Some valves (TW-2, TH-3
and PE-4) use a single large inlet
plate o-ring and some models use
two smaller o-rings.
Position
2
Position
3
Figure 3
7
1
Advertisement
Table of Contents

Related Manuals for BENDIX TW-2


Summary of Contents for BENDIX TW-2
- Page 1 Body Figure 3 Inlet Plate Cap Screws Lock Washer Figure 1 Figure 2 *NOTE: Some valves (TW-2, TH-3 Kit Contents and PE-4) use a single large inlet Item No. Description Qty. plate o-ring and some models use two smaller o-rings.
- Page 2 Bendix ® ® ® ™ any vehicle maintenance where one or more dryer reservoir module, or a Bendix AD-9si ® ® wheels on a drive axle are lifted off the ground dryer, be sure to drain the purge reservoir.
- Page 3 REMOVAL 3. Install the inlet plate and secure with cap screws and washer. Torque to 50-180 in-lbs. 1. With the vehicle on a level surface, park the vehicle 4. Install the o-ring (6) on the plungers. by means other than the air brakes and drain all air pressure from all reservoirs.
- Page 4 Log-on and Learn from the Best On-line training that's available when you are 24/7/365. Visit brake-school.com. S-0308 Rev. 002 © 2019 Bendix Commercial Vehicle Systems LLC, a member of the Knorr-Bremse Group • 12/19 • All Rights Reserved...
Need help?
Do you have a question about the TW-2 and is the answer not in the manual?
Questions and answers