Table of Contents
Advertisement
Advertisement
Table of Contents

Subscribe to Our Youtube Channel
Related Manuals for Pitsco Education TETRIX MAX


Summary of Contents for Pitsco Education TETRIX MAX
- Page 1 R/C Builder’s Guide 44715...
- Page 2 Content advising by Paul Uttley. Build creation and SolidWorks® Composer™ rendering by Tim Lankford. Desktop publishing by Todd McGeorge. ©2021 Pitsco, Inc., 915 E. Jefferson, Pittsburg, KS 66762 All rights reserved. This product and related documentation are protected by copyright and are distributed under licenses restricting their use, copying, and distribution.
-
Page 3: Table Of Contents
Safety Information ..................................3 Set Components TETRIX® MAX R/C Robotics Set Components .......................4-13 Setup/Construction Tips TETRIX MAX R/C Motor Controller Wiring Illustrated ..................... 14-15 Remote Control Setup ................................16 1. Channel Placement .................................17 2. Tool Use ......................................18 3. Take Advantage of Design Features ......................... 19-20 4. -
Page 4: Preface
• Develops real-world engineering and problem-solving skills. The TETRIX MAX R/C Robotics Set contains all the essential tools and hardware needed to enable users to build all the robots shown in the builder’s guide one at a time. -
Page 5: Safety Information
Safety Information Mechanical • Keep fingers, hair, and loose articles of clothing clear of gears and moving parts. • Never pick up the robot while it is moving or the servo motors are running. • Remove any burrs caused by cutting the metal beams. •... -
Page 6: Set Components
R/C Robotics Set Note: In order to complete the three builds shown in this book you must have the TETRIX MAX R/C Robotics Set (41990). Set Components © 2021 Pitsco, Inc. All rights reserved. - Page 7 TETRIX MAX 100 mm Axle ........6...
- Page 8 The following mechanical parts overview includes elements from the TETRIX MAX R/C Robotics Set. TETRIX MAX structural elements are identified by length. For example, a 32 mm channel or a 288 mm flat bar. Use the centimeter ruler at the bottom of this spread to measure part lengths.
- Page 9 Flat Bracket 39061 288 mm Flat Bar 39070 144 mm Angle 39072 288 mm Angle 39071 Flat Building Plate 39073 L Bracket 39062 Inside Corner Bracket 39281 Inside C Connector 39270 Adjustable Angle Corner Bracket 41790 Set Components © 2021 Pitsco, Inc. All rights reserved.
- Page 10 Structural Elements Flat 64 mm x 27 mm 39274 Flat 96 mm x 27 mm 39273 Flat 160 mm x 27 mm 39272 Flat 288 mm x 27 mm 39271 Adjustable Angle Flat Bracket 41791 Flat Round Spacer 39387 Stand-Off Post 6-32 x 1" 39102 Stand-Off Post 6-32 x 2"...
- Page 11 Motion Elements Gear 40-Tooth 39028 Gear 80-Tooth 39086 Motor Hub 39079 Axle Hub 39172 Axle Set Collar 39092 100 mm Axle 39088 Bronze Bushing 39091 Gear Hub Spacer 39090 Axle Spacer 1/8" 39100 Axle Spacer 3/8" 39101 Set Components © 2021 Pitsco, Inc. All rights reserved.
- Page 12 Motion Elements Motor Mount 39089 TorqueNADO Motor 44260 4" Wheel 39055 4" Omni Wheel Pack/Assembly 36466 Set Components © 2021 Pitsco, Inc. All rights reserved.
- Page 13 Motion Elements Single Standard-Scale Servo Motor Bracket 39060 Standard-Scale Pivot Arm with Bearing 39593 Standard-Scale Servo Motor 39197 Servo Extension 39081 Servo Y Connector 39082 Standard Servo Mounting Kit 41789 Adjustable Servo Bracket 39280 Set Components © 2021 Pitsco, Inc. All rights reserved.
- Page 14 Power, Tools, and Accessories Elements Battery Clip 38009 12-volt 3,000 mAh Battery 39057 Global NiMH Battery Pack Charger 41399 Zip Tie 31902 2-in-1 Screwdriver 42991 4-in-1 Screwdriver 36404 Wrench Set 38001 Hex Key Pack 39104 Miniature Ball-Point Hex Driver 40341 Set Components ©...
- Page 15 Control Elements Wireless Joystick Gamepad System with Receiver 40239 R/C Motor Controller with 3-Pin Channel Input Cables 45849 On/Off Switch Kit 43169 Set Components © 2021 Pitsco, Inc. All rights reserved.
-
Page 16: Setup/Construction Tips
Setup/Construction Tips TETRIX MAX R/C Motor Controller Wiring Illustrated Tank-Drive Mode Input 1 connects here Input 2 connects here Setup/Construction Tips © 2021 Pitsco, Inc. All rights reserved. - Page 17 Single-Stick Mode Input 1 connects here Input 2 connects here Setup/Construction Tips © 2021 Pitsco, Inc. All rights reserved.
-
Page 18: Remote Control Setup
7. The transmitter and receiver are now connected and ready for operation. When the TETRIX MAX R/C Motor Controller is powered on, you should see the LED flash three times. The LED will then either stay on or go off depending on which mode the controller is in. After this is complete, you can adjust the trimmer wheels on the gamepad as desired. -
Page 19: Channel Placement
1. Channel Placement Planning for easy access to fasteners will make the building experience better for everyone involved. As a general rule, when you create any substructure, it’s a good idea to only snug nuts and screws until you are sure all elements fit together. Then, go back and tighten everything before moving on to the next step. -
Page 20: Tool Use
2. Tool Use Proper use of the basic tools makes the building process smoother and more enjoyable and saves time. Setup/Construction Tips © 2021 Pitsco, Inc. All rights reserved. -
Page 21: Take Advantage Of Design Features
3. Take Advantage of Design Features Some elements have design features that either make the element function better or fill a specific role. Recognizing those so you can take full advantage will make your build be stronger, last longer, and function better. - Page 22 Axle hubs and motor hubs are often confused because they look alike and they serve the same function but in slightly different applications. The difference between the two elements is the size of the inside diameter of the hole in the center of the element.
-
Page 23: Assembly Of Specialty Parts
Quantity 39091 TETRIX MAX Bronze Bushing ......2 Tires & Wheels Part No. Part Name... - Page 24 Step 1.2 Step 1.3 Tip: To get proper offset of rollers between the two wheels, remove screws from Step 1.3 and rotate the wheel shown in either direction. Reattach screws. Setup/Construction Tips © 2021 Pitsco, Inc. All rights reserved.
-
Page 25: Tetrix Max Rangermax Bot Assembly
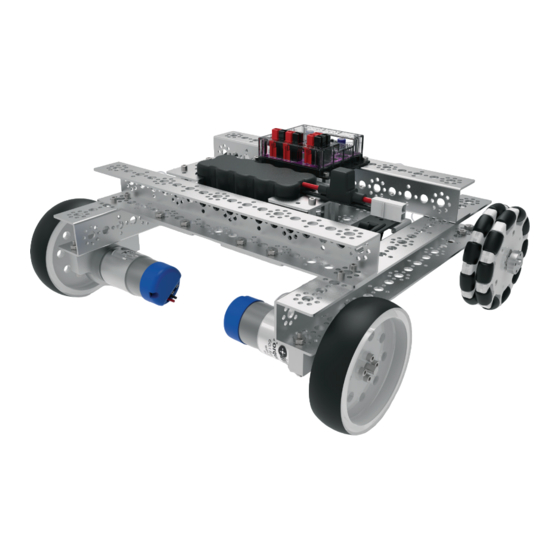
How It Works: The TETRIX MAX RangerMAX Bot build uses two 12 VDC motors mounted in opposition to provide a good example of a basic differential-drive robot. Two omni wheel assemblies are utilized to provide efficient pivoting abilities and highlight the versatility of this type of assembly. - Page 26 Kep Nut ..........8 39068 TETRIX MAX 288 mm Channel ......4 39098 Socket Head Cap Screw 6-32 x 5/16"...
- Page 27 Step 1.0 Step 1.1 Tip: It’s a good idea to only snug the nuts and screws until all four channels are connected. TETRIX MAX RangerMAX Bot Assembly © 2021 Pitsco, Inc. All rights reserved.
- Page 28 Step 1.2 Step 1.3 TETRIX MAX RangerMAX Bot Assembly © 2021 Pitsco, Inc. All rights reserved.
- Page 29 Step 1.4 Tip: Don’t forget, you can build the RangerMAX Bot following our step-by-step video tutorial. To view it, visit video.pitsco.com/TETRIX. Click TETRIX MAX in the right navigation to find the TETRIX MAX Ranger Build.. Step 1.5 TETRIX MAX RangerMAX Bot Assembly...
- Page 30 Step 1.6 Tip: After all four channels are connected and the square frame is created, don’t forget to go back and tighten all the screws and nuts. TETRIX MAX RangerMAX Bot Assembly © 2021 Pitsco, Inc. All rights reserved.
- Page 31 TETRIX MAX L Bracket ........
- Page 32 Step 2.0 Step 2.1 TETRIX MAX RangerMAX Bot Assembly © 2021 Pitsco, Inc. All rights reserved.
- Page 33 Step 2.3 Tip: It does not matter in which direction the TETRIX On/Off Switch Kit is mounted in the plate. It is strictly a matter of personal preference. TETRIX MAX RangerMAX Bot Assembly © 2021 Pitsco, Inc. All rights reserved.
- Page 34 Step 2.4 Step 2.5 TETRIX MAX RangerMAX Bot Assembly © 2021 Pitsco, Inc. All rights reserved.
- Page 35 Step 2.6 Step 2.7 TETRIX MAX RangerMAX Bot Assembly © 2021 Pitsco, Inc. All rights reserved.
- Page 36 Step 2.8 TETRIX MAX RangerMAX Bot Assembly © 2021 Pitsco, Inc. All rights reserved.
- Page 37 TETRIX MAX 4" Wheel ........
- Page 38 Step 3.0 Step 3.1 TETRIX MAX RangerMAX Bot Assembly © 2021 Pitsco, Inc. All rights reserved.
- Page 39 Step 3.2 Step 3.3 TETRIX MAX RangerMAX Bot Assembly © 2021 Pitsco, Inc. All rights reserved.
- Page 40 100 mm axle. Step 3.5 Tip: Refer to Omni Wheel Set Up on pages 21-22 to see how to assemble the omni wheel. TETRIX MAX RangerMAX Bot Assembly © 2021 Pitsco, Inc. All rights reserved.
- Page 41 Step 3.6 Tip: This step uses the Axle Hub (39172). Don’t forget to tighten the set screw. Step 3.7 TETRIX MAX RangerMAX Bot Assembly © 2021 Pitsco, Inc. All rights reserved.
- Page 42 Step 3.8 Step 3.9 Tip: This step uses the Axle Hub (39172). Don’t forget to tighten the set screw. TETRIX MAX RangerMAX Bot Assembly © 2021 Pitsco, Inc. All rights reserved.
- Page 43 Step 3.10 Step 3.11 Tip: This step uses the Axle Hub (39172). Don’t forget to tighten the set screw. TETRIX MAX RangerMAX Bot Assembly © 2021 Pitsco, Inc. All rights reserved.
- Page 44 To insert motor and move into position, this screw must be loose. Don’t forget to tighten this screw after the motor has been inserted and moved into the desired position. Step 3.13 TETRIX MAX RangerMAX Bot Assembly © 2021 Pitsco, Inc. All rights reserved.
- Page 45 Step 3.14 Step 3.15 TETRIX MAX RangerMAX Bot Assembly © 2021 Pitsco, Inc. All rights reserved.
- Page 46 To insert motor and move into position, this screw must be loose. Don’t forget to tighten this screw after the motor has been inserted and moved into the desired position. Step 3.17 TETRIX MAX RangerMAX Bot Assembly © 2021 Pitsco, Inc. All rights reserved.
- Page 47 Step 3.18 Step 3.19 TETRIX MAX RangerMAX Bot Assembly © 2021 Pitsco, Inc. All rights reserved.
- Page 48 38009 TETRIX MAX Battery Clip ....... . . 2 39057 TETRIX MAX 12-Volt Rechargeable 3,000 mAh NiMH Battery Pack .
- Page 49 Step 4.0 Tip: This step uses the 32 mm Stand-Off Post (39107). Tip: For additional resources for the RangerMAX Bot, visit video.pitsco.com/TETRIX. Step 4.1 TETRIX MAX RangerMAX Bot Assembly © 2021 Pitsco, Inc. All rights reserved.
- Page 50 Step 4.2 Step 4.3 TETRIX MAX RangerMAX Bot Assembly © 2021 Pitsco, Inc. All rights reserved.
- Page 51 Step 4.4 Step 4.5 TETRIX MAX RangerMAX Bot Assembly © 2021 Pitsco, Inc. All rights reserved.
- Page 52 Finished assembly. TETRIX MAX RangerMAX Bot Assembly © 2021 Pitsco, Inc. All rights reserved.
-
Page 53: Tetrix Max Rangermax Bot Activities
TETRIX MAX RangerMAX Bot Activities Final Connections: After you’ve mounted the R/C motor controller, the R/C wireless receiver, and the battery, you are ready to connect and complete the wire connections among all components. Secure the receiver and wires so they do not become entangled in any moving parts. - Page 54 After you’ve practiced driving in tank-drive mode, compare single-stick- and tank-drive modes. Which method of steering the robot do you prefer? Don’t forget to document your efforts and remember the engineering design process. TETRIX MAX RangerMAX Bot Activities © 2021 Pitsco, Inc. All rights reserved.
-
Page 55: Tetrix Max Minimax Bot Assembly
Getting Started: • Refer to pages 54-128 for instructions on how to build the complete TETRIX MAX MiniMAX Bot. • See page 129-130 for suggested sample activities. Time Expectations: 90-120 minutes Note: Many factors can affect building time, including such things as set organization and whether the builder has a partner. - Page 56 Quantity 39067 TETRIX MAX 160 mm Channel ......4 39094 Kep Nut ..........24 39097 Socket Head Cap Screw 6-32 x 1/2"...
- Page 57 Step 1.0 Assemble two like this. TETRIX MAX MiniMAX Bot Assembly © 2021 Pitsco, Inc. All rights reserved.
- Page 58 Step 1.1 Assemble two like this. Step 1.2 TETRIX MAX MiniMAX Bot Assembly © 2021 Pitsco, Inc. All rights reserved.
- Page 59 Step 1.3 Tip: Don’t forget to make sure all nuts and screws are tight before moving on to the next step. TETRIX MAX MiniMAX Bot Assembly © 2021 Pitsco, Inc. All rights reserved.
- Page 60 TETRIX MAX 4" Wheel ........
- Page 61 Partial assembly should look like this. TETRIX MAX MiniMAX Bot Assembly © 2021 Pitsco, Inc. All rights reserved.
- Page 62 To insert motor and move into position, this screw must be loose. Don’t forget to tighten this screw after the motor has been inserted and moved into the desired position. Step 2.0 Step 2.1 TETRIX MAX MiniMAX Bot Assembly © 2021 Pitsco, Inc. All rights reserved.
- Page 63 Step 2.2 Step 2.3 TETRIX MAX MiniMAX Bot Assembly © 2021 Pitsco, Inc. All rights reserved.
- Page 64 Step 2.4 Step 2.5 TETRIX MAX MiniMAX Bot Assembly © 2021 Pitsco, Inc. All rights reserved.
- Page 65 Step 2.6 Step 2.7 TETRIX MAX MiniMAX Bot Assembly © 2021 Pitsco, Inc. All rights reserved.
- Page 66 Step 2.8 Tip: This step uses the 1" Stand-Off Post (39102). Step 2.9 Tip: This step uses the 2" Stand-Off Post (39103). TETRIX MAX MiniMAX Bot Assembly © 2021 Pitsco, Inc. All rights reserved.
- Page 67 Step 2.10 Tip: This step uses the 1" Stand-Off Post (39102). Step 2.11 TETRIX MAX MiniMAX Bot Assembly © 2021 Pitsco, Inc. All rights reserved.
- Page 68 Step 2.12 Step 2.13 Tip: This step uses the Axle Set Collar (39092). Don’t forget to tighten the set screw. TETRIX MAX MiniMAX Bot Assembly © 2021 Pitsco, Inc. All rights reserved.
- Page 69 Tip: Refer to Omni Wheel Set Up on pages 21-22 to see how to assemble the omni wheel. Step 2.15 Tip: This step uses the Axle Set Collar (39092). Don’t forget to tighten the set screw. TETRIX MAX MiniMAX Bot Assembly © 2021 Pitsco, Inc. All rights reserved.
- Page 70 Step 2.16 Step 2.17 Tip: This step uses the Motor Hub (39079). Don’t forget to tighten the set screw. TETRIX MAX MiniMAX Bot Assembly © 2021 Pitsco, Inc. All rights reserved.
- Page 71 Step 2.18 Step 2.19 TETRIX MAX MiniMAX Bot Assembly © 2021 Pitsco, Inc. All rights reserved.
- Page 72 Step 2.20 Step 2.21 Tip: This step uses the Axle Set Collar (39092). Don’t forget to tighten the set screw. TETRIX MAX MiniMAX Bot Assembly © 2021 Pitsco, Inc. All rights reserved.
- Page 73 Step 2.22 Step 2.23 Tip: This step uses the Axle Set Collar (39092). Don’t forget to tighten the set screw. TETRIX MAX MiniMAX Bot Assembly © 2021 Pitsco, Inc. All rights reserved.
- Page 74 Step 2.24 Step 2.25 Tip: This step uses the Motor Hub (39079). Don’t forget to tighten the set screw. TETRIX MAX MiniMAX Bot Assembly © 2021 Pitsco, Inc. All rights reserved.
- Page 75 Step 2.26 Step 2.27 TETRIX MAX MiniMAX Bot Assembly © 2021 Pitsco, Inc. All rights reserved.
- Page 76 Step 2.28 Step 2.29 TETRIX MAX MiniMAX Bot Assembly © 2021 Pitsco, Inc. All rights reserved.
- Page 77 TETRIX MAX L Bracket ........
- Page 78 Partial assembly should look like this. TETRIX MAX MiniMAX Bot Assembly © 2021 Pitsco, Inc. All rights reserved.
- Page 79 Step 3.0 Step 3.1 Tip: This step uses the 16 mm Stand-Off Post (41253). Tip: This step uses the 16 mm Stand-Off Post (41253). TETRIX MAX MiniMAX Bot Assembly © 2021 Pitsco, Inc. All rights reserved.
- Page 80 Step 3.2 Step 3.3 TETRIX MAX MiniMAX Bot Assembly © 2021 Pitsco, Inc. All rights reserved.
- Page 81 Step 3.4 Step 3.5 TETRIX MAX MiniMAX Bot Assembly © 2021 Pitsco, Inc. All rights reserved.
- Page 82 Step 3.6 Step 3.7 TETRIX MAX MiniMAX Bot Assembly © 2021 Pitsco, Inc. All rights reserved.
- Page 83 Step 3.8 Step 3.9 Tip: This step uses the 32 mm Stand-Off Post (39107). TETRIX MAX MiniMAX Bot Assembly © 2021 Pitsco, Inc. All rights reserved.
- Page 84 Step 3.10 Step 3.11 Tip: This step uses the 1" Stand-Off Post (39102). TETRIX MAX MiniMAX Bot Assembly © 2021 Pitsco, Inc. All rights reserved.
- Page 85 Step 3.12 Tip: This step uses the 1" Stand-Off Post (39102). Step 3.13 TETRIX MAX MiniMAX Bot Assembly © 2021 Pitsco, Inc. All rights reserved.
- Page 86 Step 3.14 TETRIX MAX MiniMAX Bot Assembly © 2021 Pitsco, Inc. All rights reserved.
- Page 87 Step 3.15 Step 3.16 Tip: Don’t forget to make sure all nuts and screws are tight before moving on to the next step. TETRIX MAX MiniMAX Bot Assembly © 2021 Pitsco, Inc. All rights reserved.
- Page 88 TETRIX MAX Axle Hub ........
- Page 89 Partial assembly should look like this. TETRIX MAX MiniMAX Bot Assembly © 2021 Pitsco, Inc. All rights reserved.
- Page 90 Tip: This 32 mm channel is at a slight angle compared to the 144 mm angles. This angle determines how the arm hangs in relation to the body. This angle can be adjusted for personal preference. TETRIX MAX MiniMAX Bot Assembly © 2021 Pitsco, Inc. All rights reserved.
- Page 91 Step 4.3 Step 4.4 TETRIX MAX MiniMAX Bot Assembly © 2021 Pitsco, Inc. All rights reserved.
- Page 92 Tip: This step uses the Axle Hub (39172). Don’t forget to tighten the set screw. Tip: Tighten the 1-1/4" socket head cap screws completely to make room for axle spacers in subsequent steps. Step 4.6 TETRIX MAX MiniMAX Bot Assembly © 2021 Pitsco, Inc. All rights reserved.
- Page 93 Step 4.7 Step 4.8 TETRIX MAX MiniMAX Bot Assembly © 2021 Pitsco, Inc. All rights reserved.
- Page 94 Step 4.9 Step 4.10 Tip: This step uses the Axle Set Collar (39092). Don’t forget to tighten the set screw. TETRIX MAX MiniMAX Bot Assembly © 2021 Pitsco, Inc. All rights reserved.
- Page 95 Step 4.11 Step 4.12 TETRIX MAX MiniMAX Bot Assembly © 2021 Pitsco, Inc. All rights reserved.
- Page 96 Step 4.13 Step 4.14 Tip: This step uses the Axle Hub (39172). TETRIX MAX MiniMAX Bot Assembly © 2021 Pitsco, Inc. All rights reserved.
- Page 97 Step 4.15 Tip: Don’t forget to tighten the set screw. Step 4.16 TETRIX MAX MiniMAX Bot Assembly © 2021 Pitsco, Inc. All rights reserved.
- Page 98 Step 4.17 Step 4.18 Tip: Don’t forget to tighten the set screw. TETRIX MAX MiniMAX Bot Assembly © 2021 Pitsco, Inc. All rights reserved.
- Page 99 Step 4.19 Step 4.20 TETRIX MAX MiniMAX Bot Assembly © 2021 Pitsco, Inc. All rights reserved.
- Page 100 Step 4.21 Step 4.22 TETRIX MAX MiniMAX Bot Assembly © 2021 Pitsco, Inc. All rights reserved.
- Page 101 Step 4.22 (close-up side view) Step 4.23 TETRIX MAX MiniMAX Bot Assembly © 2021 Pitsco, Inc. All rights reserved.
- Page 102 Step 4.24 Step 4.25 TETRIX MAX MiniMAX Bot Assembly © 2021 Pitsco, Inc. All rights reserved.
- Page 103 Step 4.26 Tip: Don’t forget to make sure all nuts and screws are tight before moving on to the next step. TETRIX MAX MiniMAX Bot Assembly © 2021 Pitsco, Inc. All rights reserved.
- Page 104 TETRIX MAX Axle Hub ........
- Page 105 Partial assembly should look like this. TETRIX MAX MiniMAX Bot Assembly © 2021 Pitsco, Inc. All rights reserved.
- Page 106 Step 5.0 Step 5.1 TETRIX MAX MiniMAX Bot Assembly © 2021 Pitsco, Inc. All rights reserved.
- Page 107 144 mm angles. This angle determines how the arm hangs in relation to the body. This angle can be adjusted for personal preference. Step 5.3 TETRIX MAX MiniMAX Bot Assembly © 2021 Pitsco, Inc. All rights reserved.
- Page 108 Tip: This step uses the Axle Hub (39172). Don’t forget to tighten the set screw. Tip: Tighten the 1-1/4" socket head cap screws completely to make room for axle spacers in subsequent steps. TETRIX MAX MiniMAX Bot Assembly © 2021 Pitsco, Inc. All rights reserved.
- Page 109 Step 5.6 Step 5.7 TETRIX MAX MiniMAX Bot Assembly © 2021 Pitsco, Inc. All rights reserved.
- Page 110 Step 5.8 Step 5.9 TETRIX MAX MiniMAX Bot Assembly © 2021 Pitsco, Inc. All rights reserved.
- Page 111 Step 5.10 Tip: This step uses the Axle Set Collar (39092). Don’t forget to tighten the set screw. Step 5.11 TETRIX MAX MiniMAX Bot Assembly © 2021 Pitsco, Inc. All rights reserved.
- Page 112 Step 5.12 Step 5.13 TETRIX MAX MiniMAX Bot Assembly © 2021 Pitsco, Inc. All rights reserved.
- Page 113 Step 5.14 Step 5.14 (close-up side view) TETRIX MAX MiniMAX Bot Assembly © 2021 Pitsco, Inc. All rights reserved.
- Page 114 Step 5.15 Step 5.16 TETRIX MAX MiniMAX Bot Assembly © 2021 Pitsco, Inc. All rights reserved.
- Page 115 Step 5.17 Step 5.18 Tip: Don’t forget to make sure all nuts and screws are tight before moving on to the next step. TETRIX MAX MiniMAX Bot Assembly © 2021 Pitsco, Inc. All rights reserved.
- Page 116 TETRIX MAX Axle Hub ........
- Page 117 Partial assembly should look like this. TETRIX MAX MiniMAX Bot Assembly © 2021 Pitsco, Inc. All rights reserved.
- Page 118 Step 6.0 Tip: This step uses the Axle Hub (39172). Step 6.1 TETRIX MAX MiniMAX Bot Assembly © 2021 Pitsco, Inc. All rights reserved.
- Page 119 Tip: Don’t forget to tighten the set screw. Step 6.2 Step 6.3 TETRIX MAX MiniMAX Bot Assembly © 2021 Pitsco, Inc. All rights reserved.
- Page 120 Step 6.4 Step 6.5 TETRIX MAX MiniMAX Bot Assembly © 2021 Pitsco, Inc. All rights reserved.
- Page 121 Step 6.6 Tip: This step uses the 16 mm threaded spacer from the Single Standard-Scale Servo Motor Bracket (39060). Step 6.7 TETRIX MAX MiniMAX Bot Assembly © 2021 Pitsco, Inc. All rights reserved.
- Page 122 Step 6.8a Step 6.8b Tip: This step uses the Axle Hub (39172). Don’t forget to tighten the set screw. Step 6.9 TETRIX MAX MiniMAX Bot Assembly © 2021 Pitsco, Inc. All rights reserved.
- Page 123 Step 6.10 Step 6.11 TETRIX MAX MiniMAX Bot Assembly © 2021 Pitsco, Inc. All rights reserved.
- Page 124 Step 6.12 Tip: This step uses the Axle Hub (39172). Don’t forget to tighten the set screw. Step 6.13 TETRIX MAX MiniMAX Bot Assembly © 2021 Pitsco, Inc. All rights reserved.
- Page 125 Step 6.14 Step 6.15 Tip: Don’t forget to make sure all nuts and screws are tight before moving on to the next step. TETRIX MAX MiniMAX Bot Assembly © 2021 Pitsco, Inc. All rights reserved.
- Page 126 Quantity 39100 TETRIX MAX Axle Spacer 1/8" ......4 Electronics & Control Part No. Part Name Quantity Posts &...
- Page 127 Step 7.0 Step 7.1 TETRIX MAX MiniMAX Bot Assembly © 2021 Pitsco, Inc. All rights reserved.
- Page 128 Step 7.2 Step 7.3 TETRIX MAX MiniMAX Bot Assembly © 2021 Pitsco, Inc. All rights reserved.
- Page 129 Step 7.4 Step 7.5 Tip: Don’t forget to do one last check and make sure all nuts and screws are tight. TETRIX MAX MiniMAX Bot Assembly © 2021 Pitsco, Inc. All rights reserved.
- Page 130 Finished assembly. TETRIX MAX MiniMAX Bot Assembly © 2021 Pitsco, Inc. All rights reserved.
-
Page 131: Tetrix Max Minimax Bot Activities
TETRIX MAX MiniMAX Bot Activities Final Connections: After you’ve mounted the R/C motor controller, the R/C wireless receiver, and the battery, you are ready to connect and complete the wire connections among all components. Secure the receiver and wires so they do not become entangled in any moving parts. - Page 132 After you’ve practiced driving in tank-drive mode, compare single-stick- and tank-drive modes. Which method of steering the robot do you prefer? Don’t forget to document your efforts and remember the engineering design process. TETRIX MAX MiniMAX Bot Activities © 2021 Pitsco, Inc. All rights reserved.
-
Page 133: Tetrix Max Rotogrip Bot Assembly
R/C Robotics Set. How It Works: The TETRIX MAX RotoGrip Bot uses one 12 VDC motor mounted perpendicular to the axis of rotation to provide an effective method of rotation for the whole robot. This allows for a full 360 degrees of freedom while maintaining a very stable platform. - Page 134 Socket Head Cap Screw 6-32 x 1/2" ..... . 4 39072 TETRIX MAX 144 mm Angle ......2 39098 Socket Head Cap Screw 6-32 x 5/16"...
- Page 135 Then, go back and tighten everything before moving on to the next step. Step 1.1 TETRIX MAX RotoGrip Bot Assembly © 2021 Pitsco, Inc. All rights reserved.
- Page 136 Step 1.2 Step 1.3 TETRIX MAX RotoGrip Bot Assembly © 2021 Pitsco, Inc. All rights reserved.
- Page 137 Step 1.4 Step 1.5 TETRIX MAX RotoGrip Bot Assembly © 2021 Pitsco, Inc. All rights reserved.
- Page 138 Step 1.6 Step 1.7 TETRIX MAX RotoGrip Bot Assembly © 2021 Pitsco, Inc. All rights reserved.
- Page 139 Step 1.8 Step 1.9 TETRIX MAX RotoGrip Bot Assembly © 2021 Pitsco, Inc. All rights reserved.
- Page 140 Step 1.10 Step 1.11 Tip: Don’t forget to make sure all nuts and screws are tight before moving on to the next step. TETRIX MAX RotoGrip Bot Assembly © 2021 Pitsco, Inc. All rights reserved.
- Page 141 TETRIX MAX 4" Wheel ........
- Page 142 Partial assembly should look like this. Step 2.0 Assemble two like this. Tip: This step uses the button head cap screw that comes with the omni wheel assembly. TETRIX MAX RotoGrip Bot Assembly © 2021 Pitsco, Inc. All rights reserved.
- Page 143 Step 2.1 Step 2.2 Tip: This step uses the Axle Hub (39172). Don’t forget to tighten the set screw. TETRIX MAX RotoGrip Bot Assembly © 2021 Pitsco, Inc. All rights reserved.
- Page 144 Step 2.3 Tip: Don’t forget to tighten the set screw. Step 2.4 TETRIX MAX RotoGrip Bot Assembly © 2021 Pitsco, Inc. All rights reserved.
- Page 145 Step 2.5 Step 2.6 Tip: This step uses the Axle Set Collar (39092). Don’t forget to tighten the set screw. TETRIX MAX RotoGrip Bot Assembly © 2021 Pitsco, Inc. All rights reserved.
- Page 146 Step 2.7 Step 2.8 TETRIX MAX RotoGrip Bot Assembly © 2021 Pitsco, Inc. All rights reserved.
- Page 147 Step 2.9 Tip: This step uses the Axle Set Collar (39092). Don’t forget to tighten the set screw. Step 2.10 TETRIX MAX RotoGrip Bot Assembly © 2021 Pitsco, Inc. All rights reserved.
- Page 148 Step 2.11 Tip: This step uses the Motor Hub (39079). Don’t forget to tighten the set screw. Step 2.12 TETRIX MAX RotoGrip Bot Assembly © 2021 Pitsco, Inc. All rights reserved.
- Page 149 Step 2.13 Step 2.14 Tip: This step uses the Axle Hub (39172). TETRIX MAX RotoGrip Bot Assembly © 2021 Pitsco, Inc. All rights reserved.
- Page 150 Step 2.15 Tip: Don’t forget to tighten the set screw. Tip: Don’t forget to make sure all nuts and screws are tight before moving on to the next step. TETRIX MAX RotoGrip Bot Assembly © 2021 Pitsco, Inc. All rights reserved.
- Page 151 TETRIX MAX L Bracket ........
- Page 152 Partial assembly should look like this. Step 3.0 TETRIX MAX RotoGrip Bot Assembly © 2021 Pitsco, Inc. All rights reserved.
- Page 153 Step 3.1 Step 3.2 TETRIX MAX RotoGrip Bot Assembly © 2021 Pitsco, Inc. All rights reserved.
- Page 154 Step 3.3 Step 3.4 TETRIX MAX RotoGrip Bot Assembly © 2021 Pitsco, Inc. All rights reserved.
- Page 155 Step 3.5 Step 3.6 TETRIX MAX RotoGrip Bot Assembly © 2021 Pitsco, Inc. All rights reserved.
- Page 156 Step 3.7 Step 3.8 TETRIX MAX RotoGrip Bot Assembly © 2021 Pitsco, Inc. All rights reserved.
- Page 157 Step 3.9 Step 3.10 TETRIX MAX RotoGrip Bot Assembly © 2021 Pitsco, Inc. All rights reserved.
- Page 158 Step 3.11 Step 3.12 Tip: This step uses the Axle Hub (39172). TETRIX MAX RotoGrip Bot Assembly © 2021 Pitsco, Inc. All rights reserved.
- Page 159 Step 3.13 Tip: Don’t forget to tighten the set screw. Step 3.14 TETRIX MAX RotoGrip Bot Assembly © 2021 Pitsco, Inc. All rights reserved.
- Page 160 Step 3.15 Step 3.16 TETRIX MAX RotoGrip Bot Assembly © 2021 Pitsco, Inc. All rights reserved.
- Page 161 Step 3.17 Step 3.18 TETRIX MAX RotoGrip Bot Assembly © 2021 Pitsco, Inc. All rights reserved.
- Page 162 Axle Set Collar (39092). Don’t forget to tighten the set screw. Step 3.20 Tip: This step uses the Axle Hub (39172). Don’t forget to tighten the set screw. TETRIX MAX RotoGrip Bot Assembly © 2021 Pitsco, Inc. All rights reserved.
- Page 163 Step 3.21 Tip: Don’t forget to make sure all nuts and screws are tight before moving on to the next step. TETRIX MAX RotoGrip Bot Assembly © 2021 Pitsco, Inc. All rights reserved.
- Page 164 TETRIX MAX Axle Hub ........
- Page 165 Step 4.0 Tip: This step uses the 16 mm Stand-Off Post (41253). Step 4.1 Tip: This step uses the 1" Stand-Off Post (39102). TETRIX MAX RotoGrip Bot Assembly © 2021 Pitsco, Inc. All rights reserved.
- Page 166 Step 4.2 Step 4.3 Assemble two like this. Tip: This step uses the Axle Hub (39172). TETRIX MAX RotoGrip Bot Assembly © 2021 Pitsco, Inc. All rights reserved.
- Page 167 Step 4.4 Tip: This step uses the 1" Stand-Off Post (39102). Step 4.5 TETRIX MAX RotoGrip Bot Assembly © 2021 Pitsco, Inc. All rights reserved.
- Page 168 Step 4.6 Tip: Don’t forget to tighten the set screw. Step 4.7 TETRIX MAX RotoGrip Bot Assembly © 2021 Pitsco, Inc. All rights reserved.
- Page 169 Step 4.8 Tip: Don’t forget to tighten the set screw. Step 4.9 TETRIX MAX RotoGrip Bot Assembly © 2021 Pitsco, Inc. All rights reserved.
- Page 170 Step 4.10 Step 4.11 Tip: This step uses the 32 mm Stand-Off Post (39107). TETRIX MAX RotoGrip Bot Assembly © 2021 Pitsco, Inc. All rights reserved.
- Page 171 Step 4.12 Step 4.13 TETRIX MAX RotoGrip Bot Assembly © 2021 Pitsco, Inc. All rights reserved.
- Page 172 Step 4.14 Step 4.15 TETRIX MAX RotoGrip Bot Assembly © 2021 Pitsco, Inc. All rights reserved.
- Page 173 Step 4.16 TETRIX MAX RotoGrip Bot Assembly © 2021 Pitsco, Inc. All rights reserved.
- Page 174 Step 4.17 Step 4.18 TETRIX MAX RotoGrip Bot Assembly © 2021 Pitsco, Inc. All rights reserved.
- Page 175 Step 4.19 Step 4.20 TETRIX MAX RotoGrip Bot Assembly © 2021 Pitsco, Inc. All rights reserved.
- Page 176 Step 4.21 Step 4.22 TETRIX MAX RotoGrip Bot Assembly © 2021 Pitsco, Inc. All rights reserved.
- Page 177 Step 4.23 Step 4.24 TETRIX MAX RotoGrip Bot Assembly © 2021 Pitsco, Inc. All rights reserved.
- Page 178 Step 4.25 Mount gripper to arm. Tip: Don’t forget to make sure all nuts and screws are tight before moving on to the next step. TETRIX MAX RotoGrip Bot Assembly © 2021 Pitsco, Inc. All rights reserved.
- Page 179 38009 TETRIX MAX Battery Clip ....... . . 2 Gamepad System ........1...
- Page 180 Step 5.0 Tip: This step uses one 1/2" Socket Head Cap Screw (39097) and one 5/16" Socket Head Cap Screw (39098). Step 5.1 TETRIX MAX RotoGrip Bot Assembly © 2021 Pitsco, Inc. All rights reserved.
- Page 181 Step 5.2 Step 5.3 TETRIX MAX RotoGrip Bot Assembly © 2021 Pitsco, Inc. All rights reserved.
- Page 182 Step 5.4 Step 5.5 TETRIX MAX RotoGrip Bot Assembly © 2021 Pitsco, Inc. All rights reserved.
- Page 183 Step 5.6 Step 5.7 TETRIX MAX RotoGrip Bot Assembly © 2021 Pitsco, Inc. All rights reserved.
- Page 184 Step 5.8 Step 5.9 TETRIX MAX RotoGrip Bot Assembly © 2021 Pitsco, Inc. All rights reserved.
- Page 185 Finished assembly. TETRIX MAX RotoGrip Bot Assembly © 2021 Pitsco, Inc. All rights reserved.
-
Page 186: Tetrix Max Rotogrip Bot Activities
TETRIX MAX RotoGrip Bot Activities Final Connections: After you’ve mounted the R/C motor controller, the R/C wireless receiver, and the battery, you are ready to connect and complete the wire connections among all components. Secure the receiver and wires so they do not become entangled in any moving parts. - Page 187 You can use the RotoGrip Bot as a pick- and-place machine to move the ball element included in the TETRIX MAX R/C Robotics Set from one location to another. You can build the game elements shown at Pitsco.com...
-
Page 188: Glossary
Glossary continuous rotation servo: a servo motor that rotates with no restriction on how far it rotates differential drive: a drive system in which the speeds of motors located on opposite sides of a mobile apparatus control the direction of travel elapsed time: the actual amount of time required for a vehicle to move from the starting point to the finish line;... - Page 190 R/C Builder’s Guide Call Toll-Free Visit Us Online at 800•835•0686 Pitsco.com...
Need help?
Do you have a question about the TETRIX MAX and is the answer not in the manual?
Questions and answers