Table of Contents
Advertisement
Quick Links
Installation Instructions
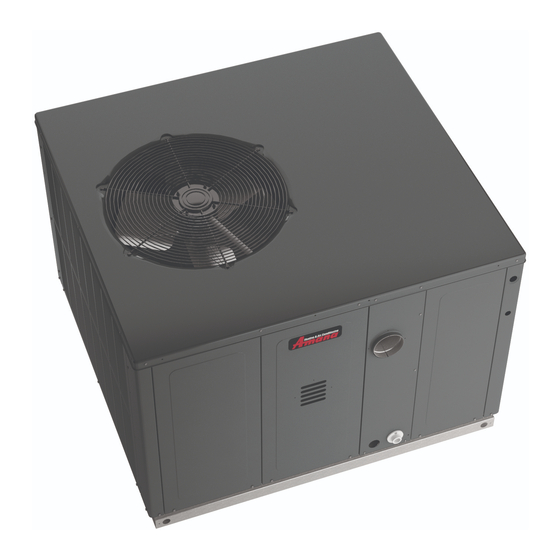
APG 16 SEER "M" SERIES 2-4 Tons
Single Package Gas-Electric Heating & Cooling Units
ATTENTION INSTALLING PERSONNEL
Prior to installation, thoroughly familiarize yourself with this
Installation Manual. Observe all safety warnings. During in-
stallation or repair, caution is to be observed.
It is your responsibility to install the product safely and to
educate the customer on its safe use.
RECOGNIZE THIS SYMBOL
AS A SAFETY PRECAUTION
"IMPORTANT - This product has been designed and manufactured to meet ENERGY STAR®
criteria for energy efficiency when matched with appropriate coil components. However,
proper refrigerant charge and proper air flow are critical to achieve rated capacity and
efficiency. Installation of this product should follow the manufacturer's refrigerant charging
and air flow instructions. Failure to confirm proper charge and air flow may reduce energy
efficiency and shorten equipment life."
IOA-3012F
05/2021
19001 Kermier Rd., Waller, TX 77484
www.goodmanmfg.com • www.amana-hac.com
© 2015-2019, 2021 Goodman Manufacturing Company, L.P.
is a registered trademark of Maytag corporation or its related companies and is used under license. All rights reserved.
Affix this manual and Users Information
Manual adjacent to the unit.
Only personnel that have been trained to install, adjust,
service or repair(hereinafter, "service") the equipment
specified in this manual should service the equipment. The
manufacturer will not be responsible for any injury or
property damage arising from improper service or service
procedures. If you service this unit, you assume responsi-
bility for any injury or property damage which may re-
sult. In addition, in jurisdictions that require one or more
licenses to service the equipment specified in this manual,
only licensed personnel should service the equipment.
Improper installation, adjustment, servicing or repair of
the equipment specified in this manual, or attempting to
install, adjust, service or repair the equipment specified in
this manual without proper training may result in product
damage, property damage, personal injury or death.
These installation instructions cover the outdoor installation
of single package heating and cooling units. See the
Specification Sheet applicable to your model for information
regarding accessories.
NOTE: Please contact your distributor or our website for
the applicable Specification Sheet referred to in this manual.
This Forced Air Central Unit Design complies with re-
quirements embodied in The American National Standard /
National Standard of Canada shown below:
ANSI Z21.47 / CSA-2.3 Gas-Fired Central Furnaces
WARNING
Advertisement
Table of Contents

Related Manuals for Amana APG 16 M Series


Summary of Contents for Amana APG 16 M Series
- Page 1 Installation of this product should follow the manufacturer’s refrigerant charging and air flow instructions. Failure to confirm proper charge and air flow may reduce energy efficiency and shorten equipment life.” 19001 Kermier Rd., Waller, TX 77484 www.goodmanmfg.com • www.amana-hac.com IOA-3012F © 2015-2019, 2021 Goodman Manufacturing Company, L.P. 05/2021...
-
Page 2: Table Of Contents
TABLE OF CONTENTS REPLACEMENT PARTS ..........3 TROUBLESHOOTING ..........18 Ordering Parts ........... 3 Ignition Control Error Codes ...... 18 Safety Instructions ........... 3 Fault Recall ............18 GENERAL INFORMATION ..........5 Abnormal Operation - Heating ...... 18 Transportation Damage ........5 Internal Control Failure ...... -
Page 3: Replacement Parts
REPLACEMENT PARTS WARNING Ordering Parts When reporting shortages or damages, or ordering repair Do not connect to or use any device that is not design certified by the manufacturer for use with this unit. Serious parts, give the complete unit model and serial numbers as property damage, personal injury, reduced unit performance stamped on the unit’s nameplate. - Page 4 RISQUE D’INCENDIE OU D’EXPLOSION RISQUE D’INTOXICATION AU MONOXYDE DE CARBONE À L Si les étapes décrites ci-dessous ne sont pas suivies pour chacun ONSIGNES É CURITÉ UIVIES ETTRE des appareils raccordés au système de ventilation au moment NTRAÎNER RAVES LESSURES OMMAGES de sa mise en marche, cela peut entraîner une intoxication au ATÉ...
-
Page 5: General Information
1. Make notation on delivery receipt of any visible cial models. Specification sheets can be found at www.ama- damage to shipment or container. na-hac.com for Amana brand products. Within the website, ® 2. Notify carrier promptly and request an inspection. please select the residential or commercial products menu 3. -
Page 6: Unit Location
UNIT LOCATION recommended. Prepare a base that is 3” larger than the package unit footprint and a minimum of 3” thick. • The base should also be located where no runoff of WARNING water from higher ground can collect in the unit. To prevent possible equipment damage, property damage, personal injury or death, the following bullet points must be observed when installing this unit. -
Page 7: Rigging Details
GAS PIPING IMPORTANT NOTE: This unit is factory set to operate on natural gas at the altitudes shown on the rating plate. WARNING To prevent property damage, personal injury or death when using propane gas alone or at higher altitudes, obtain and install the proper conversion kit(s). -
Page 8: Piping
Piping • In the prior two methods above the connector or IMPORTANT NOTE: To avoid possible unsatisfactory opera- tubing must be protected from physical and thermal tion or equipment damage due to under firing of equipment, damage. Aluminum alloy tubing and connectors do not undersize the natural/propane gas piping from the me- must be coated to protect against external corrosion ter/tank to the unit. -
Page 9: Propane Gas Installations
PROPANE GAS INSTALLATIONS Sizing Between First and Second Stage Regulator Maximum Propane Capacities listed are based on 1 PSIG Pressure Drop at 10 PSIG Setting. Capacities in 1,000 BTU/HR IMPORTANT NOTE: For Natural gas to LP gas conversion, PIPE OR NOMINAL PIPE SIZE, Conversion Kit “LPM-08”... -
Page 10: Single Stage Thermostat
it will be affected by drafts, hot or cold water pipes or air shift to HIGH STAGE. This option controls both cooling and ducts in walls, radiant heat from fireplace, lamps, the sun, heating modes. If the jumper is not moved, only low-stage television, etc. -
Page 11: High Voltage Wiring
Once the HUM jumper is cut at the ECM motor interface Note:Junction box location module, the dehumidify function is enabled during a com- shown is optional and is bination call for cooling (T-Stat) and dehumidification (DE- for illustration purposes only. HUMStat). -
Page 12: Circulating Air And Filters
CIRCULATING AIR AND FILTERS For duct flange dimensions on the unit refer to the Unit Di- mension illustration in the appendix. Airflow Conversion For down-discharge applications, the ductwork should be at- Units can easily be converted from horizontal to down-dis- tached to the roof curb prior to installing the unit. -
Page 13: Condensate Drain
2. Using the three screws provided, attach the hood jumper position. If the call for HEAT remains after the (with the opening facing down) to the heat exchanger transition delay time expires, the control will transition access door. from low stage to high stage. 6. - Page 14 On new installations, or if a major component has been re- Pre-Operation Checks placed, the operation of the unit must be checked. 1. Close the manual gas valve external to the unit. 2. Turn off the electrical power supply to the unit. Check unit operation as outlined in the following instructions.
-
Page 15: Gas Btu Input Check
With Power And Gas On: 6. Turn on power and energize main (M) solenoid. Do not energize the HI solenoid. 3. Put unit into heating cycle and turn on all other gas 7. Measure gas manifold pressure with burners firing. consuming appliances. -
Page 16: Temperature Rise Check
4. Relight all other appliances turned off in step 1. Be sure all pilot burners are operating. Main Burner Flame Check Flames should be stable, soft and blue (dust may cause or- ange tips but they must not be yellow) and extending directly outward from the burner without curling, floating or lifting off. -
Page 17: Cooling Startup
Unit Shutdown SWITCH 1. Set the thermostat to lowest setting. • • • • • • • • 2. Turn off the electrical power supply to the unit. 3. Remove the heat exchanger door on the side of the unit by removing screws. 4. -
Page 18: Checking Subcooling
3. Refer to the superheat table provided for Cooling Operation proper system superheat. Add charge to lower NOTE: Mechanical cooling cannot be reliably provided at superheat or recover charge to raise superheat. ambient temperatures below 50° F. Superheat Formula = Suct. Line Temp. - Sat. Suct. 1. -
Page 19: Pressure Switch Stuck Open
The diagnostic fault code is 1 flash for a lockout due to failed Primary Limit ignition attempts. The integrated control will automatically A primary limit will open due to excessive supply air tem- reset after one hour, or it can be reset by removing the ther- peratures. -
Page 20: Maintenance
the refrigeration system from very low operating pressures Flame Sensor (Qualified Servicer Only) due to a loss of refrigerant. Compressor operation will be A drop in the flame current can be caused by a nearly invisi- disabled if either of these devices opens. If either devices ble coating on the flame sensor. -
Page 21: Cleaning Burners
For further information on the yearly inspection, consult the User Manual. It is recommended that a qualified servicer in- spect and service the unit at least once each year. Turn the unit on at the thermostat. Wait a few minutes, since any dislodged dust will alter the normal flame appearance. -
Page 22: Appendix
APPENDIX IGNITION CONTROL DIAGNOSTIC INDICATOR CHART Red Light Signal Refer to Abnormal Heating or Cooling Operation Sections of this Manual Internal Control Failure 1 Flash External Lockout 2 Flashes Pressure Switch Stuck Open 3 Flashes Pressure Switch Stuck Closed 4 Flashes Thermal Protection Device Open 5 Flashes Flame Detected with Gas Valve Closed... -
Page 23: Heating Timing Chart
HEATING TIMING CHART HIGH Circulator Blower HIGH Gas Valve Igniter Induced HIGH Draft Blower HIGH Thermostat Seconds 90, 120, 150, 180 COOLING TIMING CHART HIGH Circulator Blower HIGH Compressor HIGH Outdoor Fan... -
Page 24: Unit Dimensions
UNIT DIMENSIONS FLUE EXHAUST HOOD 18 7/16 FLUE EXHAUST 1 3/8 5 1/2 7 15/16 SUCTION/LIQUID PRESSURE PORTS 2 3/4 BEHIND COMPRESSOR ACCESS PANEL COMBUSTION AIR INTAKE RETURN HEAT EXCHANGE ACCESS PANEL 4 3/4 GAS SUPPLY ENTRANCE SUPPLY CONDENSATE DRAIN CONNECTION 3/4"... -
Page 25: Wiring Diagram
WIRING DIAGRAM HIGH VOLTAGE! Disconnect ALL power before servicing or installing this unit. Multiple power sources may be present. Failure to do so may cause property damage, personal injury or death. SUPPLY VOLTAGE 208-230/1/60 COMP RCCF C COMP SEE NOTE 4 SEE NOTE 3 SEE NOTE 2 POWER SUPPLY... -
Page 26: Minimum Clearances
MINIMUM CLEARANCES Clearance in accordance with local installation codes, the requirements of the gas supplier and the manufacturer’s instal- lation instructions. Dégaugement conforme aux codes d’installation locaux, aux exigences du fournisseur de gaz et aux instructions d’in- stallation du fabricant. 48"... -
Page 27: Blower Performance
BLOWER PERFORMANCE DATA X = Not recommended for heating application. NOTE: The shaded area indicates ranges in excess of maximum external static pressure allowable when heating. For satisfactory operation, external static pressure should not exceed 0.8” w.c. -
Page 28: Cfm Settings And Dip Switch Output
CFM OUTPUT AND DIP SWITCH SETTINGS... -
Page 29: Homeowner's Routine Maintenance Recommendations
PACKAGE UNITS - DUAL FUEL & GAS HOMEOWNER’S ROUTINE MAINTENANCE RECOMMENDATIONS We strongly recommend a bi-annual maintenance checkup be performed by a qualified service agency before the heating and cooling seasons begin. should be performed before the heating and cooling sea- sons begin. This will ensure that adequate combustion air is WARNING being drawn and the vent system is working properly. -
Page 30: Start-Up Checklist
START-UP CHECKLIST Residential Package - (Indoor Section) Model Number Serial Number ELECTRICAL Line Voltage (Measure L1 and L2 Voltage) L1 - L2 Secondary Voltage (Measure Transformer Output Voltage) R - C Blower Amps Heat Strip 1 - Amps Heat Strip 2 - Amps BLOWER EXTERNAL STATIC PRESSURE Return Air Static Pressure IN. - Page 31 THIS PAGE IS LEFT INTENTIONALLY BLANK.
- Page 32 We are very interested in all product comments. Please fill out the feedback form on one of the following links: Amana® Brand Products: (http://www.amana-hac.com/about-us/contact-us). You can also scan the QR code on the right for the product brand you purchased to be directed to the feedback page.
Need help?
Do you have a question about the APG 16 M Series and is the answer not in the manual?
Questions and answers