Table of Contents
Advertisement
Quick Links
Advertisement
Table of Contents

Related Manuals for HTW HTW-MI45Q4DHN1D


Summary of Contents for HTW HTW-MI45Q4DHN1D
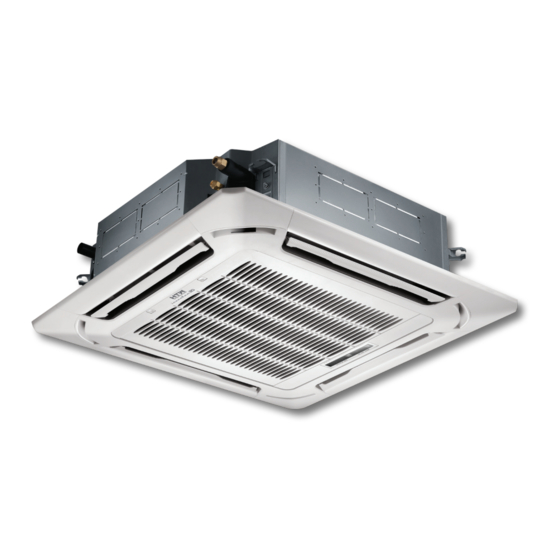
- Page 1 INSTALLATION MANUAL 4 way CASSETTE type 90x90 HTW-MI45Q4DHN1D | HTW-MI56Q4DHN1D | HTW-MI71Q4DHN1D HTW-MI80Q4DHN1D| HTW-MI100Q4DHN1D | HTW-MI140Q4DHN1D Thanks for choossing our product. Please, read carefully this manual before using the product...
-
Page 2: Table Of Contents
Install according to this installation instructions strictly. CONTENTS PAGE If installation is defective, it will cause water leakage, electrical shock fire. 1. PRECAUTIONS..................1 2. INSTALLATION INFORMATION............2 When installing the unit in a small room, take measures against to keep refrigerant concentration from exceeding 3. -
Page 3: Installation Information
There is strong electromagnetic wave existing. When carrying out piping connection, take care not to let air substances go into refrigeration cycle. There are inflammable materials or gas. Otherwise, it will cause lower capacity, abnormal high pressure in the refrigeration cycle, explosion and injury. There is acid or alkaline liquid evaporating. -
Page 4: Attached Fittings
3. ATTACHED FITTINGS Please check whether the following fittings are of full scope. If there are some spare fittings , please restore them carefully. Table: 3-1 NAME SHAPE QUANTITY 1. Expansible hook 2. Installation hook INSTALLATION FITTINGS 3. Installation paper board 4. -
Page 5: Installation
4. INSTALLATION 4.1 Installation place >1000mm (Refer to Fig. 4-1, Fig. 4-2, Fig. 4-3 and Table: 4-1 for specification.) The indoor unit should be installed in a location that meets the following reauirements: There is enough room for installation and maintenance. The ceiling is horizontal, and its structure can endure the weight of the indoor unit. - Page 6 Refer to 3 above for installation. WARNING Remove the installation paper board. Install the unit at a site with sufficient strength to supporting the weight of the unit. Unit body Insufficient supporting strength would fall-down the unit and cause Central hole human physical injury.
- Page 7 FIGURES The connective pipe of restricted assembly (accessories) Drain pipe outter diameter Φ75New air supply orifice Fig. 4-7 ≥20 Install hanger Hexagon nut (For adjust to balance) Ceiling Panel Main body Drain pipe Electrical restricting assembly Fig. 4-8 Fig. 4-9 Table: 4-2 Main body of the unit A(mm)
- Page 8 4.4 Procedure of installing the pendant bolt 4.4 Procedure of installing the pendant bolt CAUTION Base on the unit structure, please set the screw-pitch according to the size of the following figures: The bolt material is the high quality carbon steel (galvanized or covered other rust preventive materials on the surface) or rustless steel.
- Page 9 3. Install the panel CAUTION 1) The part of panel that marked “PIPING SIDE” and “DRAIN SIDE” shall be aligned to piping outlet and drainpipe outlet from main body. 1) The salient of plastic cap in sway motor shall be inserted in the notch of the water outflow pipe seal board.
- Page 10 Slug Installation cover’s rope Slide the four sliders in the corresponding Tap screw channel when installing the cover. Fig.4-21 Fig.4-20 Fig.4-20 4.6 Install the distribution duct Conditioned air can be distributes by means of a distribution duct. NOTE 5600-8000W Series A=350mm; Series B=85mm 9000-15500W Series A=350mm;...
-
Page 11: Layout The Drain Pipe
5. LAYOUT THE DRAIN PIPE CAUTION 5.1 Install the drain pipe of indoor unit The joints in drain system must be sealed to avoid water leakage. 1) The drainpipe can use PVC pipe (external diameter about 37~ 39mm, inner diameter is 32mm). 9) The height from floor to the end of drainpipe or the bottom of 2) Joint drainpipe connector to the end side of water pumping pipe, drain slot must more than 50 mm. -
Page 12: Install The Connecting Pipe
6. INSTALL THE CONNECING PIPE 5.2 Drain test 1. Before testing, please ensure that water could be drained 6.1 The connective length of indoor and outdoor piping fluently, and check all joints are sealed. and those height difference requirements. 2. Drain test shall be processed before construct ceiling for a new Connect to different outdoor units with different connective length house. - Page 13 2) The valve of the outdoor unit should be closed completely (as in 6.4 Pipeline connection the factory status). Every time when connecting the pipe, screw off the nut at the valve, and connect the flared pipe (within 5 minutes). If 1.
-
Page 14: Wiring
CAUTION Cut it from up to down Please beware when install connective pipe, do not let any air, dust or other foreign substance invading into system. Pipes connection could be conducted after the indoor and Field piping side Unit body outdoor unit are be fixed. - Page 15 7.3 Indoor unit power 7-3-1 Special power supply is employed for indoor unit that must different from the outdoor one. 7-3-2 Using the universal indoor power supply, electric leakage protection devices and operating switches for indoor units that connect to a same outdoor unit. Outdoor power supply RCCB...
-
Page 16: Control Operation
CAUTION The system together have 64units(0-63),everyone has only system addresscode,If two addresses are the same in one system , the abnormal operation will occur. Please switch off the power before setting,otherwise the The wires connected indoor unit to outdoor unit unexpected error will occur. - Page 17 8.3 Main board Code designation 8.3 Main board Code designation SW1 definition S W 1 1 means factory test mode ● ● 01 means DC fan static pressure is 1 0 means add. auto searching mode ● (reserved) (default setting) 1234 1 2 3 4 S W 1...
-
Page 18: Test Peration
SW7 definition h. Whether there is vibration or abnormal noise during operation. S W 7 I. Whether the air conditioner heats well in the case of the HEATING/COOLING type. Standard configure 2) The outdoor unit a. Whether there is vibration or abnormal noise during operation. - Page 19 C./ Industria, 13 l Polígono Industrial El Pedregar 08160 Montmeló Barcelona (Spain) Phone: (0034) 93 390 42 20 Fax: (0034) 93 390 42 05 info@htwspain.com www.htwspain.com...
Need help?
Do you have a question about the HTW-MI45Q4DHN1D and is the answer not in the manual?
Questions and answers