Table of Contents
Advertisement
Quick Links
Advertisement
Table of Contents
Troubleshooting

Related Manuals for EMB Wallenstein WP630


Summary of Contents for EMB Wallenstein WP630
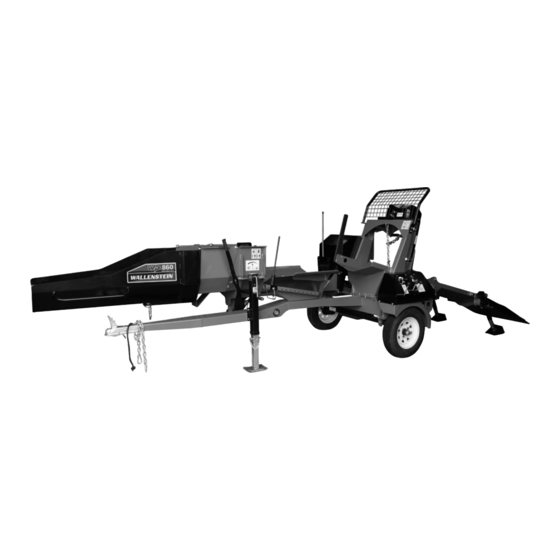
- Page 1 EMB MFG INC. EMB Manufacturing Inc. 4144 Boomer Line · St. Clements, On · N0B 2M0 · Canada Ph: (519) 699-9283 · Fax: (519) 699-4146 www.embmfg.com WP630 WP830 WP860 Wood Processor MODEL WP630, WP830 & WP860 OPERATOR'S MANUAL PRINTED IN CANADA...
-
Page 2: Table Of Contents
TABLE OF CONTENTS WARRANTY ..............3 ATTACHING AND UNHOOKING ..28 MACHINE SET-UP ....... 29 INSPECTION REPORT ..........4 FIELD OPERATION ......32 SERIAL NUMBER LOCATION ........5 4.8.1. PREPARE ..........32 INTRODUCTION ..........6 4.8.2. STARTING PROCEDURE: ....33 SAFETY ............7 4.8.3. STOPPING PROCEDURE: ....33 GENERAL SAFETY ........8 4.8.4. -
Page 3: Warranty
• any device or accessories installed by parties other than an authorized EMB dealer or distributor Engines are covered by the manufacturer of the engine and covered by the warranty period specified by that manufacturer. -
Page 4: Inspection Report
WALLENSTEIN Wood Processor INSPECTION REPORT This form must be filled out by the dealer and signed by both the dealer and the customer at the time of deliv- ery. Customer’s Name Dealer Name Address Address City, State/Province, Code City, State/Province, Code Phone Number ( Phone Number ( Contact Name... -
Page 5: Serial Number Location
SERIAL NUMBER LOCATION Always give your dealer the serial number of your Wallenstein Wood Processor when ordering parts or requesting service or other information. The serial number plate is located where indicated. Please mark the number in the space provided for easy reference. -
Page 6: Introduction
INTRODUCTION Congratulations on your choice of a Wallenstein Wood Processor to compliment your operation. This equip- ment has been designed and manufactured to meet the needs of a discerning timber or woodlot industry. Safe, efficient and trouble free operation of your Wallenstein Wood Processor requires that you and anyone else who will be using or maintaining the Wood Processor, read and understand the Safety, Operation, Maintenance and Trouble Shooting information contained within the Operator's Manual. -
Page 7: Safety
SAFETY SAFETY ALERT SYMBOL This Safety Alert symbol means The Safety Alert symbol identifies im- ATTENTION! BECOME ALERT! portant safety messages on the Wal- YOUR SAFETY IS INVOLVED! lenstein Wood Processor and in the manual. When you see this symbol, be alert to the possibility of personal injury or death. -
Page 8: General Safety
SAFETY GENERAL SAFETY YOU are responsible for the SAFE operation and 1. Read and understand the Op- maintenance of your Wallenstein Wood Processor. erator’s Manual and all safety YOU must ensure that you and anyone else who signs before using, maintaining, is going to use, maintain or work around the Wood adjusting or cleaning the Wood Processor be familiar with the using and mainte-... -
Page 9: Equipment Safety Guidelines
EQUIPMENT SAFETY GUIDELINES 1. Safety of the operator and bystanders is one of 8. Do not modify the equipment in any way. Un- the main concerns in designing and developing authorized modification may result in serious equipment. However, every year many accidents injury or death and may impair the function and occur which could have been avoided by a few life of the equipment. -
Page 10: Safety Training
SAFETY TRAINING PREPARATION 1. Never use the machine until you have read and 1. Safety is a primary concern in the design and manufacture of our products. Unfortunately, our completely understand this manual, the engine efforts to provide safe equipment can be wiped Operator's Manual and each of the Safety Mes- out by a single careless act of an operator or sages found on the safety signs on the engine... -
Page 11: Maintenance Safety
MAINTENANCE SAFETY HYDRAULIC SAFETY 1. Make sure that all the components in the hy- 1. Good maintenance is your responsibility. Poor draulic system are kept in good condition and maintenance is an invitation to trouble. are clean. 2. Follow good shop practices. 2. -
Page 12: Operating Safety
OPERATING SAFETY 1. Please remember it is important that you read 12. Do not try to split logs across the grain. Some and heed the safety signs on the Wood Proc- logs can burst or splinter and fly out of the ma- essor. -
Page 13: Storage Safety
2.10 STORAGE SAFETY 2.12 BATTERY SAFETY 1. Store the unit in an area away from human 1. Batteries generate hydrogen gas, which can activity. be highly explosive. Do not smoke or allow flames or sparks near a battery, especially dur- 2. -
Page 14: Gas Motor Safety
2.14 GAS MOTOR SAFETY 14. DO NOT crank engine with spark plug removed. If engine is flooded, crank until engine starts. BEFORE STARTING ENGINE, READ AND UNDERSTAND THE OPERATING 15. DO NOT strike flywheel with a hard object or AND MAINTENANCE INSTRUCTIONS metal tool as this may cause flywheel to shatter THAT CAME WITH YOUR ENGINE. - Page 15 2.15 SIGN-OFF FORM Wallenstein follows the general Safety Standards specified by the American Society of Agricultural and Biological Engineers (ASABE) and the Occupational Safety and Health Administration (OSHA). Anyone who will be using and/or maintaining the Wood Processor must read and clearly understand ALL Safety, Usage and Maintenance information presented in this manual.
-
Page 16: Safety Sign Locations
SAFETY SIGN LOCATIONS The types of safety signs and locations on the equipment are shown in the illustrations that follow. Good safety requires that you familiarize yourself with the various safety signs, the type of warning and the area, or particular function related to that area, that requires your SAFETY AWARENESS. •... -
Page 17: Operation
OPERATION OPERATING SAFETY • Read and understand operator's manual • Check rope condition before using winch. before starting. Review safety instructions Rope may break during operation if it is cut, knotted, has broken strands or worn. Replace annually. rope if damaged. •... -
Page 18: To The New Operator Or Owner
TO THE NEW OPERATOR OR OWNER The Wallenstein Wood Processors are designed to Job Site: connect to and pull logs to the machine, position for cutting with a chain saw and split the resulting log. It is the responsibility of the operator to be The operator should be familiar with the machine thoroughly familiar with the work site prior to prior to starting. -
Page 19: Machine Components
MACHINE COMPONENTS The Wallenstein Wood Processor consists of a winch mounted in a frame to winch logs into the log lead in chute and then position the log on the log loader chute, up to the log length guide. The hydraulic winch control lever engages the winch motor to wind or unwind the rope. -
Page 20: Machine Break-In
MACHINE BREAK-IN PRE-OPERATION CHECKLIST Although there are no operational restrictions on the Efficient and safe operation of the Wallenstein Wood Wood Processor when used for the first time, it is Processor requires that each operator reads and recommended that the following mechanical items understands the using procedures and all related be checked: safety precautions outlined in this section. -
Page 21: Controls
CONTROLS Before starting to work, all operators should famil- iarize themselves with the location and function of Choke controls. Throttle 4.5.1. GAS ENGINE ELECTRIC START (Models WP830 & WP860): Read the engine manufacturers operator's manual before starting for more detailed in- structions. -
Page 22: Gas Engine Manual Start
4.5.2. GAS ENGINE MANUAL START (Model WP 630): Read the engine manufacturers operator's manual before starting for more detailed in- structions. Ignition a. Ignition Switch: Switch Throttle This switch controls the electrical power to the engine electrical system. Turn the Choke switch counter-clockwise to turn OFF. -
Page 23: Hydraulic Winch Control
Unwind: 4.5.3. HYDRAULIC WINCH CONTROL push forward This 3-position "spring-loaded-to-center neutral" valve controls the flow of oil to the hydraulic motor Wind: powering the rope winch. pull 1. Pull the lever back and hold to start the winch back and wind the rope. 2. -
Page 24: Controls & Auto Cycle
4.5.5. HYDRAULIC CONTROLS & AUTO CYCLE WP830 and WP860: These two hydraulic levers control the extending and retracting movement of the Wood Processors' splitting cylinder rod. These 3-position "spring-loaded-to-center neutral" levers, control the flow of oil to the cylinder. They are equipped with a detent in the engaged position to allow the cylinder to move through its complete cycle and then return to its starting position automatically. - Page 25 WP630: This 3-position "spring-loaded-to-center neutral" lever controls the flow of oil to the cylinder. 1. Pull the lever back and hold for the cylinder piston to extend and split the wood. 2. Once the wood is split, move the lever forward and place it in the detent position to retract the cylinder 3.
-
Page 26: Splitting Wedge Height Lever
4.5.6. SPLITTING WEDGE HEIGHT LEVER: This multi-position lever controls and sets the height position of the horizontal splitting wedge. Lower At its lowest position the 4 way wedge becomes a two way wedge, to handle smaller logs, increasing the height allows for 4 way splitting of larger logs. Adjust the height as required. -
Page 27: Splitter Chute Height Adjuster
4.5.8. SPLITTER CHUTE HEIGHT ADJUSTER: The adjustable sliding bracket controls the height of the end of the splitter chute, up to 54" (1.37 m). This allows for split wood to be loaded directly onto a conveyor, or into a high sided dumper with out any extra handling. -
Page 28: Attaching And Unhooking
ATTACHING AND UNHOOKING When attaching the Wood Processor to a tow unit, the Wood Processor should always be located on a level, dry area that is free of debris and other foreign objects. When attaching the Wood Processor to a tow unit, follow this procedure: 1. -
Page 29: Machine Set-Up
MACHINE SET-UP Follow this procedure to prepare and set-up the machine at the work site: 1. Use the tow unit to position the Wood Proces- sor at the work site. IMPORTANT Position the machine so the prevail- ing wind/breeze blows the exhaust gases/fumes away from the opera- tor's station. - Page 30 5. Remove the snapper pins securing the bracing jacks and turn them to the bracing Bracing Jacks position. 6. Replace the snapper pins to secure the jacks. NOTE Angle the jacks upward so they will contact the ground evenly when the chute is lowered.
- Page 31 9. Fold the log loader chute down. 10. Install and tighten the nuts for the log loader chute anchor bolts, on the left and right side. 11. Crank the bracing jacks till the jack feet are Log Loader Chute firmly on the ground. 12.
-
Page 32: Field Operation
FIELD OPERATION OPERATING SAFETY • Read and understand operator's manual • Do not touch rope during operation. before starting. Review safety instructions • Check rope condition before using winch. annually. Rope may break during operation if it is cut, • Close and secure all guards, deflectors and knotted, has broken strands or worn. -
Page 33: Starting Procedure
4.8.2. STARTING PROCEDURE: Throttle Choke a. The Wood Processor should be set up and ready to run. b. Ensure the hydraulic controls are in neu- tral position (out of detent) Ignition c. Close the choke if the engine is cold. d. -
Page 34: Processing Operation
4.8.5. PROCESSING OPERATION: The Wood Processor is running and set up at the work site. Ensure the operator is wearing the appropriate safety equipment. (see Prepare). Have your chainsaw ready A. Winching: a. Release the winch rope by moving the Winch Gear Lever winch gear lever to the left. - Page 35 B. Second log: As you finish the first log, you will find it is too short to winch in. At that point another log can be used to move the first one into the cutting area. When working with a second log, follow this procedure: Winching to Cutting Guide 1.
-
Page 36: Pull Angle
4.8.6. PULL ANGLE: It is recommended that the pull angle of the rope not exceed + 25° from the horizontal axis of the machine. Exceeding that angle can subject the machine to a tipping load and tip the machine over. Use a log peavey to move the log in line with the Wood Processor to reduce or eliminate the tipping load. -
Page 37: Cutting
4.8.9. CUTTING: Chain Saw Guide Review the chain saw operator's manual and follow all safety instructions. Always wear appropriate Personal Protective Equipment (PPE) when using a chain saw. a. Ensure you chainsaw is sharpened and in good working order. b. Use the saw guide to safely align your cuts. -
Page 38: Transporting
TRANSPORTING TRANSPORT SAFETY • Comply with state and local laws govern- • Always install transport locks, pins or brack- ing safety and transporting of machinery on ets before transporting. public roads. • Plan your route to avoid heavy traffic. • Check that all the lights, reflectors and other lighting requirements are installed and in •... -
Page 39: Storage
4.10 STORAGE STORAGE SAFETY • Store the unit in an area away from human activity. • Do not permit children to play on or around the stored machine. • Store the unit in a dry, level area. Support the frame with planks if required. -
Page 40: Service And Maintenance
SERVICE AND MAINTENANCE SERVICE MAINTENANCE SAFETY 5.1.1 FLUIDS AND LUBRICANTS • Good maintenance is your responsibility. 1. Engine Oil: Poor maintenance is an invitation to trouble. Refer to the engine manufacturer's manual for maintenance and service information • Follow good shop practices. 2. -
Page 41: Service Illustration
5.1.3 SERVICE ILLUSTRATION See Service Record Chart This illustration shows the general location of service points for all models in this manual. Refer to your engine instruction manual for specific maintenance instructions / requirements On a regular Winch Rope: inspect basis check all during each use. - Page 42 5.1.4 SERVICE RECORD CHART See Lubrication and Maintenance sections for details of service. Copy this page to continue record. Refer to your engine instruction manual for specific maintenance instructions / requirements 40 Hours or 50 Hours or 8 Hours or Daily 100 Hours or Annually Weekly Annually...
-
Page 43: Hydraulic Oil Filter & Change
5.1.5 HYDRAULIC SYSTEM OIL FILTER & OIL CHANGE 1. Review the Operator's Manual for the Wood Processor. 2. Move controls to neutral or off position, stop Hydraulic Oil engine, remove ignition key and wait for all Filter moving parts to stop before servicing, re- pairing or maintaining. -
Page 44: Trouble Shooting Chart
TROUBLE SHOOTING CHART Always wear the appropriate safety gear when trouble shooting, performing maintenance or working around the machine. This includes but is not limited to: • Hard hat for protection to the head. • Face mask for protection to the face and eyes. •... -
Page 45: Specifications
SPECIFICATIONS MECHANICAL Model WP860 WP830 WP630 14 HP (10.3 kW) / EX 400 DP Subaru 9 HP (9.6 kW) / EX27 Engine Power / Model Engine Subaru Engine 16 GPM (60.5 lpm) / 22 GPM (83.2 lpm) / 2 Stage Hydraulic Pump Flow / Type 2 Stage 4.5"... -
Page 46: Bolt Torque
BOLT TORQUE CHECKING BOLT TORQUE ENGLISH TORQUE SPECIFICATIONS Bolt Torque* The tables shown give correct torque Bolt values for various bolts and capscrews. Diamter SAE 2 SAE 5 SAE 8 Tighten all bolts to the torques specified "A" (N.m) (lb-ft) (N.m) (lb-ft) (N.m) (lb-ft) in chart unless otherwise noted. -
Page 47: Hydraulic Fitting Torque
HYDRAULIC FITTING TORQUE Tightening Flare Type Tube Fittings * 1. Check flare and flare seat for defects that might cause leakage. 2. Align tube with fitting before tightening. 3. Lubricate connection and hand tighten swivel nut until snug. 4. To prevent twisting the tube(s), use two wrenches. Place one wrench on the connector body and with the second tighten the swivel nut to the torque shown. -
Page 48: Accessories
ACCESSORIES Call your dealer for pricing and availability 2089A570 NYLON CHAINSAW HOLSTER For models: WP630, WP830, WP860 easy to install, fastens to Wood Processor Nylon holder, safely holds your chainsaw keeping it off the ground and out of the way! #2089A570 #2089W571 6-WAY WEDGE For models: WP630, WP830, WP860... -
Page 49: Index
INDEX ACCESSORIES ..........48 PEAVEY .............48 AUTO CYCLE ............24 PPE ..............32 AUTO RETRACT ..........25 SAFETY ...............7 BRACING JACKS ..........30 BATTERY ............13 BREAK-IN ............20 EQUIPMENT ............9 GAS MOTOR ..........14 GENERAL ............8 CHAIN SAW GUIDE ...........37 HYDRAULIC ..........11 CHART ...............42 MAINTENANCE ..........11 CHOKE ...............21 OPERATING ..........12 COMPONENTS ..........19 PREPARATION ..........10...
Need help?
Do you have a question about the Wallenstein WP630 and is the answer not in the manual?
Questions and answers