
Subscribe to Our Youtube Channel
Related Manuals for Home Accents Holiday 1006 129 413


Summary of Contents for Home Accents Holiday 1006 129 413
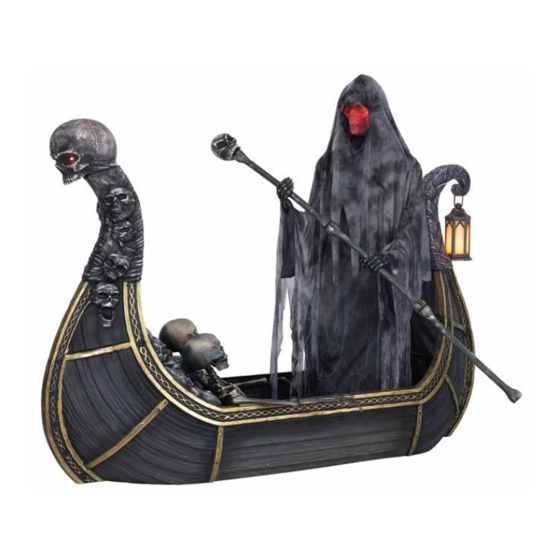
- Page 1 1006 129 413 INSTRUCTION MANUAL SET-UP INSTRUCTIONS FOR THE 8 FT ANIMATED LED FERRY OF THE DEAD 1-877-527-0313, 8 a.m. to 5 p.m., EST, info@pan-asian.com.hk. Monday-Friday...
- Page 2 READ CAREFULLY & RETAIN FOR FUTURE REFERENCE! Questions, problems, missing parts? Before returning to your retailer, call our customer service department at 1-877-527-0313, 8 a.m. to 5 p.m., EST, Monday-Friday or email at info@pan-asian.com.hk. WARNING: This is not a toy and is for decorative purposes only. For incoor/outdoor use. This item is not intended for use by children under the age of 14.
-
Page 3: Troubleshooting
WARNING: Changes or modifications to this unit not expressly approved by the party responsible for compliance could void the user's authority to operate the equipment. NOTE: This equipment has been tested and found to comply with the limits for a Class B digital device, pursuant to Part 15 of the FCC Rules. - Page 4 PART LIST: Front Right & Back Left Front Left & Back Right Right Middle QTY 2 QTY 2 QTY 1 Left Middle Front Top Front Top Skull QTY 1 QTY 1 QTY 1 Back Top Lantern Bones Kit QTY 1 QTY 1 QTY 1 Skeleton...
- Page 5 Skeleton Support Rod Support Rod for Screws Boat front and Back QTY 1 QTY 2 QTY 16 Plistic Screwdriver Fabric Ground Stakes QTY 1 QTY 1 QTY 6 Part list for Reaper Support Rod Base Reaper’s Support Rod Body QTY 1 QTY 2 QTY 1 Hip Rod...
- Page 6 Boat pole-Middle & Top Boat pole-Bottom Boat pole Skull QTY 2 QTY 1 QTY 1 AC/DC adapter & Cable Instructions Menu QTY 1 QTY 1 NOTE: If any parts are broken or missing first call the customer care number 1-877-527-0313...
- Page 7 Step 1 Step 2 BOAT BACK Right Left Middle Middle BOAT FRONT BOAT BACK BOAT FRONT...
- Page 8 Step 3 Back View Front View REPEAT STEP 3 AND STEP 4 TO ASSEMBLE THE OPPOSITE SIDE OF THE BOAT. Step 4 Close the (8) x “Locking Clips” located inside the boat parts onto the corresponding (8) x Use the plastic screw driver “Locking Clip Attachments”...
- Page 9 Step 6 BOAT BOAT BACK BACK Step 7 BOAT BOAT FRONT FRONT Use the plastic screw driver (16) and 3 x screws (15) to securely fasten the front top (5) to the front of the boat as shown. DO NOT OVERTIGHTEN Step 8 Step 9...
- Page 10 Step 11 Step 10 Step 10 Use the plastic screw driver (16) and 3 x screws (15) to securely fasten the back top (7) to the back of the boat as shown. DO NOT OVERTIGHTEN Step 12 Insert 2 x ground stakes (18) through the corresponding holes located in the support rods (14) and push or gently hammer (not included) to secure into the ground for outdoor display stability as shown.
- Page 11 Use the plastic screw driver (16) and 2 x Step 12-1 screws (15) to securely fasten the bones kit (9) to the front of the boat as shown. DO NOT OVERTIGHTEN BOAT FRONT BOAT BACK Step 13: Unpack and Unfold the black fabric (17) BOAT BACK BOAT...
- Page 12 Step 17 Attach the two skeletons onto the Skeleton Support Rods (13). NOTE: Please install left skeleton first and then install the right side RIGHT skeleton. as shown. LEFT BOAT FRONT BOAT BACK...
- Page 13 Step 19 Step 18 Sound Box Step 20 Align the two arrows, Connect the Black wires together and White wires together. Step 21 Plug the Try Me wire into the port on the sound box as shown Step 22 Step 23 Attach the left arm into the reaper Attach the right arm into...
- Page 14 Step 24 Attach the right sleeve of the costume to the right hand using the hook and loop tabs to secure in place as shown Attach the left sleeve of the costume to the left hand using the hook and loop tabs to secure in place as shown Step 25 Step 26...
- Page 15 Step 28 Insert 4 x ground stakes (18) through the corresponding holes located in the support rods (14 and 19) and push or gently hammer (not included) to secure into the ground for outdoor display stability as shown. Step 29 Step 30 Step 32 Step 32...
- Page 16 Step 33 Sound Box Fully Assembled Product AC Adapter (DC 6V, 1.5A) Plug adapter into 100-240V household outlet...
- Page 17 Step 3 Use the plastic screw driver (16) and 2 x Step 19 Step 24 Back View Front View Step 12-1 screws (15) to securely fasten the bones ASSEMBLING THE REAPER Step 17 kit (9) to the front of the boat as shown. Step 28 DO NOT OVERTIGHTEN “CLICK”...
Need help?
Do you have a question about the 1006 129 413 and is the answer not in the manual?
Questions and answers