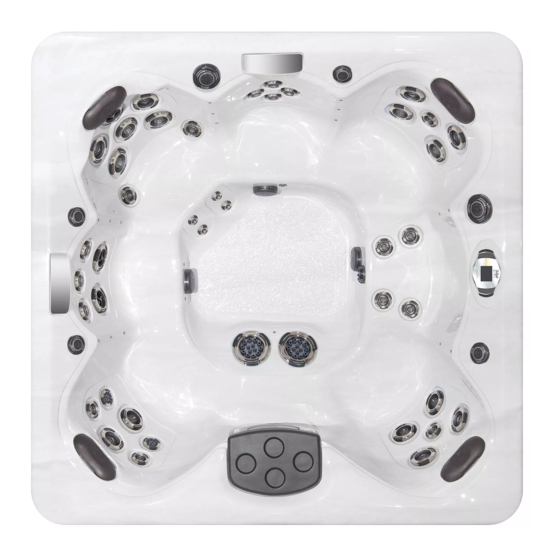
Master Spas Twilight TS 240 Owner's Manual

Master Spas Twilight TS 240 Owner's Manual

Hide thumbs Also See for Twilight TS 240:

Advertisement

O W N E R ' S M A N U A L

Advertisement

Table of Contents
loading

Summary of Contents for Master Spas Twilight TS 240

  • Page 1 O W N E R ’ S M A N U A L...
  • Page 3: Record Of Ownership

    MASTER SPAS OWNER’S MANUAL Welcome To Ultimate Relaxation! Thank you for choosing your new spa built by Master Spas. Please read the entire Owner’s Manual before installing and using your spa. The goal of this manual is to provide you with safety and operational information plus some tips that will help you enjoy your spa to its fullest.
  • Page 4: Table Of Contents

    TABLE OF CONTENTS Record of Ownership ......................1 Table of Contents ........................2 Safety Instructions ......................3-10 VGB Suction Safety & Maintenance Instructions ............... 11-12 Glossary of Spa Terminology ................... 13-15 Site Preparation / General Guidelines ................16-18 Installation Instructions ....................19-20 The Advantages of EcoPur Charge ..................
  • Page 5: Safety Instructions

    INTRODUCTION It’s time to relax! You now have your very own portable spa by Master Spas, Inc. By fully under- standing the operation of each of the features of your new Master Spa, you will be assured of many years of hassle-free, hot water therapy and fun.
  • Page 6 SAFETY INSTRUCTIONS IMPORTANT SAFETY INSTRUCTIONS When installing and using this electrical equipment, basic safety precautions should be observed including the following: READ AND FOLLOW ALL INSTRUCTIONS WARNING – To reduce the risk of injury, do not permit children to use this product unless they are closely supervised at all times.
  • Page 7 SAFETY INSTRUCTIONS IMPORTANT SAFETY INSTRUCTIONS (CONT.) (For units with GFCI) WARNING – This product is provided with a ground-fault circuit interrupter located on the front panel of selected swim spas and on the power cord of 120 volt convertible spas. The GFCI must be tested before each use. With the product operating, open the service door.
  • Page 8 SAFETY INSTRUCTIONS IMPORTANT SAFETY INSTRUCTIONS (CONT.) b) Since excessive water temperatures have a high potential for causing fetal damage during the early months of pregnancy, pregnant or possibly preg- nant women should limit spa water temperatures to 38˚C (100˚F). c) Before entering a spa, the user should measure the water temperature since the tolerance of water temperature- regulating devices varies.
  • Page 9 SAFETY INSTRUCTIONS IMPORTANT SAFETY INSTRUCTIONS (CONT.) DANGER – To reduce the risk of injury to persons, do not remove the suction grate. Suction through drains and skimmers is powerful when the jets in the spa are in use. Damaged covers can be hazardous to small children and adults with long hair.
  • Page 10 SAFETY INSTRUCTIONS IMPORTANT SAFETY INSTRUCTIONS (CONT.) The unit should be subjected to periodic routine maintenance once every quarter to make sure that the it is operating properly. DANGER – Risk of Electric Shock. A green colored terminal or a terminal marked G, GR, Ground, Grounding or the symbol shown in Figure 14.1 of UL 1563 is located inside the supply terminal box or compartment.
  • Page 11 SAFETY INSTRUCTIONS WARNING: CHILDREN SHOULD NOT USE SPAS OR HOT TUBS WITHOUT ADULT SUPERVI- SION AVERTISSEMENT: NE PAS LAISSER LES ENFANTS UTILISER UNE CUVE DE RELAXATION SANS SURVEILLANCE WARNING: DO NOT USE SPAS OR HOT TUBS UNLESS ALL SUCTION GUARDS ARE INSTALLED TO PREVENT BODY AND HAIR ENTRAPMENT.
  • Page 12 SAFETY INSTRUCTIONS WARNING: DO NOT USE A SPA OR HOT TUB IMMEDIATELY FOLLOWING STRENUOUS EXERCISE AVERTISSEMENT: NE PAS UTILISER UNE CUVE DE RELAXATION IMMÉDIATEMENT APRÉS UN EXERCISE FATIGANT WARNING: PROLONGED IMMERSION IN A SPA OR HOT TUB MAY BE INJUROUS TO YOUR HEALTH AVERTISSEMENT: L’UTILISATION PROLONGÉE D’UNE CUVE DE RELAXATION PEUT...
  • Page 13: Vgb Suction Safety & Maintenance Instructions

    VGB Suction Safety & Maintenance Instructions VGB 2008: WARNING Read and follow all instructions in this manual and on the suction fitting. Failure to follow instructions can cause severe injury and/or death. Failure to remove pressure test plugs and/or plugs used in winterization of the spa/swim spa from the suction outlets can result in an increased potential for suction entrapment as described on the previous page.
  • Page 14 This is a mandated regulation and is not part of nor covered by the spa warranty. NOTE: Always review entire safety and maintenance information before beginning maintenance. Contact Master Spas for Suction Installation information for complete suction assembly replace- ment. DO NOT DIVE.
  • Page 15: Glossary Of Spa Terminology

    GLOSSARY OF SPA TERMINOLOGY Your new Master Spa features a variety of jets. All jets, regardless of style return the water to the spa. Air is mixed with the water by using the air controls (if equipped) creating a gentle to most vigorous massage.
  • Page 16 12. ACCESS PANELS These are the skirt panels located around all four sides of the spa. All of the skirt panels are removable should service be required. Master Spas recommends at least 3 feet of access be provided around the spa.
  • Page 17 GLOSSARY OF SPA TERMINOLOGY 16. SPA HEATER This is an electric heater housed in a stainless steel tube. It is thermostatically controlled and equipped with high-limit temperature safety shut-off sensors. 17. SLICE VALVES These valves are used by service personnel to shut off water to the heating system (heater and pump plumbed to the heater) so that the spa water does not need to be drained if the spa requires service to the heating system (varies by...
  • Page 18: Site Preparation / General Guidelines

    Please be sure to contact and review these site and installation plans with your Master Spas dealer prior to delivery. 2) Surface/Pad Requirements - When your new spa is filled with water and bathers, it may weigh as much as several tons.
  • Page 19 GUIDELINES FOR PARTIALLY OR FULLY RECESSED INSTALLATION Spas manufactured by Master Spas, Inc. are designed to be installed in a variety of settings. One of which is installing below grade. Should a spa be installed below the level of the site drainage system (below grade), a system for preventing water collecting and pooling must be designed based on the requirements of the local authority having jurisdiction.
  • Page 20 SITE PREPARATION / GENERAL GUIDELINES DO NOT DIVE.
  • Page 21: Installation Instructions

    INSTALLATION INSTRUCTIONS Put spa in final position that allows for access to equipment and spa components. Master Spas recommends that at least 3 feet of space be provided around all sides of the spa for access. This provides adequate space for regular maintenance and service. Remove front skirt panel (this is the side where the topside control panel is located) so electrical can be hooked up to the spa control system.
  • Page 22 Due to the nature of water flow and hydro-therapy pumps, please be advised that air locking of pumps may occur. Master Spas has taken measures to reduce the possibility of this, but it still may occur, especially after refilling a spa. This is not a service covered under warranty.
  • Page 23: The Advantages Of Ecopur Charge

    ® tected against the corrosive effects of chlorine. EcoPur Charge Master Core Technology, another exclusive design by Master Spas. FEATURES • Releases Sanitizing Copper & Zinc Oxides • Reduces Water Soluble Heavy Metals •...
  • Page 24 ® THE ADVANTAGES OF EcoPur Charge ECOPUR ® CHARGE INSTALLATION Master Spas Outer Filter EcoPur ® Charge ® Step 1: Insert EcoPur Charge in to outer filter. ® Step 2: Twist EcoPur Charge clockwise to lock in place while holding on to outer filter. When snapped in to ®...
  • Page 25: Water Chemistry Terms You Should Know

    WATER CHEMISTRY TERMS YOU SHOULD KNOW Before jumping into Water Maintenance, here are some terms to help you. Parts per million, or ppm: This is a form of measurement used in most pool or spa chemical readings. Best described as any one million like items of equal size and make up, next to one unlike item, but of equal size.
  • Page 26 WATER CHEMISTRY TERMS YOU SHOULD KNOW Sanitizers: This is what kills the germs and bacteria that enter the water from the environment and the human body. A. Chlorine 1. Only one type is approved for spa use. Sodium dichlor which is granular, fast dissolv- ing and pH neutral chlorine.
  • Page 27: Why Are Chemicals Important In A Spa

    WHY ARE CHEMICALS IMPORTANT IN A SPA 1. Evaporation: As water evaporates, only pure water evaporates, leaving the salts, minerals, metals, and any unused chemicals behind. Adding water adds more salts, minerals, and metals. In time, the water can become saturated with these dissolved solids and can cause stains or scale to form on the walls of the spa or a scale build up inside the equipment.
  • Page 28: Water Maintenance

    WATER MAINTENANCE – START-UP Your spa should be filled using a Pre-filter, which can be obtained from your local Step 1: dealer. This Pre-filter will help remove many of the minerals existing in the water, which will make adjusting the water balance easier after a new fill. Never use more then 50% softened water when filling the spa.
  • Page 29: Schedule

    WATER MAINTENANCE – SCHEDULE BEFORE EACH USE Check spa water with a test strip for proper sanitation levels and adjust accordingly to the proper levels. Free chlorine level should be 2.0 - 4.0 ppm. Appropriate levels should be present before use of the spa.
  • Page 30 WATER MAINTENANCE – SCHEDULE AS NEEDED If water looks hazy, check PH and Total Alkilinity, and treat with chlorine*. Always refer to the chemical manufactures dosage recommendations listed on the container. Free chlorine levels should be maintained between 2.0 - 4.0 ppm. These are general recommendations for water maintenance that may vary by usage and bather load.
  • Page 31: Troubleshooting Guide

    WATER MAINTENANCE – TROUBLE-SHOOTING GUIDE PROBLEM POSSIBLE CAUSES HOW TO FIX IT Chlorine / Bromine Odor • Excessive Chlorine or • Shock water with non-chlorine bromine levels shock treatment • Low pH • Adjust pH if necessary Water Odor • Low levels of sanitizer •...
  • Page 32 Regular Maintenance Procedures Note: These are areas that will require the spa owner to perform routine maintenance. These are not areas covered under the warranty of the spa. Your spa requires periodic draining and cleaning to ensure a safe, healthy environment. It is recom- mended that you clean your spa at least every 180 days or as necessary.
  • Page 33: Regular Maintenance Procedures

    • If your spa has developed an oily or chalky residue at the waterline it may require special treat- ment. Consult your dealer. • Always use an approved insulating spa cover by Master Spas to cover your spa when not in use, especially in outdoor installations where the spa is exposed to weather conditions and sun.
  • Page 34 REGULAR MAINTENANCE PROCEDURES ACCESSING FILTERS Filter Weir with Top Access Remove Filter Lid Turn Filters Counterclockwise to Remove Vane Teleweir Filter Housing Pull Up to Remove Turn Filters Floater Assembly Counterclockwise to Remove Telescoping Filter Housing Twist Lock Ring Remove Basket Turn Filters Counterclockwise to Counterclockwise...
  • Page 35 REGULAR MAINTENANCE PROCEDURES Note: These are areas that will require the spa owner to perform routine maintenance. These are not areas covered under the warranty of the spa. CLEANING JETS The majority of jets in your spa can individually be turned on/off. If any of these jets become hard to turn, it will be necessary to remove the jet to clean it as grit/sand and mineral deposit may be present.
  • Page 36 CARE OF YOUR SPA COVER Always cover your spa when not in use with an approved insulating spa cover by Master Spas. This will greatly reduce energy consumption and will cause spa water to heat more rapidly. Water loss and chemical usage will also be reduced.
  • Page 37 STAINLESS STEEL Master Spas uses stainless steel in a number of our spas. Its lasting beauty and resistance to corro- sion make it an excellent material for handrails and jets faces. With the proper care it will keep its luster for many years. All stainless steel can corrode given the right circumstances so we have provided a guide to help you keep the stainless components in your spa looking nice.
  • Page 38: Spa Troubleshooting Guide

    SPA TROUBLE SHOOTING GUIDE Note: For wiring outside of U.S. and Canada, GFCI may be referred to as a RCD (residual current device). Be sure all local electrical codes are followed. NOTHING ON THE SPA OPERATES 1. Check the control panel display for any messages. If there is a message, refer to the diagnostic section on that model spa.
  • Page 39 SPA TROUBLE SHOOTING GUIDE Note: For wiring outside of U.S. and Canada, GFCI may be referred to as a RCD (residual current device). Be sure all local electrical codes are followed. SPA NOT HEATING If the spas heater has failed, the majority of the time it will trip the GFCI breaker. If the spa is not heating and has not tripped the breaker, please follow these steps: 1.
  • Page 40: Winterizing & Storing Your Spa

    Replace access panels. 10. Cover spa to prevent water from entering the spa. * Disclaimer: Master Spas does not recommend winterizing your spa. If you choose to do so, any damage that may result is not covered under the spa warranty.
  • Page 41: Spa Care & Maintenance Record

    SPA CARE AND MAINTENANCE RECORD DATE DATE DATE DATE DATE DATE DATE DATE Drain & Clean Spa Clean Filter Cartridge Soak Filter Cartridge in Solution Test GFCI Clean and Condition Spa Cover Miscellaneous Service Miscellaneous Service DO NOT DIVE.
  • Page 42 SPA CARE AND MAINTENANCE RECORD DATE DATE DATE DATE DATE DATE DATE DATE Drain & Clean Spa Clean Filter Cartridge Soak Filter Cartridge in Solution Test GFCI Clean and Condition Spa Cover Miscellaneous Service Miscellaneous Service DO NOT DIVE.
  • Page 43: Electrical Requirements

    ELECTRICAL REQUIREMENTS Configuration 2 - 240V, 50A GFCI Note: Electrical requirements by model is shown in Model Specifications. Only electrical configurations pertain- ing to the models referenced in this manual are shown. ELECTRICAL REQUIREMENTS HAVE YOUR ELECTRICIAN READ THE FOLLOWING INFORMATION BEFORE INSTALLATION BEGINS Electrical connections made improperly, or the use of wire gauge sizes for incurring power which are too small, may continually blow fuses in the electrical equipment...
  • Page 44 ELECTRICAL REQUIREMENTS Configuration 2 - 240V, 50A GFCI MAIN ELECTRICAL PANEL (HOUSE) WHT - White Neutral BLK - Black Hot, Line 1 RED - Red Hot, Line 2 GND - Ground 50 AMP GFCI TEST *SPA CONTROL SYSTEM CONFIGURATION 2 240V, 50A GFCI *Refer to wiring diagram inside spa control system...
  • Page 45: Model Specifications

    Model SPECIFICATIONS DO NOT DIVE.
  • Page 46 Spa Controls - Icon Spa Touch The Main Screen DO NOT DIVE.
  • Page 47 Spa Controls The Main Screen                   SPA STATUS Important information about spa operation can be seen on the Main Screen. Most features, including Set Temperature adjustment, can be accessed from this screen. The actual water temperature can be seen, and the Set Temperature can be adjusted.
  • Page 48 Spa Controls The Main Screen ICON SPECIFICATIONS = High Temperature Range = Low Temperature Range = Ready Mode = Ready And Rest Mode = Rest Mode = Filter1 Mode = Filter2 Mode = Filter1 and 2 Mode = Ozone is Running. If you don't see the icon that means the Ozone is OFF. = Cleanup Cycle is Running.
  • Page 49 Spa Controls The Main Screen ICON SPECIFICATIONS 14. Indicates if the temperature is in = Fahrenheit or = Celsius. 15. Current water temperature. 16. Setting Icon. = Settings is Active = Settings is Inactive Takes you to Settings Menu Screen Where the available specific features that can be adjusted for the control can be adjusted.
  • Page 50 Spa Controls The Main Screen MESSAGES At the bottom of the screen, at certain times an indicator may appear showing that a message is waiting. Touch this indicator to go to the Message Display Screen. On that Screen some of the messages can be dismissed.
  • Page 51 Spa Controls The Set Temperature Set Temperature Set Temperature Down SET TEMPERATURE Press Up or Down once to display the Set Temperature (indicated by a flashing ºF or ºC). Press Up or Down again to modify the Set Temperature. The Set Temperature changes immediately. If you need to switch between High Temperature Range and Low Temperature Range you need to go to the Settings Screen.
  • Page 52 Spa Controls The Spa Screen ALL EQUIPMENT ACCESS The Spa Screen shows all available equipment* to control. The display shows icons that are related to the equipment installed on a particular spa model, so this screen may change depending on the installation.
  • Page 53 Spa Controls Common Buttons VALUES INCREMENT/DECREMENT If an Up or Down button is shown and pressed when on an editing page, and a value has been selected (highlighted), the value can be incremented by pressing the up arrow or decremented by pressing the down arrow.
  • Page 54 Spa Controls Common Buttons EXITING SCREENS The Back button is on every screen except the Main Screen, the Priming Mode Screen are a Message Display Screen. When you see only this button, or this button plus an Inactive Save Button, it means Back or Exit. It appears on editing screens before you have changed any value, as well as on all other screens.
  • Page 55 Spa Controls Common Buttons PAGE RIGHT/LEFT If there is a right arrow at the bottom of the screen, it takes you to the next page. If there is a left arrow at the bottom of the screen, it takes you to the previous page. PAGE UP/DOWN If an Up or Down button is shown and pressed when on a page with a text list, the list can be scrolled a page at a time.
  • Page 56 Spa Controls The Settings Screen PROGRAMMING, ETC. The Settings Screen is where all programming and other spa behaviors are controlled. Each icon on the Settings screen takes you to a different screen, where one or more setting may be viewed and/or edited. The Heat Icon takes you to a screen where you control the Heat...
  • Page 57 Spa Controls The Settings Screen HEAT MODE – READY VS. REST In order for the spa to heat, a pump needs to circulate water through the heater. The pump that performs this function is known as the “heater pump.” The heater pump can be either a 2-speed pump (Pump 1) or a circulation pump. If the heater pump is a 2-Speed Pump 1, Ready Mode will circulate water every 1/2 hour, using Pump 1 Low, in order to maintain a constant water temperature, heat as needed, and refresh the temperature display.
  • Page 58 Spa Controls Fill it up! PREPARATION AND FILLING Fill the spa to its correct operating level. Be sure to open all valves and jets in the plumbing system before filling to allow as much air as possible to escape from the plumbing and the control system during the filling process.
  • Page 59 Spa Controls Spa Behavior PUMPS On the Spa Screen, select a “Jets” button once to turn the pump on or off, and to shift between low- and high-speeds if equipped. If left running, the pump will turn off after a time-out period. Non-Circ Systems The low-speed of pump 1 runs when the blower or any other pump is on.
  • Page 60 Spa Controls Spa Behavior FREEZE PROTECTION If the temperature sensors within the heater detect a low enough temperature, then the water devices automatically activate to provide freeze protection. The water devices will run either continuously or periodically depending on conditions. CLEAN-UP CYCLE (OPTIONAL) When a pump is turned on by a button press, a clean-up cycle begins 30 minutes after the pump is turned off or times out.
  • Page 61 Spa Controls Time-of-Day BE SURE TO SET THE TIME-OF-DAY Setting the time-of-day is important for determining filtration times and other background features. The Heat Icon on the Settings Screen takes you to a screen where you control the Time-of-Day. On the Time-of-Day screen, simply select the Hours and Minutes. Use the Up and Down Buttons to make changes, then Save.
  • Page 62: Spa Controls

    Spa Controls Adjusting Filtration MAIN FILTRATION Using the same adjustment as Setting the Time, Filter Cycles are set using a start time and a duration. Each setting can be adjusted in 15-minute increments. The panel calculates the end time and displays it automatically. The Filter Icon on the Settings Screen takes you to a screen where you control the Filter Cycles.
  • Page 63 Spa Controls Adjusting Filtration PURGE CYCLES In order to maintain sanitary conditions, as well as protect against freezing, all pumps will purge water from their respective plumbing by running briefly at the beginning of each filter cycle. If the Filter Cycle 1 duration is set for 24 hours, enabling Filter Cycle 2 will initiate a purge when Filter Cycle 2 is programmed to begin.
  • Page 64 Spa Controls Restricting Operation The control can be restricted to prevent unwanted use or temperature adjustments. Locking the Panel prevents the controller from being used, but all automatic functions are still active. Locking the Settings allows Jets and other features to be used, but the Set Temperature and other programmed settings cannot be adjusted.
  • Page 65 Spa Controls Additional Settings HOLD - M037* Hold Mode is used to disable the pumps during service functions like cleaning or replacing the filter. Hold Mode will last for 1 hour unless the mode is exited manually. If spa service will require more than an hour, it may be best to simply shut down power to the spa.
  • Page 66 Spa Controls The Utilities Screen UTILITIES The Utilities Icon in the Settings Screen takes you to the Utilities Screen. The Utilities Screen may contain the following: FAULT LOG The Fault Log is a record of the last 24 faults that can be reviewed by a service tech. Use the Up and Down buttons to view each of the Faults.
  • Page 67 Spa Controls Additional Settings UNITS SCREEN The Units Icon on the Settings Screen takes you to the Units Screen. Press “Temp Display” to change the temperature between Fahrenheit and Celsius. Press “Time Display“ to change the clock between 12 hr and 24 hr display. REMINDERS The Reminder Icon on the Settings Screen takes you to the Reminders screen.
  • Page 68 Spa Controls Additional Settings CLEANUP CYCLE Cleanup Cycle Duration is not always enabled, so it may not appear. When it is available, set the length of time the heat/filter pump will run after each use. 0-4 hours are available. Setting to 0.0 Hr prevents the Cleanup Cycles from running.
  • Page 69 Spa Controls Information SYSTEM INFORMATION The System Information Screen displays various settings and identification of the particular system. System Model Displays the Model Number of the System. Panel Version Displays a number of the software in the topside control panel. Software ID (SSID) Displays the software ID number for the System.
  • Page 70 Spa Controls Utilities – GFCI Test Feature The Ground Fault Circuit Interrupter (GFCI) or Residual Current Detector (RCD) is an important safety device and is required equipment on a hot tub installation. Forcing the GFCI Trip Test (North America Only) Touching the GFCI Test Icon on the Utilities Screen takes you to the GFCI Test screen .
  • Page 71 Spa Controls General Messages Most messages and alerts will appear at the bottom of the normally used screens. Several alerts and messages may be displayed in a sequence. WATER TEMPERATURE IS UNKNOWN After the pump has been running for 1 minute, the temperature will be displayed. POSSIBLE FREEZING CONDITION A potential freeze condition has been detected, or the Aux Freeze Switch has closed.
  • Page 72 Spa Controls Heater-Related Messages THE WATER FLOW IS LOW – M016** There may not be enough water flow through the heater to carry the heat away from the heating element. Heater start up will begin again after about 1 min. See “Flow Related Checks” below. THE WATER FLOW HAS FAILED* –...
  • Page 73 Spa Controls Sensor-Related Messages SENSORS ARE OUT OF SYNC – M015** The temperature sensors MAY be out of sync by 3°F (1°C). Call for Service if this message does not disappear within a few minutes. SENSORS ARE OUT OF SYNC -- CALL FOR SERVICE* – M026** The temperature sensors ARE out of sync.
  • Page 74 Spa Controls System-Related Messages PROGRAM MEMORY FAILURE* – M022** At Power-Up, the system has failed the Program Checksum Test. This indicates a problem with the firmware (operation program) and requires a service call. THE SETTINGS HAVE BEEN RESET (PERSISTENT MEMORY ERROR)* – M021** Contact your dealer or service organization if this message appears on more than one power-up.
  • Page 75 Spa Controls Reminder Messages GENERAL MAINTENANCE HELPS. Reminder Messages can be suppressed by using the Reminders Screen. Reminder Messages and frequency may vary. These are general messages to remind users about normal spa maintenance. Some messages may not apply depending on the actual equipment in the spa.
  • Page 76 Spa Controls Reminder Messages CLEAN THE COVER May appear on a regular schedule, i.e. every 30 days. Vinyl covers should be cleaned and condi- tioned for maximum life. TREAT THE WOOD May appear on a regular schedule, i.e. every 180 days. Wood skirting and furniture should be cleaned and conditioned per the manufacturers instructions for maximum life.
  • Page 77: Wi-Fi Module (If Equipped)

    Android® devices. Please refer to the Balboa Water Group website and mobile device app for operation information. http://www.balboawater.com/bwa Note: WiFi Module is not available for all spa models. If this options was not added from the factory, see your Master Spas dealer for further details and compatibility. DO NOT DIVE.
  • Page 78: Fusion Touch Sound (If Equipped)

    FUSION TOUCH SOUND (if equipped) Warning: Never remain in your spa longer than 15 minutes per session when the water temperature is above 98˚F (36˚C). If you wish to spend more time in your spa, whether enjoying music, or just lounging, be sure to keep the spa water at or below body temperature (98.6˚F / 37˚C).
  • Page 79 FUSION TOUCH SOUND (if equipped) Warning: Never remain in your spa longer than 15 minutes per session when the water temperature is above 98˚F (36˚C). If you wish to spend more time in your spa, whether enjoying music, or just lounging, be sure to keep the spa water at or below body temperature (98.6˚F / 37˚C).
  • Page 80: Mast3Rpur (If Equipped)

    (if equipped) Note: This regular maintenance for the Mast3rPur system is not covered under the warranty of the spa. Your Master Spas Dealer or Service Center can be contacted to schedule this maintenance. WARNING: BEFORE PERFORMING ANY MAINTENANCE ON THE MAST3RPUR SYSTEM, MAKE SURE THE SPA IS SHUT DOWN.
  • Page 81 Mast3rPur (if equipped) b. Installing the UV Lamp Make sure to handle the new lamp by the ceramic endcaps and clean the UV Lamp before installation if needed. ii. Slowly place the UV Lamp into the Lamp Retainer until the top of the UV Lamp is pushed past the tabs on the Lamp Retainer.
  • Page 82 Reinstall the Upper Enclosure Assembly to the Enclosure Base. ix. The unit is now ready for normal operation. Contact your Master Spas dealer for replacement Mast3rPur parts and scheduling service for this regular maintenance.. Note: The ozone hose and check valve connecting between the ozone generator and ozone injector should be inspected and/or replaced, if necessary, every 12 months.
  • Page 84 Master Spas, Inc. We cannot and do not accept any responsibility or liability for any other representations, statements or contracts made by any dealer beyond the provisions of our written limited warranty.

Table of Contents