
Related Manuals for Bosch BEL554MS0M


Summary of Contents for Bosch BEL554MS0M
- Page 1 Microwave Oven BEL554MS0M User manual and installation instructions [en] [ar] دليل المستخدم وتعليمات التركيب...
-
Page 2: Table Of Contents
en Safety 1.2 Intended use Table of contents Only a licensed professional may connect ap- pliances without plugs. Damage caused by in- correct connection is not covered under the USER MANUAL warranty. Safety .............. 2 The appliance can only be used safely if it is correctly installed according to the safety in- Preventing material damage ....... -
Page 3: Safety
Safety en ▶ If smoke is emitted, the appliance must be on the appliance door, as they may scratch switched off or the plug must be pulled out the surface. The hinges on the appliance door move when and the door must be held closed in order the door is opened and closed, which could to stifle any flames. - Page 4 en Safety ▶ Always use oven gloves to remove the Food and its packaging and containers may dishes from the cooking compartment. catch fire. The accessible parts of the appliance become ▶ Never heat food in heat-retaining pack- hot during operation. aging.
-
Page 5: Preventing Material Damage
Preventing material damage en ▶ Only use microwave-safe cookware or use ▶ Always keep the cooking compartment, the microwave in combination with a type door and door stop clean. of heating. → "Cleaning and servicing", Page 14 Never operate the appliance if the cooking WARNING ‒ Risk of electric shock! compartment door is damaged. -
Page 6: Environmental Protection And Saving En- Ergy
en Environmental protection and saving energy When using the grill or the microwave combined op- Using unsuitable cookware may result in damage. ▶ eration, only use cookware that can withstand high temperatures. 3 Environmental protection and saving energy 3.1 Disposing of packaging The packaging materials are environmentally compat- ible and can be recycled. -
Page 7: Familiarising Yourself With Your Appliance
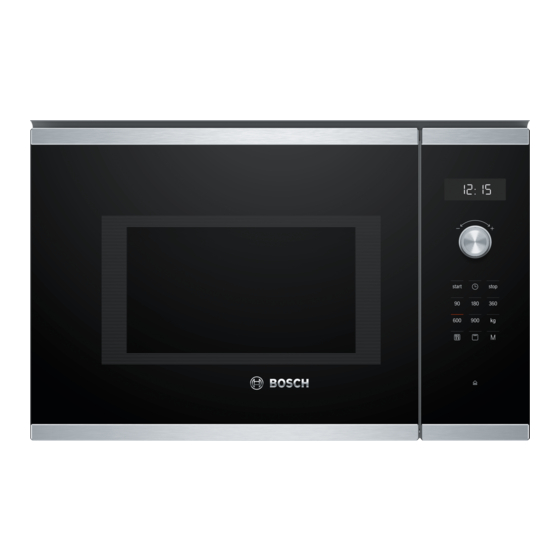
Familiarising yourself with your appliance en 4 Familiarising yourself with your appliance 4.1 Control panel You can use the control panel to configure all functions of your appliance and to obtain information about the operating status. Note: On certain models, specific details such as col- our and shape may differ from those pictured. - Page 8 en Accessories Rotary selector Notes ¡ In the event of a power cut, the automatic door Use the rotary selector to change the setting values opener does not work. You can open the door that are shown on the display. manually. The rotary selector can be pushed in.
-
Page 9: Accessories
Basic operation en Engage the turntable in the drive in the centre 6.3 Cleaning the accessories of the cooking compartment floor. Clean the accessory thoroughly with soapy water ▶ Check whether the turntable is correctly engaged. and a soft dish cloth. Note: The turntable can turn anti-clockwise or clock- wise. -
Page 10: Grill
en Grill Not microwave-safe 7.4 Configuring the microwave settings Cookware and accessor- Reason ATTENTION! Operating the appliance without food in the cooking compartment may lead to overloading. Metal cookware Metal does not allow mi- Do not switch on the microwave unless there is food ▶... -
Page 11: Memory
Memory en Press . 8.4 Cancelling the operation Use the rotary selector to set the required duration. Press twice or open the door and press ▶ Note: If you open the cooking compartment door dur- once. ing operation, the microwave interrupts the operation and pauses the set time that is counting down. -
Page 12: Programmes
en Programmes 10.4 Defrosting with the automatic programmes You can use the four defrosting programmes to defrost meat, poultry and bread. Programme Food Cookware Weight range in kg Minced meat Open 0.20–1.00 Pieces of meat Open 0.20–1.00 Chicken, chicken pieces Open 0.40–1.80 Bread Open 0.20–1.00 Note: Liquid is produced when you defrost meat... -
Page 13: Basic Settings
Basic settings en Cooking food using the combi cooking Place the food in microwave-safe, heat-resistant cookware that is not too big. programme Set the programme. → Page 11 Take the food out of its packaging. Once the programme has finished, leave the food to Weigh the food. -
Page 14: Cleaning And Servicing
en Cleaning and servicing 12 Cleaning and servicing To keep your appliance working efficiently for a long Clean the components of the appliance with hot ‒ time, it is important to clean and maintain it carefully. soapy water and a dish cloth. Dry with a soft cloth. -
Page 15: Troubleshooting
Troubleshooting en Read the information on cleaning products. 12.5 Cleaning the control panel → Page 14 ATTENTION! Clean the door panels with a soft dish cloth and Incorrect cleaning may damage the control panel. glass cleaner. Never wipe the control panel with a wet cloth. ▶... -
Page 16: Disposal
en Disposal Fault Cause and troubleshooting Food takes longer The microwave power setting is set too low. than usual to heat up. Set a higher microwave power setting. → Page 10 ▶ You have placed a larger amount of food than normal in the appliance. Set a longer cooking time. -
Page 17: Customer Service
Customer Service en 15 Customer Service If you have any queries on use, are unable to rectify 15.1 Product number (E-Nr.) and production faults on the appliance yourself or if your appliance number (FD) needs to be repaired, contact Customer Service. You can find the product number (E-Nr.) and the pro- Detailed information on the warranty period and terms duction number (FD) on the appliance's rating plate. - Page 18 en How it works Delicate parts, such as the legs and wings of Issue chicken or fatty outer layers of roasts, can be After defrosting, poultry or ¡ Set a lower microwave covered with small pieces of aluminium foil. The foil meat should not be de- power setting.
-
Page 19: How It Works
How it works en Food Weight in g Microwave power Cooking time in mins setting in W Fruit, e.g. raspberries 7–10 Fruit, e.g. raspberries 1. 180 1. 8 2. 90 2. 5–10 Butter, defrosting 1. 180 1. 1 2. 90 2. 2–3 Butter, defrosting 1. - Page 20 en How it works Heating frozen food in the microwave Observe the recommended settings for using the microwave to heat frozen food. Food Weight in g Microwave power Cooking time in mins setting in W Set menu, plated meal, ready meal with 2–3 300–400 8–11 components Soup...
- Page 21 How it works en Do not cover the food when grilling. 16.5 Cooking ‒ Do not cover the food when combining the mi- ‒ With your appliance you can cook food. crowave and grill. Always place the cookware on the turntable. Cooking food Always place the wire rack on the turntable when ‒...
- Page 22 en How it works Food Amount Accessories Type of Cooking Information crowave heating time power in mins setting in W Soups, gratinated, 2–4 cups Cookware 15–20 e.g. onion soup without lid Vegetables, fresh 250 g Cookware with 5–10 Cut the ingredients into equal-sized pieces. Add 1 to 2 tbsp water for every 100 g.
-
Page 23: Installation Instructions
Installation instructions en 16.6 Test dishes These overviews have been produced for test institutes to facilitate appliance testing in accordance with EN 60350-1:2013 or IEC 60350-1:2011 and EN 60705:2012, IEC 60705:2010. Cooking with the microwave Food Microwave power Cooking time in mins Note: setting in W Custard, 750 g 1. - Page 24 en Installation instructions ¡ Only a licensed professional may connect 17.4 Fitted units appliances without plugs. Damage caused Here, you can find notes on safe installation. by incorrect connection is not covered un- ATTENTION! der the warranty. Any shavings may impair the function of electrical com- ponents.
- Page 25 Installation instructions en Check the clearance to the adjacent appliances. 17.7 Installing the appliance Secure the spacers to the appliance in accordance with the wall thickness. The clearance to the adjacent appliances must be at least 3 mm. Remove any packaging material and adhesive film Note: from the cooking compartment and the door.
- Page 26 ar األمان االستعمال المطابق للتعليمات فهرس المحتويات ال يجوز توصيل الجهاز دون قابس إال بمعرفة فني مؤهل. حيث ال يحق المطالبة بحقوق الضمان في حالة توصيل الجهاز بشك ل ٍ غير دليل المستخدم .صحيح ............... األمان فتركيب الجهاز بشكل سليم وفقًا لدليل التركيب هو...
- Page 27 األمانar .تعامل مع الصحن الدوار بعناية بقايا األطعمة السائبة والدهون وعصارات ◀ .اللحوم يمكن أن تشتعل !تحذير ‒ خطر الصعق الكهربائي احرص قبل التشغيل على إزالة االتساخات ◀ أي عزل متضرر لكابل الكهرباء سوف يش ك ِّل الجافة من حيز الطهي ومن عناصر التسخين .خط...
- Page 28 ar األمان وأكياس الذرة والحبوب واإلسفنجات وفوط تسخينها كالخبز على سبيل المثال عن طريق .التنظيف الرطبة وما شابهها إلى اإلصابة بحروق ضبط الميكروويف على قدرة أعلى من الالزم .أو وضعها فيه لفترة أطول من الالزم ال تستخدم الجهاز أب د ًا لتجفيف األطعمة أو ◀...
- Page 29 تجنب األضرار الماديةar والتعرض لمواقف خطيرة مثل تسريب طاقة وتجنب تشغيل الجهاز في حالة تلف باب حيز .الميكروويف الطهي. يمكن أن تتسرب طاقة الميكروويف قم بتنظيف الجهاز بشكل منتظم وأزل بقايا .للخارج ◀ .األطعمة على الفور ال تستخدم الجهاز أبدا إذا كان باب حيز ◀...
- Page 30 ar حماية البيئة والتوفير حماية البيئة والتوفير التخلص من مواد التغليف كافة مواد التغليف خاما ت ٌ غير ضارة بالبيئة ويمكن .إعادة استغاللها تخ ل َّص من المك و ِّنات المفردة بشك ل ٍ منفصل حسب ◀ .نوعها توفير الطاقة عندما...
- Page 31 التع ر ّفar التع ر ّف نطاق االستعمال اضبط كل وظائف جهازك واحصل على معلوما ت ٍ حول .حالة التشغيل عبر لوحة االستعمال يمكن أن تختلف التفاصيل الواردة في الصورة :مالحظة .حسب نوع الجهاز، من قبيل اللون والشكل .فتح الباب األوتوماتيكي مفتاح...
- Page 32 ar الملحقات مفتاح االختيار الدوار مالحظات وعند انقطاع التيار الكهربائي تتوقف وظيفة الفتح ¡ يمكنك باستخدام مفتاح االختيار الدوار تغيير قيم الضبط .األوتوماتيكي للباب. وعندئذ يمكنك فتح الباب يدو ي ًا .التي تظهر في شاشة العرض يمكن خفض مفتاح االختيار الدوار. اضغط على مفتاح إذا...
- Page 33 االستعمال األساسيar تركيب الصحن الدوار في في آلية التدوير قم بتثبيت الصحن الدوار .منتصف أرضية حيز الطهي .ال تستخدم جهازك إال مع تركيب الصحن الدوار .تأكد من تثبيت الصحن الدوار بشكل صحيح في التجويف الموجود بحيز ضع الحلقة الدوارة .يمكن إدارة الصحن الدوار إلى اليسار أو اليمين :مالحظة...
- Page 34 ar الشواية اختبار اإلناء من حيث مالءمته للميكروويف لتحقيق أفضل استفادة من الجهاز، استرشد :نصيحة .بالبيانات الواردة في توصيات الضبط .تحقق من مالءمة اإلناء للميكروويف من خالل اختبار اإلناء صفحة ,""هكذا يتم األمر ← حيث ال ي ُسمح بتشغيل الجهاز دون إضافة طعام في .طريقة...
- Page 35 الذاكرةar الذاكرة باستخدام وظيفة »الذاكرة«، يمكنك تخزين وضع الضبط للتخزين في الذاكرة وعدم بدء التشغيل، اضغط ‒ .لوجبة ما واستدعائها مرة أخرى في أي وقت . على ،إذا كنت ت ُعد إحدى الوجبات بشكل متكرر :نصيحة إذا لم يبدأ الجهاز في التشغيل، فسيظهر في شاشة .«فاستخدم...
- Page 36 ar البرامج افصل قطع اللحم المفلطحة وقطع اللحم المفروم عن .يجب إدخال الوزن لضبط البرنامج .بعضها البعض قبل وقت التهدئة ضع الطعام على إناء مسطح مناسب للميكروويف، مثال اترك الطعام المذاب عنه التجمد يهدأ لمدة من .طبق زجاجي أو طبق بورسلين .دقيقة...
- Page 37 أوضاع الضبط األساسيةar أوضاع الضبط األساسية .يمكنك ضبط جهازك حسب احتياجاتك نظرة عامة على أوضاع الضبط األساسية 11.1 تجد هنا نظر ة ً عامة حول أوضاع الضبط األساسية وإعدادات ضبط المصنع. تتوقف أوضاع الضبط األساسية على تجهيزات .جهازك المعنى االختيار...
- Page 38 ar التنظيف والعناية تنظيف واجهة الجهاز 12.4 تنظيف الجهاز 12.2 قم بتنظيف الجهاز على النحو المقرر، لكي ال تحدث أية !تنبيه أضرار باألجزاء واألسطح المختلفة من جراء التنظيف الخاطئ التنظيف بطريقة غير سليمة قد يلحق الضرر بواجهة .أو مواد التنظيف غير المناسبة .الجهاز...
- Page 39 التغلب على االختالالتar .ضع دائما ملعقة في الفنجان لتجنب تأخر الغليان الظالل الموجودة على زجاج الباب والتي :مالحظة .ضع الفنجان في منتصف حيز الطهي تبدو كالخطوط ترجع إلى انعكاسات ضوئية ناتجة عن .واط اضبط قدرة الميكروويف .إضاءة حيز الطهي .دقائق اضبط...
- Page 40 ar التخلص السبب والتغلب على األعطال العطل .تم الضغط على نطاق الضبط دون قصد الجهاز ال يعمل. تظهر مدة في شاشة . اضغط على ◀ .العرض .بعد القيام بالضبط لم يتم الضغط على . أو قم بمحو وضع الضبط من خالل الضغط على اضغط...
- Page 41 هكذا يتم األمرar هكذا يتم األمر تجد هنا أوضاع الضبط المناسبة وكذلك أفضل الكماليات النصيحة الهدف واألواني لتحضير الوجبات المختلفة. وقد قمنا بمواءمة ينبغي أن يكون الطعام غير ¡ آلخر حين من الطعام بتقليب قم .التوصيات بما يتناسب مع جهازك بشكل مثالي معرض...
- Page 42 ar هكذا يتم األمر إزابة التجمد باستخدام الميكروويف .احرص على مراعاة توصيات الضبط الخاصة بإذابة تجمد األطعمة المجمدة باستخدام الميكروويف المدة بالدقائق قدرة الميكروويف بالواط الوزن بالجرام الطعام ،لحم بقري، لحم بتلو، لحم دسم، قطع كاملة - بعظم ودون عظم 1000 ،لحم...
- Page 43 هكذا يتم األمرar التسخين 16.4 !تنبيه تالمس المعدن مع جدار حيز الطهي قد ي ُولد شرر ي ُلحق .يمكنك تسخين األطعمة باستخدام جهازك .الضرر بالجهاز ويؤدي إلى كسر زجاج الباب الداخلي تسخين األطعمة يجب أال تقل المسافة بين المعدن – مثل الملعقة ◀...
- Page 44 ar هكذا يتم األمر التسخين باستخدام الميكروويف .احرص على مراعاة توصيات الضبط الخاصة بالتسخين باستخدام الميكروويف المدة بالدقائق قدرة الميكروويف بالواط الكمية الطعام - مل المشروبات - مل المشروبات حوالي مل طعام ال ر ُضع، مثل زجاجة الحليب حوالي مل طعام...
- Page 45 هكذا يتم األمرar إرشادات المدة بالدقائق نوع التسخين قدرة الكماليات الكمية الطعام الميكروويف بالواط .ال تقلب الطعام 15-25 إناء مفتوح جم أجنحة دجاج، مجمدة بالتتبيلة الشبكة السلكية .اقلب الطعام مرة أو مرتين 40-50 إناء مفتوح جم لحم دسم بدون قشرة...
- Page 46 ar دليل التركيب إرشادات المدة بالدقائق نوع التسخين قدرة الكماليات الكمية الطعام الميكروويف بالواط الجانب الشبكة السلكية شرائح تحميص أولي لخبز :األول التوست الجانب :الثاني تختلف المدة حسب الطبقة 7-10 الشبكة السلكية شرائح خبز توست عليه .العلوية إضافات 9-12 إناء مغلق جم...
- Page 47 دليل التركيبar مجموعة التجهيزات الموردة 17.3 ¡ بتوصيل تقم وال التغليف مواد من إخراجه بعد الجهاز افحص النقل عملية عن ناتجة أضرار وجود حالة في الجهاز بعد إخراج كافة القطع من أغلفتها تأكد من خلوها من .أضرار النقل وعدم نقصان أ ي ِّ منها ¡...
- Page 48 ar دليل التركيب استمر في ربط الجهاز حتى تتم محاذاة الجهاز في .المنتصف تركيب الجهاز 17.7 .افحص المسافة من األجهزة المجاورة .قم بتركيب المباعدات على الجهاز وفقا ل س ُمك الحائط مم على يجب أن تبلغ المسافة من األجهزة المجاورة .األقل...
- Page 52 Expert advice for your Bosch home appliances, help with problems or a repair from Bosch experts. Find out everything about the many ways Bosch can support you: www.bosch-home.com/service Contact data of all countries are listed in the attached service directory.
Need help?
Do you have a question about the BEL554MS0M and is the answer not in the manual?
Questions and answers