
Related Manuals for Vertex PureWaterCooler PWC-8000


Summary of Contents for Vertex PureWaterCooler PWC-8000
- Page 1 PureWaterCooler Owners Installation Manual PWC-8000 Ice-Making Cooler Water Products...
-
Page 2: Table Of Contents
Installation, Operation & Service Manual I c e & W a t e r D i s p e n s e r PWC-8000 S A F E T Y I N S T R U C T I O N S - - - - - - - - - - - - - - - - - - - - - - - 3 F E A T U R E S &... - Page 3 NOTICES AND SAFETY INFORMATION To ensure proper and efficient operation of the Crystal Pro Purified Water Dispenser to your full satisfaction, carefully follow the instructions in this manual. Do not use with water that is microbiologically unsafe or of unknown quality without adequate disinfection before the system.
-
Page 4: Safety Instructions
SAFETY INSTRUCTIONS Electrical Safety Improper use of the power cord plug can result in the risk of electrical DANGER shock, property damage and personal injury or death. This appliance is equipped with a 3-prong grounding- type plug, and shall be plugged into a properly connected grounding-type outlet. - Page 5 Cleaning To reduce the risk of injury when cleaning your appliance, follow DANGER these basic precautions. Unplug appliance disconnect power before performing maintenance or cleaning. Do not clean appliance with flammable fluids. Do not store or use gasoline or other flammable vapors or liquids in the vicinity of this or any other unit.
-
Page 6: Features & Specifications
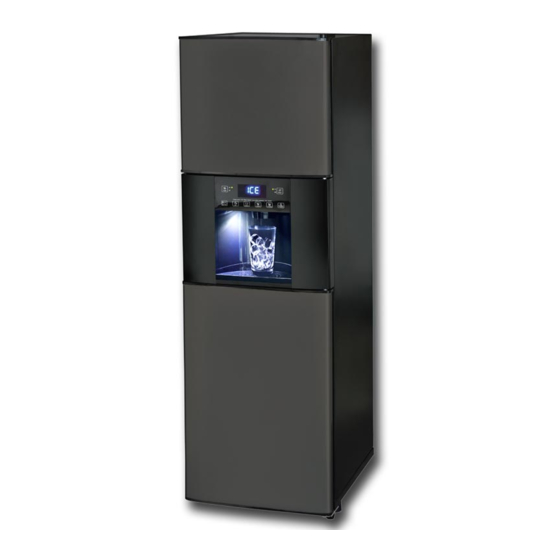
FEATURES & SPECIFICATIONS Overview This is a great appliance to help you prepare hot or cold beverages and drinks. The PWC-8000 ice and water dispensers are an innovative design that combines cubed and crushed ice with hot and ambient water in a single compact product. - Page 7 Drip Tray Storage Supply Inlet (for POU) Back Cover Power Cord Drain (for R/O installations only) The dispenser allows you to enjoy cubed or crushed ice and hot or ambient water with the touch of a button. The two-evaporator cooling system and the ice freezer keep ice from melting and produces ice quickly.
-
Page 8: Dispenser Use
DISPENSER USE DANGER Hot water can scald your hands and body and cause serious injury. Do not use with water that is microbiologically unsafe or of CAUTION unknown quality without adequate disinfection before the system. Using water with high TDS levels may cause premature equipment CAUTION failure. - Page 9 Indicator and Display Functions Water heater indicator Low water level indicator Hot water temperature display Use of the Dispenser Once the unit is powered, if bottled water is selected, the water pump works immediately to pump water from the bottle to the water tank. If the filtered or R/O water supply option is selected, the water inlet valve opens immediately to let water flow into the water tank.
- Page 10 Turning the icemaker function on/off The Icemaker function switch is located on the rear of the unit. The switch is shipped in the off position. Press the “Ice” switch to turn the Icemaker off. Turning the hot water function on/off NOTE The hot water function can be turned off to save energy.
- Page 11 Dispensing ambient temperature water Ambient water dispensing button Place a cup under the water dispenser. Press and hold the “Ambient” button to dispense room-temperature water. Dispensing ice The ice dispenser will stop working while the freezer door is open. If ice cubes haven’t been used for several days, they may freeze NOTE together and not dispense.
-
Page 12: D I S P E N S E R C A R
Replacing water filters It is recommended that all water filters be replaced at the same time. CAUTION The filters should be replaced as per the manufacturer’s guidelines, typically at least once a year. When “FLr” flashes, replace the water filters as soon as possible. ... - Page 13 How to empty the ice bin Use the following instructions to remove the ice bin when emptying ice or when cleaning the ice bin. Push the ice bin back until the auger is engaged in the auger coupler. If it is stuck, rotate the auger 1/8 turn, then push it in again.
- Page 14 Cleaning the water system with citric acid if scale has built up For a bottled unit: Fill a 5 gallon bottle with cold water and add 8 oz of citric acid powder and install the bottle adapter. Wait for hot water to be ready. Dispense both ambient and hot water to flush the system.
- Page 15 If ice cubes are frozen together Press the “Cubed” or “Crushed” button to dispense ice for a few minutes. Open the upper door and pull out the ice bin to shake it to break apart cubes or remove the large clumps of ice cubes. If the ice bin is stuck ...
-
Page 16: I N S T A L L A T I O N I N S T R U C T I O N
You may hear a high pitched hum or pulsating sound produced by the compressor. You may hear the ice cubes being ejected from the icemaker to the ice bin. INSTALLATION INSTRUCTIONS Location This unit is designed for indoor use only. CAUTION Use the rear wheels to move the unit around. - Page 17 Plug the unit into a grounded 3 prong outlet only. How to insert or disconnect a tube or plug 1. Remove the lock clip first. 2. To install, insert a tube or plug until it is engaged; To disconnect, press the release ring down and pull out a tube or plug. 3.
- Page 18 Open the storage door more than 90 degrees. Check that the water inlet (2) and outlet (3) are connected using a loop of ¼” OD tubing. If the tubing is not present, these connections must be plugged. Clean the outside of new bottle with a clean cloth. Remove bottle cap completely from the top of the bottle.
- Page 19 Water filter installation Bottled water inlet Bottled/POU switch Water line from filters to ice maker Water line to filters R/O Drain (if necessary) A filtration installation is shown. Reverse Osmosis systems may require Note additional plumbing. Open the storage door more than 90 degrees. ...
-
Page 20: T R O U B L E S H O O T I N
TROUBLESHOOTING Complaint Possible Causes Response Unit is not working a. Power cord is unplugged. a. Plug in the power cord. and display is not lit b. No power at outlet. b. Check outlet and breaker or fuse. c. Power cord is broken. c. - Page 21 f. The cooling system is not f. Call for service. working properly. Ice cubes are hollow a. The icemaker thermostat is a. Call for service. defective. b. The icemaker water pump is b. Call for service. defective. Ice cubes are frozen a.
- Page 22 Display PCB is defective or has wiring problems. Water dispenser is a. The water dispensing tubes a. Straighten them. slow are kinked. b. The water dispensing valve is b. Call service. defective. Water is leaking a. The dispenser drip tray is full. a.
-
Page 23: S E R V I C E & W A R R A N T Y N O T I C
This warranty is void if the data plate is removed or the serial number in not legible. This warranty is void if original Vertex Water Products parts are not used to repair the water cooler. Service to the sealed refrigeration system must be performed by an authorized Vertex service agent or Vertex.
Need help?
Do you have a question about the PureWaterCooler PWC-8000 and is the answer not in the manual?
Questions and answers