Vertex PureWaterCooler PWC-600 Service Manual
Hide thumbs
Also See for PureWaterCooler PWC-600:
- Owners & installation manual (24 pages) ,
- Owners & installation manual (27 pages)

Related Manuals for Vertex PureWaterCooler PWC-600


Summary of Contents for Vertex PureWaterCooler PWC-600
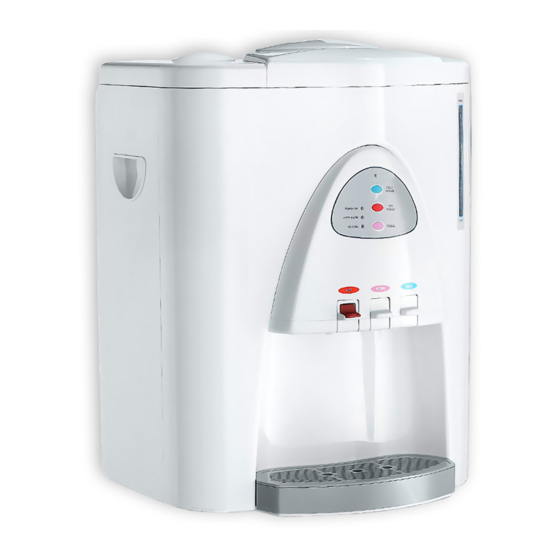
- Page 1 PWC – 600/2000 PureWaterCooler SERVICE MANUAL PureWaterCooler ™ by Vertex Model PWC-600/2000 P/N man-7006 Copyright 2004 Vertex Water Products...
-
Page 2: Table Of Contents
9. Draining Cooler Tanks 10. Remove/Replace Hot Tank Sensor 11. Remove/Replace Cold Temperature Switch and Sensor 12. Sanitization Procedure 13. Trouble Shooting 14. Specifications 15. Model PWC-3000 Cooler 16. Cooler Exploded View 17. Parts List 18. Schematics Copyright 2004 Vertex Water Products... -
Page 3: Introduction
(PWC-2000F) should not be used with water hardness over 7 grains because of lime scale build up on the heating element. If hardness is higher than 7 grains, softening of the water is recommended. Copyright 2004 Vertex Water Products... - Page 4 Remove Lower Front Panel/Access Filters 2.1 Tilt cooler back (NOTE: For model PWC-3000 grab lower panel at bottom mid-point and simply pull forward) 2.2 Depress on of the tabs under the base 2.3 Pull panel forward and off Copyright 2004 Vertex Water Products...
-
Page 5: Cooler Set-Up
2.8 Caution: Filter only units (PWC-2000F) can only be used on water that is soft (less than 10 grains) or has a water softener installed to treat the water. Copyright 2004 Vertex Water Products... - Page 6 2.17 Water will start to flow through the filters into the main tank Drain saddle connection method Drain connection required only for cooler with reverse osmosis filtration Figure 1 Feed water Solenoid Valve activates when cooler is plugged in. Copyright 2004 Vertex Water Products...
-
Page 7: Front Cover Installation
3.2 Install center of upper section (near drip tray) 3.3 With palm of hand, hit left and right side of upper panel to finish installation. This will snap the tabs into place. Copyright 2004 Vertex Water Products... - Page 8 4.1 Remove the round top cover 4.2 Firmly pull up on the main top cover to remove it (NOTE: on PWC-3000 model remove 2 holddown screws rear of main top cover first.) 4.2 Lift off Main Tank inner cover Copyright 2004 Vertex Water Products...
- Page 9 PWC – 600/2000 PureWaterCooler 4. Remove top cover and back cover continued 4.3 The Main Tank and float are now accessible 4.5 Back Cover 4.6 Remove 6 screw from back cover and lift off Copyright 2004 Vertex Water Products...
- Page 10 5.0 Push down firmly on the top portion of the faucet cover. 5.1 The top part of the cover will disengage from the cooler. 5.2 Carefully pivot the top of the cover forward and clear the 3 faucets. Copyright 2004 Vertex Water Products...
- Page 11 5.5 Remove 4 screws that hold the circuit board to the faucet cover. Lift off circuit board from the faucet cover. 5.6 Reverse above process to reinstall circuit board and faucet cover. Copyright 2004 Vertex Water Products...
-
Page 12: Remove/Replace Float Switch
6.3 Remove hot tank as described in this manual (sec. 7) 6.4 Remove back panel 6.4 Remove (9) screws holding main tank to frame 6.5 Disconnect silicon tubing from main tank (5 places). Access silicon tubing from back of cooler. Copyright 2004 Vertex Water Products... - Page 13 6.6 Tilt up edge of main tank to gain access to micro-switch assembly 6.6 Disconnect electrical terminals from micro- switch 6.7 Lift main tank out of cooler 6.8 Place main tank on work bench to remove float assembly Copyright 2004 Vertex Water Products...
- Page 14 PWC – 600/2000 PureWaterCooler 6. Remove/Replace Float Switch Cont. 6.9 Remove micro switch by loosening and removing plastic nut. 6.10 Remove washer and activator rod 6.11 Remove metal nut and silicon washer Copyright 2004 Vertex Water Products...
- Page 15 PWC – 600/2000 PureWaterCooler 6. Remove/Replace Float Switch Cont. 6.12 Remove float mechanism from main housing 6.13 Complete Float assembly (removed) 6.14 Replace new float assembly in reverse order Copyright 2004 Vertex Water Products...
-
Page 16: Remove/Replace Hot Tank
7. Remove/Replace Hot Tank (for coolers built after 10/02) 7.1 With cooler top cover off, and back removed, remove screws (5 places) holding hot tank to main reservoir assembly. 7.2 Remove silicon tubing from hot tank (4 places) Copyright 2004 Vertex Water Products... - Page 17 7.3 Remove electrical contactors from thermal sensors (4 places). See Figure 2 for wiring schematic 7.4 Lower hot tank and remove 7.5 Disconnect 2 electrical connectors at bottom of tank 7.6 To install hot tank, reverse the above steps Copyright 2004 Vertex Water Products...
-
Page 18: Remove/Replace Faucet
8.3 Remove plastic nut from rear of faucet using 7/8” socket. 8.4 Once the nut is removed, faucet can with- drawn from the front. 8.5 Reverse the above process to replace faucet. Copyright 2004 Vertex Water Products... -
Page 19: Draining Cooler Tanks
Water will pour from this port. Don’t forget to replace the cap and the plug after the tanks are empty. 9.3 Drain any remaining water in the system by depressing the faucets. Copyright 2004 Vertex Water Products... -
Page 20: Remove/Replace Hot Tank Sensor
10.2 Remove the electrical terminals from the sensor 10.3 Remove the two screws that hold the sensor to the tank. The sensor can now be removed 10.4 Reverse the above procedure to replace the sensor Copyright 2004 Vertex Water Products... -
Page 21: Remove/Replace Cold Temperature Switch And Sensor
The switch. The sensor probe (integral with the switch ) is inserted into the Receptacle at the bottom of the cold tank. 11.0 Remove adjustment knob using a flat head screwdriver 11.1 Loosen (2) screws holding the switch to the mounting plate. Copyright 2004 Vertex Water Products... - Page 22 11.2 Carefully remove the sensor probe from the receptacle at the bottom of the hot tank. 11.3 Disconnect (2) electrical terminal wires. 11.4 Lift and remove switch assembly form mounting plate. 11.5 Replace new switch in reverse order. Copyright 2004 Vertex Water Products...
-
Page 23: Sanitization Procedure
Completely drain the sanitizing solution from all the tanks. Fill the main (room temp.) tank with clear tap water to rinse out the sanitizing solution. Completely empty the rinse water from the tanks. The cooler is now sanitized and ready for use. Copyright 2004 Vertex Water Products... -
Page 24: Trouble Shooting
4. All cold water has been drained Cooler needs time to recover. wait 10 minutes until water cools 5. Water not dispensing from Cold tank is frozen. Turn down cold spigot cold temperature adjustment Copyright 2004 Vertex Water Products... - Page 25 Disconnect one of the connector at the heating element terminals (at bottom of tank). Using an ohm meter, check for continuity across the 2 terminals. If there is no continuity (open), the tank must be replaced. Copyright 2004 Vertex Water Products...
- Page 26 Using an ohm meter, check for continuity If there is no continuity (open), replace sensor Copyright 2004 Vertex Water Products...
- Page 27 No Continuity across Including cold power or burned out upper thermal sensor Hot Power – on Lower thermal sensor No Continuity across Keep Warm – on disconnected or burned out lower thermal sensor Heating - off Copyright 2004 Vertex Water Products...
- Page 28 Float rotated 90º for clarity To lower the water level in the tank, bend the micro-switch bracket towards the activator rod, reducing the gap between the micro-switch and the rod Bend bracket here Float rotated 90º for clarity Copyright 2004 Vertex Water Products...
-
Page 29: Specifications
2.2 gallons Hot tank 0.5 gallons Cold tank 0.5 gallons Power Consumption Total 600 Watts Hot Tank 500 Watts Cold Tank 100 Watts Temperature 180 ºF average Cold (adjustable) 38 ºF average Refrigerant R134a 36 mg. Copyright 2004 Vertex Water Products...
Need help?
Do you have a question about the PureWaterCooler PWC-600 and is the answer not in the manual?
Questions and answers