Table of Contents
Advertisement
Quick Links
Advertisement
Table of Contents

Related Manuals for Siemens HX9S7RI40N


Summary of Contents for Siemens HX9S7RI40N
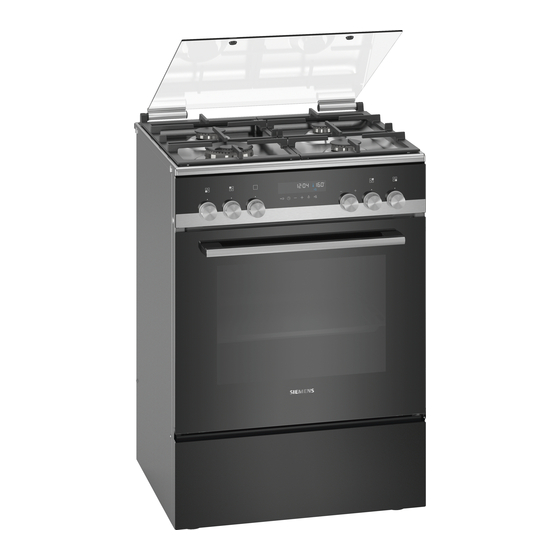
- Page 1 Free standing cooker HX9S7RI40N [en]Instruction manual...
-
Page 3: Table Of Contents
Table of contents [ e n ] I n s t r u c t i o n m a n u a l Intended use ......4 Time-setting options . -
Page 4: Intended Use
Additional information on products, accessories, accordance with the instruction and replacement parts and services can be found at installation manual. An incorrect connection or www.siemens-home.bsh-group.com and in the online incorrect settings may lead to serious shop www.siemens-home.bsh-group.com/eshops accidents and damage to the appliance. The appliance manufacturer accepts no liability for damage of this kind. -
Page 5: Important Safety Information
Important safety information Warning – WHAT TO DO IF YOU SMELL (Important safety GAS! information Escaping gas may cause an explosion. If you smell gas or notice any faults in the Warning – Risk of fire! gas installation: I m p o r t a n t s a f e t y i n f o r m a t i o n A draught is created when the appliance Immediately shut off the gas supply or close ■... - Page 6 Important safety information Never place flammable objects on the Warning – Risk of scalding! ■ burners or store them in the cooking The accessible parts become hot during ■ compartment. Never open the appliance operation. Never touch the hot parts. Keep door if there is smoke inside.
-
Page 7: Halogen Lamp
Important safety information The hinges on the appliance door move Risk of injury! Warning – Risk of electric shock! ■ when opening and closing the door, and When replacing the cooking compartment you may be trapped. Keep your hands away bulb, the bulb socket contacts are live. -
Page 8: Causes Of Damage
Causes of damage Cooling with the appliance door open: Following ]Causes of damage ■ operation at high temperatures, only allow the cooking compartment to cool down with the door closed. Do not trap anything in the appliance door. H ob C a u s e s o f d a m a g e Even if the door is only left open a crack, the front of Caution! -
Page 9: Environmental Protection
Environmental protection Open the appliance door as infrequently as possible 7Environmental protection ■ when the appliance is in use. Y our new appliance is particularly energy-efficient. E n v i r o n m e n t a l p r o t e c t i o n Here you can find tips on how to save even more energy when using the appliance, and how to dispose of your appliance properly. -
Page 10: Saving Energy With The Gas Hob
Installation and connection Saving energy with the gas hob 5Installation and connection Always use a saucepan which is the correct size for ■ your food. A larger, less full saucepan requires a lot of energy. I n s t a l l a t i o n a n d c o n n e c t i o n Always place a suitable lid on the saucepan. -
Page 11: Electrical Connection
Installation and connection Faults in the gas installation/smell of gas For the after-sales service If you notice a smell of gas or faults in the gas Caution! installation, you must The appliance must be connected in accordance ■ with the data on the rating plate. immediately shut off the gas supply and/or close the ■... -
Page 12: Setting Up The Appliance
Installation and connection Setting up the appliance The appliance must be set up directly on the kitchen ■ floor and in line with the specified dimensions. The appliance must not be set up on any other object. The distance between the top edge of the oven and ■... -
Page 13: Getting To Know Your Appliance
Getting to know your appliance Depending on the appliance model, individual Note: *Getting to know your details and colours may differ. appliance I n this chapter, we will explain the indicators and G e t t i n g t o k n o w y o u r a p p l i a n c e controls. -
Page 14: Control Panel
Getting to know your appliance Control panel Details may vary depending on the appliance model. Interior lighting Switch the interior lighting on or off. Buttons and display Rapid heating Start or cancel Rapid heating for the cooking compartment. You can use the buttons to set various additional functions on your appliance. -
Page 15: Cooking Compartment
Getting to know your appliance Other functions Your new oven has yet more functions; see below for a brief description of these. Function Programmes For many types of food, the appliance has preprogrammed setting values that you can use. ~ "Programmes" on page 35 Pyrolytic self-cleaning The pyrolytic self-cleaning function cleans the cooking compartment almost by itself. -
Page 16: Accessories
Accessories _Accessories Y our appliance is accompanied by a range of A c c e s s o r i e s accessories. Here, you can find an overview of the accessories included and information on how to use them correctly. Accessories included Your appliance is equipped with the following Notes... -
Page 17: Before Using For The First Time
Before using for the first time KBefore using for the first Professional pan For preparing large quantities of food. Also ideal for moussaka, for time example. Professional pan with wire insert B efore you can use your new appliance, you must For preparing large quantities of food. -
Page 18: Cooking Pans
Cooking pans ÅCooking pans C o o k i n g p a n s Burner Power Minimum Maximum [kW] cookware cookware Electric diameter diameter hotplate* Electric 1 kW 14.5 cm 14.5 cm hotplate* Wok burner* 3.5 kW 24 cm 28 cm High-output 3 kW... -
Page 19: Gas Burners
Gas burners Igniting the gas burners ÄGas burners Always position the burner lid precisely on the burner cup. The openings in the burner cup must remain T his chapter explains how to set a hotplate. The table unobstructed at all times. All parts must be dry. G a s b u r n e r s shows heat settings and cooking times for various meals. - Page 20 Gas burners Table - Cooking Cooking times may vary depending on the type of food, its weight and quality. Because of possible variations, it Select the right saucepan size for each burner. The is best to judge the optimal cooking time yourself. diameter of the saucepan or pan base should be the Use as little water as possible when cooking, so that the same as that of the burner.
-
Page 21: Operating The Appliance
Operating the appliance If you change the heating function, the temperature will 1Operating the appliance be changed to the corresponding default value. Y ou have already learnt about the controls and how Rapid heating O p e r a t i n g t h e a p p l i a n c e they work. -
Page 22: Time-Setting Options
Time-setting options Use the button to set the cooking time. OTime-setting options Y our appliance has different time-setting options. T i m e - s e t t i n g o p t i o n s Time-setting option Use Cooking time Once the set cooking time has elapsed, the appliance will automatically stop heating. -
Page 23: Setting The End Time
Time-setting options Setting the end time already started to count down. Otherwise the cooking result would no longer be satisfactory. You can delay the time at which cooking is due to To cancel, use the button to set the end time all the finish. -
Page 24: Setting The Time
Childproof lock Setting the time QBasic settings Once the appliance has been connected to the mains or following a power failure, the clock will flash on the T here are various settings available to you in order to display. Set the time. B a s i c s e t t i n g s help use your appliance effectively and simply. -
Page 25: Changing The Basic Settings
Sabbath mode Changing the basic settings FSabbath mode The function selector must be set to the "Off" position. S abbath mode lets you set a cooking time of over 70 Press and hold the button for approximately S a b b a t h m o d e hours. -
Page 26: Cleaning
Cleaning DCleaning Area Cleaning products Upper glass cover* Glass cleaner: Clean with a soft cloth. (Depending on the W ith good care and cleaning, your appliance will retain You can remove the upper glass cover for appliance model) C l e a n i n g its appearance and remain fully functioning for a long cleaning. - Page 27 Cleaning Area Cleaning products Area Cleaning products Glass hob* Care: Protective/care products for glass Rack Hot soapy water: Cleaning: Cleaning agents for glass. Clean with a dishcloth or a brush. (Depending on the Follow the cleaning instructions on the packag- appliance model) Remove the rail for cleaning.
-
Page 28: Keeping The Appliance Clean
Cleaning function Keeping the appliance clean .Cleaning function Always keep the appliance clean and remove dirt immediately so that stubborn deposits of dirt do not U se the "Self-cleaning" function to clean the cooking build up. C l e a n i n g f u n c t i o n compartment. -
Page 29: Setting The Cleaning Function
Cleaning function After running the cleaning function Warning Risk of fire! Allow the cooking compartment to cool down. Use a Loose food remnants, fat and meat juices may catch damp cloth to wipe off the ash that has been left behind ■... -
Page 30: Rails
Rails qAppliance door pRails W ith good care and cleaning, your appliance will retain W ith good care and cleaning, your appliance will retain R a i l s A p p l i a n c e d o o r its appearance and remain fully functional for a long its appearance and remain fully functional for a long time to come. -
Page 31: Removing And Installing The Door Panels
Appliance door Removing and installing the door panels Attaching the door Reattach the oven door in the reverse sequence to To facilitate cleaning, you can remove the glass panels removal. from the oven door. When attaching the oven door, ensure that both When removing the inner panels, pay attention to the hinges are inserted straight into the opening sequence in which the panels are removed. -
Page 32: Upper Glass Cover
Appliance door Upper glass cover Installation During installation, make sure that the lettering "right Before opening the top cover, remove any spills with a above" is upside down at the bottom left of both panels. cloth. Insert the lower panel at an angle towards the back Use glass cleaner if possible. -
Page 33: Trouble Shooting
Trouble shooting 3Trouble shooting Warning – Risk of electric shock! Incorrect repairs are dangerous. Repairs may only be carried out and damaged power cables replaced by I f a fault occurs, there is often a simple explanation. one of our trained after-sales technicians. If the T r o u b l e s h o o t i n g Before calling the after-sales service, please refer to the appliance is defective, unplug the appliance from the... -
Page 34: Replacing The Bulb In The Oven Ceiling Light
Customer service Replacing the bulb in the oven ceiling light 4Customer service If the bulb in the oven light fails, it must be replaced. Heat-resistant, 25 watt, 230 V halogen bulbs are O ur after-sales service is there for you if your appliance available from the after-sales service or specialist C u s t o m e r s e r v i c e needs to be repaired. -
Page 35: Programmes
Programmes clay or plastic, and cookware with plastic handles, is PProgrammes not suitable. Size of the cookware: Y ou can prepare food very easily using the various The roast should cover around two thirds of the P r o g r a m m e s programmes. - Page 36 Programmes Programme Food Cookware Add liquid Shelf posi- Set weight Notes tion Baked potatoes, whole Unpeeled, starchy Universal pan Total potatoes weight Stew, with vegetables Vegetarian Deep roasting As per recipe Total Cut vegetables that take dish with lid weight longer to cook (e.g.
-
Page 37: Setting A Programme
Programmes Programme Food Cookware Add liquid Shelf posi- Set weight Notes tion Joint of veal, lean E.g. tenderloin or Roasting dish Cover the bottom of the Meat Do not sear the meat with lid roasting dish, and add weight beforehand up to 250 g vegetables if you wish Haunch of roe venison Boned, seasoned... -
Page 38: Tested For You In Our Cooking Studio
Tested for you in our cooking studio method of preparation and the type of food, it is JTested for you in our possible to save energy. If you open the appliance door before the food has finished cooking or if you preheat cooking studio the appliance, you may not be able to achieve this result. -
Page 39: Cakes And Pastries
Tested for you in our cooking studio Ensure that you always use suitable accessories and If you are using silicone moulds, follow the that they are placed in the oven the right way around. manufacturer's instructions and recipes. Silicone ~ "Accessories" on page 16 moulds are often smaller than normal baking tins. - Page 40 Tested for you in our cooking studio Cakes on trays Dish Accessories/cookware Shelf posi- Heating Temperature Cooking tion function in °C time in Sponge cake with topping Universal pan 160-180 20-45 Small yeast cakes, 2 levels Universal pan + baking tray 140-160 30-55 Shortcrust tart with dry topping...
- Page 41 Tested for you in our cooking studio Dish Accessories/cookware Shelf position Heating Temperature in Cooking function °C time in mins Macaroons, 2 levels Universal pan + baking tray 100-120 35-45 Macaroons, 3 levels Baking trays + universal pan 5+3+1 100-120 40-50 * Preheat Bread and rolls...
-
Page 42: Bakes And Gratins
Tested for you in our cooking studio Baking tips You want to find out whether the Push a cocktail stick into the highest point on the baked item. If the cocktail stick comes out clean with no baked item is completely cooked in dough residue, the baked item is ready. -
Page 43: Poultry, Meat And Fish
Tested for you in our cooking studio Poultry, meat and fish When grilling, try wherever possible to use pieces of food which are of a similar thickness and weight. This Your appliance offers you a range of heating types for will allow them to brown evenly and remain succulent preparing poultry, meat and fish. - Page 44 Tested for you in our cooking studio roasting dish, it will need a little more liquid than if Meat cooked in glass cookware. Baste lean meat with fat as required or cover it with strips of bacon. The steam evaporates in the cookware when roasting. Carefully pour in more liquid if required.
-
Page 45: Vegetables And Side Dishes
Tested for you in our cooking studio Dish Accessories/cookware Shelf posi- Heating Step Tempera- Cooking tion function ture in °C time in mins Knuckle of veal, 1.5 kg Cookware, uncovered 210-230 130-150 Leg of lamb, boned, medium, 1.5 kg Cookware, uncovered 170-190 70-80* Saddle of lamb on the bone, medium, 1.5 kg... -
Page 46: Yoghurt
Tested for you in our cooking studio Yoghurt It is sufficient to heat UHT milk to 40 °C. Stir in 30 g (approx. 1 tbsp) (chilled) yoghurt. You can use your appliance to make your own yoghurt. Pour into cups or small jars with lids and cover. Place the cups or jars onto the cooking Remove accessories and shelf supports from the compartment floor and use the settings indicated in... -
Page 47: Drying
Tested for you in our cooking studio Dish Accessories/cook- Shelf posi- Heating Searing time Tempera- Cooking ware tion function in min ture in °C time in Duck breast, 300 g each Cookware, uncovered 60-70 Chicken breast fillet, 200 g each, well done Cookware, uncovered 120* 80-110... -
Page 48: Preserving
Tested for you in our cooking studio Preserving Seal the jars with the clips. Place no more than six jars in the cooking For preserving, the jars and rubber seals must be clean compartment. and intact. If possible, use jars of the same size. The information in the table is for round, one-litre jars. -
Page 49: Defrosting
Tested for you in our cooking studio Dish Accessories/cookware Shelf posi- Type of Step Tempera- Cooking tion heating ture in °C time in mins Yeast dough, light Bowl 35-40 25-30 Baking tray 35-40 10-20 Yeast dough, heavy and rich Bowl 35-40 60-75 Heat-resistant cookware... - Page 50 Tested for you in our cooking studio Grilling Also slide in the universal pan. The liquid will be caught and the cooking compartment stays cleaner. Baking Dish Accessories/cookware Shelf posi- Heating Temperature in Cooking tion function °C time in mins Viennese whirls Universal pan 140-150*...
- Page 51 Tested for you in our cooking studio...
- Page 52 *9001306773* 9001306773 281297(B)
Need help?
Do you have a question about the HX9S7RI40N and is the answer not in the manual?
Questions and answers