Zanussi ZEFIST1001SS User Manual

Zanussi ZEFIST1001SS User Manual

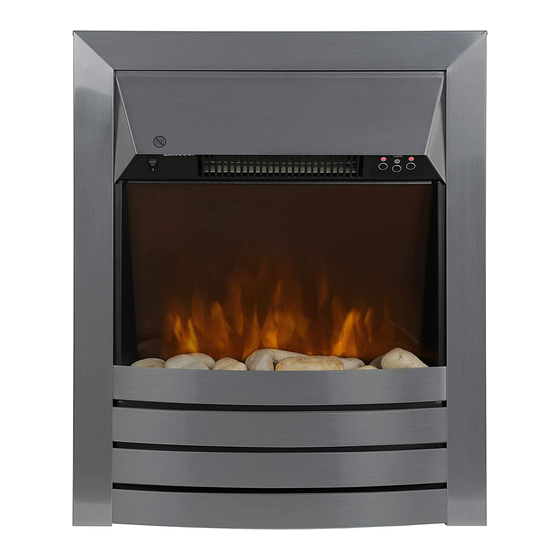
2kw electric insert fire

Advertisement

2KW Electric Inset Fire
User Guide
Model Number:
ZEFIST1001SS, ZEFIST1003B
For Customer Services & Spare Parts please call 0330 1230 597
Or visit us at www.zanussiheatingandcooling.uk
PLEASE RETAIN
FOR FUTURE REFERENCE

Advertisement

Table of Contents
loading

Summary of Contents for Zanussi ZEFIST1001SS

  • Page 1 2KW Electric Inset Fire User Guide Model Number: ZEFIST1001SS, ZEFIST1003B For Customer Services & Spare Parts please call 0330 1230 597 Or visit us at www.zanussiheatingandcooling.uk PLEASE RETAIN FOR FUTURE REFERENCE...
  • Page 2: Table Of Contents

    CONTENTS Page(s) Safety Instructions 3 - 5 Product Overview Electric Insert Fire Installation Using your Electric Inset Fire 8-14 Cleaning and Care Problem Solving Guarantee and Customer Services Connection to the Mains Supply Information Requirements for Electric Local Space 19-20 Heaters Notes 21-23...
  • Page 3: Safety Instructions

    SAFETY INSTRUCTIONS When using electrical appliances, basic safety precautions should always be observed, including the following: • Read all instructions. • Check that the your mains voltage corresponds with the rating on the appliance. • The appliance must not be left unattended while it is connected to the mains supply.
  • Page 4 SAFETY INSTRUCTIONS • Never use the appliance in a room with explosive gas such as petrol, or while using any kinds of flammable glues, sprays or solvents. • The appliance must not be used with an extension lead. • Do not place any part of your body near the air inlet, outlet or on the fins ,to avoid personal injury, electric shock or fire.
  • Page 5 SAFETY INSTRUCTIONS • Warning: This appliance is not intended for use by persons (including children) with reduced physical, sensory or mental capabilities, or lack of experience and knowledge, unless they have been given supervision or instruction concerning use of the appliance by a person responsible for their safety. Children should be supervised to make sure that they do not play with the appliance.
  • Page 6: Product Overview

    PRODUCT OVERVIEW 1. Top of the electric fire 5. High heat setting 2. On/Off switch 6. Low heat setting 7. Flame effect ON/OFF switch 3. Air outlet 4. Pebble effect fire bed 8. Remote control...
  • Page 7: Electric Insert Fire Installation

    Electric Insert Fire Installation • The Electric heater is supplied with approximately 1.7 meters of flexible mains cable. The appliance and surround should be located close to a suitable mains socket and MUST be easily accessible to allow proper connection. •...
  • Page 8: Using Your Electric Inset Fire

    USING YOUR ELECTRIC INSET FIRE Temperature and programme number display • The appliance can be operated either by the switches located on the control panel under the pitched canopy or the supplied remote control. • Temperature and programme number display: usually it displays the room temperature;...
  • Page 9 USING YOUR ELECTRIC INSET FIRE Manual Operation The appliance can be operated by pressing the buttons on the control panel under the canopy. • First, press the On/Off button on the left of the control panel once to turn on the appliance.
  • Page 10 USING YOUR ELECTRIC INSET FIRE Remote Operation To activate the appliance by simply pressing the standby rocker switch which is located at the front left-hand side of the product. The appliance will beep to indicate that it is powered up. It takes a couple of seconds for the receiver to respond to the transmitter.
  • Page 11 USING YOUR ELECTRIC INSET FIRE Automatic heating Press "IC" button on the remote controller to start or exit the automatic heating. When switched on, the fireplace can automatically change the heating mode depending on the set temperature and the room temperature. During a timed starting process, it is possible to start heating ahead of schedule.
  • Page 12 USING YOUR ELECTRIC INSET FIRE • Press the "TIMER SET" button, and the programme number starts blinking; press the "+" or "-" to change the programme number until you get the programme number that you need to set or modify. •...
  • Page 13 USING YOUR ELECTRIC INSET FIRE Timer switch "TIMER ON/OFF" is to control the timed opening and closing. Restart the appliance after power is cut off, the last timer setting is kept, but the current date and time must be reset. Note: •...
  • Page 14 USING YOUR ELECTRIC INSET FIRE Safety Protective Devices The appliance is fitted with an over heat protection and safety cut off system. • Overheat protection - the power to the heating elements will automatically cut off if the temperature of the heating elements exceeds a certain limit.
  • Page 15: Cleaning And Care

    CLEANING AND CARE WARNING: Electrical Shock Hazard. Before you clean the appliance, disconnect the mains plug from the wall socket. • Allow the appliance to cool down completely before cleaning. • Do not immerse cord, plug or appliance in any liquid or allow moisture to come into contact with electrical parts.
  • Page 16: Problem Solving

    PROBLEM SOLVING My appliance does not work when I turn it on: 1. Check that your appliance is plugged in and the power is turned on at the mains socket. 2. Try another mains socket. 3. Check the appliance is in an upright position. 4.
  • Page 17: Guarantee And Customer Services

    GUARANTEE AND CUSTOMER SERVICES At Zanussi, we take all our customer feedback seriously. Feel free to contact our Customer Service Team on 0330 1230 597 who will be more than happy to assist you. This product is guaranteed for 12 months from the date of the original purchase.
  • Page 18: Connection To The Mains Supply

    CONNECTION TO THE MAINS SUPPLY This appliance is designed to operate from a mains supply of 220-240V~50Hz. Check that the voltage marked on the product corresponds with your supply voltage. How to change the fuse 1. Slot the end of a screwdriver into the recess in the fuse holder of the plug.
  • Page 19: Information Requirements For Electric Local Space Heaters

    Information Requirements for Electric Local Space Heaters Auxiliary electricity consumption Symbol Value Unit At nominal heat output elmax 0.014 At minimum heat output elmin 0.014 In standby mode elSB 0.48 Type of heat input, for electric storage local space heaters only (select one) manual heat charge control, with integrated thermostat Not applicable manual heat charge control with room and/or outdoor Not applicable...
  • Page 20 Information Requirements for Electric Local Space Heaters Other control options (multiple selections possible) yes or no room temperature control, with presence detection [no] room temperature control, with open window detection [no] with distance control option [no] with adaptive start control [yes] with working time limitation [no]...
  • Page 21: Notes

    Notes...
  • Page 22 Notes...
  • Page 23 Notes...
  • Page 24: Disposal Information

    ZANUSSI is a registered trademark used under license from AB Electrolux (publ). Made by Product Care Trading Limited, Wigan, WN2 4AY/ PCT (NI) Ltd, Belfast, BT5 5AD. Zanussi Support: call 0330 1230 597 Or visit us at: www.zanussiheatingandcooling.uk The ‘wheelie bin’ symbol is known as the 'Crossed-out wheelie bin Symbol'.

This manual is also suitable for:

Zefist1003b

Table of Contents