Table of Contents
Advertisement
Available languages
Available languages
Quick Links
Advertisement
Table of Contents

Related Manuals for Beco HCA92640


Summary of Contents for Beco HCA92640
- Page 1 Hood User manual HCA92640 HCA62640 EN AR 01M-8848793200-0119-06...
-
Page 2: Explanation Of Symbols
Please read this user manual first! Dear Customer, Thank you for preferring a Beko product. We hope that you get the best results from your product which has been manufactured with high quality and state-of-the-art technology. Therefore, please read this entire user manual and all other accompanying documents carefully before using the product and keep it as a reference for future use. - Page 3 CONTENTS ENGLISH 04-19 20-34 اللغة العربية 3 / EN Hood / User Manual...
-
Page 4: Important Instructions For Safety And Environment
Important instructions for safety and environment This section contains safety in- If the power cable is damaged, it • structions that will help protect must be replaced by the manufac- from risk of personal injury or prop- turer, after sales service or a sim- erty damage. -
Page 5: Product Safety
Important instructions for safety and environment 1.1.2 Product safety Avoid inflammable materials • under the hood. You can use a pipe with a diameter • Oil may ignite while frying foods. of 120 mm or 150 mm on the flue •... -
Page 6: Children's Safety
Important instructions for safety and environment When a non-electrical device is 1.3 Compliance with WEEE • regulation and disposal of the concurrently used in the same waste product room together with the hood, the negative pressure in the room This product does not contain harmful and forbidden materials described in the must be maximum 0.4 mbar in "Directive on the Restriction of the Use... -
Page 7: Technical Specifıcations Of Your Appliance
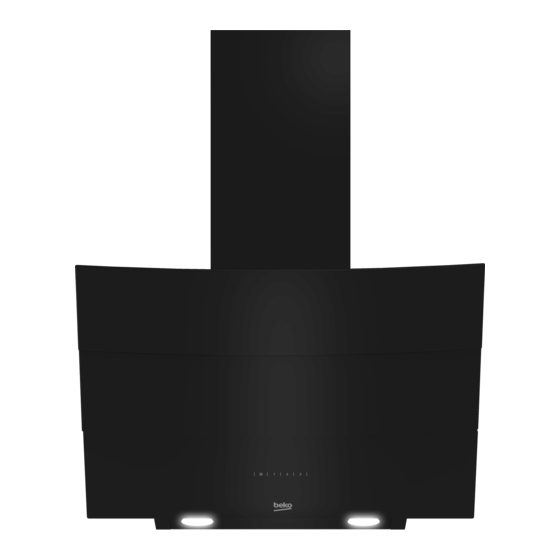
Technical specifıcations of your appliance 1. Internal flue 2. External flue 3. Glass cover 4. Filter (under the glass cover) 5. Control panel 6. Illumination (Figure 1) HCA 92640 BH HCA 92640 WH HCA 62640 W HCA 62640 WH Width 896 mm 896 mm 596 mm... - Page 8 Technical specifıcations of your appliance HCA 62640 B HCA 62640 BH HCA 62540 B HCA 92540 B Width 596 mm 596 mm 596 mm 896 mm Depth 386 mm 386 mm 386 mm 393 mm Height 750 mm /1080 mm 750 mm /1080 mm 750 mm /1080 mm 750 mm / 1130 mm...
-
Page 9: Installing Your Appliance
Installing your appliance Please consult the nearest Authorised Service Distance between lower surface of the hood Agent for the installation of your hood. and upper surface of the hob should be at least 65 cm. *Preparation of location and electrical installation for the product is under customer’s responsibility. -
Page 10: Installing The Hood Onto The Wall
Installing your appliance Information required for the preparation of the in- stallation place for your hood is given below. External flue connection plate 3.2 Installing the hood onto the wall To install the hood onto the wall, loosen the screws of hanger plates on the motor housing and pull the plates upwards. - Page 11 Installing your appliance (Figure 4 - 60) (Figure 4 - 90) 11 / EN Hood / User Manual...
- Page 12 Installing your appliance 3.2.1 Boring the hanger holes Affix the installation template onto the installa- tion place of the hood. Drill the points market with (X,Y) (Figure 5) using a Ø 10 mm bit and points market with (Z) (Figure 5) using a Ø 6 mm bit. 10 mm plastic 6 mm plastic wall plug...
-
Page 13: Hammering The Wall Plugs
Installing your appliance 3.2.2 Hammering the wall plugs Hammer Ø 10 mm wall plugs (X,Y) into the holes drilled for hanger screws. Hammer 2 x Ø 6 mm wall plugs (Z) into the holes drilled with a Ø6 mm bit for the external flue connection plate. (Figure 5) 3.2.3 Installing the hanger screws... -
Page 14: Installing The Hood Flue
Installing your appliance 3.3 Installing the hood flue Extend and screw the internal flue from its outer edges onto the flue connection plate which was Disconnect the product from mains supply before secured to the wall (Figure 8). starting flue installation. Fit the sheet metal flue parts around the body. -
Page 15: Using With Flue Connection
Installing your appliance 3.4.1 Using with flue connection Pipe connection must be as short as possible and have minimum number of elbows. • The vapour is removed via flue pipe which is se- cured to the connection head on the hood. A: Flue outlet pipe •... -
Page 16: Operating Your Appliance
Operating your appliance (Figure 9) (A): Light On / Off key (B): 1st level key (C): 2nd level key (D): 3rd level key 4.1 Digital electronic control Auto-stop in 15 min.: with 3 levels This appliance is equipped with an Auto-Stop function which allows the appliance to ventilate (A) Light On/Off Key: You can illuminate the the room for an additional period of time in order... -
Page 17: Energy Efficient Usage
Operating your appliance 4.2 Energy efficient usage: • When operating the hood, adjust the speed level according to the odour and vapour inten- sity in order to prevent unnecessary power con- sumption. • Use low speeds in normal conditions (1-2), and high speed (3) when smell and vapors are inten- sified. -
Page 18: Cleaning And Maintenance
Cleaning and maintenance Carbon filter (Using without flue) Prior to cleaning and maintenance, unplug the ap- pliance or turn the main switch off or loosen the This filter removes the cooking odours. If it is not fuse that supplies the hood. possible to use a flue, it purifies the air which is circulated inside the kitchen. -
Page 19: Replacing The Lamps
Cleaning and maintenance 5.3 Cleaning 5.4 Replacing the lamps Particularly do not neglect to clean your hood im- Disconnect the hood from the mains supply. mediately after you have made frying. This appliance is equipped with 3 W LED lamps. Use a soft cloth soaked with liquid detergent to To replace the LED lamps, press the lamp down- clean the outer surface of your hood. - Page 20 !يرجى قراءة هذا الدليل أوال ،عزيزي العميل . نأمل أن تحصل على أفضل النتائج من جهازك الذي قد تم تصنيعه بأعلى جودةBeko شكرً ا لك على شرائك لمنتجات وبأحدث التقنيات. وعلى ذلك، يرجى قراءة كامل دليل المستخدم هذا وجميع المستندات المصاحبة له بعناية قبل استخدام المنتج...
- Page 21 تعليمات مهمة للسالمة والبيئة للحصول على أفضل أداء، يجب أال يزيد طول يحتوي هذا القسم على تعليمات السالمة التي • الموصل الخارجي عن 4 أمتار. يجب أال يحتوي تساعد على الحماية من التعر ّ ض لخطر اإلصابة الموصل الخارجي على أكثر من زاويتين الشخصية،...
- Page 22 تعليمات مهمة للسالمة والبيئة ال تترك موقد الطهي بدون مراقبة مطل ق ً ا عند 2.1 االستخدام المعد له • قلي األطعمة؛ وإال فقد يتسبب الزيت المغلي في الجهاز .نشوب حريق .الغرض من هذا الجهاز هو االستخدام المنزلي • هناك خطر لنشوب حريق إذا لم يتم تنظيف •...
- Page 23 المواصفات الفنية للجهاز أنبوب المدخنة الداخلي أنبوب المدخنة الخارجي غطاء زجاجي )مرشح (أسفل الغطاء الزجاجي لوحة التحكم مصباح إضاءة )1 (الشكل HCA 62640 WH HCA 62640 W HCA 92640 WH HCA 92640 BH 695 ملم 695 ملم 698 ملم 698 ملم العرض...
- Page 24 المواصفات الفنية للجهاز HCA 92540 B HCA 62540 B HCA 62640 BH HCA 62640 B 698 ملم 695 ملم 695 ملم 695 ملم العرض 393 ملم 683 ملم 683 ملم 683 ملم العمق 057 ملم / 0311 ملم 057 ملم / 0801 ملم 057 ملم...
- Page 25 تركيب الجهاز يجب أن تكون المسافة بين السطح السفلي للمدخنة والسطح العلوي .يرجى الرجوع إلى أقرب وكيل خدمة معتمد لتركيب المدخنة .لشعالت الموقد 56 سم على األقل .* يتم إعداد الموقع والتركيب الكهربائي للمنتج تحت مسؤولية العميل .اطلب من كهربائي مؤهل إجراء التوصيل الكهربائي قم...
- Page 26 تركيب الجهاز .فيما يلي أدناه تجد المعلومات المطلوبة إلعداد مكان تركيب المدخنة لوحة توصيل أنبوب المدخنة الخارجي 2.3 تركيب المدخنة على الحائط لتركيب المدخنة على الحائط، قم بفك براغي ألواح التعليق بمبيت المحرك واسحب األلواح إلى أعلى. بعد ذلك، أحكم ربط براغي ألواح )التعليق.
- Page 27 تركيب الجهاز )60 - 4 (الشكل )90 - 4 (الشكل 27 /AR مدخنة الموقد / دليل المستخدم...
- Page 28 تركيب الجهاز 1.2.3 حفر ثقوب لوحة التعليق ضع قالب التركيب في موضع تركيب المدخنة. احفر بالمثقاب في ) (الشكل 5) باستخدام لقمةX,Y( مواضع النقاط المميزة بالحرف )5 ) (الشكلZ( حفر قطرها 01 ملم والنقاط المميزة بالحرف .باستخدام لقمة حفر قطرها 6 ملم حشوة...
- Page 29 تركيب الجهاز 2.2.3 تثبيت حشوات المسامير بالحائط بالمطرقة ) بمطرقة في الثقوبX,Y( قم بتثبيت حشوات حائط بقطر 01 ملم المحفورة بالحائط لتركيب براغي التعليق. قم بتثبيت حشو ت َ ين بقطر ) بمطرقة في الثق ب َ ين المحفور َ ين بلقمة الحفر ذات القطرZ( 6 ملم .6 ملم...
- Page 30 تركيب الجهاز 3.3 تركيب أنبوب المدخنة قم بتمديد أنبوب المدخنة الداخلي وتثبيته بالبراغي من أطرافه الخارجية على لوحة توصيل أنبوب المدخنة التي تم تركيبها بالحائط (الشكل افصل المنتج عن مصدر التيار الكهربائي قبل بدء تركيب أنبوب المدخنة. قم بتثبيت أجزاء أنبوب المدخنة المكونة من الصفائح المعدنية .حول...
- Page 31 تركيب الجهاز عند تشغيل المدخنة، يتم إغالق اللوحات لمنع دخول الروائح والغبار 1.4.3 استخدام وصلة أنبوب المدخنة .المحتمل من الخارج ي ُ زال البخار عن طريق أنبوب المدخنة الذي يتم تركيبه برأس الوصل • .بالمدخنة .يجب أن يكون قطر أنبوب المدخنة مساو ي ً ا لقطر حلقة التوصيل •...
- Page 32 تشغيل جهازك )9 (الشكل (أ): مفتاح تشغيل/إيقاف اإلضاءة 1 (ب): مفتاح اختيار المستوى 2 (ج): مفتاح اختيار المستوى 3 (د): مفتاح اختيار المستوى 3 1.4 وحدة تحكم إلكترونية رقمية بها إذا ضغطت على نفس مفتاح مستوى السرعة أثناء تمكين وظيفة اإليقاف .التلقائي،...
- Page 33 تشغيل جهازك يمكنك تشغيل المدخنة عن طريق الضغط على مفتاح مستوى السرعة • .)المطلوب (ب، ج، د .يمكنك إضاءة منطقة الطهي عن طريق الضغط على مفتاح المصباح • )(أ 33 /AR مدخنة الموقد / دليل المستخدم...
- Page 34 الصيانة والتنظيف قبل التنظيف والصيانة، افصل الجهاز أو افصل مفتاح مصدر التيار )مرشح الكربون (االستخدام بدون أنبوب المدخنة .الرئيسي أو قم بفك المصهر الذي يمد المدخنة بالطاقة يزيل هذا المرشح روائح الطهي. إذا لم يكن من الممكن استخدام أنبوب المدخنة، فسينقي هذا المرشح الهواء الذي يدور داخل المطبخ. سيتم سد 1.5 مرشح...
- Page 35 الصيانة والتنظيف 3.5 التنظيف .ال تهمل في تنظيف المدخنة مباشر ة ً بعد القلي بشكل خاص استخدم قطعة قماش ناعمة منقوعة في منظف سائل لتنظيف السطح .الخارجي للمدخنة .وال تستخدم المواد األكالة أو الكاشطة للتنظيف يمكنك استخدام المنظفات المتاحة تجار ي ًّا إلزالة الشحوم العنيدة وما إلى...
- Page 36 www.beko.com...
Need help?
Do you have a question about the HCA92640 and is the answer not in the manual?
Questions and answers