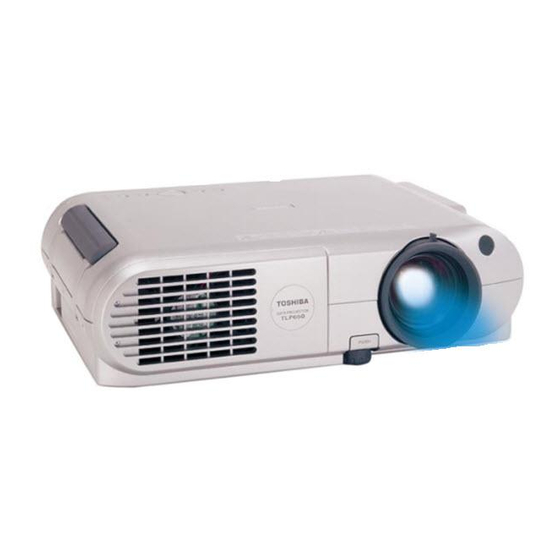
Toshiba TLP450E Owner's Manual
3lcd data projector
Hide thumbs
Also See for TLP450E:
- Service manual (61 pages) ,
- Owner's manual (54 pages) ,
- Owner's manual (52 pages)
Advertisement
Quick Links
Before use
OWNER'S MANUAL
3LCD DATA PROJECTOR
TLP450E
TLP451E
TLP650E
TLP651E
TLP650Z
TLP651Z
TLP470E
TLP471E
TLP670E
TLP671E
( WITH DOCUMENT IMAGING CAMERA )
( WITH DOCUMENT IMAGING CAMERA )
( WITH DOCUMENT IMAGING CAMERA )
( WITH DOCUMENT IMAGING CAMERA )
( WITH DOCUMENT IMAGING CAMERA )
1
CONTENTS
Advertisement

Related Manuals for Toshiba TLP450E


Summary of Contents for Toshiba TLP450E
- Page 1 CONTENTS Before use OWNER’S MANUAL 3LCD DATA PROJECTOR TLP450E TLP451E ( WITH DOCUMENT IMAGING CAMERA ) TLP650E TLP651E ( WITH DOCUMENT IMAGING CAMERA ) TLP650Z TLP651Z ( WITH DOCUMENT IMAGING CAMERA ) TLP470E TLP471E ( WITH DOCUMENT IMAGING CAMERA )
- Page 2 CONTENTS Before use SAFETY PRECAUTIONS WARNING: TO REDUCE THE RISK OF FIRE OR ELECTRIC SHOCK, DO NOT EXPOSE THIS APPLIANCE TO RAIN OR MOISTURE. DANGEROUS HIGH VOLTAGES ARE PRESENT INSIDE THE ENCLOSURE. DO NOT OPEN THE CABINET. REFER SERVICING TO QUALIFIED PERSONNEL ONLY. CAUTION: Laser beam is emitted when the laser button of the remote control is pressed.
- Page 3 CONTENTS Before use IMPORTANT PRECAUTIONS In the spaces provided below, record the Model and Serial No. located at the rear of your LCD projector. Model No. Serial No. Save Original Packing Materials The original shipping carton and packing materials will come in handy if you ever have to ship your LCD projector.
- Page 4 CONTENTS Before use IMPORTANT SAFETY INSTRUCTIONS CAUTION: PLEASE READ AND OBSERVE 3. Source of Light 1. Read Owner’s Manual ALL WARNINGS AND Do not look into the lens while the lamp is After unpacking this product, read the INSTRUCTIONS GIVEN IN THIS on.
-
Page 5: Power Cord
CONTENTS Before use IMPORTANT SAFETY INSTRUCTIONS 5. Heat 7. Cleaning 9. Overloading The product should be situated away from Unplug this product from the wall outlet Do not overload wall outlets; extension heat sources such as radiators, heat before cleaning. Do not use liquid cleaners cords, or integral convenience receptacles registers, stoves, or other products or aerosol cleaners. - Page 6 CONTENTS Before use IMPORTANT SAFETY INSTRUCTIONS 11. Object and Liquid Entry 13. Stack Inhibited 15. Accessories Never push objects of any kind into this Do not stack other equipment on this Do not place this product on an unstable product through openings as they may product or do not place this product on the cart, stand, tripod, bracket, or table.
- Page 7 CONTENTS Before use IMPORTANT SAFETY INSTRUCTIONS 16. Damage Requiring Service 17. Servicing 19. Safety Check Unplug this product from the wall outlet and Do not attempt to service this product Upon completion of any service or repairs refer servicing to qualified service yourself as opening or removing covers to this product, ask the service technician to personnel under the following conditions:...
- Page 8 CONTENTS Before use IMPORTANT SAFETY INSTRUCTIONS 21. Do not carry by the camera arm. 23. Do not move the projector while the arm 25. If glass components, including lens and is still erect. lamp, should break, contact your dealer Do not carry the projector by the camera for repair service.
- Page 9 CONTENTS Before use Power supply cord selection If your line voltage is 220 to 240, use one of the following types of cable. Plug configuration Plug type Line voltage EURO 220 – 240V 220 – 240V Use a 5A fuse which is approved by ASTA or BSI to BSI362.
- Page 10 CONTENTS Before use Contents Before use Camera SAFETY PRECAUTIONS ............... Part names and functions of document imaging camera ..... IMPORTANT PRECAUTIONS ............Picture projection with the document imaging camera ....IMPORTANT SAFETY INSTRUCTIONS ........Overlaying projection ..............Power supply cord selection ............. Part names and functions ..............
- Page 11 CONTENTS Before use Part names and functions Control panel ON/STANDBY button SELECT/ADJUST To turn the projector on or off. ON/STANDBY MENU ENTER INPUT LAMP MENU button Main unit TEMP To display or close the menu. SELECT/ADJUST button To select items or adjust values on the menu.
- Page 12 CONTENTS Before use (Continued) Left side Right side RS-232C AUDIO AUDIO CONTROL MONITOR OUTPUT RGB INPUT Carrying handle VIDEO INPUT AC IN socket Open to carry the projetor. S-VIDEO VIDEO L - AUDIO -R Rear side CONTROL connector 17 49 To connect a computer to control the projector.
- Page 13 IEC60825–1 A1;1997 MAX OUTPUT: CLASS II LASER PRODUCT radiation exposure. COMPLIES WITH DHHS 21 CFR SUBCHAPTER J TOSHIBA AMERICA CONSUMER PRODUCTS, INC. 82 TOTOWA RD., MANUFACTURED: WAYNE, NJ 07470, SEPTEMBER 1999 U.S.A PLACE OF...
- Page 14 CONTENTS Before use MUTE button (Continued) To cut off the picture and sound temporarily. L-CLICK button* / MENU button CALL button • To left-click.* Laser emission part • To display or close the menu. To display the current input source and signal status information.
- Page 15 CONTENTS Before use Notes Remote control operation (Continued) • Do not leave the remote control unit turned Point the remote control at the infrared the face down as it may make the buttons Notes pressed to hasten the battery end. remote sensor and press a button.
-
Page 16: Rgb Cable
CONTENTS Connections and installation Connections Connecting an IBM PC or compatible computer (DOS/V) Connecting a Macintosh computer Check that the power for the projector and computer is off before • Attach the supplied adapter for Macintosh computers. connecting the cables. •... -
Page 17: Pc Audio Cable
CONTENTS Connections and installation (Continued) Connecting video equipment Output terminals Check that the power for the projector and computer is off before Check that the power for the projector and computer is off before connecting the cables. connecting the cables. (not supplied) To C R (P R ) output To C B (P B ) output... - Page 18 CONTENTS Connections and installation Projector placement Floor-mounted front projection Floor-mounted rear projection Viewing a picture projected on the front of Viewing a picture projected through the the screen from a floor. back of the screen from a floor installation. There are four ways of installing this projector Translucent screen as shown right.
- Page 19 CONTENTS Connections and installation (Continued) Adjust the distance between Connect the power cord. the lens and the screen. • Insert one end in the AC IN socket on the projector. Place the projector on a steady, The projection size depends on the distance between the lens and the •...
- Page 20 CONTENTS Connections and installation 3) To put the foot adjuster back, hold down How to use the foot adjuster (Continued) the foot adjuster release button and The tilt of the projector can be adjusted using lower the front slowly. Notes the foot adjuster.
- Page 21 CONTENTS Operations Picture projection Select the input source. (On the remote control) Press RGB or VIDEO. (On the control panel of the main unit) CAUTION AUTO SET ON/STANDBY KEYSTONE Do not look into the projection lens while Press INPUT repeatedly. MARKER LASER operating the projector.
- Page 22 CONTENTS Operations Notes (Continued) • Even after turning the power off, the intake and exhaust fans continue to work for a while Notes to cool the inside of the projector. SELECT/ADJUST • “ ” is displayed on the screen if the •...
- Page 23 CONTENTS Operations 2) Press MUTE again. (Continued) Contents of displayed items The picture is also cut off temporarily. [ S t a t u s ] “ ” appears. I n p u t : RGB To restore, press MUTE again. S i g n a l : XGA6 0 AUTO SET...
- Page 24 CONTENTS Operations When the picture size is smaller than the (Continued) projection area: : To move the picture upward : To move the picture down : To move the picture leftward AUTO SET ON/STANDBY KEYSTONE : To move the picture rightward MARKER LASER POINTER...
-
Page 25: Remote Mouse Receiver
CONTENTS Operations Notes If you connect the iREMOTE MOUSE Operating the computer RECEIVER to the computer, the supplied • To operate the projector and the computer by remote control can work as a mouse of the the remote control, place the REMOTE by the remote control MOUSE RECEIVER close to the projector. - Page 26 CONTENTS Operations To drag and drop (Continued) While holding down the center of the pointer control, press the rim and release the Operating the computer by the center. remote control Notes Use the supplied remote control pointing it at • The remote control operating range is about 5 the connected REMOTE MOUSE RECEIVER.
- Page 27 CONTENTS Adjustments H-position : To shift the image position Bass : To adjust the bass of the sound Settings and adjustments on horizontally output. the menu V-position : To shift the image position Treble : To adjust the treble of the sound vertically.
- Page 28 CONTENTS Adjustments Proj. mode Initial settings Press to select Confirm your installation type on the chart on page – Default De f a u l t Standard: Floor-mounted front projection L a n g u a g e E n g l i s h Make the basic settings for projecting.
- Page 29 CONTENTS Adjustments (Continued) Scrn display On-screen displays (indications of input selection, signal absent or mute mode, etc.) appear. Off: On-screen displays do not appear. Press MENU. The menu disappears. Notes • These settings are stored until you turn the power off. •...
- Page 30 CONTENTS Adjustments Notes Keystone correction Press MENU to display the • Pressing KEYSTONE on the remote control menu. can also correct the keystone distortion – Keystone automatically. Press to select • These adjustments are stored until you turn Preparation the power off. •...
- Page 31 CONTENTS Adjustments Notes Projection adjustments • When performing the automatic projection adjustment, use a bright and distinctly edged – Image I ma g e picture. • Pressing AUTO SET on the remote control Preparation A u t o s y n can also adjust the image automatically.
- Page 32 CONTENTS Adjustments Camera gain: (For document imaging Picture adjustments T i n t – camera model only) S h a r p n e s s – – Picture (–) To lower the camera R - l e v e l –...
- Page 33 CONTENTS Adjustments Notes Sound adjustments Press MENU to display the • These adjustments are stored until you turn menu. the power off. – Audio • To store the adjustments even if the power is Press to select turned off, follow the procedure of “Saving Preparation data”.
- Page 34 CONTENTS Adjustments Saving data Press MENU to display the menu. – Save Press to select Preparation • Display the image as explained in “Picture Sa v e Projection”. S a v e d a t • Set the POINTER/PJ selector to “PJ”. A l l p r e s e t SELECT/ADJUST ON/STANDBY...
- Page 35 CONTENTS Camera Part names and functions of Camera control panel OVERLAY button document imaging camera To activate the overlaying projection. PHOTO/TEXT button CAUTION To switch modes between text and photo. • When using the camera, be careful to not pinch your hand or fingers into the arm. ARM LIGHT button •...
- Page 36 CONTENTS Camera 3) Turn the arm. 6) Pull up the light. (Continued) Preparation of the document imaging camera 1) Raise up the arm. 4) Open the camera head. 7) Turn the light. 2) Stretch the arm. 5) Turn the camera head. Notes •...
- Page 37 CONTENTS Camera Picture projection with the Place a document (text, Press CAMERA to select the illustration) onto or around the camera input mode. document imaging camera projector, and turn the camera Pressing CAMERA on the camera control head to direction of the panel or INPUT on the main unit can also Preparation select it.
- Page 38 CONTENTS Camera • “Camera gain” adjustment may improve view Correcting illuminated defects (Continued) of a camera subject which is too dark or vivid. If there are some luminous dots on a projected picture, make the following correction. Focus on the picture by 1) While the camera is active, cover the turning the focusing ring on camera lens with a black paper...
- Page 39 CONTENTS Camera Overlaying projection Write on the paper with a blue or red pen. The handwriting is superimposed on the picture. With the RGB input or the video input selected, you can draw on the screen with the pen. RGB picture Preparation •...
- Page 40 CONTENTS Maintenance Trouble indications Lit (red) Lit (red) LAMP Lit (red) LAMP – TEMP – TEMP Flashing (red) If there is some problem inside the projector, The lamp turns off or does not light up. The power turns off or does not come on. the indicators light up or flash.
- Page 41 CONTENTS Maintenance 3) Clean the air filter cover. Cleaning the lens Air filter, lens and main unit Remove dust and stains with a vacuum Use a blower or a lens cleaner to clean the cleaning cleaner. lens. Never rub or tap the lens with a hard object as CAUTION the lens surface is fragile.
- Page 42 • When replacing, always use lamp “TLPL6” (for TLP450E, TLP451E, TLP650E, Notes TLP651E, TLP470E, TLP471E, TLP670E, • The projector displays the total working time TLP671E) or “TLPL8” (for TLP650Z, at every 1,000 hours (only when plugged in TLP651Z) (sold separately).
- Page 43 CONTENTS Others • The “Brightness” adjustment is at its • The picture is out of focus. Before calling service → Focus the picture. darkest. → Make the “Brightness” adjustment. personnel • The projection distance is not • The source is not correctly connected to appropriate.
- Page 44 CONTENTS Others (Continued) Image does not appear when using the document imaging camera. The remote control does not work. • The wrong input is selected. • The remote control is not facing the → Select the correct input source. remote sensor. →...
- Page 45 CONTENTS Others Input Signal Mode determination and signal system : full compatible : dot resizing display : simplified display : high resolution serial transfer control Frequency Signal Resolution (line) Synchronizing Default 650/651 450/451 Remarks Horizontal Vertical Horizontal Vertical 670/671 470/471 Mode System (kHz)
- Page 46 CONTENTS Others (Continued) : full compatible : dot resizing display : simplified display : high resolution serial transfer control Frequency Signal Resolution (line) Synchronizing Default 650/651 450/451 Remarks Horizontal Vertical Horizontal Vertical 670/671 470/471 Mode System (kHz) (Hz) model model XGA60 XGA 60Hz 48.363...
- Page 47 CONTENTS Others (Continued) Signal assignment D-SUB 15 pin shrinking terminal Input Signal Pin arrangements Video signal Pin No. Analog 0.7V(p-p) 75Ω Video input (Red) Video input (Green) Horizontal synchronizing signal Video input (Blue) TTL level (positive/negative polarity) GND (Red) Vertical synchronizing signal GND (Green) TTL level (positive/negative GND (Blue)
- Page 48 CONTENTS Others (Continued) RGB signal defaults The following signals are factory set as defaults Video Timing (Horizontal) Video Timing (Vertical) in each mode. However, some computers may have different timings than those in the chart. Make the necessary adjustments if the picture Video Video has flickers or is blurred.
- Page 49 CONTENTS Others Command list Adjustments with RS-232C Conditioning of the Projection Unit can also be Classification Command Meaning done by a computer via the RS-232C, as well NORMAL Power OFF as by the remote control. NORMAL Power ON NORMAL Video audio mute OFF Pin No.
- Page 50 CONTENTS Others (Continued) Classification Command Meaning Classification Command Meaning ADJUST Adjustment value decrease Default German display setting ADJUST Adjustment value increase Default Italian display setting ADJUST Adjustment value decrease Default Spanish display setting KEYSTONE Keystone automatic adjustment Default Portuguese display setting KEYSTONE Keystone manual adjustment Default...
- Page 51 Video signal : 1V(p-p), 75Ω Zooming Manual operation TLP651Z : 210W Audio : 1V(p-p), more than 22kΩ, Mass TLP450E, TLP470E : 3.7 Kg RCA pin jack TLP451E, TLP471E : 4.5 Kg Document imaging camera MONITOR OUTPUT TLP650E, TLP670E : 3.7 Kg...
-
Page 52: Table Of Contents
International Business Machines Corporation. Macintosh is a registered trademark of Apple The design and specifications are subject to Computer, Inc. change without notice. Windows is a registered trademark of Microsoft Corporations in the U.S. and other countries. TOSHIBA CORPORATION...
Need help?
Do you have a question about the TLP450E and is the answer not in the manual?
Questions and answers