Sign In
Upload
Download
Table of Contents
Contents
Add to my manuals
Delete from my manuals
Share
URL of this page:
HTML Link:
Bookmark this page
Add
Manual will be automatically added to "My Manuals"
Print this page
×
Bookmark added
×
Added to my manuals
Manuals
Brands
Viessmann Manuals
Boiler
Vitopend 200-W
Installation and service instructions for contractors
Viessmann Vitopend 200-W Installation And Service Instructions For Contractors
Gas fired combi boiler for balanced flue operation natural gas and lpg version
Hide thumbs
1
2
3
4
5
6
7
8
9
10
11
12
13
14
15
16
17
18
19
20
21
22
23
24
25
26
27
28
29
30
31
32
33
34
35
36
37
38
39
40
41
42
43
44
45
46
47
48
49
50
51
52
53
54
55
56
57
58
59
60
61
62
63
64
65
66
67
68
69
70
71
72
73
74
75
76
77
78
79
80
81
82
83
84
85
86
87
88
89
90
91
92
93
94
95
96
97
98
99
100
101
102
103
104
105
106
107
108
109
110
111
112
113
114
115
116
117
118
119
120
121
122
123
124
125
126
127
128
129
130
131
132
page
of
132
Go
/
132
Contents
Table of Contents
Troubleshooting
Bookmarks
Table of Contents
Index Installation Instructions
Table of Contents
Product Information
Preparing for Installation
Installation Sequence
Installing the Boiler and Making All Connections
Flue Gas Connection
Gas Connection
Opening the Control Unit Casing
Electrical Connections
Fitting the Programming Unit into the Control Unit
Fitting the Front Panel
Steps - Commissioning, Inspection and Maintenance
Commissioning, Inspection, Maintenance
Further Details Regarding the Individual Steps
Filling the Heating System
Venting the Heating System
Setting the Time and Date (if Required) Only for Weather-Compensated Control Units
Changing the Language (if Required) Only for Weather-Compensated Control Units
Checking the Gas Type
Function Sequence and Possible Faults
Checking the Static and Supply Pressure
Checking the Nozzle Pressure
Setting the Maximum Output
Checking the Balanced Flue System for Soundness (Annular Gap Check)
Draining the Heating System
Checking and Cleaning the Burner
Checking and Cleaning the Flue Gas Heat Exchanger
Checking the Ignition and Ionisation Electrodes
Flow Limiter
Checking All Gas Equipment for Soundness at Operating Pressure
Checking the Diaphragm Expansion Vessel and System Pressure
Flue Gas Emissions Test
Checking the Ionisation Current
Matching the Control Unit to the Heating System
Adjusting the Heating Curves (Only for Weather-Compensated Control Units)
Connecting the Control Unit to the LON System (Only for Weather-Compensated Control Units)
Instructing the System User
Scanning and Resetting the "Service" Display
Code 1
Coding
Code 2
Resetting Codes to Their Delivered Condition
Service Level Overview
Service Scans
Temperatures, Boiler Coding Card and Brief Scans
Checking Outputs (Relay Test)
Scanning Operating Conditions and Sensors
Fault Display
Troubleshooting
Fault Codes
Repairs
Constant Temperature Control Unit
Function Description
Weather-Compensated Control Unit
Extensions for External Connections (Accessories)
Control Functions
Remote Control DIP Switches
Connection and Wiring Diagram Internal Connections
Designs
Connection and Wiring Diagram External Connections
Parts Lists
Commissioning/Service Reports
Specification
Certificates
Declaration of Conformity
Keyword Index
Advertisement
Quick Links
1
Table of Contents
2
Product Information
3
Fault Codes
Download this manual
VIESMANN
Installation and service
instructions
for contractors
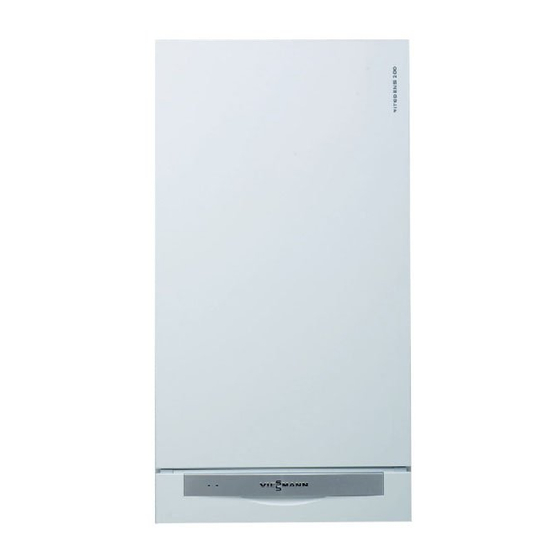
Vitopend 200-W
Type WHKA, 10.5 to 29.3 kW
Gas fired combi boiler
for balanced flue operation
Natural gas and LPG version
For applicability, see the last page
VITOPEND 200-W
Please keep safe.
5592 817 GB
3/2007
Table of
Contents
Previous
Page
Next
Page
1
2
3
4
5
Advertisement
Chapters
Index Installation Instructions
4
Steps - Commissioning, Inspection and Maintenance
18
Table of Contents
Need help?
Do you have a question about the Vitopend 200-W and is the answer not in the manual?
Ask a question
Questions and answers
Subscribe to Our Youtube Channel
Related Manuals for Viessmann Vitopend 200-W
Boiler Viessmann VITOPEND 200 Installation And Service Instructions Manual
Gas fired combi boiler (128 pages)
Boiler Viessmann VITODENS Operating Instructions Manual
(69 pages)
Boiler Viessmann VITODENS Operating Instructions Manual
Heating systems with vitotronic 100 control unit for constant temperature operation (28 pages)
Boiler Viessmann VITOPEND Operating Instructions Manual
(36 pages)
Boiler Viessmann VITODENS Operating Instructions Manual
Heating system with vitotronic 100 control unit, type hc1b, for operation with a constant boiler water temperature (36 pages)
Boiler Viessmann Vitopend 100-W Installation And Service Instructions Manual
(64 pages)
Boiler Viessmann VITOPEND 100-W Operating Instructions Manual
With constant temperature or weather-compensated control unit (48 pages)
Boiler Viessmann Vitopend 100-W Installation And Service Instructions Manual
(136 pages)
Boiler Viessmann Vitopend 100-W Installation And Service Instructions For Contractors
Gas system and combi boilers for open flue operation natural gas and lpg version (72 pages)
Boiler Viessmann VITOPEND 100-W Installation And Service Instructions Manual
10.5 to 24 kw and 13 to 30 kw. gas fired central heating and combi boilers for open flue operation. natural gas and lpg version (60 pages)
Boiler Viessmann VITOPLEX 300 Service Instructions Manual
Oil/gas fired boiler rated output 620 to 2000 kw (32 pages)
Boiler Viessmann VITOPLEX 300 Service Instructions Manual
Viessmann vitoplex 300 type tx3a, 90 to 500 kw oil/gas boilers (32 pages)
Boiler Viessmann Vitoplex 100 Service Instructions For Contractors
Oil/gas boiler (33 pages)
Boiler Viessmann VITOPLEX 100 Service Instructions Manual
Oil/gas boiler. 780 to 2000 kw 08 to 13 (33 pages)
Boiler Viessmann VITOPLEX 200 Service Instructions Manual
Oil/gas fired boiler (32 pages)
Boiler Viessmann VITOPLEX 200 Instructions Manual
(29 pages)
This manual is also suitable for:
Whka
Vitopend 200
Table of Contents
Print
Rename the bookmark
Delete bookmark?
Delete from my manuals?
Login
Sign In
OR
Sign in with Facebook
Sign in with Google
Upload manual
Upload from disk
Upload from URL


Need help?
Do you have a question about the Vitopend 200-W and is the answer not in the manual?
Questions and answers