Table of Contents
Advertisement
Advertisement
Table of Contents

Related Manuals for Russell Hobbs RHCV20AS01


Summary of Contents for Russell Hobbs RHCV20AS01
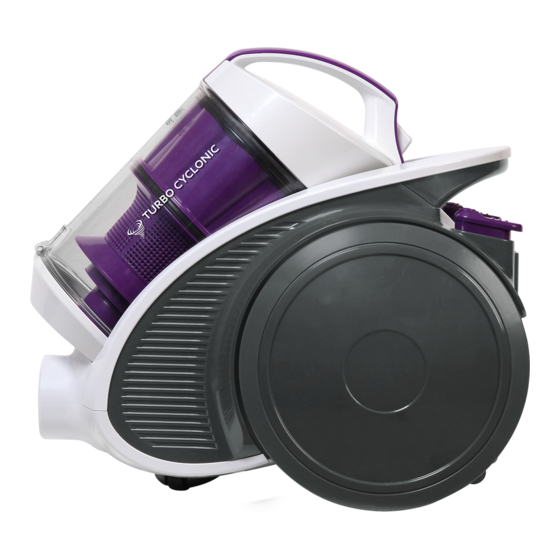
- Page 1 Turbo Cyclonic Bagless Cylinder Vacuum Cleaner Model Number: RHCV20AS01 220-240V~, 50/60Hz, 900W For Customer Services & Spare Parts please call 0345 209 7461 Opening times: Monday - Friday 8am – 8pm & Saturday 9am – 1pm Or visit us at www.productcare.co.uk...
-
Page 2: Table Of Contents
Spare parts Connection to the mains supply Disposal information Thank you for purchasing your Russell Hobbs Turbo Cyclonic Bagless Cylinder Vacuum Cleaner. To get the best from your new cleaner, take a few moments to read these instructions and keep them in a safe place for future reference. -
Page 3: Safety Instructions
SAFETY INSTRUCTIONS IMPORTANT SAFETY INSTRUCTIONS READ CAREFULLY AND KEEP FOR FUTURE REFERENCE WARNING: • It is hazardous for anyone other than a competent person to carry out any service or repair operation that involves the removal of a cover which gives protection against exposure to electrical parts. - Page 4 SAFETY INSTRUCTIONS IMPORTANT SAFETY INSTRUCTIONS READ CAREFULLY AND KEEP FOR FUTURE REFERENCE • Do not direct at people, animals, electrical outlets, or equipment containing electrical components. • Unplug from outlet when not in use. Do not leave the cleaner unattended while plugged in. •...
- Page 5 SAFETY INSTRUCTIONS IMPORTANT SAFETY INSTRUCTIONS READ CAREFULLY AND KEEP FOR FUTURE REFERENCE WARNING: • Do not let the cord hang over the edge of the worktop, or touch hot surfaces. • Do not use this vacuum to pick up water or any other liquids, combustible substances or hot/burning objects.
- Page 6 SAFETY INSTRUCTIONS IMPORTANT SAFETY INSTRUCTIONS READ CAREFULLY AND KEEP FOR FUTURE REFERENCE • Important: This cleaner has a thermal safety device which automatically cuts off the power supply in case of over heating. If the safety device has switched the cleaner off, unplug from the mains, allow the cleaner to cool down and check for any blockages.
-
Page 7: Energy Performance Label
1. Energy rating – based primarily on energy consumption and pick-up. 2. Annual energy usage – the amount of RHCV20AS01 energy used over a year. 3. Emissions – the amount of dust in the air emitted from the machine’s exhaust. -
Page 8: Technical Data
TECHNICAL DATA (PRODUCT FISCHE) Trade mark Russell Hobbs Model RHCV20AS01 Energy efficiency class Annual energy consumption 33.5 (kWh/year) Carpet cleaning performance class Hard floor cleaning performance class Dust re-emission class Sound power level 83 dB Rated input power 900W... -
Page 9: Vacuum Feature Diagram
VACUUM FEATURE DIAGRAM (Not visible on diagram) Hose suction control Floor head Power button Hose connector Hose attachment clip Wheel Extension lock Dust container 2 in 1 crevice tool Extension tube Cord release button External filter and cover Hose Container release Dust container filter button Floor surface selector... -
Page 10: Vacuum Cleaner Assembly
VACUUM CLEANER ASSEMBLY Before using your vacuum cleaner Remove all packaging and lay out the separate components. Check the unit after unpacking for any visual damage such as: • Misaligned or damaged parts • Damage to the main body and separate components •... -
Page 11: Vacuum Cleaner Assembly
VACUUM CLEANER ASSEMBLY Ensure the unit is unplugged before assembling. 1. Place the dust container onto the unit, base first, then tilt forward to engage the top. Note: Do not carry the unit with the dust container. 2. Insert the hose connector into the hose outlet, aligning the grooves in the outlet with the clips on the connector. -
Page 12: Using Your Vacuum Cleaner
USING YOUR VACUUM CLEANER Once assembled: 1. The cord is stored inside the unit. Pull the power cord out of the machine to as long as you require and stop when you see the yellow tab. Do not over-extend. If the red tab is visible, then wind the cord back until only the yellow tab is visible. - Page 13 USING YOUR VACUUM CLEANER 5. You can adjust the extension tube length to a comfortable cleaning height. To alter the length of the telescopic handle, a) Press and hold the extension lock in the direction indicated. b) Slide the steel pole, up or down, to the correct length. 6.
- Page 14 USING YOUR VACUUM CLEANER Emptying the dust container When the dust container starts to fill it will need to be emptied. 1. To remove the dust container, press the release button located at the top of the lid handle. 2. Lift the container away from the unit base. 3.
-
Page 15: Cleaning And Care
CLEANING AND CARE: CLEANING THE FILTER Before you clean the appliance, disconnect the mains plug from the wall socket. Remove the filter cover on the back of the cleaner by pushing the tab downwards and pulling the cover away. Pull the filter out of the cover and tap over a bin to remove any excess dust. -
Page 16: Cleaning The Filter
CLEANING AND CARE: CLEANING THE FILTER 1. Remove the dust container and rotate the lid anti clockwise so that the arrow is pointing to the unlock symbol. 2. Remove the dust container filter and get rid of excess dirt over a bin. 3. - Page 17 CLEANING AND CARE Before you clean the appliance, disconnect the mains plug from the wall socket. Disassembly 1. Press the cord rewind button to automatically bring the cord back inside the unit for storage. 2. To remove the extension hose, manoeuvre it away from the hose connector.
-
Page 18: Problem Solving
PROBLEM SOLVING PROBLEM POSSIBLE PROBLEM POSSIBLE SOLUTION Power cord/plug damage Check the power cord and plug for signs of damage. The vacuum cleaner is plugged in but does not work Fuse is damaged Check and replace the fuse in the plug. Dust container Check if the dust container is full, if so, empty it. -
Page 19: Guarantee And Customer Services
GUARANTEE AND CUSTOMER SERVICES At Russell Hobbs, we take all our customer feedback seriously. Feel free to contact our Product Care Team, on 0345 209 7461 Monday – Friday: 8am-8pm & Saturday: 9am – 1pm, who will be more than happy to assist you. -
Page 20: Spare Parts
SPARE PARTS To check the availability of the following spare parts, simply contact our friendly Customer Services team using the details provided at the bottom of this page. Hose 2 in 1 crevice tool Extension tube Multi cyclonic filter Floor head External filter and cover Dust container Dust container filter... -
Page 21: Connection To The Mains Supply
CONNECTION TO THE MAINS SUPPLY This appliance is designed to operate from a mains supply of 220-240V~ 50/60Hz. Check that the voltage marked on the product corresponds with your supply voltage. How to change the fuse 1. Slot the end of a screwdriver into the recess in the fuse holder of the plug. - Page 22 NOTES...
- Page 23 NOTES...
- Page 24 Made by G2S Ltd under license. G2S Limited, Wigan, WN2 4AY Produced for ASDA Stores Ltd. Leeds, LS11 5AD. Russell Hobbs is the registered trademark of Spectrum Brands (U.K.) Ltd. This symbol is known as the 'Crossed-out wheelie bin Symbol'.
Need help?
Do you have a question about the RHCV20AS01 and is the answer not in the manual?
Questions and answers