
Related Manuals for Bend-Tech DRAGON A150


Summary of Contents for Bend-Tech DRAGON A150
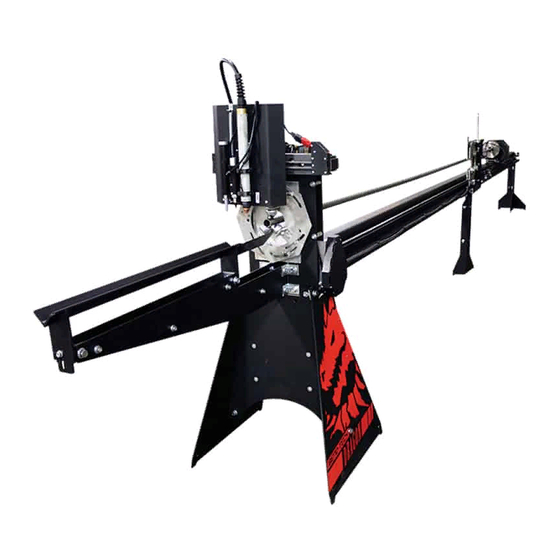
- Page 1 Part 1 of 1 A150 Maintenance & Troubleshooting Revision 1 | English ©2020 Bend-Tech LLC...
- Page 2 We are constantly working to improve and advance our products to increase performance, user satisfaction and experience. Bend-Tech LLC assumes no responsibility for errors or omissions regarding this manual. Bend-Tech LLC assumes no liability for damages resulting from the use of the information contained in this publication.
- Page 3 Dragon A150 Maintenance & Troubleshooting Revision 1 English Original Instructions September 2020 Bend-Tech, LLC 729 Prospect Ave. Osceola, WI 54020 USA (651) 257-8715 www.bend-tech.com support@bend-tech.com Bend-Tech Dragon A150 Troubleshooting Guide...
- Page 4 Bend-Tech, LLC will contact the Customer regarding updates to the maintenance plan within 1-month of expiration. Contact Bend-Tech Support to ensure software is up to date: support@bend-tech.com...
-
Page 5: Customer Service
Dragon A150. Bend-Tech, LLC places great pride in customer satisfaction and it is our promise to offer you the best support available for your Dragon A150. We recognize that our support is a key factor in your success. -
Page 6: Warnings
! Warning ! Due to the extreme temperatures that result from the plasma cutting process, parts cooled in water in the parts catcher can still be extremely hot. Always use caution when handling newly-cut parts. Troubleshooting Guide Bend-Tech Dragon A150... - Page 7 A Note gives clarification or focuses on information that is critical or unique to an operation. Example Water Cooling system greatly reduces smoke and vapor emitted by the machine. Bend-Tech recommends use of the Water Cooling system whenever possible. Bend-Tech Dragon A150 Troubleshooting Guide...
-
Page 8: Glossary
Control Box the machine to catch parts as they are cut. Connects Dragon Software Rail Suite to the Dragon A150. The Rail is the main structure of the Dragon Coolant Tray A400. The Trolley rides on the Rail. Cools cut parts as they are produced. -
Page 9: Table Of Contents
Introduction ..... . 13 Grounding The Torch ... . 31 Dragon A150 Manufacturing Differences 13 Setting Torch Dwell Time ... . 32 How To Send A Support Session . -
Page 10: Contents
Running ..... . 66 Chuck Alignment ....54 Troubleshooting Guide Bend-Tech Dragon A150... - Page 11 Other Mach3 Errors ....73 Invalid Bootloader Signature..73 CryptoMemory Error ... . . 73 Bend-Tech Dragon A150 Troubleshooting Guide...
- Page 12 Contents Troubleshooting Guide Bend-Tech Dragon A150...
-
Page 13: Introduction
651-257-8715. Dragon A150 Manufacturing Differences The Bend-Tech Dragon A150 is continuously being updated and refined. Because of this, there can be differences from machine to machine in regard to configuration of assemblies, fasteners and ongoing refinements of mechanical operation. This guide has been assembled using the most accurate information available. -
Page 14: How To Send A Support Session
Properly setting up a Support Session with a Bend-Tech Service Technician can be key to keeping the Dragon A150 up and running. Bend-Tech knows keeping the Dragon A150 performing optimally is critical to our customers’ bottom line. We are more than happy to help, and setting up a Support Session properly allows our techs to help as quickly and efficiently as possible. -
Page 15: Cutting Issues
Cutting Issues Cutting Issues Maintaining the drive systems on the Dragon A150 is critical to achieving accurate cutting, engraving and marking operations. The machine has numerous chain drives and set screws that require regular maintenance. The Gate, Trolley and Toolhead also require regular maintenance to ensure proper operation. -
Page 16: Cut Rotation And Backlash Correction
Toolhead rail Cut Rotation and Backlash Correction An operator experiencing cut rotation issues with the Dragon A150 machine may be required to check set screws and chains to ensure backlash settings are accurate. As a result of daily use, the machine may experience loose set screws or chains that come out of adjustment. There is also a Backlash Correction procedure in Bend-Tech Dragon software. -
Page 17: Set Screw And Chain Maintenance
3. Using a 5/32 in. Allen wrench on the large sprocket and 3/32 in. Allen wrench on the small sprocket, ensure the X Drive Set Screws are tight. 5/32 in. Allen wrench 3/32 in. Allen wrench Bend-Tech Dragon A150 Troubleshooting Guide... - Page 18 Holding tension steady, re-tighten the Y Motor Block Adjustment Bolts. 3/32 in. Allen wrench 6. Using a 3/32 in. Allen wrench, ensure the Y Rotation Set Screws are tight. Troubleshooting Guide Bend-Tech Dragon A150...
- Page 19 7/16 in. wrench. Tension for the X chain is now set. 9. Reinstall the X gear cover 10. Reinstall the Trolley cover Bend-Tech Dragon A150 Troubleshooting Guide...
-
Page 20: Reversing Cut Direction
1. In Bend-Tech Dragon software, under Create New, click the type of part that will be cut on the Dragon, such as Straight Part. -
Page 21: Editing Polyline Resolution
Cutting Issues Editing Polyline Resolution A final way to adjust cut rotation on the Dragon A150 machine involves editing Polyline Resolution in the Advanced option in the Tube Library. While Bend-Tech does not recommend changing default Polyline Resolution settings, changing the settings slightly can result in more accurate cut rotation on the A150 machine. -
Page 22: Adjusting Torch Position
Torch. If the cuts get less accurate, back up to the previous position. If moving the Torch one direction results in less accurate cuts, move it in the other direction. Troubleshooting Guide Bend-Tech Dragon A150... -
Page 23: Toolhead
Toolhead Toolhead The Toolhead on the Dragon A150 serves as the tool mount and the vehicle for engaging the tools vertically (A Axis) and horizontally (Z Axis) during the machine’s operational processes. The Marker, Engraver, Torch and Laser are mounted to the Toolhead. The Toolhead is powered by the A Axis and Z Axis motors. -
Page 24: Adjusting The Toolhead Trolley
4. Using a 5/32 in. Allen wrench, remove the two Toolhead mounting screws located at the center of the Toolhead assembly. Bend-Tech recommends enlisting a helper to secure the Toolhead during this process. 5. With the Toolhead removed, loosen the four Toolhead mount plate screws roughly one full turn. -
Page 25: Toolhead Rail
3. Once the Toolhead rail is level, secure the leveling feet. With the leveling feet secure, re- check to ensure the Toolhead rail is still level. If the Dragon A150 is not equipped with leveling feet it will be necessary to shim the legs of the machine to bring it to level. -
Page 26: Toolhead A Axis Mounting
Care must be taken not to damage the bearing assembly as the assembly is aluminum and can break easily. Bearing Stanchion A Axis Fixed Bearings Troubleshooting Guide Bend-Tech Dragon A150... -
Page 27: A Axis Drive Motor Set Screws
Position the drive gear so it is even with the A axis cable pulley. 6. Apply Loctite Blue 242 to the A axis drive gear set screw. Thread the set screw into the drive gear and, using a 3/32 in. Allen wrench, tighten securely. 7. Reinstall the Toolhead. Bend-Tech Dragon A150 Troubleshooting Guide... - Page 28 Toolhead Troubleshooting Guide Bend-Tech Dragon A150...
-
Page 29: Torch
T orch Torch While the Customer can choose any type of plasma machine desired, Bend-Tech recommends using a Hypertherm Powermax45, Powermax65 or Powermax85. Bend-Tech offers full technical support for the Hypertherm unit. Customers who choose to use a plasma machine other than Hypertherm will not receive the same level of technical support. -
Page 30: Mounting The Torch
It is critical to route the Torch lead clear of the Ethernet cable. The Torch lead can cause connectivity issues if routed close to the Ethernet cable. Some models of the Dragon A150 are equipped with cable loops pre-installed for the purpose of securing the Torch lead. -
Page 31: Grounding The Torch
Torch Grounding The Torch Early Dragon A150 machines achieve Torch ground via a carbon brush rod system. Bend-Tech has found moving the ground cable location to the pillow block bearing mount results in a more consistent ground for the Torch. -
Page 32: Setting Torch Dwell Time
Setting Torch Dwell Time The A150 does not use an OK To Move signal. Thus, when operating the Dragon A150, it is important the Operator set Torch dwell time. If dwell time is not set, it is possible for the machine to begin operating before the Torch fires, resulting in an incomplete cut. - Page 33 6. With the Torch wires secure in the relay, reassemble the Control Box. Reattach the Control Box cover plate. If the Torch still does not fire, it is possible the relay has failed. Contact a Bend-Tech representative for further assistance.
- Page 34 Torch Troubleshooting Guide Bend-Tech Dragon A150...
-
Page 35: Engraver
Engraver Engraver The Engraver on the Dragon A150 is powered by a single air source. The air pressure to the Engraver is controlled by a regulator located on top of the Head of the machine. Proper performance of the Engraver is dependent on air pressure. Bend-Tech recommends setting initial air pressure to 70-80 PSI. - Page 36 Engraver Troubleshooting Guide Bend-Tech Dragon A150...
-
Page 37: Marker
Marker Marker The Marker on the Dragon A150 is held in a weighted Marker holder that operates via gravity. The weight of the holder pushes the marker down on the material to place markings. Bend- Tech has had the best luck using silver Sharpie markers or Milwaukee Inkzall markers. The Inkzall marker features a tab on the body that will need to be cut off in order to fit in the Marker holder. - Page 38 Marker Troubleshooting Guide Bend-Tech Dragon A150...
-
Page 39: Laser
The Laser serves as a critical tool in calibrating and ensuring the ongoing accuracy of the Dragon A150. While the Laser is a robust piece, it is a consumable and can burn out. If the Laser has stopped working it is likely because it has reached the end of its life cycle and needs to be replaced. -
Page 40: Laser Replacement
5. Route the Laser cord in the same fashion the old Laser cord was routed, placing the cord inside the wire loom. Reattach the wire loom to the machine with zip ties. 6. Place the Laser in its mount in the Torch mount collar. Secure with set screw. Troubleshooting Guide Bend-Tech Dragon A150... -
Page 41: Gate
G ate Gate The Gate on the Dragon A150 is a rotating ring design. The Gate is adjusted by loosening the thumb screws and turning the outer ring by hand. The inner rollers are adjustable to fit the diameter of the given material loaded into the machine. -
Page 42: Gate Wear
On some Gates it will be necessary to remove a nut on each stud in order to remove the Gate adjustment face. If the material support bearing adjustment studs are equipped with nuts, use a ⅜ in. wrench to remove the nuts. Troubleshooting Guide Bend-Tech Dragon A150... - Page 43 Gate. Use a ⅜ in. wrench to secure the nut during the Allen head cap screw removal process. Repeat for the second Allen head cap screw. 5. Remove the Gate. 3/4 in. Bolts Bend-Tech Dragon A150 Troubleshooting Guide...
- Page 44 Gate Troubleshooting Guide Bend-Tech Dragon A150...
-
Page 45: Trolley
Trolley Trolley Trolley The Trolley on the Dragon A150 rides on a steel rail. The Trolley’s roller system is a two-piece design. The Trolley rides on the upper part of the roller system. The upper part of the roller system is connected to the lower part via an adjustment plate that is mounted on the right side of the assembly. -
Page 46: Adjusting The Trolley
5. Check play in the roller system by rocking the Trolley back and forth, and lifting up and down. 6. Adjust to ensure the Trolley moves smoothly along the length of the Rail with no play or binding. Troubleshooting Guide Bend-Tech Dragon A150... -
Page 47: Removing The Trolley Cover
3. Use an 11/16 in. wrench to loosen the set screw on the limit switch. 4. Remove the limit switch. Reverse the process to install the replacement switch. Bend-Tech Dragon A150 Troubleshooting Guide... - Page 48 Trolley Troubleshooting Guide Bend-Tech Dragon A150...
-
Page 49: Chuck
Chuck Chuck Overview The Chuck assembly on the Dragon A150 is a precision piece that requires periodic maintenance to remain in operating order. The jaws on the Chuck are machined pieces that are matched to their positions in the assembly. When servicing the Chuck, always ensure the Chuck jaws are replaced in the same position from which they were removed. -
Page 50: Removing The Chuck
5. Reinstall the Chuck jaws, ensuring they are installed in the same location and on the same rotation of the Chuck key. 6. Reinstall the Chuck. Tighten the Chuck mounting screws then give each screw another quarter turn. Troubleshooting Guide Bend-Tech Dragon A150... -
Page 51: And Y Axis Maintenance
Maintenance X and Y Axis Maintenance and Adjustment Maintaining specific mechanical aspects of the Dragon A150 is critical to achieving accurate operation. The machine relies on numerous set screws and adjustments regarding its operational axes. Maintaining set screws and drive systems adjustments is critical to the accurate operation of the machine. -
Page 52: Set Screw And Chain Maintenance
Set Screw and Chain Maintenance An Operator experiencing cut rotation issues with the Dragon A150 machine may be required to check set screws and chains to ensure backlash settings are accurate. As a result of daily use, the machine may experience loose set screws and/or chains that come out of adjustment. -
Page 53: Backlash Correction
14. Reinstall the Trolley cover Backlash Correction In Bend-Tech Dragon software, click Machine Library and ensure the proper machine is chosen from the Machine List. Click the Mechanical icon in the menu at the top of the screen. In the Backlash Correction box click the box with the multicolored diamond-shaped icon. -
Page 54: Additional Trolley Set Screws
242 to all set screws. Ensure set screws are secure. Chuck Alignment During normal operation it is possible for the Chuck to fall out of alignment on the Dragon A150 machine. If the Chuck is out of alignment it will result in imprecise machine operation. If the Chuck is out of alignment it will be necessary for the Operator to bring the Chuck back into alignment. - Page 55 Ensure tension is not excessive. Using a ½ in. wrench, secure the Y motor mounting bolts. 13. Place the Chuck cover on the Trolley. Using a 5/16 in. wrench, install the four screws that secure the Chuck cover. 14. Remove the material from the machine. Bend-Tech Dragon A150 Troubleshooting Guide...
- Page 56 X and Y Axis Maintenance Troubleshooting Guide Bend-Tech Dragon A150...
-
Page 57: Center Support Lift
Center Support Lift Center Support Lift Dragon A150 models with a 24-foot Rail come equipped with a Center Support Lift that supports longer material, keeping it from sagging, allowing the machine to achieve accurate operation. The Center Support Lift also relieves pressure on the Chuck, Trolley and Gate, and assists in preventing potential Torch collision. -
Page 58: Center Support Lift Air Cylinder
Center Support Lift Air Pressure Setting Air pressure settings for the Center Support Lift are dependent on the operation of the mechanism. Bend-Tech recommends a starting range of 60-80psi. The Operator may need to adjust the air pressure to achieve optimum Center Support Lift operation. -
Page 59: Control Box
Control Box Control Box The Control Box for the Dragon A150 is mounted inside the front Support Leg under the Head of the machine. The Control Box is protected by a Cover Plate. The Cover Plate mounts to four studs on the leg of the machine. The Operator will be required to remove the Cover Plate to access the Control Box. -
Page 60: Main Power Fuse
Mach3 indicates the machine is working but is not responding, it is typically an indication the Gecko Drive has failed. Mach3 is sending signals to the machine but the Gecko Drive is not transmitting them to the motors. Troubleshooting Guide Bend-Tech Dragon A150... -
Page 61: Adjusting The Gecko Drive
X AXIS Y AXIS Z AXIS A AXIS adjust the Gecko Drive and achieve smoother and quieter motor operation. If the Dragon A150 is working properly it is not necessary to adjust the Gecko Drive. PARALLEL PORT POWER CHARGE PUMP... - Page 62 5. Install the new Gecko Drive using the four Phillips head screws and nuts. 6. Using the small Phillips screwdriver, carefully transfer each wire from the old Gecko Drive to the corresponding port in the new Gecko Drive. 7. Reinstall the Motor Cables. Troubleshooting Guide Bend-Tech Dragon A150...
-
Page 63: Operator Control Panel
Panel gathers information from Bend-Tech software and sends it to the Dragon A150 machine to perform its CNC operations. Knowing the functions of the ESS board and Operator Control Panel can assist the Operator in diagnosing issues that may arise regarding the Dragon A150. Reading ESS LED Status Codes... -
Page 64: Ethernet Jack Led Lights
Mach3 and the DragonA400. Ethernet Jack LED Cable is connected to a device (the computer) Amber Link Light No connection - bad cable or Ethernet disabled on computer Green Data Light Flashing Ethernet connected Troubleshooting Guide Bend-Tech Dragon A150... -
Page 65: Ethernet Cable And Connections
Control box not powered Check E-Stops, check fuses, check up, fuse blown, e-stop ribbon connection to Breakout Board, triggered power up Control Box. ESS Failure To Connect ESS Signature Error, Check Ethernet cable. damaged cable Bend-Tech Dragon A150 Troubleshooting Guide... -
Page 66: Connection Lost While Machine Is
Re-route Ethernet cable away from interference or electrical other electrical cables. Connection Lost While interference. Machine Is Running Ensure Bend-Tech is the only program Computer running out of running. Close out of all other RAM. programs. Check CPU usage. Troubleshooting Guide... -
Page 67: Limit Switch Operation
Limit Switch Operation Limit Switch Operation The Dragon A150 uses a normally closed limit switch system. There are three limit switches, they are all connected inline. There are two limit switches on the Toolhead (Z axis and A axis) and one on the Trolley (X axis). When a limit switch is triggered it opens the loop. The switches are normally closed, so when a switch is triggered it breaks the loop. -
Page 68: Troubleshooting Limit Switches
Limit Switch Operation Troubleshooting Limit Switches Older Dragon A150 models use a normally closed limit switch system. It is possible to bypass a limit switch to determine if there is a failed limit switch in the circuit. The Operator can also test for continuity in each loop using a multimeter. -
Page 69: And A Axis Limit Switch Failure
X and A Axis Limit Switch Failure The X and A axes on the Dragon A150 use micro switch style limit switches. The limit switches are triggered when the Toolhead assembly makes physical contact with the limit switch. In the... -
Page 70: Replacing The X Limit Switch
Hold the Toolhead in place while removing the Engraver tensioning spring mount. 5. Using a 5/32 in. Allen wrench, remove the two Toolhead mounting screws located at the center of the Toolhead assembly. Bend-Tech recommends enlisting a helper to secure the Toolhead during this process. - Page 71 3. Use an 11/16 in. wrench to loosen the set screw on the limit switch. 4. Remove the limit switch. Reverse the process to install the replacement switch. Bend-Tech Dragon A150 Troubleshooting Guide...
- Page 72 Limit Switch Operation Troubleshooting Guide Bend-Tech Dragon A150...
-
Page 73: Mach3
Operator to be able to interface with Mach3 and perform troubleshooting through the software. It is critical that the computer be optimized to run Mach3 and to have clear Ethernet connection between the computer (Mach3) and the Dragon A150 ESS board. -
Page 74: Mach3 Lost Communications While Operating
This message will also appear if the Dragon machine was powered down and Bend- Tech Dragon software was closed out, but Mach3 was left open. When the Dragon machine is powered up the computer will display this message. Troubleshooting Guide Bend-Tech Dragon A150... -
Page 75: Invalid Bootloader Signature
Mach homing switch failed homing switch until the problem switch is found. M1++ limit switch error Possible relay failure. Call Bend-Tech Faulty control box during operation service technician. Check to ensure ribbon cable is Error In Mach/faulty Failure within Operator securely connected;... - Page 76 Ensure no homing switches are of emergency mode: switch triggered Breakout Board has lost Ensure Breakout Board is firmly connection with ESS board seated on ESS board Check 25-pin parallel cable Replace 25-pin parallel cable for connectivity Troubleshooting Guide Bend-Tech Dragon A150...
- Page 78 Bend-Tech, LLC 729 Prospect Ave. Osceola, WI 54020 1-651-257-8715 sales@bend-tech.com www.bend-tech.com...
Need help?
Do you have a question about the DRAGON A150 and is the answer not in the manual?
Questions and answers