Table of Contents
Advertisement
Quick Links
Advertisement
Table of Contents

Related Manuals for Poulan Pro PP350


Summary of Contents for Poulan Pro PP350
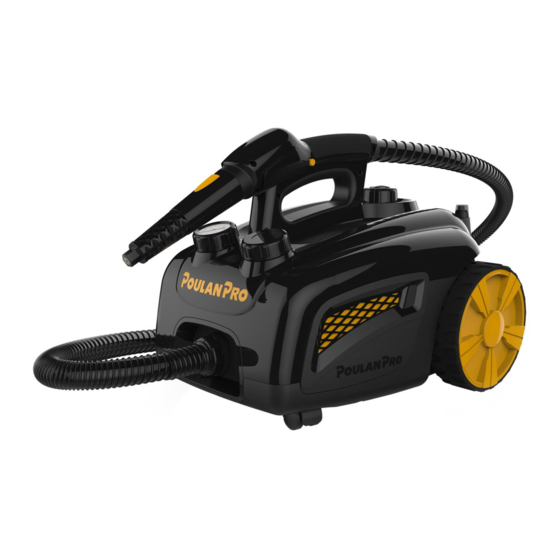
- Page 1 PP350 H E A V Y D U T Y S T E A M C L E A N E R O W N E R ’ S G U I D E...
-
Page 2: Important Safety Instructions
10. Do not use unit where aerosol-based products are being used, or where oxygen is being administered. 11. Unit is only meant to be used with recommended model PP350 accessories. Using other types of attachments may cause damage to unit or injury. - Page 3 If interference is suspected, the user is encouraged to contact Poulan Pro Consumer Service at 1-800-711-6617. SAVE THESE INSTRUCTIONS Questions or comments? •...
-
Page 4: Product Information
Product Information The following features and accessories are included with your Heavy Duty Steam Cleaner. Carefully inspect the packing material for all parts listed below. To obtain possible missing parts, refer to Product Support on Page 15 of this manual for Consumer Service contact information. UNIT FEATURES 10' Steam Hose Pressure Gauge... - Page 5 ACCESSORIES 2 - 16.5" Extension Wands Microfiber Mop Pad Scrubbing Mop Pad 5.5" Jet Nozzle Triangle Brush Squeegee 3 - 1.5" Nylon Utility Brushes 2 - 1.5" Brass Utility Brushes Angled Nozzle 3" Scraper 13" x 8.5" Large Mop Head Storage Bag Fill Cup Accessory Net...
- Page 6 Assembling Your Heavy Duty Steam Cleaner STEAM MOPPING ACCESSORIES WARNING: Do not try to connect accessories while unit is emitting steam. EXTENSION WANDS 1. Select one of the Extension Wands. Insert end (A) of Wand onto Steam Nozzle (B) with yellow lock/release button slightly off center with hole.
-
Page 7: Microfiber Pads
MICROFIBER PADS 1. Lay one Microfiber Pad on flat surface, with two fastener strips facing upward. 2. Align Mop Head with Microfiber Pad. Make sure Mop Head is oriented with Pad as shown, and centered as best as possible (See figure 2-A). 3. - Page 8 Assembling Your Heavy Duty Steam Cleaner STEAM CLEANING ACCESSORIES WARNING: Do not connect accessories while unit is emitting steam. JET NOZZLE / SCRAPER / TRIANGLE BRUSH 1. Select Jet Nozzle and push onto the Steam Nozzle (A). 2. Rotate accessory until the yellow lock/release button snaps into the accessory hole (B). NOTE: The Jet Nozzle can be connected to the end of an Extension Wand for reaching high or difficult spots.
- Page 9 Accessory Recommendations Jet Nozzle / Angled Nozzle Dirt, Grease, Grime, Cracks and Crevices, Golf Clubs, Tread of Running Shoes Triangle Brush Corners on Countertops, Bathtubs, Floors Scraper Baked on Food, Grime, Grease, Stove Tops, Ovens Nylon Utility Brush and Round Brush Ovens, Stove Tops, Faucet Fixtures, Microwaves, Sports Equipment, Tile, Grout, Refrigerators, Toys, Door Knobs, Showers, Bathtubs, Changing Tables...
-
Page 10: Filling Boiler
Using Your Heavy Duty Steam Cleaner FILLING BOILER 1. Place unit on a flat, level surface. 2. Make sure illuminated On/Off Switch is turned to “Off” and grounded power cord is unplugged from electrical outlet. If unit has been in use, always use the following safety precautions before removing the Boiler cap to add water: •... -
Page 11: General Operation
GENERAL OPERATION NOTE: Be sure that Boiler has been filled and that all desired accessories are connected before following these steps. 1. For first time use, remove protective plastic cover from electrical plug. Plug power cord into a electrical outlet. 2. -
Page 12: Steam Mopping
STEAM MOPPING NOTE: Be sure that Boiler has been filled and that all steam mopping accessories are connected before following these steps. It is recommended to sweep or vacuum hard floors before mopping. 1. Follow Steps 1-3 of General Operation section above. Refer to Page 9 for a listing of hard floor surfaces that are recommended for cleaning with the Heavy Duty Steam Cleaner. -
Page 13: Storage & Care
Storage & Care PROPER STORAGE Preparing your Heavy Duty Steam Cleaner for storage is quick and simple. When you have finished your steaming tasks, follow the steps listed below. 1. Turn unit “Off” and unplug power cord. 2. Allow unit to completely cool (at least 30 minutes). 3. -
Page 14: Troubleshooting
Troubleshooting PROBLEM POSSIBLE CAUSE SOLUTION Unit fails to heat up Unit is not plugged in. Plug power cord into electrical outlet. Household circuit breaker / ground Reset circuit breaker / ground fault fault interrupter has tripped or blown interrupter, or replace fuse. If you a fuse. -
Page 15: Product Support
What is covered Poulan Pro® is a licensed brand of Steamfast, a division of Vornado Air, LLC (“Steamfast”). Subject to the terms and conditions of this 2-Year Limited Warranty (“Warranty”) as set forth below, Steamfast warrants to the original consumer or purchaser (“Buyer”) that this Poulan Pro®-branded steam product, excluding all accessories and attachments, (the... -
Page 16: Warranty Information
Warranty Information • Use of the Product other than for normal household purposes. • Normal wear and tear. • Used consumable parts, accessories and attachments, including, but not limited to, brushes, hangers, scrub pads and mop pads. • Use of parts and accessories other than those produced or recommended by Steamfast. •... - Page 17 Poulan Pro 415 East 13th, Andover, KS 67002 1-800-711-6617 poulanprosteam.com help@poulanprosteam.com T350-005 R-, V00...
Need help?
Do you have a question about the PP350 and is the answer not in the manual?
Questions and answers