
Subscribe to Our Youtube Channel
Related Manuals for Alinea The Empire II-2


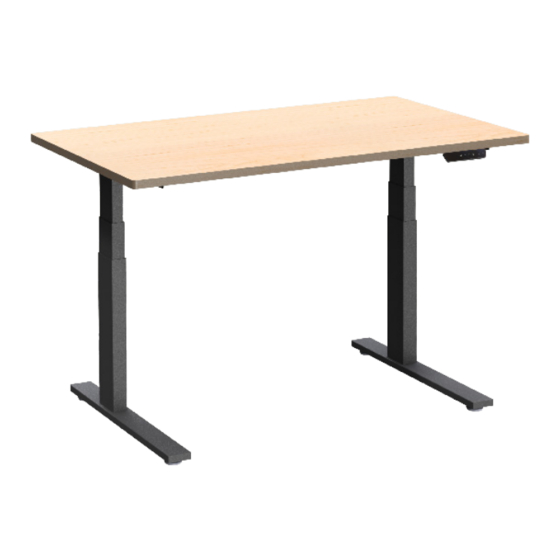
Summary of Contents for Alinea The Empire II-2
- Page 1 TABLE ÉLECTRIQUE Modèle: L’Empire II-2 (SH-LTM-2L-27.5-xx-2M-2) Guide d`installation et d`instructions ELECTRIC TABLE II-2 (SH-LTM-2L-27.5-xx-2M-2) Model: The Empire Assembly and instructions * Image pour références seulement. / Images for references only.
- Page 2 S.V.P lire ce document attentivement. Si ce produit est vendu, s.v.p donner ce document à l`acheteur. Please read this document carefully. If this desk is sold, please provide this manual to the buyer. Prévoyez un espace libre lorsque la table sera en mouvement. Assurez-vous que la table ne touche pas les murs.
- Page 3 Composantes incluses Parts Included Structure Frame S.v.p notez que B & E sont préassemblés. Please note that B & E are preassembled. Composantes électriques Quincaillerie Electrical components Hardware *Quantités sont requise, extras sont fournis* *Quantities below are required, extras are provided* Boîte de contrôle électrique Control Box #M6X16...
- Page 4 Instructions d`assemblage Assembly instructions Étape - Step 1 M6X10 Les parties B et E sont préassemblées. Vous devez les ajuster approximativement selon la longueur de votre table. Ne serrer pas complètement les vis en prévision de votre ajustement final. Part B and E are preassembled. You must adjust them to approximately match the length of your table.
- Page 5 Étape - Step 3 #M6X16 Réaliser cette étape pour les deux côtés. Complete this step for both sides. Étape - Step 4 #M6X16 Réaliser cette étape pour les deux côtés. Assurez que l’embout le plus long de est du même côté que l’embout le plus long de Complete this step for both sides.
- Page 6 Étape - Step 5 Prévoyer l`emplacement des pattes sur votre table. Centrer les pattes sur la table pour une stabilité maximale. Largeur ajustable de 1100 mm à 1600 mm ( 43 ” - 63”). Nous vous suggérons une épaisseur de dessus de table d`un minimum de 25,4 5/16 mm (1”), mais ce n`est pas requis.
- Page 7 Étape - Step 7 #12x3/4 Ajuster la longeur des pattes et du support (B+E) avant de la visser le dessus du table. S.V.P centrer les supports pour de meilleurs résultats. Adjust the length of the legs and the table support (B+E) before you attach the table top.
- Page 8 Étape - Step 9 Cable d’alimentation Power Cord Patte Patte Manette Control switch Boîte de controle Control box Connecter les câbles d’alimentation comme montrée si-dessus. Attachez les câbles à l’aide des attache-câbles pour sécuriser. Lorsque vous aurez terminé les branchements, relever la table avec l`aide d`une deuxième personne. Connect the power cords as shown above.
-
Page 9: Direction For Use
2 Leg Desk User Instructions a. Direction for Use 1. Correctly connect the Control Box, Handset, Power Cord, Lifting Column & Patch Cord. (Picture 1). 2. Plug the power cord into 110-240VAC outlet,the handset will display current height. Reset(Initialization): Press and hold the down button,until handset display "rES", The desk will begin to lower, until to the lowest height then slightly rise. -
Page 10: Troubleshooting
b. Trouble Shooting If the LCD Controller displays error codes when raising or lowering the desk, a reset will be required. 1. Motor error (E01,E02 or E03,E04) Control box can not detect motor halt plate signal or Control box detect one lifting column is over loaded. - Page 11 "1" Button - Return to previous menu "UP" / "DOWN" Button - Select menu "M" Button - Confirm menu d. Changing between cm and inch-1Un Keep pressing Button “M” for 3 seconds,Handset will display “S---", then release pressing Button “M” and press Button “M “again,the code “ ”...
- Page 12 f. Adjusting Sound-3bE 1. Keep pressing Button “M” for 3 seconds.Handset will display “S---", then release pressing Button “M” and press Button “M” again to enter,the code “ ” will then appear. 3bE” 2. Press button “Up”/”Down” to be “ Then press button “M”...
- Page 13 i. Adjust Vibration Sensitivity-6FS 1. Keep pressing “M” for 3 seconds.Handset will display “S---", then release pressing Button “M” and press Button “M” again to enter,the code “ ” will then appear. 6FS” 2. Press button “Up”/”Down” to be “ ,Then press button “M”...
- Page 14 k. Switching between modes-8Hc 1. Keep pressing Button “M” for 3 seconds.Handset will display “S---", then release pressing Button “M” and press Button “M” again to enter,the code “ ” will then appear. 8Hc” 2. Press button “Up”/”Down” to be “ ,Then press button “M”...
-
Page 15: Handset Lock
3. Press button “Up”/”Down” to set a favourite bounce height, then press button “M” to preserve and quit,pls wait for 2 seconds and it will display current height. n. Restore factory Settings-11r 1. Keep pressing Button “M” for 3 seconds.Handset will display “S---", then release pressing Button “M”... - Page 16 EMPIRE / EMPIRE II / EMPIRE II-2 Modéles: SWI-LTM-2L-**/EL + SH-LTM-2L-27.5-**/2M + SH-LTM-2L-27.5-**/2M-2 **IMPORTANT** CONSIGNES POUR UN BON FONCTIONNEMENT SECURITAIRE DE VOTRE TABLE INSTALLATION : Prière de toujours suivre ces consignes SVP! -Ne jamais ouvrir la boite de contrôle. -Utilisez uniquement le câble d’alimentation A/C fourni. -Assurez-vous que la table est au niveau et n’est pas sur une surface trop inégale.
- Page 17 EMPIRE / EMPIRE II / EMPIRE II-2 Modéles: SWI-LTM-2L-**/EL + SH-LTM-2L-27.5-**/2M + SH-LTM-2L-27.5-**/2M-2 **IMPORTANT** GUIDELINES TO ASSURE SAFE AND PROPER OPERATION OF YOUR TABLE INSTALLATION GUIDELINES: - Never open the A/C Control Box. - Only use supplied Power Cable. - Do not install table on an uneven surface. - Do not install table in dusty or humid locations.
Need help?
Do you have a question about the The Empire II-2 and is the answer not in the manual?
Questions and answers