Table of Contents
Advertisement
Available languages
Available languages
Quick Links
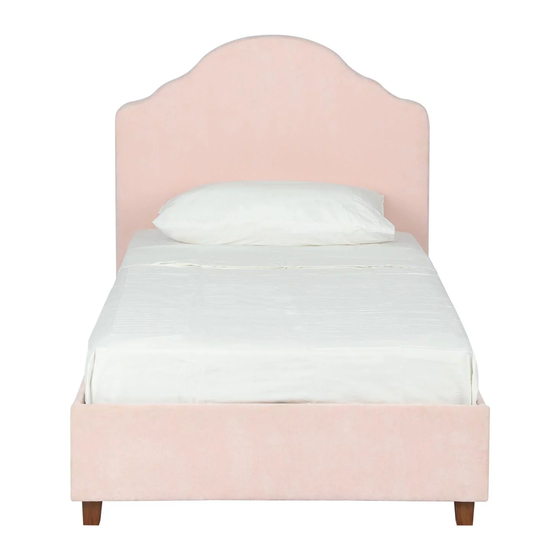
Weight Limit: 225 Lb / 102 Kg
K.W. - 2016/1/26
2014 Dorel Home Products All Rights Reserved
Savannah Upholstered Bed
Thank you for purchasing from DHP!
DO NOT RETURN TO THE STORE !
If parts are missing or damaged, we will gladly ship your
replacement parts free of charge.
Visit www.dhpfurniture.com/eng/support-home
or call Toll-Free 1-800-267-1739
Date of Purchase
THIS INSTRUCTION BOOKLET CONTAINS IMPORTANT SAFETY
INFORMATION. PLEASE READ AND KEEP FOR FUTURE REFERENCE.
4075719
Lot Number
B34407571900 - 10125-M
Twin
Pink
1
Advertisement
Table of Contents

Subscribe to Our Youtube Channel
Related Manuals for DHP Savannah 4075719


Summary of Contents for DHP Savannah 4075719
- Page 1 Savannah Upholstered Bed Twin Pink Weight Limit: 225 Lb / 102 Kg Thank you for purchasing from DHP! DO NOT RETURN TO THE STORE ! If parts are missing or damaged, we will gladly ship your replacement parts free of charge.
-
Page 2: Warranty Information
Warranty Information Read Before Beginning Assembly DHP warrants this product to be free from defects in material and workmanship and Call our toll free number if you need assistance. agrees to remedy any such defect. This warranty covers one year from the date of Work in a spacious area and near where the unit will be used, preferably on a original purchase. - Page 3 B34407571900...
- Page 4 Parts Replacement Parts, Visit www.dhpfurniture.com/eng/support-home All in 1 big box! There are inner box(es) that include components required to complete this assembly. Headboard Footboard Side Panel 01 Side Panel 02 Before you throw the package, please use the Back Panel Side Rail 01 T935510 T935530...
-
Page 5: Hardware Pack
Hardware Pack Hardware Pack #: T4028319-01 1/4" X 3/4" X 44 1/4" X 1 3/8" 1/4" X 1 9/16" X 28 1/4" X 1 3/4" 5/16" X 2 1/4" 5/16" 1/4" Hardware Note: Please do not completely tighten all the hardware, until the entire assembly is complete, unless otherwise indicated in the step-by-step instructions. - Page 6 Step 1 Attach (F)&(H) to (C)&(D) with BOLT 3. Repeat the same step for remaining parts (C), (D), (F) & (H). Holes on parts (F) should be facing upward. X 16 B34407571900...
- Page 7 Step 2 Attach (G) x 2 to previous subassembly (C)&(D) with BOLT 3. Repeat the same step for remaining subassembly (C)&(D). Holes on parts (G) should be facing upward. X 12 B34407571900...
- Page 8 Step 3 Attach (S) to (D) and (T) to (C)with BOLT 1. Repeat the same step for the other subassembly (C) & (D). X 12 B34407571900...
- Page 9 Step 4 Stick (A1) to the back of (A) with Velcro as illustrated. B34407571900...
- Page 10 Step 5 Screw BOLTS 1 into (A) & (B) and leave half of the bolts exposed. Leave half of the bolts exposed! B34407571900...
- Page 11 Step 6 Hang (C) & (D) on (A) & (B) as illustrated below, don't completely tighten the BOLT untill STEP 10 is complete. B34407571900...
- Page 12 Step 7 Push NUT 6 into the hole of the leg Z, then attach (Z) to (N) with BOLT 5 and NUT 6. Repeat this step for all remaining leg (Z). B34407571900...
- Page 13 Step 8 8.1 Attach (N) x 4 to (A,B,C & D) with BOLT 8.2 Attach (L) x 2 to (H) with BOLT 2. X 16 B34407571900...
- Page 14 Step 9 Slide (I) x 2 & (J) into (M) x 2, then fix them with BOLT 1. Holes on part (I) & (J) should be facing up! B34407571900...
- Page 15 Step 10 Attach subassembly from previous STEP to (A) & (B) with BOLT 1, then properly tighten all the bolts. B34407571900...
- Page 16 Step 11 Attach (K) to (F) x 2 &(J) with BOLT 4 and NUT 9 . B34407571900...
- Page 17 Step 12 12.1 Insert (O) into (X) ; 12.2 Press (X) into (F)&(G); 12.3 Repeat the same procedure for the opposite side as shown. 12.1 12.3 12.2 B34407571900...
- Page 18 Step 13 13.1 Insert the free end of slats (O) into (Y); 13.2 Press (Y) into (I)&(J) as shown. 13.1 13.2 B34407571900...
-
Page 19: Helpful Hints
Move your new furniture carefully, with two people lifting and carrying the unit to its new location. Your DHP furniture can be disassembled and reassembled to move. Some parts have been pre-assembled for this item. They are illustrated on this page and available for replacement. - Page 20 Garant a Gracias por su compra DHP! DHP garantiza que este producto est libre de defectos de material y de fabricaci n, comprometi ndose a corregirlos en caso de ser hallados. Esta garant a es valida por Registra tu producto y participa para ganar! un a o a partir de la fecha de compra original.
- Page 21 Lea antes de comenzar a ensamblar Partes Llame a nuestro n mero gratuito si necesita asistencia. Piezas de reemplazo, visite www.dhpfurniture.com/spa/support-home Trabaje en un rea espaciosa y cerca de donde su producto ser utilizado, preferiblemente sobre una alfombra o utilice el cart n del empaque para proteger su piso y su producto.
- Page 22 Una la parte (G) x 2 con (C)&(D) con los TORNILLO 3. Repita el paso para las otras Sus muebles DHP se pueden desmontar y volver a ensamblar en caso de partes (C) & (D).
-
Page 23: Garantie
S'IL VOUS PLA T LIRE ET CONSERVER POUR R F RENCE ULT RIEURE. Garantie Merci d'avoir achet un produit de DHP ! DHP garantit que ce produit est exempt de tout vice de mat riaux et de fabrication et Enregistrez votre produit et s'engage rem dier un tel d faut. -
Page 24: Avant De Commencer L'assemblage
Avant de commencer l'assemblage Pi ces Si vous avez besoin d'aide, appelez notre service la client le sans frais. Pi ces de rechange, visitez www.dhpfurniture/fre/support-home Travailler dans un endroit spacieux et pr s du lieu o l'unit sera utilis e, pr f rablement sur un tapis, ou sur un morceau de l'emballage pour prot ger le Tout dans 1 grosse bo te! plancher et le produit. -
Page 25: Conseils Utiles
Attacher (G) (C,D) avec BOULON 3. R p tez la m me tape pour les autres (C) et Votre mobilier DHP peut tre d mont et reassembl pour faciliter les (D). d m nagements.
Need help?
Do you have a question about the Savannah 4075719 and is the answer not in the manual?
Questions and answers