Table of Contents
Advertisement
Quick Links
BNTM80001
BN Thermic Ltd
34 Stephenson Way
Three Bridges, Crawley
West Sussex RH10 1TN
England
Tel: +44 (0)1293 547361
Fax: +44 (0)1293 531432
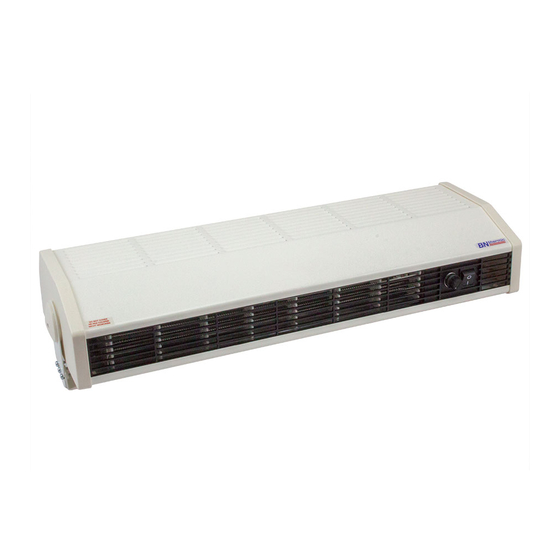
800 Series - High Level and Over Door Fan Assisted Heater
INSTALLATION AND OPERATING INSTRUCTIONS
Please read carefully
Personnel - Installation and maintenance must be carried out by suitably qualified personnel.
Application – 800 Series High Level Fan Assisted Heater is designed for mounting above a doorway to counteract the
draughts associated with frequently opening doors or for mounting at high level as a space heater in commercial or industrial
premises. They are intended for use normal dry atmospheres and should not be exposed to excessively damp conditions.
Packaging - Carefully unpack the heater and discard the packaging.
Location - When used above a doorway, the heater can be wall or ceiling mounted at a height between 1.8m and 3m above
floor level and a minimum of 300mm from adjacent walls. It must be mounted horizontally. When used as a space heater, it
should be wall mounted at a height between 1.8m and 3m above floor level and a minimum of 300mm from the ceiling and
adjacent walls. Ensure that the airflow through the heater is not obstructed in any way and that no object is closer than 1.5m
from the heater outlet. Do not position the heater beneath a socket outlet.
Mounting - The mounting kit supplied with each heater consists of the following items.
1 x Fixing Plate (approximately the same length as the heater)
2 x L shaped End Brackets
2 x Plastic Domes
4 x M2.9 screws
6 x M4 bolts
A. Wall mounting above a doorway
Inspect the Fixing Plate. You will see that it has a side with countersunk holes. This is the back of the Fixing Plate and will
eventually be mounted against the wall. Offer the long section of the two End Brackets up to the front of the Fixing Plate so
that the threaded holes align with the countersunk holes. Use the six M4 bolts to fix the End Brackets to the Fixing Plate
ensuring that the 90° bends in the brackets are at the extreme ends of the Fixing Plate. Use the slots in the Fixing Plate to fix
this assembly securely to the wall. Offer the heater up to the brackets, ensuring that the air outlet is pointing vertically
downwards. The plastic spigot in either end of the heater should be firmly located in the 25mm diameter hole in the End
Bracket. Lock the heater in place by using the four screws provided to fit the Plastic Domes to the outside of each End
Bracket.
B. Ceiling mounting above a doorway
The mounting method is as described above (A) with the following changes. 1. The short section of the End Bracket should be
fixed to the Fixing Plate using four M4 bolts (the other two bolts can be discarded). 2. The Fixing Plate should be fixed to the
ceiling rather than the wall.
C. Wall mounting for space heating
The mounting method is as described above (A) with the following changes. 1. The short section of the End Bracket should be
fixed to the Fixing Plate using four M4 bolts (the other two bolts can be discarded). 2. Before locking the heater in place with
the Plastic Domes, the angle of the heater outlet can be adjusted between 90° (horizontal) and 180° (vertically downwards).
Connection
Always check that the supply voltage is the same as shown on the rating label. Connection to the heater should be made
using a suitably rated cable.
Advertisement
Table of Contents

Related Manuals for BN Thermic 800 Series


Summary of Contents for BN Thermic 800 Series
- Page 1 Personnel - Installation and maintenance must be carried out by suitably qualified personnel. Application – 800 Series High Level Fan Assisted Heater is designed for mounting above a doorway to counteract the draughts associated with frequently opening doors or for mounting at high level as a space heater in commercial or industrial premises.
- Page 2 Control Options 830 and 830T without remote mounted control device Control is by panel front on/off switch. 830T is also fitted with an electronic thermostat with panel front adjustment knob. 830 with remote mounted thermostat (15A minimum)
- Page 3 830 with remote mounted CS1 control box providing on/off/high heat/low heat/ fan only settings 830 with both mounted CS1 control box providing on/off/high heat/low heat/ fan only settings and remote mounted thermostat (15A minimum)
- Page 4 830T with remote mounted CS1 control box providing on/off/high heat/low heat/ fan only settings 860 and 860T without remote mounted control device Control is by panel front on/off switch. 860T is also fitted with an electronic thermostat with panel front adjustment knob...
- Page 5 860 with remote mounted thermostat (5A minimum) 860 with remote mounted CS1 control box providing on/off/high heat/low heat/ fan only settings...
- Page 6 860 with both mounted CS1 control box providing on/off/high heat/low heat/ fan only settings and remote mounted thermostat (5A minimum) 860T with remote mounted CS1 control box providing on/off/high heat/low heat/ fan only settings...
- Page 7 If in doubt always contact a qualified electrician. Warranty - Your BN Thermic product is guaranteed for one year from date of purchase. We will repair or replace, at our discretion, any part found to be defective. We cannot accept any consequential liability. This guarantee in no way prejudices...
Need help?
Do you have a question about the 800 Series and is the answer not in the manual?
Questions and answers