
Related Manuals for Naxa NDL-256


Summary of Contents for Naxa NDL-256
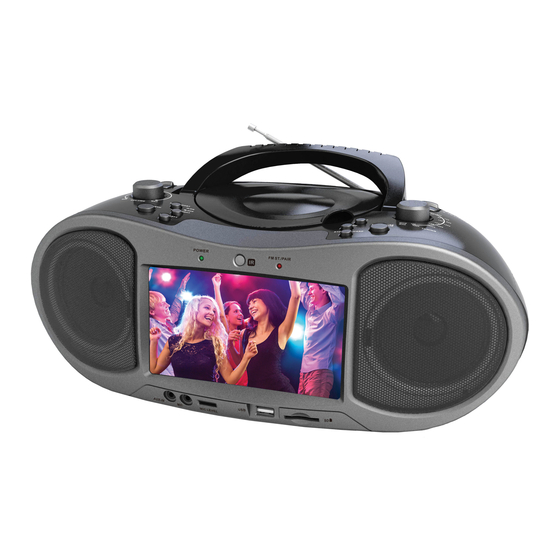
- Page 1 7” Bluetooth DVD Boombox ® NDL-256 Instruction Manual Please read carefully before use and keep for future reference.
-
Page 2: Table Of Contents
Turning the Unit On and Off ............17 General Setup Page ..............26 Adjusting the Volume ..............17 Audio Setup Page ................. 27 Turning the Screen On and Off ...........17 Video Setup Page ................. 28 Using the Number Keypad ............17 Preference Page ................28 Page 2 Naxa Electronics... - Page 3 Picture CDs (JPEG) ..............32 DVD Features ................32 DVD Region Codes ................ 32 Disc Care and Maintenance ............33 Handling a Disc ..............33 Cleaning a Disc ..............33 Warnings and Precautions ......... 34 Troubleshooting ............38 Specifications .............40 Support ................41 www.naxa.com Page 3...
-
Page 4: Thank You
You may also find the latest FAQ, documentation, and other product material at our website. Come visit • NDL-256 us on the web at www.naxa.com and see all that we • AC power cable have to offer! •... -
Page 5: Before You Start
• Before turning on the power for the first time, make sure that the power cord is properly installed. • Store your DVDs and CDs in a cool area to avoid damage from heat. www.naxa.com Page 5... - Page 6 Previous: Press to go to the previous title, chapter, or track. Left: Press to browse left in menu/option screens. NEXT/RIGHT Next: Press to go to the next title, chapter, or track. Right: Press to browse right in menu/option screens. Page 6 Naxa Electronics...
- Page 7 DVD/BT/AUX, press and hold to change the active function mode between DVD/BT, USB, and CARD (SD). Note: Make sure no cables are connected to the AUX IN jack of the unit otherwise it will stay in AUX mode. www.naxa.com Page 7...
- Page 8 TUNING dial Turn to tune to a radio station. BAND When the FUNCTION switch is set to switch RADIO: • Set to AM to tune to AM radio frequen- cies (kHz). • Set to FM STEREO to tune to FM radio frequencies (MHz). Page 8 Naxa Electronics...
- Page 9 3.5mm AUX audio input. MIC In 3.5mm microphone input. The microphone is active in DVD, USB, and CARD modes. MIC level Turn the dial to adjust the MIC In level (i.e., dial the volume of a connected microphone). www.naxa.com Page 9...
- Page 10 Load memory cards here. Refer to the card slot Specifications section of this manual for a list of supported memory cards. LCD screen Enjoy your videos on a color TFT LCD screen. Speakers Full-range drivers deliver powerful stereo sound. Page 10 Naxa Electronics...
- Page 11 Headphone Connection for headphones or earphones with a 3.5 mm plug. The speakers will be disabled when this connection is in use. www.naxa.com Page 11...
- Page 12 Slide the cover in the direction of the ment cover arrow to remove it. When loading batter- ies, make sure to match their positive (+) and negative (-) poles with the markings found inside the battery compartment. Page 12 Naxa Electronics...
-
Page 13: Remote Control
View program information ENTER Select an item in a menu. on the LCD screen. ZOOM Change the zoom options. AUDIO Change the audio options. SLOW Slow motion playback. MAIN Go to the DVD root menu MENU screen. www.naxa.com Page 13... -
Page 14: Using The Remote Control
3. Replace the battery compart- CLEAR Cancel. ⚠ fere with the signal. ment door. ANGLE Change the camera view Use only the size and extra angles are available. type of batteries speci- SUBTITLE Change the subtitle options. fied. Page 14 Naxa Electronics... -
Page 15: Connect Power
Do not handle the power plug with wet hands. Doing so may cause electric shock. Do not incinerate batteries or otherwise ap- ply heat to them; they may explode or leak. www.naxa.com Page 15... -
Page 16: Using The Dc Car Adapter
Be sure to match the positive and negative poles of the battery with the positive and negative terminals of the battery compart- ment. Reversed or other improper instal- lation can damage the device and other property. Page 16 Naxa Electronics... -
Page 17: Basic Functions
Press the MUTE key again to 2. Press the “5” key. restore sound output. 3. Press the ENTER key. Turning the Screen On and Off You can turn the LCD screen off to conserve power. www.naxa.com Page 17... -
Page 18: Dvd Mode
(This function will only work with DVDs that REPEAT Using the remote, press to repeat the current have been mastered with titles or chapters.) chapter/track, title, or to repeat the entire disc. Page 18 Naxa Electronics... -
Page 19: Program Mode
To start Program playback, use the arrow keys to highlight START and then press the ENTER key. • To stop Program playback, press the STOP key. To clear the program list, press the STOP key again while play is stopped. www.naxa.com Page 19... -
Page 20: Playing Digital Music/Video Files
REPEAT Using the remote, press to repeat the current track or all tracks in the folder. Numeric Using the remote, enter a track number and Keypad (0-9, then press ENTER to skip directly to it. +10) Page 20 Naxa Electronics... -
Page 21: Playing Digital Photo Files
The unit will return to the file list when the Numeric Using the remote, enter a track number and slideshow ends. Keypad (0-9, then press ENTER to skip directly to it. +10) www.naxa.com Page 21... -
Page 22: Bluetooth ® Mode
Boombox. This process is called “pairing” and you will only have to do it once. Once two devices are paired, they will automatically connect when they detect each other. Page 22 Naxa Electronics... -
Page 23: Playing Connected Devices
Playing Connected Devices 3. Have your Bluetooth device “search for devices”. Select the boombox (NAXA NDL-256) when it is Control playback from your Bluetooth device. found. Enter 0000 as a passkey if the device asks Set the volume level of the Bluetooth device to maxi- for one. -
Page 24: Aux Mode
2. Start and control playback with the audio player. When a USB/SD card is loaded that contains files, the unit will read it and then list all of the files and folders on the LCD screen. Page 24 Naxa Electronics... -
Page 25: Radio (Am/Fm) Mode
Set the BAND switch [14] to FM to tune to FM radio frequencies (MHz). 2. Tune to a station by turning the TUNING dial [13]. The FM ST/PAIR indicator [17] will light red when the tuner is locked onto an FM stereo broadcast. www.naxa.com Page 25... -
Page 26: Setup Menu
TV set, select this option. The widescreen image will be displayed in full screen in its native aspect ratio while the 4:3 image will be stretched out horizontally to fit in the screen. Page 26 Naxa Electronics... -
Page 27: Audio Setup Page
The next time that you insert the same disc and close the disc tray to load the disc, the unit will play from the memorized point. • Off: Disables this function. www.naxa.com Page 27... -
Page 28: Video Setup Page
• NTSC: Select this mode if the unit is con- nected to an NTSC-format TV (used in Tai- wan, America, Canada, etc). It will convert the video signal of a PAL disc and output in NTSC format. Page 28 Naxa Electronics... - Page 29 Disc Menu Select a preferred disc menu language. If the selected language is not available for the disc, the disc’s default setting will remain enabled. Default Reset: Restore all options to their factory- default state. www.naxa.com Page 29...
-
Page 30: Optional Connections
6. Set the TV to display the composite video source. You will see the unit’s output on the screen when the source is set correctly. Please refer to the owner’s manual pro- vided with the TV to learn how to set the display source. Page 30 Naxa Electronics... -
Page 31: About Optical Discs
Still Picture This unit can play back optical discs or memory cards that contain MP3 or JPEG files. Discs and media types not listed above are not supported by this unit (e.g., PC CD-ROM, CD-Extra, CD-G, CD-I, etc.) www.naxa.com Page 31... -
Page 32: Picture Cds (Jpeg)
Some of the DVD features enabled by this Region 5 Africa, the former Soviet Union, India, North player depend on how the DVD was pro- Korea, Pakistan, Turkmenistan duced. Some features may not be enabled Region 6 China Page 32 Naxa Electronics... -
Page 33: Disc Care And Maintenance
• To reduce the risk of scratches, always put discs back in their case after use. Store discs vertically in a cabinet. • Do not place stickers or labels on either side of a disc. www.naxa.com Page 33... -
Page 34: Warnings And Precautions
Consider the environmental impact of your actions! • Invisible laser radiation when open and interlock has failed or been defeated. Avoid direct exposure to beam. • To prevent fire or shock hazard, do not expose this appliance to rain or moisture. Page 34 Naxa Electronics... - Page 35 Article 810 of the NationalElectrical Code, ANS/NFPA70 provides in- from overheating. These openings should never be blocked by placing formation withregard to proper grounding ofthe mast and support- www.naxa.com Page 35...
- Page 36 22. Safety Check: Upon completion of any service or repairs to this keep from touching suchpower lines or circuits, as contact with them product,ask the service technician to perform safety checks to ensure might be fatal. that the productis in proper operating condition. Page 36 Naxa Electronics...
- Page 37 Increase the separation between the equipment and receiver. • Connect the equipment into an outlet on a circuit different from that to which the receiver is connected. • Consult the dealer or an experienced radio/TV technician for help. www.naxa.com Page 37...
-
Page 38: Troubleshooting
The unit will not turn on. the power and switch it on again. There is no power. Please check that the AC or DC power cord is connected securely and that the outlet is providing power. Page 38 Naxa Electronics... - Page 39 Static electricity may Switch off and unplug the unit. Then have interfered tempo- reconnect the unit to power and rarily with the opera- switch it on again. tion of the unit. www.naxa.com Page 39...
-
Page 40: Specifications
Output RCA composite video RCA stereo audio 3.5 mm headphone Input Bluetooth 2.1 + EDR 3.5 mm AUX audio 3.5 mm microphone Power Source AC 120 V DC 12 V 8 “C” size batteries (not included) Page 40 Naxa Electronics... -
Page 41: Support
If you have problems with your device, please consult the instructions in this manual. Please also visit us on the web at www.naxa.com to get up to the minute news, alerts, and documentation for your device. For additional assistance, please contact Naxa Technical Support. - Page 42 7” DVD Portatil con Bluetooth ® NDL-256 Manual de Operación Favor de leer este manual completamente antes de operar este producto Conservar el manual para futuras referencias...
- Page 43 Pagina de Ajustes de Audio "Audio Setup Page" ..... 28 Encender / Apagar la Pantalla ............18 Pagina de Ajustes de Video "Video Setup Page" ..... 29 Usando el teclado numérico ............18 Página de Preferencias "Preference Page" ......29 Pg 2 Naxa Electronics...
- Page 44 Cuidado y mantenimiento de los discos ........34 Manejo de los discos ............34 Limpieza de los discos ............34 Advertencias y Precauciones ........35 Guía rápida para la solución de problemas ..... 39 Especificaciones ............41 Soporte ................ 42 www.naxa.com Pg 3...
-
Page 45: Agradecimiento
Aunque hacemos de Naxa Electronics. Fundada en 2001 en Los Ángeles, todo lo posible para asegurarnos de que cada disposi- California, estamos dedicados a ofrecer productos que tivo Naxa esté... -
Page 46: Antes De Iniciar
Antes de encender el producto por primera vez, asegurarse que el cordón de alimentación esta in- stalado adecuadamente. • Almacenar este producto, los casetes y discos compac- tos en un lugar fresco para evitar daños debido al calor. www.naxa.com Pg 5... -
Page 47: Descripción De Partes
LEFT: Presionar para buscar a la izquierda en una pantalla de menú u opción. NEXT/RIGHT NEXT: Presionar para ir al capítulo, titulo o pista siguiente. RIGHT: Presionar para buscar a la derecha en una pantalla de menú u opción. Pg 6 Naxa Electronics... - Page 48 "USB" para cambiar el modo entre DVD/BT, USB o Tarjeta (memo- ria SD). Nota: Asegurarse que no esté conectado un cable al conector de entrada auxiliar de la unidad, de otra forma la unidad estará en modo de Entrada Auxiliar. www.naxa.com Pg 7...
- Page 49 Selector de Cuando el selector de función esta en Banda modo de Radio: • Ajustar a AM para sintonizar las frecuen- cias de AM (kHz) • Ajustar a FM para sintonizar las frecuen- cias de FM (MHz) Pg 8 Naxa Electronics...
- Page 50 Conector de entrada para micrófono de Ø 3.5 mm El micrófono es activo en los modos de DVD, USB y Tarjeta SD. MIC LEVEL Girar la perilla para ajustar el nivel del micrófono conectado a la unidad. www.naxa.com Pg 9...
- Page 51 Pantalla Pantalla de cristal líquido LCD-TFT a color para disfrutar de sus videos y películas. Bocinas Bocinas con controladores de rango completo para disfrutar del poder del sonido estéreo. Pg 10 Naxa Electronics...
- Page 52 Radio, Discos de Audio u otra función que no requiere video, para ahorrar energía. Salida para Conector estéreo de Ø 3.5 mm para audífo- Audífonos nos. La unida desactiva automáticamente las bocinas cuando los audífonos son conectados. www.naxa.com Pg 11...
- Page 53 Deslizar la tapa del compartimiento de las baterías en dirección de la flecha y removerla. Insertar las baterías verificando la correcta polaridad “+” y “-“ como se observa en el interior del compartimiento. Colocar la tapa nuevamente Pg 12 Naxa Electronics...
-
Page 54: Control Remoto
ENTER Confirmar una opción en el menú ZOOM Cambiar las opciones de acercamiento AUDIO Seleccionar la opción de audio deseada SLOW Reproducción de video a velocidad lenta www.naxa.com Pg 13... -
Page 55: Operación Del Control Remoto
RETURN Regresar a la ventana anterior sensor remoto pueden interferir con la señal. BT PAIR Conectar a un dispositivo Bluetooth ® Los rayos directos del CLEAR Cancelar sol, los lámparas fluo- rescentes e incandes- Pg 14 Naxa Electronics... -
Page 56: Instalación De Las Baterías
Alcalinas con manganeso). No mezclar baterías nuevas con usadas. Remover las baterías del control remoto si este no va ser usado por un periodo largo de tiempo para prevenir fuga de ácido y daños en el control. www.naxa.com Pg 15... -
Page 57: Fuente De Alimentación
Verificar la correcta polaridad de acuerdo de alimentación con las manos mojadas o con lo observado en el compartimiento, húmedas, esto puede ocasionar riesgo de una polaridad inadecuada puede dañar el choque eléctrico. control y otras propiedades. Pg 16 Naxa Electronics... -
Page 58: Funciones Básicas
Reemplazar las baterías si el control remoto • Presionar "MUTE" en el control remoto para desac- no opera. Siempre desechar las baterías de tivar la salida de audio (silencio), presionar nueva- mente para volver a activar la salida de audio www.naxa.com Pg 17... -
Page 59: Encender / Apagar La Pantalla
DVD. valor cuando una opción o menú en pantalla lo requiere. (Esta función solo está disponible para discos DVD Por ejemplo, para ir a la pista 15: que han sido grabados con una raíz de menú) Pg 18 Naxa Electronics... - Page 60 Presionar nuevamente cuando la reproduc- cion está detenida para borrar el punto de la memoria. REPEAT Presionar en el control remoto para repetir el título, capitulo o pista actual o para repetir el disco completamente. www.naxa.com Pg 19...
-
Page 61: Modo De Programa
"START" en la ventana y presionar "ENTER" para iniciar la reproducción del programa. • Presionar "PLAY/PAUSE/ENTER/PAIR" (11) para pausar o reanudar la reproducción. • Presionar "STOP/USB/CARD" (10) para detener la reproduc- cion. Estando la reproduccion detenida, presionar "STOP/ USB/CARD" (10) nuevamente para borrar el programa. Pg 20 Naxa Electronics... -
Page 62: Reproducción De Archivos De Audio/Video Digital
Presionar en el control remoto para repetir la pista actual o todas las pistas en la carpeta 0-9, +10 Usar el control remoto, ingresar el número de la pista y presionar "ENTER" para saltar directamente a la pista. www.naxa.com Pg 21... -
Page 63: Reproduccion De Archivos De Imagen Digital
Usando el control remoto, ingresar el número las demás imágenes en deslizamiento). de la imagen y presionar "ENTER" para saltar directamente a la imagen. La unidad regresa e la lista de archivos cu- ando el deslizamiento de imágenes termina Pg 22 Naxa Electronics... -
Page 64: Modo De Bluetooth
Este proceso es llamado "sincronia" y solo se requiere hacerlo una vez. Una vez que los dos dispositi- vos estan sincronizados, estos se conectan automati- camente cuando se detectan uno al otro. www.naxa.com Pg 23... -
Page 65: Reproducción De Un Dispositivo Conectado
3. Seleccionar el modo de "Búsqueda de dispositivos". conectado En la lista dispositivos Bluetooth localizados, se- leccionar "NAXA NDL-256" para continuar la Controlar la reproducción desde el dispositivo Bluetooth. sincronía. Si se requiere contraseña, ingresar la - contraseña predeterminada " 0000 ". -
Page 66: Modo De Entrada Auxiliar
USB o tarjeta de memoria SD. Refer- irse a la sección de especificaciones para conocer más 2. Iniciar la reproducción a través del reproductor de acerca de los archivos de media compatibles. audio externo. www.naxa.com Pg 25... -
Page 67: Modo De Radio (Am/Fm)
2. Girar el control de sintonía (13) para sintonizar la Video digital estación deseada. • Modo de DVD - Reproducción de archivos de El indicador de FM ST/PAIR (17) se enciende Imagen digital en color rojo al sintonizar una estacion con senal FM estéreo. Pg 26 Naxa Electronics... -
Page 68: Menú De Ajustes
También se pueden usar los botones de forma normal, mientras que la imagen 4:3 se ajusta "ƒ„‚" y "ENTER" en el control remoto. horizontalmente para desplegarse en la pantalla. www.naxa.com Pg 27... -
Page 69: Pagina De Ajustes De Audio "Audio Setup Page
Memory" punto de reproduccion. Al insertar el disco derecha. nuevamente y cerrar la bandeja, se empieza la reproduccion des de el punto memorizado. • Off (Desactivado): Desactiva la función. Pg 28 Naxa Electronics... -
Page 70: Pagina De Ajustes De Video "Video Setup Page
• Contraste ductor se conecta a una TV con formato NTSC (usado en Tailandia, EUA, Canadá, • Color México, etc.). Convierte la señal de video • Saturación de un disco formato PAL en una salida en formato NTSC. www.naxa.com Pg 29... - Page 71 "Disc Menu" Si el idioma seleccionado no está disponible en el disco, el idioma predeterminado del disco per- manece habilitado Predeterminado Restablece los ajustes predeterminados de "Default" fábrica y borra los ajustes realizados por el usuario. Pg 30 Naxa Electronics...
-
Page 72: Conexiones Opcionales
(ajustar a entrada de AV). Se despliega la salida del reproductor en la pantalla de la TV cu- ando la fuente es ajustada corretamente. Referirse al manual de la TV para conocer más acerca de cómo ajustar la fuente de despliegue. www.naxa.com Pg 31... -
Page 73: Acerca De Los Discos Ópticos
MP3 o JPEG. Los tipos de discos o archivos de media no indicados en la lista anterior no son soportados por la unidad (por ejemplo, PC CD-ROM, CD-Extra, CD-G, CD-I, etc.) Pg 32 Naxa Electronics... -
Page 74: Disco De Imágenes (Jpeg)
Región 5 África, países de ex unión soviética, India, compatibles con el reproductor dependen Corea del Norte, Paquistán, Turkmenistán de la producción del disco. Algunas fun- Región 6 China ciones no se pueden activar si el disco no www.naxa.com Pg 33... -
Page 75: Cuidado Y Mantenimiento De Los Discos
Para reducir el riesgo de daños en los discos, colo- carlos en su estuche después de usarlo. Almacenar los discos de forma vertical dentro de un gabinete. • No pegar etiquetas adheribles o escribir sobre las superficies de los discos. Pg 34 Naxa Electronics... -
Page 76: Advertencias Y Precauciones
¡Considere el impacto al medio ambiente con sus acciones! • Para prevenir riesgo de fuego o choque eléctrico, no exponer al goteo o salpicadura de agua, a la lluvia o humedad. www.naxa.com Pg 35... - Page 77 No deben bloquearse o taparse estas aberturas, colocando el pro- mulada. La sección 810 del NEC (National Electrical Code), ANSI/ ducto sobre una cama, sofá alfombra u otra superficie similar. El pro- Pg 36 Naxa Electronics...
- Page 78 Pg 37...
- Page 79 • Aumentar la separación entre el equipo y el receptor. • Conectar el equipo a una salida de un circuito diferente al receptor. • Consultar a su proveedor o a un tecnico de Radio y televisión. Pg 38 Naxa Electronics...
-
Page 80: Guía Rápida Para La Solución De Problemas
Apagar la unidad y desconectar la El reproductor no enciende fuente de alimentación; reconectar la unidad y encenderla nuevamente. No hay poder Asegurar que la fuente de aliment- ación está conectada a la unidad y al tomacorriente. www.naxa.com Pg 39... - Page 81 La unidad puede verse Apagar el reproductor y desconec- afectado por la electri- tarlo de la fuente de alimentación, cidad estática. entonces reconectarlo y encenderlo. Pg 40 Naxa Electronics...
-
Page 82: Especificaciones
Audio: CD-audio, MP3, WMA, AC-3, OGG Radio Radio AM/FM (analógico) Salidas Video compuesto RCA Audio estéreo RCA Audífonos de Ø 3.5 mm Entradas Bluetooth 2.1 + EDR Auxiliar de Ø 3.5 mm Micrófono de Ø 3.5 mm www.naxa.com Pg 41... -
Page 83: Soporte
Si necesita asistencia futura, favor de contactar al centro de servicio autorizado. NAXA Soporte Técnico 2320 East 49th St.
Need help?
Do you have a question about the NDL-256 and is the answer not in the manual?
Questions and answers