
Subscribe to Our Youtube Channel
Related Manuals for Naxa NDL-257


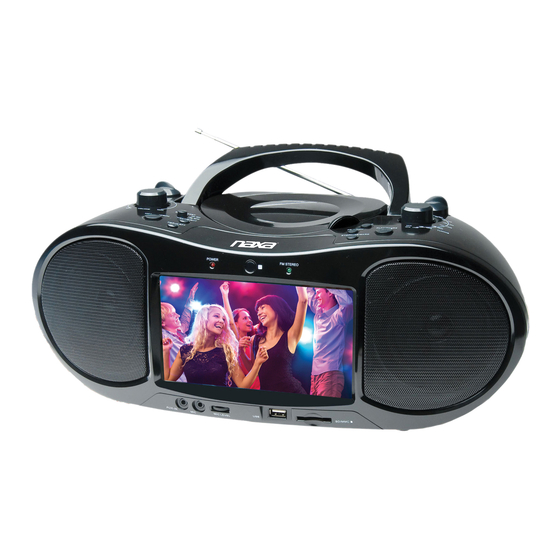
Summary of Contents for Naxa NDL-257
- Page 1 7” Bluetooth DVD Boombox with TV ® NDL-257 Instruction Manual Please read carefully before use and keep for future reference.
-
Page 2: Table Of Contents
Basic Functions ............17 Playing Connected Devices ............27 Turning the Unit On and Off ............17 Adjusting the Volume ..............17 AUX Mode ..............27 Turning the Screen On and Off ...........17 Using the Number Keypad ............17 USB/Card Mode ............28 Page 2 Naxa Electronics... - Page 3 Audio CDs ................35 Picture CDs (JPEG) ..............35 DVD Features ................35 DVD Region Codes ................ 36 Disc Care and Maintenance ............36 Handling a Disc ..............36 Cleaning a Disc ..............37 Warnings and Precautions ......... 38 Troubleshooting ............42 www.naxa.com Page 3...
-
Page 4: Thank You
You may also find the latest FAQ, documentation, and other product material at our website. Come visit • NDL-257 us on the web at www.naxa.com and see all that we • AC power cable have to offer! •... -
Page 5: Before You Start
• Before turning on the power for the first time, make sure that the power cord is properly installed. • Store your DVDs and CDs in a cool area to avoid damage from heat. www.naxa.com Page 5... -
Page 6: At A Glance
Previous: Press to go to the previous title, chapter, or track. Left: Press to browse left in menu/option screens. NEXT/RIGHT Next: Press to go to the next title, chapter, or track. Right: Press to browse right in menu/option screens. Page 6 Naxa Electronics... - Page 7 TV/DVD/BT/AUX, press and hold to change the active function mode between DVD/BT, USB, and CARD (SD). Note: Make sure no cables are connected to the AUX IN jack of the unit otherwise it will stay in AUX mode. www.naxa.com Page 7...
- Page 8 TUNING dial Turn to tune to a radio station. BAND When the FUNCTION switch is set to switch RADIO: • Set to AM to tune to AM radio frequen- cies (kHz). • Set to FM STEREO to tune to FM radio frequencies (MHz). Page 8 Naxa Electronics...
- Page 9 3.5mm AUX audio input. MIC In 3.5mm microphone input. The microphone is active in DVD, USB, and CARD modes. MIC level Turn the dial to adjust the MIC In level (i.e., dial the volume of a connected microphone). www.naxa.com Page 9...
- Page 10 Load memory cards here. Refer to the card slot Specifications section of this manual for a list of supported memory cards. LCD screen Enjoy your videos on a color TFT LCD screen. Speakers Full-range drivers deliver powerful stereo sound. Page 10 Naxa Electronics...
- Page 11 Headphone Connection for headphones or earphones with a 3.5 mm plug. The speakers will be disabled when this connection is in use. TV ANT TV antenna input. RF coaxial connection input for external TV antennas. www.naxa.com Page 11...
- Page 12 Slide the cover in the direction of the ment cover arrow to remove it. When loading batter- ies, make sure to match their positive (+) and negative (-) poles with the markings found inside the battery compartment. Page 12 Naxa Electronics...
-
Page 13: Remote Control
Select an item in a menu. DISPLAY View program information on the LCD screen. AUDIO Change the audio options. ZOOM Change the zoom options. Go to the TV menu or DVD SLOW Slow motion playback. MENU/ root menu screen. SEARCH www.naxa.com Page 13... -
Page 14: Using The Remote Control
3. Replace the battery compart- CLEAR Cancel. ⚠ fere with the signal. ment door. ANGLE Change the camera view Use only the size and extra angles are available. type of batteries speci- SUBTITLE Change the subtitle options. fied. Page 14 Naxa Electronics... -
Page 15: Connect Power
Do not handle the power plug with wet hands. Doing so may cause electric shock. Do not incinerate batteries or otherwise ap- ply heat to them; they may explode or leak. www.naxa.com Page 15... -
Page 16: Using The Dc Car Adapter
Be sure to match the positive and negative poles of the battery with the positive and negative terminals of the battery compart- ment. Reversed or other improper instal- lation can damage the device and other property. Page 16 Naxa Electronics... -
Page 17: Basic Functions
Press the MUTE key again to 2. Press the “5” key. restore sound output. 3. Press the ENTER key. Turning the Screen On and Off You can turn the LCD screen off to conserve power. www.naxa.com Page 17... -
Page 18: Dvd Mode
(This function will only work with DVDs that REPEAT Using the remote, press to repeat the current have been mastered with titles or chapters.) chapter/track, title, or to repeat the entire disc. Page 18 Naxa Electronics... -
Page 19: Program Mode
To start Program playback, use the arrow keys to highlight START and then press the ENTER key. • To stop Program playback, press the STOP key. To clear the program list, press the STOP key again while play is stopped. www.naxa.com Page 19... -
Page 20: Playing Digital Music/Video Files
REPEAT Using the remote, press to repeat the current track or all tracks in the folder. Numeric Using the remote, enter a track number and Keypad (0-9, then press ENTER to skip directly to it. +10) Page 20 Naxa Electronics... -
Page 21: Playing Digital Photo Files
The unit will return to the file list when the Numeric Using the remote, enter a track number and slideshow ends. Keypad (0-9, then press ENTER to skip directly to it. +10) www.naxa.com Page 21... -
Page 22: Tv Mode
You must connect an antenna to the TV show transition effect. ANT connector found on the back of the unit. The built-in telescopic rod antenna is not used by the TV tuner. An external antenna is included in the box. Page 22 Naxa Electronics... -
Page 23: Connecting An External Antenna
• Connect the included external antenna to receive Please visit www.antennaweb.org to learn more. TV signals. (The telescopic rod antenna cannot be used with the TV.) www.naxa.com Page 23... -
Page 24: Channel Search
Channel list. Press and hold MODE/TV MENU to MODE/TV Press and hold to view the TV options menu. exit the TV Menu. MENU Perform a new channel search when you change the location of the unit. Page 24 Naxa Electronics... -
Page 25: Tv Options Menu
Return all of the TV options to their default tory Default settings. Country Set the location of the unit. Auto Search Automatically find TV signals within reception range and save them to the Channel list. This will overwrite any previously saved Channel list. www.naxa.com Page 25... -
Page 26: Bluetooth ® Mode
3. Have your Bluetooth device “search for devices”. Use this mode to stream audio wirelessly from play- Select the boombox (Naxa NDL-257) when it is ers with Bluetooth. Bluetooth devices may include lap- found. Enter 0000 as a passkey if the device asks tops, tablets, smartphones, and more. -
Page 27: Playing Connected Devices
1. Set the volume level of the connected audio player control if your Bluetooth device supports it. to approximately 80%. Adjustment the volume to a comfortable level by turning the VOLUME dial [2] of the unit. 2. Start and control playback with the audio player. www.naxa.com Page 27... -
Page 28: Usb/Card Mode
Refer to the Specifications section to learn more about media file compatibility. When a USB/SD card is loaded that contains files, the unit will read it and then list all of the files and folders on the LCD screen. Page 28 Naxa Electronics... -
Page 29: Radio (Am/Fm) Mode
You may also use the arrow keys and the 2. Tune to a station by turning the TUNING dial [13]. ENTER key on the remote control. The FM ST/PAIR indicator [17] will light red when the tuner is locked onto an FM stereo broadcast. www.naxa.com Page 29... -
Page 30: General Setup Page
4:3 image will • Off: Disables this function. be stretched out horizontally to fit in the screen. Page 30 Naxa Electronics... -
Page 31: Audio Setup Page
• Downmix > Stereo: Rear surround audio is • Sharpness kept in separate channels. Rear left audio • Brightness is output through the left speaker; rear • Contrast right audio is output through the right • Hue speaker. • Saturation www.naxa.com Page 31... -
Page 32: Preference Page
Password Mode option is enabled. See nected to an NTSC-format TV (used in Tai- the following “Password“ option for more wan, America, Canada, etc). It will convert information. the video signal of a PAL disc and output in NTSC format. Page 32 Naxa Electronics... -
Page 33: Optional Connections
You will be required to enter the current “old” password before you are al- lowed to set a new password. Always write down and save your new password. Default Reset: Restore all options to their factory- default state. www.naxa.com Page 33... -
Page 34: About Optical Discs
TV to learn how to set the that contain MP3 or JPEG files. Discs and media types display source. not listed above are not supported by this unit (e.g., PC CD-ROM, CD-Extra, CD-G, CD-I, etc.) Page 34 Naxa Electronics... -
Page 35: Video Dvds
Angle indicator tracks; each is given a track number. Screen format (aspect ratio) Zoom Some of the DVD features enabled by this player depend on how the DVD was pro- duced. Some features may not be enabled www.naxa.com Page 35... -
Page 36: Dvd Region Codes
Do not place stickers or labels on either side of a Korea), Southeast Asia disc. Region 4 Australia, Caribbean, Central America, South America, Mexico, New Zealand Region 5 Africa, the former Soviet Union, India, North Korea, Pakistan, Turkmenistan Region 6 China Page 36 Naxa Electronics... -
Page 37: Cleaning A Disc
Small dust particles and light stains will not affect playback quality. Never use chemicals such as record sprays, anti-static sprays, benzene, or thinners to clean a disc. Doing so will damage the surface of the disc permanently. www.naxa.com Page 37... -
Page 38: Warnings And Precautions
Consider the environmental impact of your actions! • Invisible laser radiation when open and interlock has failed or been defeated. Avoid direct exposure to beam. • To prevent fire or shock hazard, do not expose this appliance to rain or moisture. Page 38 Naxa Electronics... -
Page 39: Important Safety Information
Article 810 of the NationalElectrical Code, ANS/NFPA70 provides in- from overheating. These openings should never be blocked by placing formation withregard to proper grounding ofthe mast and support- www.naxa.com Page 39... - Page 40 22. Safety Check: Upon completion of any service or repairs to this keep from touching suchpower lines or circuits, as contact with them product,ask the service technician to perform safety checks to ensure might be fatal. that the productis in proper operating condition. Page 40 Naxa Electronics...
- Page 41 Increase the separation between the equipment and receiver. • Connect the equipment into an outlet on a circuit different from that to which the receiver is connected. • Consult the dealer or an experienced radio/TV technician for help. www.naxa.com Page 41...
-
Page 42: Troubleshooting
The unit will not turn on. the power and switch it on again. There is no power. Please check that the AC or DC power cord is connected securely and that the outlet is providing power. Page 42 Naxa Electronics... - Page 43 Static electricity may Switch off and unplug the unit. Then have interfered tempo- reconnect the unit to power and rarily with the opera- switch it on again. tion of the unit. www.naxa.com Page 43...
-
Page 44: Specifications
Audio: CD-audio, MP3, WMA, AC-3, OGG Broadcast Tuner AM/FM radio (analog) Digital ATSC TV Output RCA composite video RCA stereo audio 3.5 mm headphone Input Bluetooth 2.1 + EDR Coaxial RF (TV Antenna) 3.5 mm AUX audio 3.5 mm microphone Page 44 Naxa Electronics... -
Page 45: Support
If you have problems with your device, please consult the instructions in this manual. Please also visit us on the web at www.naxa.com to get up to the minute news, alerts, and documentation for your device. For additional assistance, please contact Naxa Technical Support.
Need help?
Do you have a question about the NDL-257 and is the answer not in the manual?
Questions and answers