
Related Manuals for Opencockpits BREAKERF


Summary of Contents for Opencockpits BREAKERF
- Page 1 www.opencockpits.com Manual de Instalación y uso Installation & user`s Manual BREAKERS ...
- Page 2 Índice / Index Datos Técnicos Technical Introducción Data Puesta en Marcha Introduction Start Up Precaución/Mantenimiento Links de interés Caution/Maintenance Links...
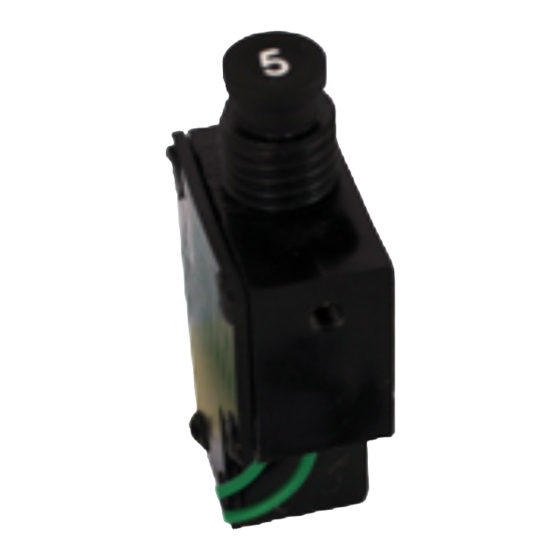
- Page 3 Presentan compatibilidad con paneles de aviación reales, tarjetas de Opencockpits u otras. La grabación de los tapones se realizan por laser, consiguiendo una gran durabilidad y una mayor resistencia al uso.
-
Page 4: Datos Técnicos
ON-OFF type output for the switch. Fabricados en plástico inyectado. Made of injected plastic. Compatibles con tarjetas de Opencockpits [2T13], [2T14], [2T3], [2T1], [3T5] u otros fabricantes. Compatible with the Opencockpits cards [2T13], [2T14], [2T3], [2T1], [3T5] or others manufacturers. -
Page 5: Puesta En Marcha
Normal position Puesta en marcha / Start Dentro del catálogo de tarjetas IOCards de Opencockpits, podemos encontrar varias compatibles con el uso de los breakers. En este manual vamos a detallar la conexión de breakers con la tarjeta USB Rele [2T14]... - Page 6 USB Expansion [2T3] y Master Card [2T1], usando la Relé [2T14] como tarjeta única y en red (dos tarjetas Relé). Within the Opencockpits IOCards catalog, we can find several compatible with the use of breakers. In this manual we are going to detail the...
- Page 7 ...
- Page 8 ...
- Page 9 ...
- Page 10 Check Se requiere el uso del software Sioc. Sioc está disponible en la página de tienda de Opencockpits, en la pestaña “Soporte – Software”. The use of Sioc software is required. Sioc is available on the Opencockpits store page, under the "Support - Software" tab.
-
Page 11: Installation
Instalación del Software / Software Installation: Al igual de lo que sucede en otros módulos de Opencockpits y debido a la cantidad de diferentes add-ons que pueden ofrecerse, es imposible que Opencockpits pueda ofrecer cobertura para todos ellos ya que el software siempre es obra de terceros y Opencockpits no tiene ninguna vinculación... - Page 12 to offer coverage for all of them since the software is always the work of third parties and Opencockpits does not have any link with them. Even so, Opencockpits has made the effort to try to integrate its hardware with all these external packages, although with certain products it has been very difficult to do so.
- Page 13 { &B1_ACTION = 1 } } // Declaracion del impulso 1 selenoide Var 9024, NAME SLND_B1, STATIC, LINK IOCARD_OUT, DEVICE 9 OUTPUT 139 // Declaracion del impulso 2 selenoide VAR 9025, NAME SLND_B12, STATIC, LINK IOCARD_OUT, DEVICE 9 OUTPUT 155 // Reseteo de todas las variables del Breaker VAR 9026, NAME RESET_B1, STATIC { &SLND_B1 = 1 &SLND_B12 = 1 &B1_ACTION = 0 &RESET_B1 = 0 &B1_POPUP = 0 } // Desencadenante de la accion que activa el breaker HA‐1 VAR 9027, NAME B1_ACTION, STATIC { if (&B1_ACTION > 0) { ...
- Page 14 if (&B1_POPUP > 0) { &B1_ACTION = 1 } } // Declaracion del impulso 1 selenoide Var 9024, NAME SLND_B1, STATIC, LINK IOCARD_OUT, DEVICE 9 OUTPUT 139 // Declaracion del impulso 2 selenoide VAR 9025, NAME SLND_B12, STATIC, LINK IOCARD_OUT, DEVICE 9 OUTPUT 155 // Reseteo de todas las variables del Breaker VAR 9026, NAME RESET_B1, STATIC { &SLND_B1 = 1 &SLND_B12 = 1 &B1_ACTION = 0 &RESET_B1 = 0 &B1_POPUP = 0 } // Desencadenante de la accion que activa el breaker HA‐1 VAR 9027, NAME B1_ACTION, STATIC { if (&B1_ACTION > 0) { ...
- Page 15 } // Switch a mapear con prosim VAR 9100, NAME P_H1, STATIC, LINK IOCARD_SW, DEVICE 9 INPUT 1 ... Uso de los ficheros configurados por Opencockpits o terceros / Use of files configured by Opencockpits or third parties: Una vez descargados los programas y scripts pasaremos a usarlos, conectaremos la tarjeta USB Rele Card o USB Expansion al ordenador.
- Page 16 valor del puerto USB (Device) donde se ha conectado el módulo y tomamos nota del número. Once the programs and script have been downloaded, we will use them, we will connect the module to the computer, we will execute Sioc.exe. We will observe in the upper right window the value of the USB port (Device) where the module has been connected and we take note of this number.
- Page 17 Los pasos para la configuración son: 1. Hacer clic en Script. Dir. y pegar el código script a utilizar. 2. Hacer clic en Multiple Scripts y cargar el script. 3. Hacer clic en Config Devices, seleccionar la tarjeta dentro de la lista de Devices conectados y el script dentro de la lista de IDX.
- Page 18 Configuraciones específicas por add-ons: Hay que tener en cuenta que algunos add-ons necesitan configuraciones especiales o drivers específicos. Siempre tendremos el simulador y el add-ons corriendo antes de lanzar el Sioc y los softwares intermedios. Keep in mind that some add-ons require special configurations or specific drivers.
- Page 19 Precaución / Caution Seguridad en el espacio de instalación / Installation space safety Asegúrese de dejar suficiente espacio para la ventilación cuando coloque el producto. Un incremento de la temperatura interior puede dañarlo. Make sure to leave enough space for ventilation when placing the product.
- Page 20 Centro de servicio al cliente de Opencockpits. To reduce the risk of electric shock, do not remove the cover (or the back) of the electronic components. For any repairs, contact the Opencockpits Customer Service Center. Electricidad y seguridad / Electricity and security Advertencia / Warning ...
- Page 21 No coloque el cable de alimentación ni el producto cerca de fuentes de calor. Do not place the power cord or the product near heat sources. Limpie el polvo existente alrededor de las patillas del enchufe o de la toma de corriente mediante un paño seco. Wipe off any dust around the pins of the plug or socket using a dry cloth.
- Page 22 Instalación / Installation Advertencia / Warning No coloque velas, repelentes para insectos ni cigarrillos sobre el producto. No instale el producto cerca de fuentes de calor. Do not put candles, insect repellants or cigarettes on the product. Do not install the product near heat sources. ...
- Page 23 Precaución / Caution Mover con precaución el producto. Move the product with care. Instale el producto únicamente en lugares con el tamaño adecuado. Install the product only in appropriately sized locations. Si instala el producto en un lugar inusual (un lugar expuesto a gran cantidad polvo fino, sustancias químicas, temperaturas extremas o mucha humedad), o bien en un lugar donde deba funcionar ininterrumpidamente durante un periodo largo de...
- Page 24 Existe alta tensión dentro del producto. No desmonte, repare ni modifique nunca el producto por su cuenta. Póngase en contacto con el Centro de servicio al cliente de Opencockpits para las reparaciones. There is high voltage inside the product. Never disassemble,...
- Page 25 A continuación, póngase en contacto con el Centro de servicio al cliente de Opencockpits. Do not insert metallic objects (toothpicks, hairpins, etc.) or highly flammable objects (paper, matches, etc.) into the product (through slots, inlet / outlet ports, etc.).
- Page 26 A continuación, póngase en contacto con el Centro de servicio al cliente de Opencockpits. Do not place objects that contain liquids (vases, flowerpots, bottles, etc.) or metallic objects on the product. Be sure to turn off the product and disconnect the power cord if water or other foreign substances get into the product.
- Page 27 when it may be exposed to rain or snow. Be careful not to get the AC / DC power adapter wet when scrubbing the floor. No coloque el adaptador de alimentación CA/CC cerca de aparatos de calefacción. Do not place the AC / DC power adapter near heating appliances.
- Page 28 1. Apague el producto y los ordenadores. 1. Turn off the product and computers. 2. Desconecte el cable de alimentación del producto. 2. Disconnect the power cord from the product. 3. Limpie el producto con un paño limpio, suave y seco. 3.
-
Page 29: Mantenimiento
!!! __________________________________________________________ We come to the end of this manual !!! We invite you to read the manuals for the other Opencockpits elements and for the SIOC software Thank you very much for trusting us !!! - Page 30 AFDALJAOÑ J Soporte técnico: support@opencockpits.com admin@opencockpits.com www.opencockpits.com F ...
Need help?
Do you have a question about the BREAKERF and is the answer not in the manual?
Questions and answers