Advertisement
Quick Links
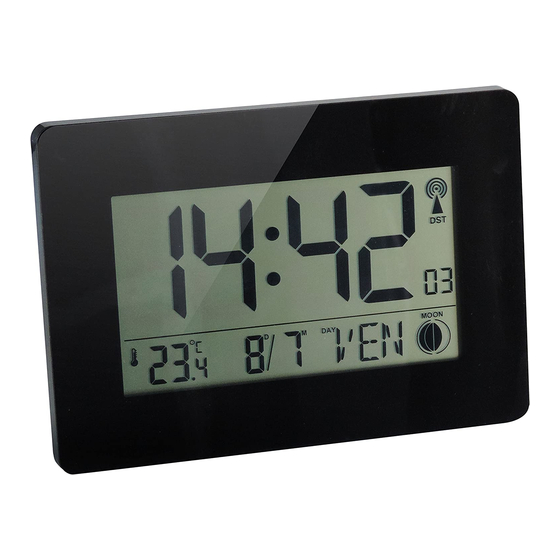
Austin digital, radio-controlled clock Ref. 11094
User manual
Characteristics:
-
DCF 77 frequency radio-controlled clock: automatic time and
date setting, plus automatic summer/winter time-change
-
12 or 24-hour format time display.
-
Time can be manually adjusted.
-
Time zone adjustment: +12 or -12 hours' difference.
-
Calendar: Display of the date / month / day of the week.
-
Day of the week display in seven languages: English, German, Italian, French,
Danish, Dutch and Spanish.
-
Interior temperature in °C or °F, from 0°C to 60°C.
-
Displays the phases of the moon
-
Snooze function (repeated) automatic (5 minutes).
-
Runs on 2 x 1.5V LR6/AA batteries (supplied)
Installation:
Carefully remove the clock from its packaging. Gently remove the protective film.
To insert the batteries: open the battery compartment at the back of the clock by gently
pulling on the cover.
Install the 2 LR6 batteries in the direction indicated (observing the correct polarity: +/-).
Inserting in the wrong position may damage the article. Close the cover.
2 installation methods:
-
Wall mounted
-
Standalone: raise the stand
Set calendar
manually
Activation of
the snooze
function
Scroll through
units +
Set alarm
Importé par :
AIC International - 44980 Ste Luce sur Loire - France
Scroll through
-
units
Activation /
deactivation of RC
signal reception
Reset: zero
reset
Battery
compartment
Advertisement

Subscribe to Our Youtube Channel
Related Manuals for ORIUM 11094


Summary of Contents for ORIUM 11094
- Page 1 Austin digital, radio-controlled clock Ref. 11094 User manual Characteristics: DCF 77 frequency radio-controlled clock: automatic time and date setting, plus automatic summer/winter time-change 12 or 24-hour format time display. Time can be manually adjusted. Time zone adjustment: +12 or -12 hours’ difference.
- Page 2 Receiving the radio signal: When you insert the batteries, all existing symbols on the screen light up briefly and an audible signal is emitted; the clock then goes into DCF receiving mode for 7 to 10 minutes (the aerial near the minutes display flashes). If this automatic setting function fails, press the Wave button to initiate a manual search for the DCF signal.
- Page 3 Press “SET” to confirm your setting, exit setting procedures and return to the default display. For your information: If you do not press a button for 30 seconds, the clock will automatically switch over from setting mode to normal display mode. Setting a daily alarm: This clock has a daily alarm.
- Page 4 Cleaning: You can clean the clock with a soft cloth or microfiber cloth to avoid scratching the face. Do not use solvents or any other solutions that might damage the product. Replacing the battery When the information display begins to fade, you need to change the batteries. Open the battery compartment at the back of the clock by gently pulling the cover.
Need help?
Do you have a question about the 11094 and is the answer not in the manual?
Questions and answers