Panasonic ES-LV9Q Operating Instructions Manual
Rechargeable shaver
Hide thumbs
Also See for ES-LV9Q:
- Operating instructions manual (430 pages) ,
- Operating instructions manual (68 pages) ,
- User manual
Table of Contents
Advertisement
Contents
Sa fe t y pre c a ut ions........... 2
Intended use ............................6
Parts identification ..................7
Preparation...............................8
How to use .............................10
Cleaning thoroughly ..............13
foil and the inner blades .......14
Thank you for purchasing this Panasonic product.
Before operating this unit, please read these instructions completely and save them for future use.
glows .......................................16
FAQ .........................................17
Troubleshooting ....................17
Battery life ..............................21
rechargeable battery .............21
Specifications ........................22
Operating Instructions
Rechargeable Shaver
(Household)
Model No.
ES-LV9Q
Advertisement
Table of Contents

Related Manuals for Panasonic ES-LV9Q


Summary of Contents for Panasonic ES-LV9Q
-
Page 1: Table Of Contents
Removing the built-in Replacing the system outer rechargeable battery .....21 foil and the inner blades ..14 Specifications ......22 Thank you for purchasing this Panasonic product. Before operating this unit, please read these instructions completely and save them for future use. -
Page 2: Safety Precautions
Safety precautions WARNING To reduce the risk of injury, loss of life, electric shock, fire, and damage to property, always observe the following safety precautions. ►This product This shaver has a built-in rechargeable battery. Do Explanation of symbols not throw into fire, apply heat, or charge, use, or The following symbols are used to classify and describe the level leave in a high temperature environment. - Page 3 Always ensure the appliance is operated on an WARNING electric power source matched to the rated voltage indicated on the AC adaptor. ►Power supply Fully insert the adaptor. - Failure to do so may cause fire or electric shock. Do not connect or disconnect the adaptor to a household outlet with a wet hand.
- Page 4 WARNING CAUTION If detergent or oil is consumed accidentally, do not ►Protecting the skin induce vomiting, drink a large amount of water and Do not use excessive pressure to apply the system contact a physician. outer foil to your lip or other part of your face. If detergent or oil comes into contact with eyes, Do not apply the system outer foil directly to wash immediately and thoroughly with running...
- Page 5 Use caution when opening detergent as spout is sharp. CAUTION - Failure to do so may cause injury. ►Note the following precautions Handling of the removed battery when disposing Do not wrap the cord around the adaptor when storing. - Doing so may cause the wire in the cord to break with the load, and may cause fire due to a short circuit.
-
Page 6: Intended Use
• Treat yourself to wet lather shaves for at least three weeks and notice the difference. Your Panasonic WET/DRY shaver requires a little time to get used to because your skin and beard need about a month to adjust to any new shaving method. -
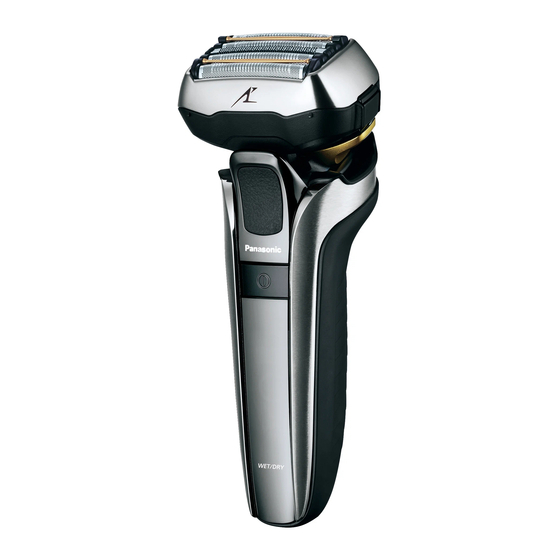
Page 7: Parts Identification
Parts identification Back < > A Main body f. Foil/blade check lamp A Intake port Accessories Protective cap B Self-cleaning recharger D Travel case ... -
Page 8: Preparation
Notes Preparation • When charging the shaver for the first time or when it has not been in use for more than 6 months, the charging time may Charging the shaver change or the charge status lamp ( ) may not glow for a few minutes. - Page 9 Notes • To replace the cleaning liquid, see page 15. Cleaning can start right after the usage by preparing in advance. • Only use self-cleaning recharger detergent for Panasonic (See page 12.) shavers. • Remove the AC adaptor from the self-cleaning recharger.
-
Page 10: How To Use
How to use Tips for better shaving Apply the whole system outer foil This appliance has a smart lock function, so the power switch is perpendicularly against the skin and automatically locked to prevent accidental operation when not shaving. shave by slowly gliding the shaver over ►... - Page 11 ►Switching the shaver head When the battery capacity is low You can change the pivot action. “10%” appears and “ ” blinks. FREE The appliance beeps twice after switched off. The shaver head is moved to prevent • You can shave 1 to 2 times after “10%” missed spots.
- Page 12 Remove the adaptor after the selected mode is Cleaning, drying, charging completed. We recommend cleaning the shaver after each use. Clean the shaver with water or with the cleaning Insert the shaver into the brush once per month. (See pages 13 and 14.) self-cleaning recharger and The main unit neck section (), inner blade plug the adaptor into a...
-
Page 13: Cleaning Thoroughly
Cleaning thoroughly Attach the outer foil section and dry with the self-cleaning Cleaning with water recharger. 1. Insert the shaver into the self- • Turn the shaver off and disconnect the AC adaptor. cleaning recharger and plug the Apply some hand soap and some adaptor into a household outlet. -
Page 14: Replacing The System Outer Foil And The Inner Blades
► Drying the shaver without the self-cleaning recharger Cleaning with the brush Dry in a shade and apply oil. Remove the outer foil section and the inner blades. (See page 15.) ► Cleaning with the long brush Clean the outer foil section, system outer foil, the shaver body and the trimmer using the long brush. -
Page 15: Replacing The Cleaning Liquid
►Removing the outer foil section Replacing the cleaning liquid Press the foil frame release buttons and lift the If the STATUS lamp glows for 5 seconds when the SELECT button outer foil section upwards. is pressed, the cleaning liquid needs to be replaced. •... -
Page 16: When The Low/Status Lamp Glows
(Only “Charge” mode can be used.) ►Replacement parts Replacement parts are available at your dealer or Service Center. System outer foil and inner WES9036 blades Replacement parts for ES-LV9Q System outer foil WES9177 Inner blades WES9170 Special Detergent for Shaver Cleaning & Charging System WES4L03... -
Page 17: Faq
This self-cleaning recharger can only the unit or a service center authorized by Panasonic for repair. Can the self-cleaning be used for the ES-LV9Q model. recharger be used to... - Page 18 ►Self-cleaning recharger Problem Action If you mix soapy water or hand Problem Action soap with the detergent or use If the shaver is not cleaned for another detergent, the cleaning more than 2 weeks, first clean liquid will foam. Use the self- with the cleaning brush to remove The cleaning liquid has cleaning recharger after...
- Page 19 Problem Action Problem Action Check that the AC adaptor is During cleaning: connected to the self-cleaning The self-cleaning recharger recharger, and that the adaptor is makes a loud sound due to the plugged in to a household outlet. cleaning of the blades. (See page 12.) After cleaning: The self-cleaning recharger...
- Page 20 Problem Action Problem Action Depending on the beard Apply oil. thickness or the amount of beard This can be improved by cleaning trimmings in the shaver head, the Operating time is short every time after shaving. shaving sensor may not react and even after charging.
-
Page 21: Battery Life
Removing the built-in rechargeable battery Problem Action This can be improved by cleaning Remove the built-in rechargeable battery before disposing of The odor is getting stronger. every time after shaving. the shaver. Please make sure that the battery is disposed of at an officially This can be improved by cleaning every time after shaving. -
Page 22: Specifications
For environmental protection and recycling of materials This shaver contains a Lithium-ion battery. Please make sure that the battery is disposed of at an officially assigned location, if there is one in your country. Specifications See the name plate on the AC adaptor. Power source (Automatic voltage conversion) Motor voltage... - Page 23 MEMO...
- Page 24 Panasonic Corporation http://www.panasonic.com © Panasonic Corporation 2018 Printed in Japan F EN ES9700LV9Q1H Y0518-0...
Need help?
Do you have a question about the ES-LV9Q and is the answer not in the manual?
Questions and answers