Table of Contents

Subscribe to Our Youtube Channel
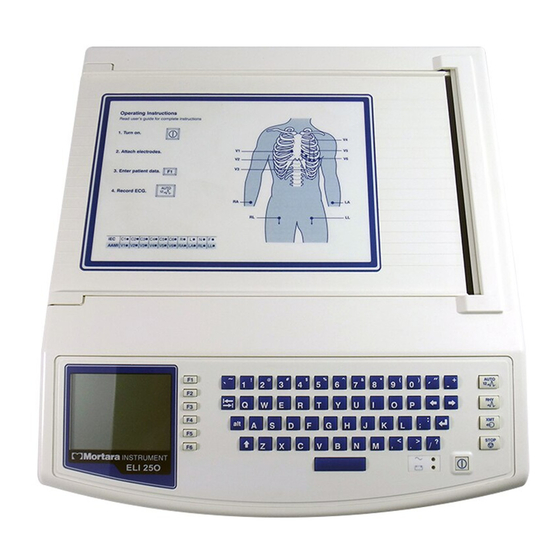
Related Manuals for Mortara Instrument ELI 25O


Summary of Contents for Mortara Instrument ELI 25O
- Page 1 REF 9515-163-50-ENG Rev F1 ELI 25O 12-LEAD RESTING ELECTROCARDIOGRAPH USER MANUAL Manufactured by Mortara Instrument, Inc. Milwaukee, Wisconsin U.S.A. CAUTION: Federal law restricts this device for sale to or on the order of a physician.
- Page 2 This document contains confidential information that belongs to Mortara Instrument, Inc. No part of this document may be transmitted, reproduced, used, or disclosed outside of the receiving organization without the express written consent of Mortara Instrument, Inc. Mortara is a registered trademark of Mortara Instrument, Inc. ELI 250 is a trademark of Mortara Instrument, Inc.
- Page 3 TECHNICAL SUPPORT AND SERVICE Headquarters Sales Support/ Supplies & Accessories Mortara Instrument, Inc. 7865 North 86th Street Mortara Instrument, Inc. Milwaukee, WI 53224 7865 North 86th Street Tel: 414.354.1600 Milwaukee, WI 53224 Tel: 800.231.7437 Tel: 414.354.1600 Fax: 414.354.4760 Fax: 414.354.4760 Internet: http://www.mortara.com...
- Page 4 The information in this document is subject to change without notice. Mortara Instrument, Inc. makes no warranty of any kind with regard to this material including, but not limited to, implied warranties of merchantability and fitness for a particular purpose. Mortara Instrument, Inc. assumes no responsibility for any errors or omissions that may appear in this document.
- Page 5 WARRANTY INFORMATION Your Mortara Warranty MORTARA INSTRUMENT, INC. (hereinafter referred to as “Mortara”) hereby warrants that Mortara products (hereinafter referred to as “Products”) shall be free from defects in material and workmanship under normal use, service and maintenance for the warranty period of such Product from Mortara or an authorized distributor or representative of Mortara.
- Page 6 • To maintain designed operator and patient safety, only use parts and accessories supplied with the device and available through Mortara Instrument, Inc. • ECG electrodes could cause skin irritation and should be examined for signs of irritation or inflammation.
- Page 7 • The rechargeable internal battery is a sealed lead acid type and it is totally maintenance free. If the battery appears to become defective, refer to Mortara Instrument Service Department. • Do not pull or stretch patient cables as this could result in mechanical and/or electrical failures. Patient cables should be stored after forming them into a loose loop.
- Page 8 User Safety Information (Continued) Notes • Excessive patient movement could interfere with the operation of the device. • Proper patient preparation is important to proper application of ECG electrodes and operation of the device. • There is no known safety hazard if other equipment, such as pacemakers or other stimulators, are used simultaneously with the ELI 250;...
- Page 9 EQUIPMENT SYMBOLS AND MARKINGS Symbol Delineation Attention, consult accompanying documents Alternating current Protective earth (ground) Fuse Telephone line (modem) Network (LAN) Defibrillator-proof type CF applied part Output/Transmit Input ON/OFF (power) Stop (of action)
- Page 10 Equipment Symbols and Markings (Continued) Shift key (to enter upper case text) Space key Enter key (accept data/return) Initiate printing of 12-Lead ECG Initiate printing of continuous rhythm strip Do not dispose as unsorted municipal waste. Per EC Directive 2002/96, requires separate handling for waste disposal according to national requirements Indicates compliance to applicable EEC directives viii...
- Page 11 ELECTROMAGNETIC COMPATIBILITY (EMC) Electromagnetic compatibility with surrounding devices should be assessed when using the system. An electronic device can either generate or receive electromagnetic interference. Testing for electromagnetic compatibility (EMC) has been performed on the ELI 250 cardiograph according to the international standard for EMC for medical devices (IEC 60601-1-2).
- Page 12 ELECTROMAGNETIC COMPATIBILITY (EMC) (Continued) Table X-1 Guidance and Manufacturer’s Declaration: Electromagnetic Emissions The system is intended for use in the electromagnetic environment specified in the table below. The customer or the user of the system should assure that it is used in such an environment. Emissions Test Compliance Electromagnetic Environment: Guidance...
- Page 13 ELECTROMAGNETIC COMPATIBILITY (EMC) (Continued) Table X-3 Guidance and Manufacturer’s Declaration: Electromagnetic Immunity The system is intended for use in the electromagnetic environment specified below. The customer or the user of the system should assure that they are used in such an environment. Emissions Test IEC 60601 Test Level Compliance Level...
- Page 14 ELECTROMAGNETIC COMPATIBILITY (EMC) (Continued) Table X-4 Recommended Separation Distances Between Portable and Mobile RF Communications Equipment and the ELI 250 cardiograph. The system is intended for use in the electromagnetic environment in which radiated RF disturbances are controlled. The customer or the user of the system can help to prevent electromagnetic interference by maintaining a minimum distance between portable and mobile RF communications equipment (transmitters) and the system as recommended below, according to the maximum output power of the communications equipment.
-
Page 15: Table Of Contents
TABLE OF CONTENTS INTRODUCTION SECTION 1 Manual Purpose ................. 1-1 Audience &... - Page 16 Table of Contents (Continued) RECORD AN ECG SECTION 4 Chapter Purpose ................4-1 Display Overview .
-
Page 17: Manual Purpose
INTRODUCTION SECTION 1 Manual Purpose This Operator's Manual explains how to operate the ELI 250 electrocardiograph. This manual describes how to perform the following tasks: • Preparing the cardiograph for use • Using and understanding the keyboard, the viewing screen, and the menu sequences •... -
Page 18: System Description
SECTION 1 System Description The ELI 250 is a 12-lead diagnostic electrocardiograph capable of viewing, acquiring, printing, and storing ECG data. The ELI 250 is optionally equipped with Mortara’s VERITAS 12-lead resting interpretation algorithm. If this option is enabled, the VERITAS ECG algorithm can provide an over reading physician with a silent second opinion through diagnostic statements output on the ECG report. -
Page 19: System Layout
SECTION 1 System Layout ELI 250, Left Side Figure 1-2 Writer Cover Handle Input Connector (Patient Cable Connector) Left Side View ELI 250, Rear Figure 1-3 RJ45 Modem Connector AC (Powercord) Connector (Optional) (Optional) Serial Connector AC Fuses... - Page 20 SECTION 1 ELI 250, Base Figure 1-4 Cart Mounting ECG Imput Battery Fuse...
-
Page 21: Automatic Feature Keys
SECTION 1 ELI 250, Display and Keyboard Figure 1-5 Function Keys activate the liquid crystal display (LCD) label adjacent to each function key. LCD labels/functions change depending upon the screen displayed. If the label is blank, the adjacent function key is deactivated. Automatic Feature Keys are used as a one-touch operation for: ECG Acquisition Rhythm Printing... -
Page 22: Eli 250 Specifications
SECTION 1 ELI 250 Specifications Feature Specifications Instrument Type 12-lead Electrocardiograph Input Channels Simultaneous acquisition of 12 leads Standard Leads Acquired I, II, III, aVR, aVL, aVF, V1, V2, V3, V4, V5, V6 Waveform Display Backlit, 1/4 VGA LCD 3-channel lead groups or complete 8-channel presentation Input Impedance Meet or exceed the requirements of... -
Page 23: Getting Started Section
GETTING STARTED SECTION 2 Chapter Purpose This chapter is intended to provide the user with: • Equipment set-up procedures: • Load paper • Apply power • Set date and time • Patient preparation and hook-up • Real-Time ECG View Equipment Set-Up Two AC line fuses and one battery fuse are installed on your ELI 250. - Page 24 SECTION 2 To load paper: Remove the outer packaging from the paper stack. Facing the front of the unit, use the release latch on the left side and slide the paper tray cover to the left. Place the stack of thermal paper into the paper tray such that the grid side of the paper is up when it is pulled over the paper tray cover.
- Page 25 SECTION 2 A4 paper users: If your ELI 250 was ordered with A4 paper, the paper tray spacer will be inserted in the paper tray and the configuration option to use A4 paper will be set to YES. If units are purchased with standard paper, the paper tray spacer will not be provided.
- Page 26 SECTION 2 The paper tray spacer should be parallel with the rear wall of the writer tray, as pictured above. Gently press paper tray spacer in place. Set configuration option to use A4 paper. See section 3 for instructions. Gently press on the top three plastic arms to remove the paper tray spacer.
- Page 27 SECTION 2 To Apply Power to the Electrocardiograph: Plug the power cord into an AC wall outlet and into the back of the ELI 250. (Reference Figure 1-3). Unit powers on automatically and can not be turned off when AC is connected (unit is in Stand by Mode).
- Page 28 SECTION 2 Select number 3 (Set Time/Date) from the Application menu. The preprogrammed date and time is displayed for the ELI 250. To make changes, type in the desired date and time values (using a 24-hour clock) in the same format as displayed. Use (F1) and (F2) to move back and forth through each row.
-
Page 29: Patient Preparation
SECTION 2 Patient Preparation Correct electrode placement is important for acquiring a successful ECG (see Patient Hookup below). Consider performing some patient preparation procedures to remove oils, lotions, and hair from the skin. Optimal skin preparation includes exposing skin on hairy areas, scratching with abrading pad, wiping with alcohol and a dry gauze pad. -
Page 30: Real Time Ecg View
SECTION 2 Real-Time ECG View The ELI 250 LCD display offers the user valuable information including waveform display, function keys and parameters (leadfail messages, clock, filter, etc.). Detailed descriptions of the Real-Time ECG View are offered in section 4. NOTE: Regardless of the display, function keys always correspond to the LCD label adjacent to each function key. -
Page 31: System Settings Section
SYSTEM SETTINGS SECTION 3 Chapter Purpose This chapter is intended to provide the user with: • Instructions to access configuration menus • Summary of configuration options • Detailed descriptions of configuration settings Access Configuration Menus The configuration pages define all ELI 250 operational conditions that do not change on a daily or patient-to-patient basis. - Page 32 SECTION 3 From the Set Time/Date screen, simultaneously press (SHIFT) + ALT + C. The first configuration screen will appear. Notice the page indicator in the upper right hand corner on each screen. NOTES: Use Page (F4) to toggle through the configuration pages. (F1) and (F2) to move back and forth through each configuration option.
-
Page 33: Summary Of Configuration Menus
SECTION 3 Summary of Configuration Menus Configuration Parameter Definition Configuration Screen Software Version The firmware version of the unit Screen One Cart Number User-defined (6 digits) Screen One Site Number User-defined (4 digits) Screen One Site Name User-defined (up to 30 alphanumeric characters) Screen One Telephone Number User-defined (up to 30 alphanumeric characters) - Page 34 SECTION 3 Summary of Configuration Menus (Continued) Configuration Parameter Definition Configuration Screen 6 Rhythm Lead 1 V1-V6, I, II, III, aVR, aVL, aVF Screen Four 6 Rhythm Lead 2 V1-V6, I, II, III, aVR, aVL, aVF Screen Four 6 Rhythm Lead 3 V1-V6, I, II, III, aVR, aVL, aVF Screen Four 6 Rhythm Lead 4...
-
Page 35: Configuration
This option identifies the site of your ELI 250. Site numbers designate the hospital, clinic, or institution for ECG records stored in a Mortara Instrument E-Scribe data management system and must be defined for transmitting and retrieving ECGs from the data management system. You can use up to four digits for the site number, numbers from 0 –... - Page 36 SECTION 3 Telephone Number This option specifies the telephone number for modem transmission (to another unit or to an E-Scribe data management system). Enter up to 30 alphanumeric characters, and use the BACKSPACE key to erase entry errors. To wait for an additional dial tone, use the letter W. For example, you may need to dial a 9 to get an outside line.
- Page 37 SECTION 3 Configuration Page 2 Flash Size Flash Size indicates the ECG storage capacity of your electrocardiograph. Normal Flash Size is the standard memory capacity. If the optional expanded memory has been installed, Expanded will be displayed. ID Format This option defines the format for the patient ID information prompts. There are three standard formats: short, standard, or long.
- Page 38 SECTION 3 Auto-Fill ID When enabled, the system will automatically populate the demographic fields in the ID screen. When the patient ID field is manually populated and followed either by selecting enter or F2 ( ) the system automatically scans the patient directory and if records with the exact ID are found, the existing data is used to fill some of the demographic fields.
-
Page 39: Configuration
SECTION 3 Interpretation Option The ELI 250 automatically analyzes ECGs and prints the optional interpretation on the ECG printout. This option allows you to select or suppress the “interpretive” text on the ECG report. NOTE: A qualified physician should review the computer generated ECG interpretation before the treatment of any patient. - Page 40 SECTION 3 ECGs Retrieved This option defines the number of ECGs retrieved from an E-Scribe data management system. The ECGs are retrieved by ID number. A zero (0) setting retrieves the most current ECG for that ID number. Settings from one (1) to nine (9) retrieve the most current ECG plus “X”...
-
Page 41: Configuration
SECTION 3 Use A4 Paper The ELI 250 accommodates use of Z-fold thermal paper in either the letter size (8.5 x 11 inches; 216 x 279 mm) or the “A4” size (8.27 x 11.69 inches; 210 x 297 mm). The provided paper tray spacer is required for use with A4 size paper. -
Page 42: Configuration
SECTION 3 Configuration Page 5 Plot Format This option defines the default for one of five available plot formats in either Standard or Cabrera presentation. Please note that regardless of the plot format selected, 10 seconds of 12-leads are always stored. The ECG plot options are: Format Option ECG Data... -
Page 43: Configuration Page 6 (Optional Lan Connectivity)
SECTION 3 Configuration Page 6 (optional LAN connectivity) The ELI 250 connectivity options are RS232 (or direct), modem, LAN or WLAN. Configuration parameters associated with each type of transmission media will be presented in configuration pages six and seven only if those media are installed in the cardiograph. -
Page 44: Configuration Page 6 (Optional Wlan Connectivity)
SECTION 3 Host IP Enter the IP address of the host server. NOTE: Addresses are always entered as 4 sets of 3 digits; therefore, an address of 192.168.0.7 must be entered on the ELI 250 as 192.168.000.007. Port Number Enter the port number used by the host server. Configuration Page 6 (optional WLAN connectivity), (Continued) Modify Configuration Page 6/7... -
Page 45: Configuration Page 7 (Optional Wlan Connectivity)
SECTION 3 Configuration Page 7 (optional WLAN connectivity), (Continued) Security (WEP) Wired Equivalent Privacy (WEP) is an encrypted security protocol, part of the 802.11 standard, and is used to protect the network from unauthorized users. The IT Manager will provide the 26 HEX digits that are the same to be used by all access points on the network. - Page 46 SECTION 3 3-16...
-
Page 47: Record An Ecg Section
RECORD AN ECG SECTION 4 Chapter Purpose This chapter is intended to provide the user with: • Display overview • Overview of patient demographic entry • Instructions to acquire an ECG • Instructions to print an ECG • Instructions to store an ECG •... - Page 48 SECTION 4 Function keys always activate the corresponding LCD label adjacent to each key. LCD function key labels change according to the ECG view - the Real-Time ECG View is pictured below and the Acquired ECG View is described later in this section. Toggle through the available waveform display formats by selecting Leads (F2).
-
Page 49: Patient Demographics
SECTION 4 Patient Demographics You may enter patient demographic information before acquisition. The entered patient ID fields will remain populated until you acquire the ECG. However, when you disconnect the leads from the patient, turn off the cardiograph, or change a configuration setting before acquisition, the entered patient demographic information will be cleared for you to enter the demographics of your next patient. - Page 50 SECTION 4 The patient directory (sorted by name) is pictured below. 012345 13:45 Nov 21 2001 Adams Anderson Davis Johnson Selec Jones Smith Delet Stevens More Stevens Stevens Exit (F1) to navigate down the Directory list and Shift (F1) to move up the list. Similarly, use (F2) to page down and Shift (F2) to page up through the directory.
-
Page 51: Ecg Acquisition, Printing, Storage
SECTION 4 ECG Acquisition, Printing, Storage Acquisition When a patient is connected to the electrocardiograph, the ELI 250 is continuously collecting and processing the ECG data; therefore, you should first instruct the patient to relax in a recumbent position to ensure that the ECG is free from noise and artifact due to patient activity before you press the Auto ECG or Auto RHY key. -
Page 52: Printing
SECTION 4 Finally, select the Auto ECG key . The Real-Time ECG View is then replaced with the Acquired ECG View. The default Real-Time ECG View (as pictured below) is not available in the Acquired ECG View for navigation purposes. 25mm/s 10mm/uV 150 Hz... - Page 53 SECTION 4 In order to change the speed, gain, filter, or printout format in the Acquired ECG View, select More (F5). The function key labels change as follows: 25mm/s 10mm/uV 150 Hz Speed Gain Filt Save Back 10: 36: 20 To manipulate the print format of the acquired ECG, regardless of the plot format configuration setting, select Fmt (F4).
-
Page 54: Storage
SECTION 4 Storage The ELI 250 manages storage in one of two ways – automatically or manually. When the Auto Save configuration option is enabled, ECGs are automatically saved upon acquisition and printing. However, when the Auto Save configuration option is disabled, upon completion of acquisition, a prompt is presented as follows and saving the ECG record is at the user’s discretion. - Page 55 SECTION 4 The Rhythm Activity Screen appears as soon as the writer begins printing the rhythm strip. Notice, the waveform display format is similar to the Real-Time ECG Screen; however, new functions keys are available during rhythm printing. In addition to manipulating SPEED, GAIN, FILTER during rhythm printing, the user may also toggle different lead groups.
- Page 56 SECTION 4 Optional Barcode Scanner Mortara’s optional barcode scanner is purchased separately. By connecting the barcode scanner to the electrocardiograph’s RS232 (serial port) all aspects of acquiring an ECG are automated for speed and accuracy of alpha-numeric entry, functions and feature processes. In order to map the function and feature keys of the electrocardiograph to a desired barcode font, the following values and/or symbols must be available: Feature Keys...
-
Page 57: Special Functions Section
SPECIAL FUNCTIONS SECTION 5 Chapter Purpose This chapter is intended to provide the user with: • Summary of the Special Functions • Patient Directory & Directory Maintenance • Configuration Printouts • Set Time & Date Application Menu The ELI 250 offers several special functions available through the Application menu. Select More (F6) from the Real Time ECG View and the Application Menu is displayed. -
Page 58: Patient Directory
SECTION 5 Patient Directory The standard patient directory saves up to 60 ECGs depending on the storage space required for individual record. The optional expanded memory permits up to 150 ECGs. The heart rate, storage sensitivity, and signal quality determine the ECG file size and ultimately how much memory is needed to store each record. To access the directory of stored ECGs, select number 1 from the Application menu and the patient directory list is displayed. - Page 59 SECTION 5 To view a specific ECG record, highlight the desired name from the directory list and press Selec (F3). The selected patient’s ECG is presented in Acquired ECG View with the same functions available as previously described. To access the patient demographics screen, select ID (F1) to change or add patient information. Toggle through the available Acquired ECG View waveform formats by selecting Leads (F2) and Page (F3).
- Page 60 SECTION 5 The directory of stored ECGs is easily sorted either by Name, ID, or Date. To sort the patient records, select More (F5) from the patient list. 012345 13:45 Nov 21 2001 Sort Requests by Name Adams Anderson Sort Requests by ID Davis Johnson Sort Requests by Date...
-
Page 61: Print Configuration
SECTION 5 Print Configuration In order to verify the cardiograph’s configuration settings, a printout of the unit’s configuration is possible from the Application menu by selecting Print Configuration (2). The configuration printout obtains every configuration setting for the specific cardiograph, the firmware version, the cart number of the unit, and the date and time that the configuration printout occurred. - Page 62 SECTION 5 Select Set Time/Date (number 3) from the Application menu. The preprogrammed date and time is displayed for the ELI 250. To make changes, type in the desired date and time values (using a 24-hour clock) in the same format as displayed. Use (F1) and (F2) to move back and forth through each row.
-
Page 63: Eli 250 Connectivity
• Custom ID Transmitting Records You may transmit ECGs from the ELI 250 to another Mortara Instrument electrocardiograph, to an E-Scribe Data Management System, or to ELI LINK using a direct connection, an optional factory installed internal modem, or network connection. - Page 64 APPENDIX A that have been marked for deletion will be removed. Records are automatically marked for deletion based on the Delete Rule configuration. To manually mark an ECG record for deletion, press Delet (F4) and an “X” will appear in the far right hand column of the directory and to remove the delete status, select F4 again. To transmit one ECG, select F2 (Selec) to choose a record from the patient directory.
-
Page 65: Direct Connection
For a direct connection hookup, set the Default XMT media to RS232 from Configuration page 6 (see section 3 of this manual). Connect the ELI 250 to another Mortara Instrument electrocardiograph, to the E-Scribe, or to ELI LINK with a direct connect serial cable. - Page 66 APPENDIX A From the Configure Modem screen, select F2 (+GCI=) to populate the prefix “AT+GCI” of the modem command. Send Configure MODEM Enter MODEM Command: AT + GCI = XX Hook Type Modem Type: MultiTech Exit TIP: “AT+GCI” will be highlighted – cursor is not present – use keypad to enter country code. The type of modem installed in your cardiograph is displayed at the bottom of the Configure Modem screen.
-
Page 67: Blind Dialing For Xircom Modems
APPENDIX A Blind Dialing for Xircom Modems Using the ATX3 command may support specific countries where the “wait for dial tone” often causes dialing/telephone issues. Following the steps outlined above, access the Configure Modem Screen. Using the keypad, enter ATX3. Select F1 (Send). The following status messages will be displayed: “Sending…”... -
Page 68: External Modem
APPENDIX A External Modem Before using the external modem, modem command(s) must be entered and two configuration settings must be defined. In the configuration, select “external modem” for the XMT Media and set the baud rate to 57600. From the modem configuration screen, as described above, enter and send the initialization command as AT&FEQX4&K. - Page 69 APPENDIX A Country Code Country Code Canada Gambia Georgia Korea, Republic of (South Korea) Germany Kyrgyzstan Ghana Lao People's Democratic Republic Gibraltar Latvia Greece Lebanon Greenland Liberia Grenada Libya Guadeloupe Liechtenstein Guam Lithuania Guatemala Luxembourg Guernsey, C.I. Macau Guinea Macedonia, The Former Yugoslav Republic of Guinea-Bissau Madagascar...
- Page 70 APPENDIX A Country Code Country Code Panama Tanzania, United Republic of Papua New Guinea Thailand Paraguay Thaiti Peru Togo Philippines Tonga Poland Trinidad and Tobago Portugal Tunisia Puerto Rico Turkey Qatar Turkmenistan Reunion Turks and Caicos Islands Romania Uganda Russian Federation Ukraine Rwanda United Arab Emirates...
-
Page 71: Wlan Transmission
APPENDIX A WLAN Transmission For a WLAN transmission, set the Default XMT media to WLAN from Configuration page 6 (see section 3 of this manual). It is necessary that the IT Manager of your facility configure the wireless access point(s) and E-Scribe workstation. -
Page 72: Lan Transmission
APPENDIX A LAN Transmission For a LAN transmission, set the Default XMT media to LAN from Configuration page 6 (see section 3 of this manual). It is necessary that the IT Manager of your facility set the ELI 250 LAN configuration values. Refer to section 3 for more information on LAN configuration setup. -
Page 73: Receive Ecgs
APPENDIX A Receive ECGs To receive ECGs from another Mortara Instrument electrocardiograph (using either a telephone or a direct connection), select Receive ECGs (4) from the Application Menu. The LCD displays the following message: Press STOP to terminate When the LCD displays the above message, the unit is ready to receive the ECGs from the transmitting electrocardiograph. -
Page 74: Retrieve Ecgs
APPENDIX A Retrieve ECGs It is possible to retrieve ECGs from the E-Scribe Data Management System using any of the connectivity options. Before attempting to retrieve ECGs, please configure the Default XMT Media, the telephone number (if using modem transmission) and the site number (see Section 3). Select Retrieve ECGs (5) from the Application Menu. -
Page 75: Requests Download
APPENDIX A Requests Download The ELI 250 can download and process a patient request list from the E-Scribe, which identifies the ECGs (or ECG orders) needed for particular patients. Request Codes are designed in your E-Scribe Data Management System, which contain the particular patients who require ECGs. The technician at the cardiograph selects the desired Request Code (e.g. - Page 76 APPENDIX A From the Application Menu, select number 6 (Requests Download) and the following screen is displayed: The Request Code(s) is (are) displayed. Use F1 (F1) and (F2) to scroll through the available Request Codes. Request Codes are only available if a Custom ID has been downloaded. Once you find the desired Request Code, Select F3 (Selec) to select the desired Request Code.
- Page 77 APPENDIX A Transmission Status “Transmission Status” will be displayed for approximately 10 seconds followed by “Dialing: telephone number”, “Waiting for Response”, and “Connected”. Once connected, the following screen indicates the number of Requests received (patients) for the Request Code. This only appears briefly and returns to the Real Time ECG View.
-
Page 78: Patient Request List
APPENDIX A When the Request List has been downloaded, you may select the patients who need ECGs. Select ID (F1) from the Real-Time ECG View. 25mm/s 10mm/uV 150 Hz Leads Last Name: Speed 1st Name: Gain DOB: – –/– –/– – – – Direc Filt Age:... - Page 79 APPENDIX A Sort Requests by Name Sort Requests by ID Sort Requests by Date Print Requests Exit Select F1 to sort the requests by patient name (ID, time & date are displayed on the top row) Select F2 to sort the requests by patient ID (name is displayed on the top row) Select F3 to sort the requests by acquisition date (name is displayed on the top row) To make a printout of the Patient Requests List, select Print Requests (F4).
-
Page 80: Custom Id Download
APPENDIX A Custom ID Download Custom ID formats are uniquely defined by your facility’s needs. This customized ECG header information is designed in the Mortara E-Scribe data management system and downloaded to the ELI 250 as the Group Name either by serial connection (direct) or modem transmission. Select Custom ID Download (7) from the Application menu and the following screen appears: Transmission Status A-18... - Page 81 APPENDIX A “Transmission Status” will remain visible for approximately 10 seconds before the following screen appears: Transmission Status Dialing OW14143549999 “Waiting for Response”, “Connected”, and “Custom ID downloaded” will be displayed before returning to the Real-Time ECG View, which indicates the Custom ID download is complete. The new Custom ID becomes the customized header format for all future ECGs until you select a different ID format in the configuration settings.
- Page 82 APPENDIX A A-20...
-
Page 83: Maintenance And Troubleshooting
APPENDIX B MAINTENANCE AND TROUBLESHOOTING APPENDIX B Troubleshooting Chart LCD Message Problem Correction BATTERY LOW Unable to acquire ECG Charge the battery with AC power. or unable to print. CONNECTION FAILED Unable to transmit or receive ECGs. Check for correct baud rate, phone number, and cable connections or site number. -
Page 84: Inspection And Cleaning
APPENDIX B Inspection and Cleaning If the hospital or institution fails to implement a satisfactory cleaning and inspection schedule for this equipment, it may result in equipment failure and health hazards. NOTE: Only qualified service personnel should repair or replace ELI 250 parts. Inspecting the ELI 250 Inspect the equipment for the following conditions on a regular basis: •... -
Page 85: Recommendations To Biomedical Staff
APPENDIX B Recommendations to Biomedical Staff Following any service to the ELI 250 or when non-compliant operation is suspected, Mortara Instrument, Inc. recommends the following procedures: • Confirm proper operation • Perform testing to ensure continued electrical safety of the device (use IEC 60601-1 or ANSI/AAMI ES1 methods and limits) •... - Page 86 APPENDIX B...
-
Page 87: Glossary
GLOSSARY GLOSSARY TERM DEFINITION Augmented lead (aVL, aVR, aVF) The difference between one site and the average of the potential of two other sites; unipolar extremity leads. Baseline drift The QRS complexes are present, but the baseline wanders due to poor skin/electrode contact and/or patient movement. - Page 88 GLOSSARY...
Need help?
Do you have a question about the ELI 25O and is the answer not in the manual?
Questions and answers