Table of Contents
Advertisement
Quick Links
Advertisement
Table of Contents

Subscribe to Our Youtube Channel
Related Manuals for Geokon GeoNet 8000 Series


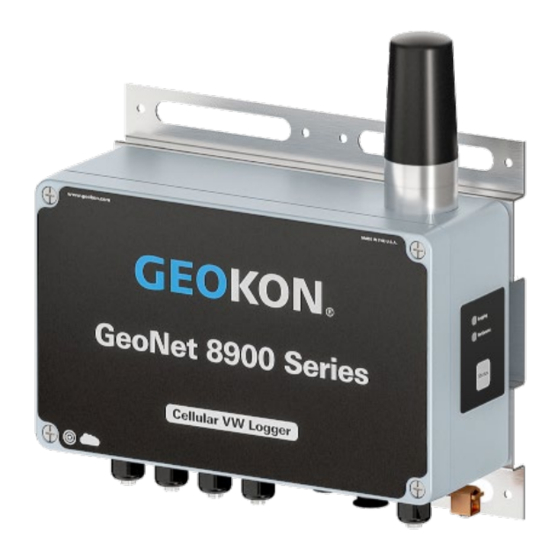
Summary of Contents for Geokon GeoNet 8000 Series
- Page 1 Installing Model 8920 Cellular Loggers...
-
Page 2: Items Required For Installation
Items Required for Installation GEOKON Provided Mini to standard USB cable ► #3 Philips head screwdriver ► Small flat head screwdriver ► Desiccant packs ► Customer Provided Mounting hardware ► Materials to create a suitable earth ground ►... -
Page 3: Attach The Antenna
Attach the Antenna Remove the rubber cap from the antenna mount Thread the antenna onto the mount by rotating it clockwise until finger tight Do not cross thread the antenna. The O-ring on the antenna must be flush against the enclosure. - Page 4 Logger Mounting Cellular Loggers can be mounted using bolts screws (A), (B), hose clamps , U-bolts etc. (D), (Mounting hardware not included) Always mount Loggers vertically, with the antenna pointing up The space around the antenna should be free of obstructions A minimum mounting height of ...
- Page 5 Tiltmeter Logger Orientation The direction of tilt for the A and B axes is shown on the cover of the unit The two axes of the tiltmeter have a calibrated range of ±30°, based on a starting position of 0° (antenna pointing up)
- Page 6 Grounding the Logger Properly grounding Loggers protects against lightning and other large transient voltages A 6-foot copper rod and 12 AWG or larger copper wire are recommended All Cellular Loggers can be grounded via the mounting bracket (A) Multi-channel Loggers can ...
-
Page 7: Remove The Cover
Remove the Cover Using a Phillips head screwdriver, loosen the cover screws by turning them counterclockwise Remove the cover... -
Page 8: Connecting The Sensor
Connecting the Sensor Record the serial number of the sensor and the logger (For Multi-channel loggers, note the channel each sensor has been wired into) Loosen the cable gland nut and remove white plastic dowel Slide the cable of the sensor through the cable gland (and gland nut) and into the Logger... - Page 9 Connect the Sensor (Continued) Wire each conductor by pressing down on an orange tab, inserting the bare end of the conductor into the terminal block, then releasing the tab Conductors are wired as follows: VW Loggers Addressable Loggers RED = BLACK = VW–...
- Page 10 Connect the Sensor (Continued) To prevent possible short circuits, do not allow bare leads to touch each other during or after wiring Gently pull on each conductor to make sure it is secure Tighten the nut onto the cable gland until the gland firmly grips the outer jacket of the cable The cable gland must be properly tightened to prevent water entry (Do not over-tighten, which may strip the plastic threads)
- Page 11 Multi-Channel and Addressable Loggers On Multi-channel loggers, sensor cables should be inserted into the cable glands in order from left to right and wired in sequence, starting with Channel 1 Do not wire sensors into the terminal blocks marked ...
- Page 12 Powering the Loggers Plug the AC adaptor, solar panel, or other external power source, into the 9-24V power jack Move the power switch to the correct position based on the table below Geographical Zone Power Source Temperate Sub Polar Mains / Solar with External Battery EXT BATTERY BATTERY Solar, NO External Battery...
-
Page 13: Verify Connectivity
Verify Connectivity Press the Status button to display the logger status The table below shows the meaning of the LED indications If the red LED flashes, wait a few minutes then try again (If communication cannot be established, refer to the manual for troubleshooting) ‘Logging’... - Page 14 Close the Logger Place the supplied desiccant packs inside the enclosure Make sure the cover gasket and the mating ridge on the enclosure are clean, and that the gasket is properly seated inside the groove Place the cover on the unit, making sure the orientation is correct Tighten the cover screws a little at a time, working in a diagonal pattern...
- Page 15 Logger Commissioning before Complete the installation commissioning the Logger Loggers are commissioned using the GEOKON API portal: https://api.geokon.com A tutorial on using the API portal is available at: https://www.geokon.com/8900-Tutorials#API...
- Page 16 The GEOKON® logo and word mark are registered trademarks with the United States Patent and Trademark Office. GEOKON maintains an ongoing policy of design review and reserves the right to amend products and specifications without notice. ©GEOKON. All Rights Reserved. | Rev-INIT-10/29/2021...
Need help?
Do you have a question about the GeoNet 8000 Series and is the answer not in the manual?
Questions and answers