Table of Contents
Advertisement
Quick Links
D. DART RACER:
Build a cool circuit to create a powerful electrical engine!
1
W
A
9cm x 2
2
O
6
3
P
4
8
V
1. Thick and thin conductive tape are provided for the different projects in this kit. Take out the roll of thin conductive tape (W) for this project.
Use the ruler printed on the instructions below. to measure out and cut off two 9cm strips of thin conductive tape. Stick the strips onto the Dart
Racer base's (A) white shaded areas. Remember to wrap the tape around the end of the base and stick each strip to the bottom of the racer as
shown.
2. Align the Battery Module (O) with the module outline and direction arrows on Dart Racer's base to make sure it is inserted in the correct
direction.
3. Insert and slide the module towards the middle of the cardboard.
4. Flip the base over to secure the module with a module clip (V).
5. Align the Motor Module (P) with the white shaded areas on the cardboard before inserting into the Dart Racer's base.
6. Insert the small wheels (T) onto the Motor Module's axle joints.
7. Secure a peg in place with a C-ring (U) at the end of the Dart Racer's base. This will help the car run steadily along any surface.
8. Turn the Battery Module on.(Unscrew the battery case cover to replace exhausted batteries.)
9. The wheels will start to turn and the Dart Racer will speed away the moment the battery is turned on.
HOW IT WORKS
A battery creates potential energy by producing more electrons at one end and less electrons at the other end (creating the positive and
negative ends). Once the two ends are connected by a complete circuit, electrons(negatively charged) naturally flow to the positive end of the
circuit where there are less electrons. This creates an electrical current which provides electrical energy. The electrical current is more
powerful when the amount of electrons is greater in one place than in another.
0
1
2
3
4
5
6
7
8
9
10
11
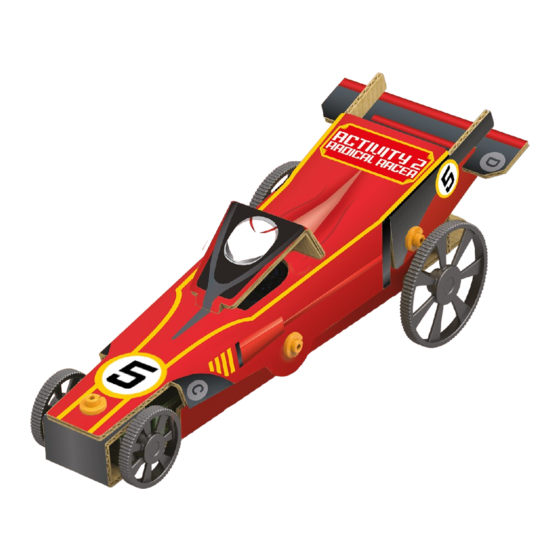
E. RADICAL RACER:
TWO wheel modules will be installed to create a more life-like racer.
1
9cm x 2
5
T
Y
7
9
1. Measure out and cut two 9cm strips of thin conductive tape. Stick the strips onto the Radical Racer base's (B) white shaded areas as shown.
2. Insert the Motor and Battery Modules according to the direction arrows and outlines. Secure the modules in place from the back with a module
clip as done previously.
3. Fold the sides of the base to create a 90 degree angle on each side.
4. Clip the rear wheel axle (R) into the wheel hub (Q). Slide the wheel hub into the holes at the end of the base.
AG13/LR44 X 2
5
7
12
13
14
15
16
17
18
19
20
21
22
23
5. Fold the front of the racer and attach the hole at the end of base (B) to the hole at the end of racer's top (C) with a C-ring and peg.
6. Fold the racer top's (C) side flaps down.
7. Attach the side flaps to the racer's base (B) with C-rings and pegs.
8. Attach the back flaps of (B) to (C) with C-rings and pegs as shown.
9. Fold down the top back flap at the end of (C) and insert it into the slot at the back end of (B).
Use your engineering skills to build a more powerful race car. Now
2
3
8
6
8
7
7
24
25
10
12
S
11
4
R
Q
10. Slot a large wheel (S) onto each end of the rear wheel axle.
11. Insert the small wheels (T) onto the Motor Module.
12. Fold and insert the cockpit cover (E) into the two slots in the middle of the racer's top (C) to create the cockpit.
13. Slide the car tail (D) into the slots as shown.
14. Flip over the racer to turn the Battery Module on.
15. The Radical Racer's wheels will start to turn the moment the battery is turned on. Place the Radical Racer on a smooth floor and watch it
zoom away.
F. CIRCUIT TRACK RACER
Transforming paper into an amazing toy is a structural engineering exercise you won't forget.
1
Z
8
2
9
1. Attach the track pieces (F, G, H) together. Stick transparent tape (Z) over the areas
where the track pieces connect. Be careful not to overlap on each other.
2. Use the ruler to measure out and cut two 70cm long strips of thick conductive tape
(five times on the 14cm marker). Slowly and carefully peel back the conductive tape
as you are taping down onto the shaded area. DO NOT PEEL IT ALL OFF AT ONCE.
Remarks: Adult assistance might be required.
Remarks: Apply slight pressure with your finger along the whole length of the tape to
ensure the whole piece of tape is firmly stuck onto the track.
:
QUESTION AND COMMENTS
We value you as a customer and your satisfaction with this product is important to us. If you have comments or
questions, or you find any part of this kit missing or defective, please do not hesitate to contact our distributor in your country. You will find the
address printed on the package. You are also welcome to contact our Marketing Support Team: Email: infodesk@4m-ind.com, Fax (852)
25911566, Tel: (852) 28936241, Web site: WWW.4M-IND.COM
13
14
15
:
Use your knowledge of circuits to construct this racetrack!
X
©2020 4M INDUSTRIAL DEVELOPMENT LIMITED. ALL RIGHTS RESERVED.
Advertisement
Table of Contents

Related Manuals for 4M Techcraft Paper Circuit Racer


Summary of Contents for 4M Techcraft Paper Circuit Racer
- Page 1 8. Attach the back flaps of (B) to (C) with C-rings and pegs as shown. address printed on the package. You are also welcome to contact our Marketing Support Team: Email: infodesk@4m-ind.com, Fax (852) 9. Fold down the top back flap at the end of (C) and insert it into the slot at the back end of (B).
- Page 2 TECHCRAFT WARNING: PLEASE SCAN THE QR CODE FOR VIEWING MULTI-LANGUAGE INSTRUCTIONS. FR. Veuillez scanner le code QR pour afficher les MOTOR RACER CHOKING HAZARD - Small parts. instructions multilingues pour ce kit. DE. Bitte scanne den QR-Code, um die mehrsprachige Anleitung für dieses Set anzusehen.
Need help?
Do you have a question about the Techcraft Paper Circuit Racer and is the answer not in the manual?
Questions and answers