Advertisement
Quick Links
E. TROUBLESHOOTING
If the LED does not light up or the motor does not run when you slide the switch:
• Check that your batteries are fresh or freshly charged.
• Check that the bare metal ends of all the wires are all touching the metal of the terminal caps.
If the motor runs but the reflectors do not spin:
• Make sure the pulley belt runs through the channels on the two pulleys.
F. HOW IT WORKS
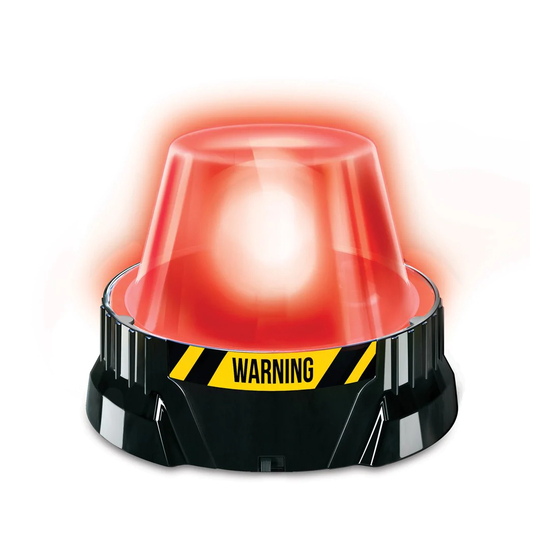
The motor turns the small pulley, which turns the large pulley with the pulley belt. The difference in size of the pulleys means that the
large pulley turns more slowly than the motor. The large pulley turns the reflectors. When the reflectors are behind the LED, you can see
the light from the LED itself, and each reflector reflects the LED's light towards you as it is directly opposite your eyes. This makes a
series of four quick flashes. When the reflectors are in front of the LED, the LED and it's reflections are hidden from you. Whichever side
of the light you stand you still see the four quick flashes and then darkness, over and over again.
G. Fun facts
• This emergency light makes flashes by covering and uncovering the LED. Other emergency lights flash by turning the LED on and off in
quick succession.
• All emergency vehicles (police cars, ambulances, fire trucks, and breakdown trucks) need flashing lights to warn people in vehicles and
pedestrians of their presence.
• Flashing lights are easier for our brains to detect than steady lights, so they attract our attention better.
• Emergency vehicles use sirens as well as lights to attract our attention, in case they are approaching from behind us.
• Unmarked police cars carry a magnetic emergency light that can be attached to the car's roof.
• A flashing emergency light can be seen from many kilometres away.
• Emergency vehicles use red or blue flashing lights (or both). This makes them look different to white or yellow street lights, or the
yellow flashing lights on construction vehicles.
• Lighthouses use rotating mirrors and lenses to send out a bright beam of light across the sea. Different lighthouses make different
patterns of flashes so that seafarers can identify them.
QUESTION AND COMMENTS
We treasure you as a customer and your satisfaction with this product is important to us. In case you have any comments or questions,
or you find any parts of this kit missing or defective, please do not hesitate to contact our distributor in your country, whose address is
printed on the package. You are also welcome to contact our marketing support team at Email: infodesk@4M-IND.com, Fax (852)
25911566, Tel (852) 28936241, Web site: WWW.4M-IND.COM
©2020 4M INDUSTRIAL DEVELOPMENT LIMITED. ALL RIGHTS RESERVED.
FLASHING
EMERGENCY LIGHT
A. SAFETY MESSAGES
1. Adult supervision and assistance are required at all times. 2. This kit is intended for children 5 years or older. 3. This kit and its finished
product contain small parts which may cause choking if misused. Keep away from children under 3 years old. 4. To prevent possible
short circuits, never touch the contacts inside the battery case with any metal. 5. Only install batteries after the kit is assembled. Adult
supervision is required. 6. Please read through all the instructions and keep them since they contain important information.
B. USE OF BATTERIES
1. Requires two 1.5-volt AAA batteries (not included). 2. For best results, always use fresh batteries. 3. Make sure you insert the batteries
with the correct polarities. 4. Remove the batteries from the kit when not in use. 5. Replace exhausted batteries straight away to avoid
possible damage to the kit. 6. Rechargeable batteries must be removed from the kit before recharging. 7. Rechargeable batteries must
be recharged under adult supervision. 8. Make sure that the supply terminals in the battery case are not short circuited. 9. Do not attempt
to recharge non-rechargeable batteries. 10. Do not mix old and new batteries. 11. Do not mix alkaline, standard (carbon-zinc), or
rechargeable batteries.
Content
C. CONTENTS
A
C
D
G
H
K
L
Part A: Base, Part B: Cover, Part C: LED holder, Part D: Motor, Part E: Motor cover, Part F: Large pulley, Part G: Pulley cap, Part H:
Pulley belt, Part I: Battery cover, Part J: Reflector holders x 2, Part K: Reflective sticker x 4, Part L: Sticker, Part M: Terminal caps x 2,
Part N: Screws x 3, Part O: Washer screw. Also required but not included in the kit: 2 x 1.5-volt AAA batteries, a small crosshead
screwdriver.
WARNING:
PLEASE SCAN THE QR CODE TO VIEW MULTI-LANGUAGE INSTRUCTIONS
CHOKING HAZARD - Small parts.
Not for children under 3 years.
TO PARENTS: PLEASE READ THROUGH THESE
INSTRUCTIONS BEFORE PROVIDING GUIDANCE
TO YOUR CHILDREN.
B
E
F
I
J
M
N
O
2x2R
Advertisement

Summary of Contents for 4M FLASHING EMERGENCY LIGHT
- Page 1 Pulley belt, Part I: Battery cover, Part J: Reflector holders x 2, Part K: Reflective sticker x 4, Part L: Sticker, Part M: Terminal caps x 2, printed on the package. You are also welcome to contact our marketing support team at Email: infodesk@4M-IND.com, Fax (852) Part N: Screws x 3, Part O: Washer screw.
- Page 2 D. ASSEMBLY 1. Turn the base (A) upside down and insert the motor pulley-end (D) first into its slot. Install the motor cover (E) and secure it with two 7. Clip the reflector holders (J) onto the large pulley (F). screws (N).


Need help?
Do you have a question about the FLASHING EMERGENCY LIGHT and is the answer not in the manual?
Questions and answers