
Subscribe to Our Youtube Channel
Related Manuals for RKI Instruments 35-3010RKA-03


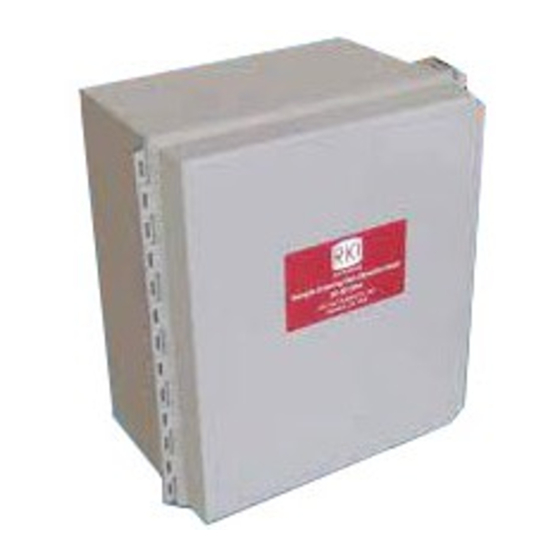
Summary of Contents for RKI Instruments 35-3010RKA-03
- Page 1 35-3010RKA-03 Sample-Draw Detector Head Part Number: 71-0134RK Revision: E Released: 6/5/17 rkiinstruments.com...
- Page 2 Typical calibration frequencies for most applications are between 3 and 6 months, but can be required more often or less often based on your usage. 35-3010RKA-03 Sample-Draw Detector...
- Page 3 Product Warranty RKI Instruments, Inc. warrants gas alarm equipment sold by us to be free from defects in materials, workmanship, and performance for a period of one year from date of shipment from RKI Instruments, Inc. Any parts found defective within that period will be repaired or replaced, at our option, free of charge.
-
Page 4: Table Of Contents
Parts List ..............25 35-3010RKA-03 Sample-Draw Detector... -
Page 5: Overview
WARNING: When using the 35-3010RKA-03, you must follow the instructions and warnings in this manual to assure proper and safe operation of the 35-3010RKA-03 and to minimize the risk of personal injury. Be sure to maintain and periodically calibrate the 35-3010RKA-03 as described in this manual. -
Page 6: Description
Use the two conduit hubs on the bottom of the housing to make wiring connections. An aluminum subpanel is mounted to the interior of the housing. The sample-draw detector’s internal components are mounted to the subpanel. 2 • 35-3010RKA-03 Sample-Draw Detector... -
Page 7: Flow System
It prevents water and other liquids from contaminating the flow system. Replace the filter when it appears dirty, discolored, or clogged. If a liquid other than water is drawn into the filter, replace the filter as soon as possible. 35-3010RKA-03 Sample-Draw Detector • 3... - Page 8 4-20 mA line for the CO channel. This causes a downscale reading at the monitor on this channel. The low flow level is factory-set at 0.6 SCFH (±0.2 SCFH). NOTE: There is no low flow indication for the LEL and oxygen channels. 4 • 35-3010RKA-03 Sample-Draw Detector...
-
Page 9: Detection System
The sensor leads are soldered to the male connector. Sensor Leads Two color-coded leads extend from the connector. The leads allow you to connect the oxygen sensor to the main circuit board. 35-3010RKA-03 Sample-Draw Detector • 5... - Page 10 Hydrogen Sulfide Gas Sensor The hydrogen sulfide gas sensor position is located in the upper right side of the flow block. In the 35-3010RKA-03, the hydrogen sulfide gas sensor position in the flow block is occupied by a dummy sensor.
- Page 11 CO sensor signal and the one of the right is for the H S sensor signal. Since the H S sensor is replaced with a dummy plug in the 35-3010RKA-03 the H sensor signal cable carries no signal in this version of the 35-3010RK. 35-3010RKA-03 Sample-Draw Detector • 7...
- Page 12 NOTE: The sensors and transmitters are factory wired to the sensor/transmitter terminal strip. See “Wiring the Sample-Draw Detector” on page 11 for all wiring procedures related to the sample-draw detector. 8 • 35-3010RKA-03 Sample-Draw Detector...
- Page 13 A small reset button is located in the upper left corner of the main PCB. When a low flow condition occurs, the pump will be shut off. To reset the low flow condition and start the pump again, press and hold the reset switch for about 2 seconds, then release. 35-3010RKA-03 Sample-Draw Detector • 9...
-
Page 14: Installation
Slightly loosen the screw that secures one of the mounting feet to the housing, then rotate the mounting foot 180 degrees. Tighten the screw that secures the mounting foot to the housing. 10 • 35-3010RKA-03 Sample-Draw Detector... -
Page 15: Connecting The Sample Lines To The Sample-Draw Detector
Route the cable or wires in conduit leading from the sample-draw detector to the controller. Connect the drain wire to an available chassis ground at the controller. RKI controllers typically have a ground stud that can be used to ground the cable’s drain wire. 35-3010RKA-03 Sample-Draw Detector • 11... - Page 16 Main Circuit Board Interconnect Terminal Strip Oxygen 4/20 (Feedback) 24 VDC (Controller Transmitter (Controller Transmitter 24 VDC Terminals) 4/20 (Feedback) Terminals) 24 VDC + (Controller Transmitter 4/20 (Feedback) Terminals) Figure 6: External (Field) Wiring, Sample-Draw Detector 12 • 35-3010RKA-03 Sample-Draw Detector...
- Page 17 Green White Pump Pressure Switch Factory Factory Wired Wired LEL Sensor Connector Detector Oxygen Sensor CO Sensor Plugs Into (Not Far Side of Pream p Used) Circuit Board Figure 7: Internal (Factory) Wiring, Sample-Draw Detector 35-3010RKA-03 Sample-Draw Detector • 13...
-
Page 18: Start Up
For the CO channel, plug the voltmeter into the test points in the AMP 1 section of the main circuit board. Plug the positive lead into the test point labeled CAL+1; plug the negative lead into the test point labeled CAL-1. Verify a voltmeter reading of 100 mV (± 2 mV). 14 • 35-3010RKA-03 Sample-Draw Detector... -
Page 19: Operation
20.9% for the oxygen channel (434 mV at the oxygen transmitter test points), and 0 ppm for the CO channel (100 mV at the amp 1 test points). Investigate significant changes in the reading. 35-3010RKA-03 Sample-Draw Detector • 15... -
Page 20: Troubleshooting
Fail Condition Symptoms • The sample-draw detector’s Fail light is on. • The controller is operating properly but indicates a reading well below zero on one or more channels. 16 • 35-3010RKA-03 Sample-Draw Detector... - Page 21 If the fail condition continues, replace the sensor from the problem channel or channels as described later in this section. If the fail condition continues, contact RKI Instruments, Inc. for further instruction. Slow or No Response/Difficult or Unable to Calibrate Symptoms •...
-
Page 22: Replacing Components Of The Sample-Draw Detector
Make sure the gaskets stay in place. Pull the CO sensor off the preamp circuit board. It is located in the amp 1 position (left side) of the preamp circuit board. Plug the new sensor into the preamp board. 18 • 35-3010RKA-03 Sample-Draw Detector... -
Page 23: Adjusting The Low Flow Setting
3 months is adequate for most sample draw detector applications. Unless experience in a particular application dictates otherwise, RKI Instruments, Inc. recommends a calibration frequency of every 3 months for the sample 35-3010RKA-03 Sample-Draw Detector • 19... -
Page 24: Calibration, Lel Detector
Verify a voltmeter reading of 100 mV ± 2 mV at the test points as described in the Preparing for Calibration section above. If necessary, use a small flat-blade screwdriver to adjust the zero pot until the 20 • 35-3010RKA-03 Sample-Draw Detector... -
Page 25: Setting The Response Reading
CO channels. A 100% nitrogen calibration cylinder could also be used to set the zero reading. Preparing for Calibration CAUTION: This procedure may cause alarms at the controller. Take appropriate action to avoid this, such as entering the calibration mode at the controller. Open the housing door. 35-3010RKA-03 Sample-Draw Detector • 21... -
Page 26: Setting The Fresh Air Reading
Connect the sample tubing from the regulator to the inlet line at or near the INLET fitting. Allow the gas to flow for one minute. Verify a voltmeter reading of 434 mV ± 2 mV at the test points as described in the Preparing for Calibration section above. 22 • 35-3010RKA-03 Sample-Draw Detector... -
Page 27: Setting The Zero Reading
Screw the regulator into the zero air cylinder. Connect the calibration kit sample tubing to the regulator. Connect the sample tubing from the regulator to the inlet line at or near the INLET fitting. Allow the gas to flow for 1 minute. 35-3010RKA-03 Sample-Draw Detector • 23... -
Page 28: Setting The Response Reading
Wait 1 to 2 minutes to allow the calibration gas to be drawn out and the reading to stabilize. Close the housing door. Store the components of the calibration kit in a safe and convenient place. 24 • 35-3010RKA-03 Sample-Draw Detector... -
Page 29: Parts List
Zero air calibration cylinder (34 liter) 81-0090RK-01 3-gas calibration gas cylinder, 50% LEL methane/12% oxygen/50 ppm CO, 34 liter 81-1055RK Regulator, demand flow, for 17 and 34 liter steel cylinders ES-1531-CO CO sensor NC-6245 Combustible sensor 35-3010RKA-03 Sample-Draw Detector • 25...
Need help?
Do you have a question about the 35-3010RKA-03 and is the answer not in the manual?
Questions and answers