Table of Contents
Advertisement
Operating and Installation Instructions
Built-in Oven
Household Use
:
Model No.
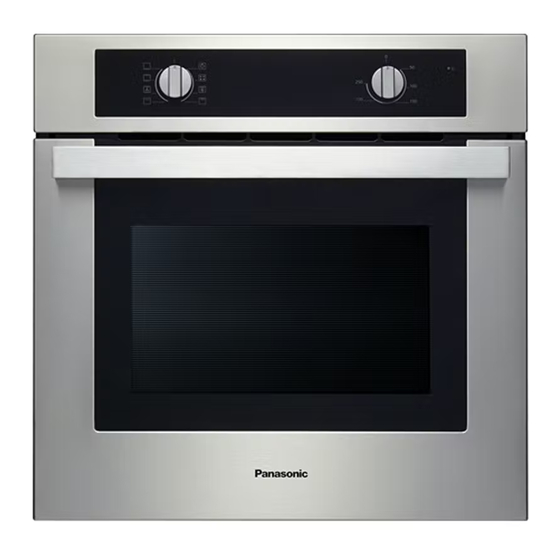
HL-FD615SJPQ
Operating and Installation Instructions
2 - 19
Thank you for purchasing the Panasonic product.
• This appliance is intended for household use only.
• Please read these instructions carefully before attempting to install, operate or service this product.
• For optimum performance and safety, please read these instructions carefully and follow safety precautions when
using this product.
• Before using this product please pay extra attention to "Safety Precautions" (Page 3 - 5).
Keep this Operating and Installation Instructions for future use
Advertisement
Table of Contents

Related Manuals for Panasonic HL-FD615SJPQ


Summary of Contents for Panasonic HL-FD615SJPQ
- Page 1 HL-FD615SJPQ Operating and Installation Instructions 2 - 19 Thank you for purchasing the Panasonic product. • This appliance is intended for household use only. • Please read these instructions carefully before attempting to install, operate or service this product. • For optimum performance and safety, please read these instructions carefully and follow safety precautions when using this product.
-
Page 2: Table Of Contents
Tables of Contents Safety Precautions 3 - 5 Parts Identifi cation 6 - 7 • Parts Identifi cation • Accessories • Control Panel Using the Oven 8 - 12 • Function Setting • Before Using the Oven • While Using the Oven •... -
Page 3: Safety Precautions
This appliance is necessary to hot. allow disconnection from the • The Oven door is cracked. supply after installation. The Contact a Panasonic Authorised disconnection may be achieved Service Centre immediately for by having the plug accessible or maintenance/repair. by incorporating a switch in the The oven must be earthed. - Page 4 Safety Precautions Make sure to follow these instructions WARNING This appliance is not intended Insert the Power Plug fi rmly, for use by persons (including otherwise it may cause fi re or children) with reduced physical, electric shock. sensory or mental capabilities, Clean the Power Plug regularly or lack of experience and with dry cloth, otherwise, it may...
- Page 5 fi re. food (such as jam) to set inside the oven since they might damage the enamel lining of the oven. ■ Note: • Contact the Panasonic service centre or authorized dealer for maintenance and repair.
-
Page 6: Parts Identifi Cation
Parts Identifi cation Parts Identifi cation 1. Control Panel 2. Oven Lamp 3. Moulded Rack 4. Removable Door 5. Name Plate... -
Page 7: Accessories
Screw Cap (2 pcs.) a. Screw (2 pcs.) ■ Note: • Contact the Panasonic service centre or authorized dealer for maintenance and repair. • Use original Panasonic accessories only. Control Panel 1. Function Setting Rotary Knob 2. Temperature Setting Rotary Knob 3. -
Page 8: Using The Oven
Using the Oven Function Setting To select the desired cooking function, turn the knob to the related symbol. Function description Symbol Oven Lamp Enables the user to observe the progress of cooking without opening the door. Defrost The circulation of air at room temperature enables quicker thawing of frozen food, (without the use of any heat). -
Page 9: Before Using The Oven
Using the Oven Before Using the Oven CAUTION Before the oven is operated, all the protective fi lm applied must be removed (apart from the Name Plate). When the oven is fi rst switched on, it may emit an unpleasant smell. This is due to the bonding agent used for insulating panels within the oven. -
Page 10: Operations
Using the Oven Operations Function Setting 1. Rotate “Function Setting” knob to choose the cooking function as require. 2. Rotate “Temperature Setting” knob to choose the cooking temperature as require. 3. The heating will start immediately after step 2. ■ Note: •... -
Page 11: Cooking Advice And Instructions
Using the Oven Cooking Advice and Instructions General Advice Preheating the oven before putting the food in is recommended. Do not place food inside the oven until “°C” on the control panel lights up to confi rm that the set temperature has been reached. -
Page 12: Tips For Energy Saving
Using the Oven Advice for Defrosting Positioning frozen food in a lid-less container is recommended. The food must be defrosted without its wrapping. Lay out the food in a single layer to be defrosted evenly, not overlapping. When defrosting meat, it is recommended to use the Wire Shelf positioned on the level-2 of the rack with the food on it and Enamel Baking Tray positioned on the level-1. -
Page 13: Cleaning And Maintenance
Cleaning and Maintenance WARNING Before performing cleaning and maintenance tasks, use isolation switch to disconnect the power supply. Children should not clean the oven or perform maintenance tasks. Cleaning the Oven Door The glass door should always be kept throughly clean. Use absorbent kitchen roll; remove stubborn dirt with a damp sponge and an ordinary detergent. -
Page 14: Bulb Replacement
Cleaning and Maintenance Replacing the Oven Door Return the door to its original position after cleaning is completed. • Align the bottom of the door along the bottom of the oven and push the door hinge into the hinge slots. Slide the door in until the slots on the hinges engage the Oven housing. -
Page 15: Specifi Cations
Specifi cations Model HL-FD615SJPQ Voltage 220 - 240 V Wattage 2744 - 3266 W Frequency 50 - 60 Hz Outside Dimensions (L × W × H) Approx. 595 mm × 575 mm × 595 mm Oven Cavity Volume Approx. 65 Litres Nett Weight Approx. -
Page 16: For Installer
Installation Instructions For Installer IMPORTANT If the oven is to work properly, the kitchen housing must be suitable. The panels of the kitchen unit that are next to the oven must be made of a heat resistant material. Ensure that the glues of units that are made of veneered wood can withstand temperatures of at least 120 °C. - Page 17 Installation Instructions For Installer The wires in the mains lead fi tted to this oven are coloured in accordance with the following code: • Green and Yellow - Earth ( • Blue - Neutral (N) • Brown - Live (L) 220 - 240 V 16 A Proper size of fl...
-
Page 18: Positioning The Oven
Installation Instructions For Installer Positioning the Oven CAUTION Installing the oven with the help of a second person is recommended. The base on which the oven is resting must be completed as shown in below illustration. Never exert pressure on the handle during installation into the cabinet. 1. -
Page 19: Securing The Oven To A Cabinet
Installation Instructions For Installer 3. Before moving the oven for installation, check that the cabinet has following inner space dimensions. To allow adequate ventilation, the measurements and distances in below diagram must be applied when fi xing the oven. Flush fi t Proud fi... - Page 20 No. 3, Jalan Sesiku 15/2, Section 15, Shah Alam Industrial Site, 40200 Shah Alam, Selangor Darul Ehsan Website: http://www.panasonic.com 16171100A08387 Printed in China G0317-0...
Need help?
Do you have a question about the HL-FD615SJPQ and is the answer not in the manual?
Questions and answers