Table of Contents
Advertisement
Quick Links
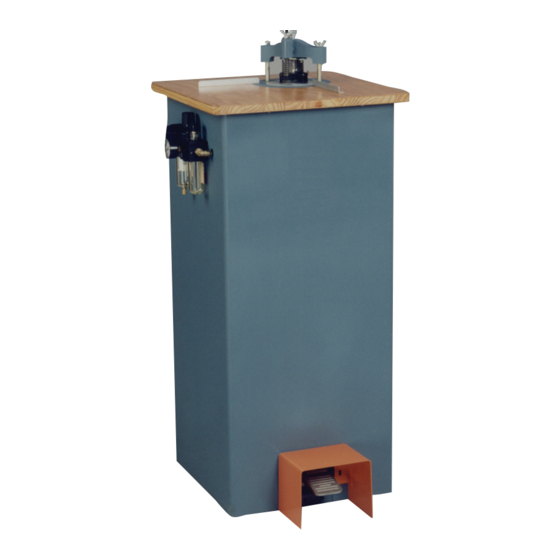
CR-50XP
Cornerounder
USER'S MANUAL
Before operating this equipment, please read these
instructions completely and keep these operating
instructions for future reference.
R
485 Hague Street, Rochester, NY 14606 U.S.A.
Tel: 585-436-1934
www.lasscowizer.com
Serial Number:
Date of Purchase:
Dealer:
Address:
Telephone Number:
Fax: 585-464-8665
info@lasscowizer.com
Advertisement
Table of Contents

Related Manuals for Lassco Wizer Cornerounder CR-50XP

Summary of Contents for Lassco Wizer Cornerounder CR-50XP
- Page 1 CR-50XP Cornerounder USER’S MANUAL Serial Number: Date of Purchase: Dealer: Address: Before operating this equipment, please read these instructions completely and keep these operating instructions for future reference. Telephone Number: 485 Hague Street, Rochester, NY 14606 U.S.A. Tel: 585-436-1934 Fax: 585-464-8665 www.lasscowizer.com info@lasscowizer.com...
-
Page 2: Table Of Contents
Table Of Contents 1 - Introduction 1 - Introduction 1.1 - Your New CR-50XP Your New CR-50XP......Page 01 Thank you for your purchase of the CR-50XP Shipping Damage Inspection....Page 01 Cornerounder . We ask that you take a moment to fill in the serial 2 - Safety number and other information on the front cover of the Safety Instructions........ -
Page 3: Safety
2 - Safety 2.1 - Safety Instructions All operators must read and understand the Users CHECK DAMAGED PARTS. Before further use of the ma- Manual including all safety instructions before using this chine, a guard or other part that is damaged should be care- equipment. -
Page 4: Warning Labels
2 - Safety 2.2 - Warning Labels English French 3 - Setting Up Your Machine 3.1 - Loose Items Inventory Please remove and inspect the following items: 10-32 x 1/2” Button Head Foot Pedal Guard (1) Socket Screw (2) 1/8” Hex Wrench (1) Page 03... -
Page 5: Installing The Leveling Feet
3 - Setting Up Your Machine 3.2 - Installing the Leveling Feet 3.2.1 Set the machine down in its desired location and determine if the machine is level, making sure that it does NOT rock in any direc- tion. If it does, determine which Leveling Feet need to be adjusted and whether they need to be adjusted up or down. -
Page 6: Preparing The Regulator System
3 - Setting Up Your Machine 3.4 - Preparing the Regulator System 3.4.1 Install the Airline into the Air Valve Shutoff on the side of the machine screwing it in place. DO NOT overtighten. It is recommended that you hold the Air Valve Shutoff securely while attaching the Airline to prevent damage. 3.4.2 Rotate the Air Valve Shutoff counter-clockwise to allow air passage into the machine. -
Page 7: Cutting Unit Installation (Standard & Special Sizes)
3 - Setting Up Your Machine 3.5 - Cutting Unit Installation (Standard & Special Sizes) 3.5.1 Loosen the Top Yoke Wing Nut (50-34) on the right hand side of the Top Yoke (50-15) and swing the Top Yoke toward you to obtain access to the Cutting Unit Cavity in the Table Ring Casting (50-14). 3.5.2 Making sure the Adapter Hold Down Tab (50-11) is not in the way, insert the Adapter Plate (50-26) into the Table Ring Casting. -
Page 8: Cutting Unit Installation (Large Sizes)
3 - Setting Up Your Machine 3.6 - Cutting Unit Installation (Large Sizes) 3.6.1 Loosen the Top Yoke Wing Nut (50-34) on the right hand side of the Top Yoke (50-15) and swing the Top Yoke as shown to obtain access to the Cutting Unit Cavity in the Table Ring Casting (50-14). 3.6.2 Make sure the Adapter Plate has been removed. -
Page 9: Adjusting The Pressure Foot
3 - Setting Up Your Machine 3.8 - Adjusting the Pressure Foot 3.8.1 To adjust horizontally (depending on the size of the Cutting Unit) Wing Nut loosen the center Thumb Screw on the Top Yoke, adjust in or out Hex Nut until the Pressure Foot clears the black guard on the Cutting Unit. -
Page 10: Maintenance
5 - Maintenance 5.1 - Safety ALWAYS TURN OFF AND DISCONNECT THE AIR SUPPLY BEFORE PERFORM- ING MAINTENANCE ON THIS MACHINE. MAINTENANCE SHOULD ONLY BE PERFORMED BY A QUALIFIED TECHNICIAN. KEEP HANDS CLEAR WHILE PERFORMING MAINTENANCE ON THIS MACHINE. MOVING PARTS CAN CRUSH AND CUT. 5.2 - Lubrication 5.2.1 Lightly grease the two Yoke Slide Rods where they enter the adapter ring approximately every two weeks or as... -
Page 11: Parts List
6 - Parts Diagram 6.2 - Parts List 50-26: Adapter Plate 50-12: Adapter Plate Rotation Tab 50-15: Top Yoke 50-201A: Pressure Foot Assembly 50-03L: Left Paper Guide (50-03R: Right Paper Guide Not Shown) 50P-80: Wood Table 50-04: Yoke Slide Rods 50P-41: Bottom Yoke 50XP-2010: Pull Rod 50XP-600AB: Upper Chip Chute...
Need help?
Do you have a question about the Cornerounder CR-50XP and is the answer not in the manual?
Questions and answers